

In the world of Arm microcontrollers there are many silicon vendors, one of the largest is STMicroelectronics. ST has a large catalog of available devices with many capabilities as well as supporting development boards for evaluating them. They also produce STM32CubeIDE, a custom IDE to use when targeting their devices, and STM32CubeMX, a configuration tool used in configuring properties of their devices and generating projects.
If you are a developer already using ST’s products I’m not telling you anything new. You may not be aware though of the work we have been doing to enable embedded developers in Visual Studio Code. This embedded experience relies on the new vcpkg artifacts capabilities to help acquire toolchains and configure the dev environment. To make it easier for developers using ST devices to try Visual Studio Code we have been working with ST to enable importing STM32CubeIDE projects.
We accomplish this by generating a CMake project from the ST project. ST provides many sample projects across their portfolio. We’ve validated builds across ST’s sample projects with this mechanism, over 3,000 of them. At present we have a 94% pass rate which we are continuing to improve. This gives us confidence that our approach will be successful for importing your own ST projects. Our embedded tools extension also enables device flashing and debugging through the importer, though we have only validated this on the hardware we have.
This post is going to go over how this project importer functionality works in conjunction with vcpkg and ST’s tools.
Using ST projects in Visual Studio Code
This post assumes some familiarity with ST devices, development tools, and embedded development generally. If you need some background, we recommend the following articles on getting started with STM32 from Shawn Hymel.
We rely on vcpkg for managing dependencies like CMake and Ninja, which includes acquiring them and making them available for use in your development environment. You can learn more about how we vcpkg in our Visual Studio Code embedded development overview. You can install it in a single shell command for your platform.
Linux/macOS
. <(curl https://aka.ms/vcpkg-init.sh -L)
PowerShell
iex (iwr -useb https://aka.ms/vcpkg-init.ps1)
You will need the Embedded Tools extension version 0.3.0 or greater installed in Visual Studio Code to use the ST project importer.

Today our importer requires that you have the STM32CubeIDE software installed in the default location for your platform. We have been testing this capability with STM32CubeIDE 1.9.0 and STM32CubeMX 6.5.0. If you have multiple instances installed side by side we do not have the ability to control which is selected.
It is also necessary to acquire the board support package for your device in STM32CubeIDE. This is so that we can use the compilers and supporting applications provided by ST from within Visual Studio Code.
There will be a lighter weight package available from ST in the future. We plan to enable acquisition of the dependencies here via vcpkg as well.
With our prerequisites installed, from within Visual Studio Code in the command pallet (<Ctrl>+<Shift>+<P>) run “Create project from ST project”.

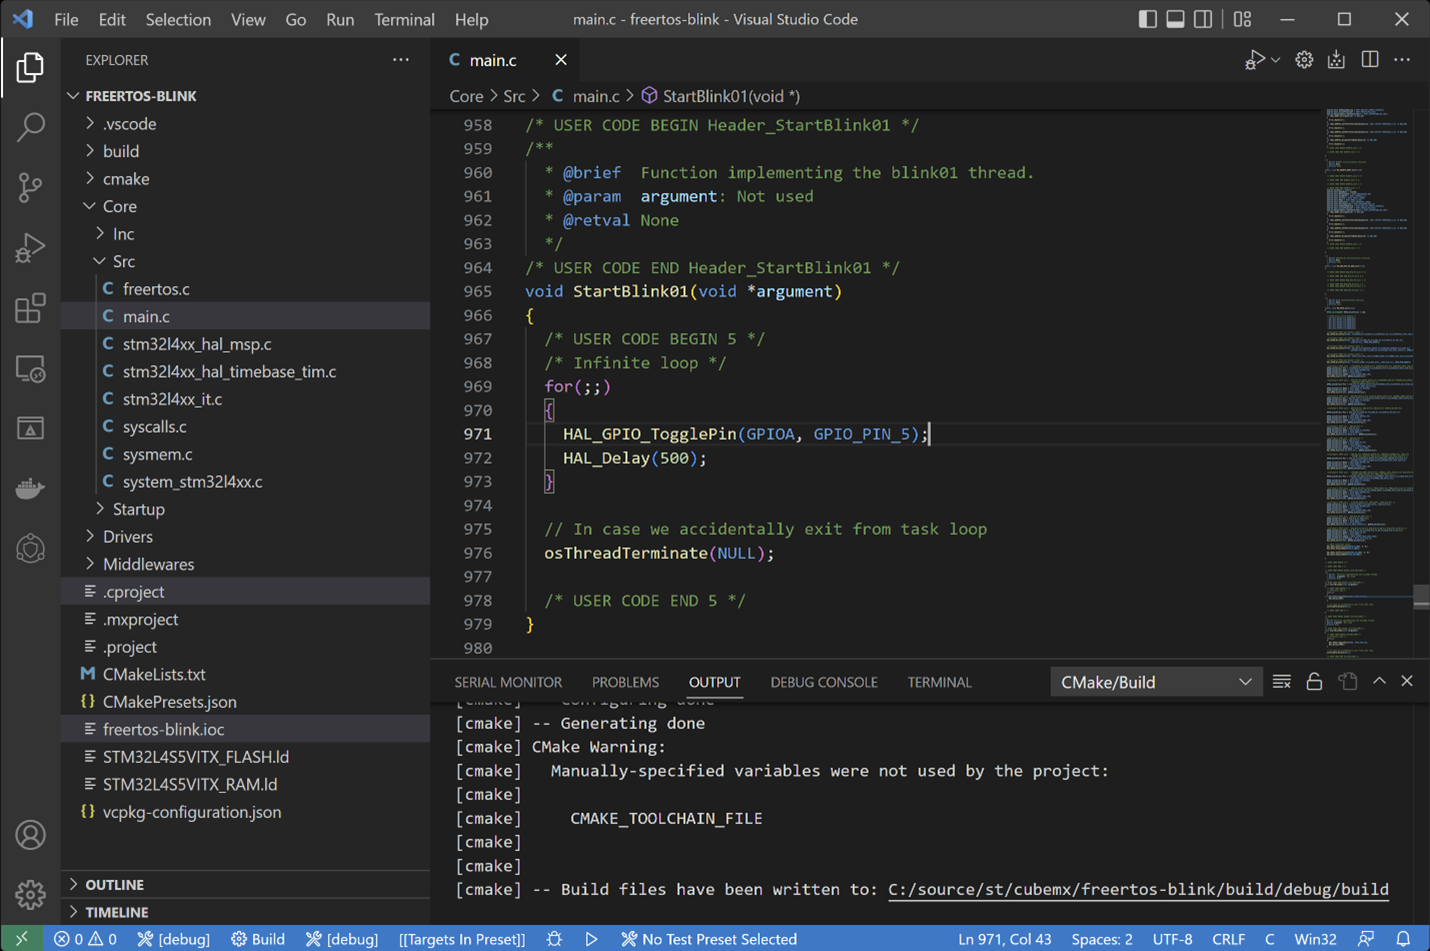
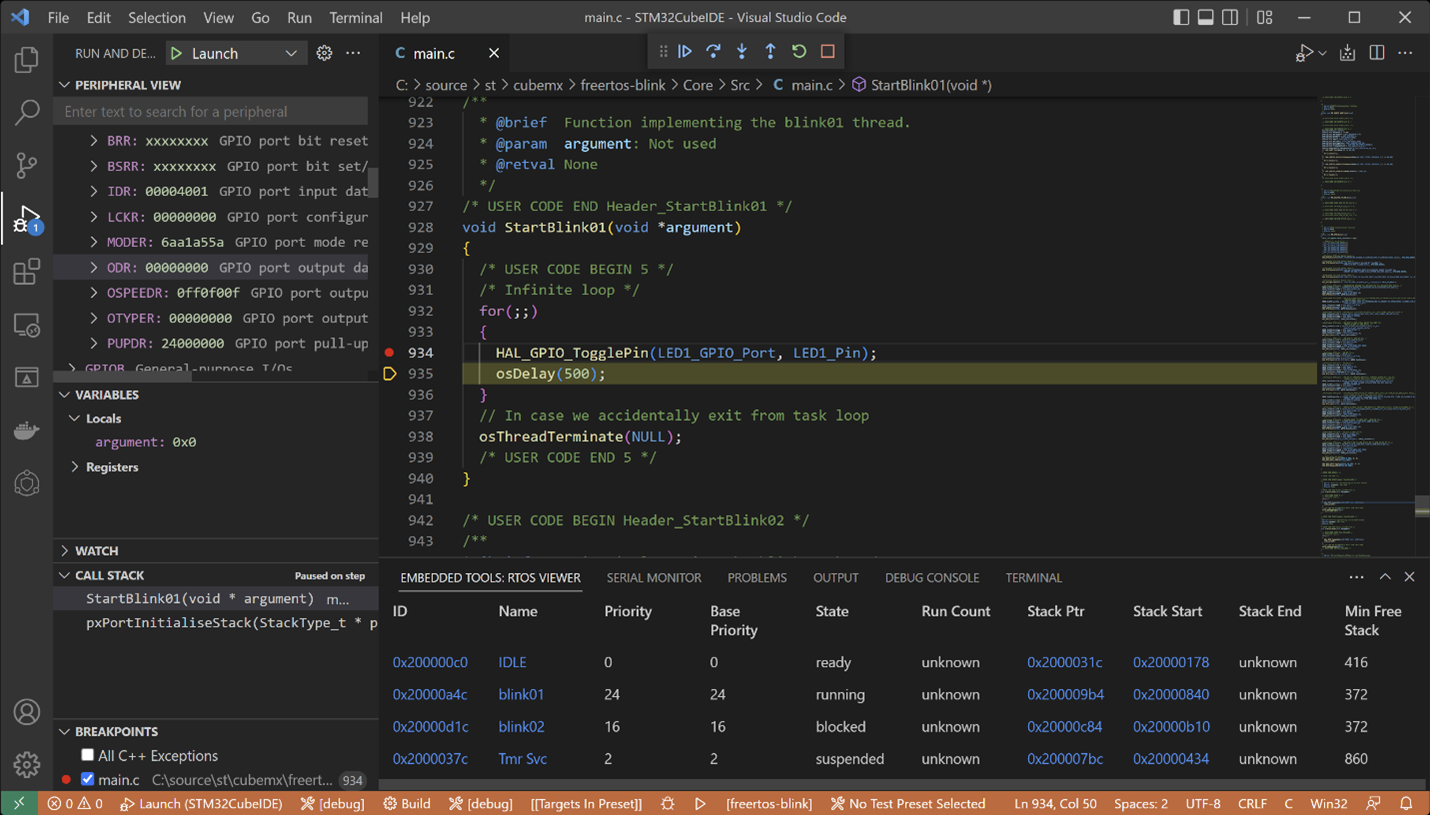
Navigate to where your ST .cproject is and select it. You can then select either the debug or release configuration. Now you can select Build to compile your firmware with CMake. To debug select the Debug view, then select the launch button. This will run the STM32 programmer to flash the firmware onto the device and connect using GDB. From here all of our embedded development views (serial, RTOS, and peripherals) are available.
If your project has an .ioc file you can open the context menu and open STM32CubeMX for your project.

If you make changes to your project in STM32CubeMX they will be recognized and the CMake cache will regenerate.
After you close Visual Studio Code for your next session with your project you will need to launch Visual Studio Code from a vcpkg activated prompt. To do so in your shell navigate to the project folder containing vcpkg-configuration.json, run vcpkg activate, then code .
In a future release this will no longer be necessary, activation will happen automatically.
Understanding CMake interaction
You can see the simple CMakeLists.txt that is generated in the root of the project where the .cproject is located. This has a dependency on generated CMake files under the cmake directory. There are paths in these files that are set to the discovered location of the ST compilers on your machine. If you intend to move to CMake from the ST project format we advise that you adjust these files to your needs, particularly for use in a team where the paths may vary.
The other thing to be aware of is that sometimes in the STM32CubeIDE samples, the project may be in a subdirectory of the source code. If you do not see your project files in the file view this may be why. Select the CMake targets view and you should see everything that CMake has used to generate the build.
Following from the above point we recommend that when generating projects using STM32CubeMX you leave the default selected in the Project Manager for “Generate Under Root”. This will keep your .cproject in the root of the folder with the generated source files. This is how STM32CubeIDE generates projects by default as well.
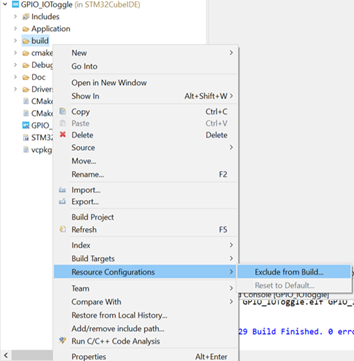
If you open the project again in STM32CubeIDE you will need to exclude the build directory used by CMake from your project. Right click the build directory and select Resource Configurations > Exclude from Build.
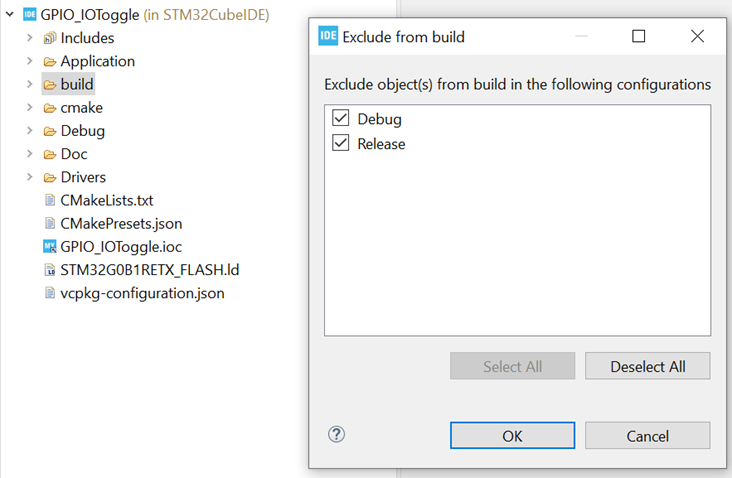
Then select both Debug and Release in the Exclude from build dialog.
Send us your feedback
We hope that these new capabilities will enable you to choose Visual Studio Code for your embedded development needs and make you more productive. We are very interested in your feedback to continue to improve this experience. The comments below are open, or you can find us on Twitter (@VisualC), or via email at visualcpp@microsoft.com.
I am getting the below error in my terminal after trying to build, do you know what maybe the issue here?
<code>
Can you build the project in STM32CubeIDE? Why do you have CMake in Python folder?
My code is building successfully in cubeIDE, about having CMake in Python folder, I am not sure but I just followed al the steps above.
Do you have double quotes, “”, around any of your paths in CubeIDE? We found an issue with that recently. The fix should be in our preview channel shortly.
Hello,
I managed to set it up for debugging (after adding CMake and Ninja to path, I would also add this information for the tutorial).
My question is how I will run my program on my board without debugging? When I hit the launch button (the triangle) VSC tries to open it on Windows. Thank you.
EDIT: I opened my project in CubeIDE and then in VSC and now I’m getting this error: “No compiler found in cache file.”
Hi @Filip, can you please explain to me how you fixed the CMake and Ninja build error, I am currently stuck on that error right now.
[cmake] CMake Error: CMake was unable to find a build program corresponding to “Ninja”. CMAKE_MAKE_PROGRAM is not set. You probably need to select a different build tool.
On subsequent open of the project in VS Code are you activating using vcpkg in your shell from the root of your project, then starting VS Code from there?