Weekend Scripter: Add Power and Functionality to the PowerShell ISE Part 2
Summary: Microsoft Scripting Guy, Ed Wilson, adds more power and functionality to the Windows PowerShell ISE with a modified module.
Microsoft Scripting Guy, Ed Wilson, is here. This is Part 2 of a two part series where I edit my Windows PowerShell ISE module and add five new functions. The five new functions are:
- Add-RemarkedText
- Remove-MarkedText
- Edit-Module
- Import-EveryModule
- Switch-OutLineView
Yesterday, in Add Power and Functionality to the PowerShell ISE Part 1, I talked about the Add-RemarkedText and the Remove-MarkedText functions. Today I am going to talk about the remaining three functions.
The Edit-Module function
The Edit-Module function is a function that I have wanted to write for a long time. The scenario goes like this: I am in the Windows PowerShell ISE working on a script. I realize I want to add or to edit something to an installed Windows PowerShell module. So I have to click around and find the module, and then open it in the Windows PowerShell ISE so I can check something or edit something in the module.
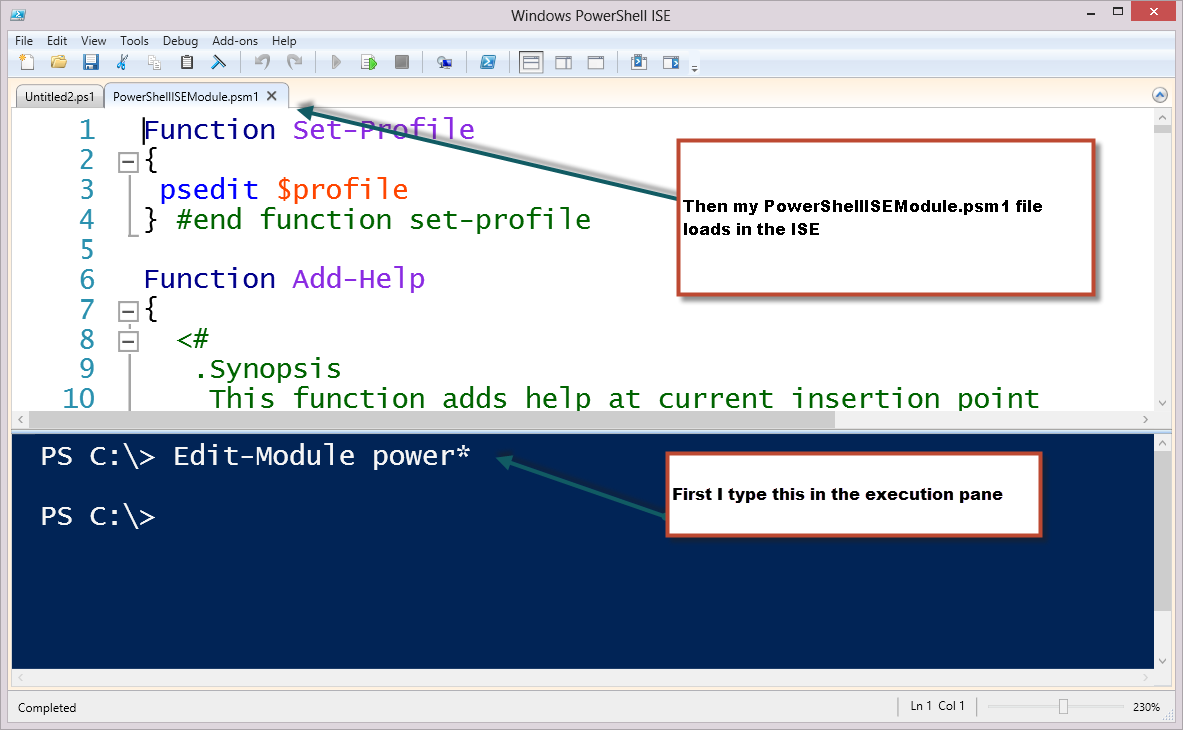
Granted, it is not a huge problem, but it does slow things down a bit. Slow no longer—not with my Edit-Module function. To use it, all I need to do is type Edit-Module (em is an alias), and provide enough of the module name to distinguish it to Windows PowerShell. Yes, this function uses wildcard characters. For example, if I want to edit my PowerShellIseModule.psm1 file, I can type all of that, or I can just type PowerShell* (on my system) to gain access to the file. This technique is shown here:
Here is the complete Edit-Module function:
Edit-Module
Function Edit-Module
{
<#
.Synopsis
This opens a module stored in the $env:PSModulePath location on a new tab in ISE
.Description
This function uses Get-Module to retrieve a module from $env:PSModulePath and then
it opens the module from that location into a new tab in ISE for editing. Wildcard
characters that resolve to a single module are supported.
.Example
Edit-Module PowerShellISEModule
Edit-Module PowerShellISEModule opens the PowerShellISEModule into a new tab in the
ISE for editing
.Example
Edit-Module PowerShellISE*
Edit-Module PowerShellISE* opens the PowerShellISEModule into a new tab in the
ISE for editing by using a wild card character for the module name
.Parameter Name
The name of the module. Wild cards that resolve to a single module are supported
.Notes
NAME: Edit-Module
AUTHOR: ed wilson, msft
LASTEDIT: 05/16/2013 18:14:19
KEYWORDS: Scripting Techniques, Modules
HSG: WES-5-18-2013
.Link
Http://www.ScriptingGuys.com
#Requires -Version 2.0
#>
Param($name)
ISE (Get-Module -ListAvailable $name).path
} #end function Edit-Module
Importing every module
Yes, there are times when I need to import every module in Windows PowerShell. I used to type the following command:
Get-Module –ListAvailable | Import-Module
Even with aliases such as gmo and ipmo, the command got a bit tedious. So I finally decided to quit typing that command by creating my Import-EveryModule function. The previous code is the gist of the function,—he remainder is the gravy. Here is the complete function:
Import-EveryModule
Function Import-EveryModule
{
<#
.Synopsis
This imports all modules from the $env:PSModulePath
.Description
This function imports all modules from $env:psmodulepath
.Example
Import-EveryModule
Import-EveryModule imports all modules from $env:psmodulepath
.Notes
NAME: Import-EveryModule
AUTHOR: ed wilson, msft
LASTEDIT: 05/16/2013 18:24:26
KEYWORDS: Scripting Techniques, Modules
HSG: Wes-5-18-2013
.Link
Http://www.ScriptingGuys.com
#Requires -Version 2.0
#>
Get-Module -ListAvailable |
Import-Module -Force
} #end function Import-Everymodule
To make it easier to call this useful bit of code, I create an alias iem for Import-EveryModule.
Toggling the Outline view in the Windows PowerShell ISE
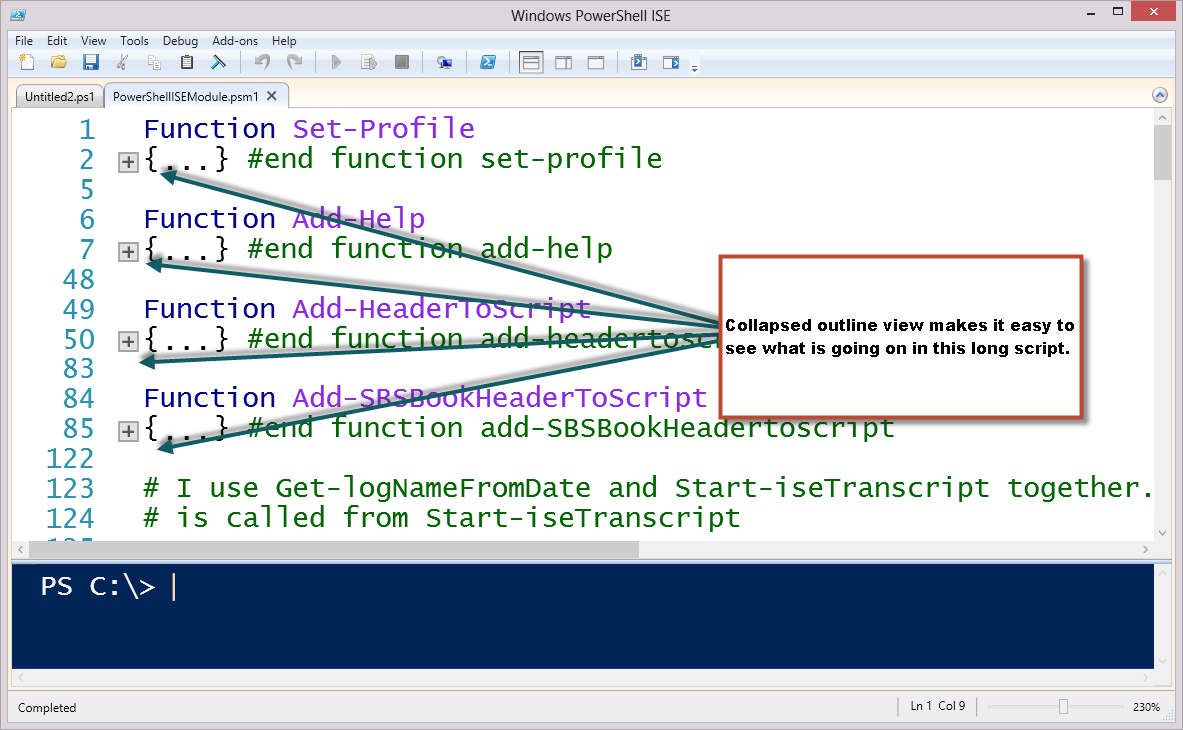
The last function I want to talk about is the Switch-OutlineView function. What this function does is toggle the Outline view in the current Windows PowerShell ISE script pane. This function is very helpful when working on a long script (such as the 500+ line PowerShellISEModule.PSM1 file). The best way to show this is to show you the script pane with the Outline view set to On:
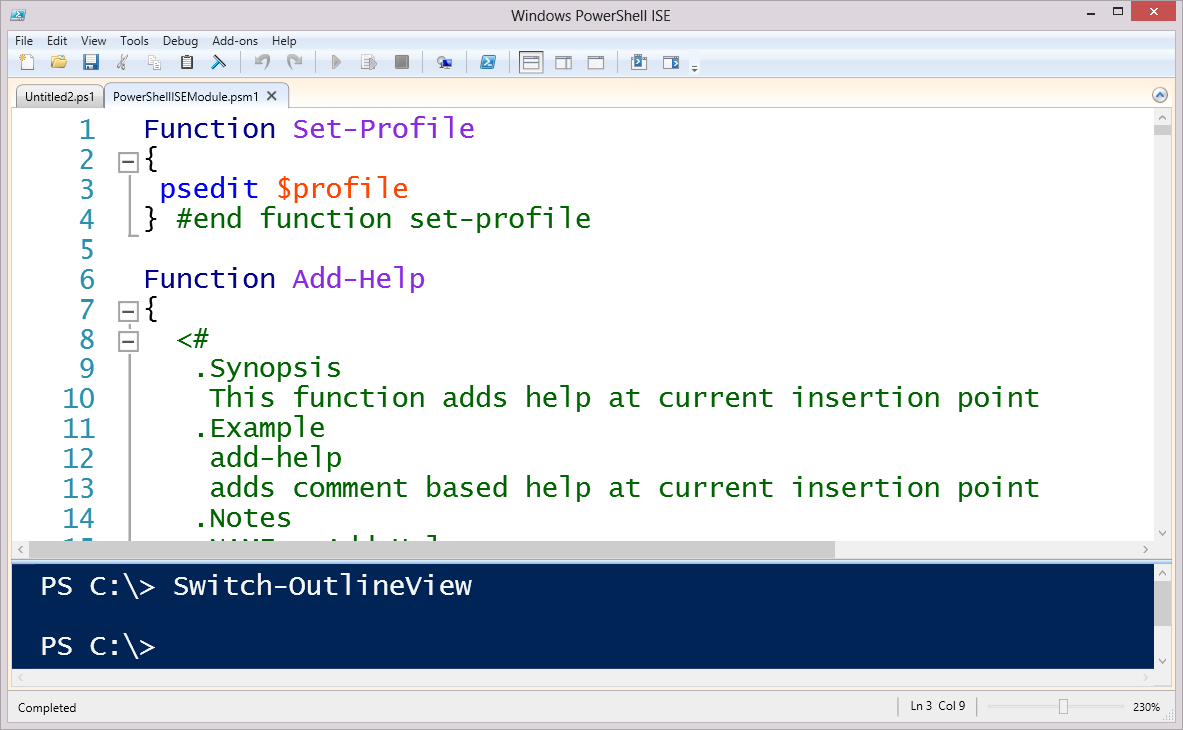
Now I can expand the Outline view to full code mode by typing Switch-OutlineView in the execution pane (sov is an alias that I created for this).
Here is the complete text of the Switch-OutlineView function:
Switch-OutlineView
Function Switch-OutlineView
{
<#
.Synopsis
This function toggles the outline view in the ISE
.Description
This function toggles the outline view in the ISE. It will expand
or collapse all functions in the current script pane.
.Example
Switch-OutlineView
Switch-OutlineView will either expand or collapse all functions
.Notes
NAME: Switch-OutlineView
AUTHOR: ed wilson, msft
LASTEDIT: 05/16/2013 19:28:37
KEYWORDS: Scripting Techniques, Modules
HSG: wes-5-18-2013
.Link
Http://www.ScriptingGuys.com
#Requires -Version 3.0
#>
$psise.CurrentFile.Editor.ToggleOutliningExpansion()
} #end function switch-outlineview
The revised PowerShellISEModule and profile is available via the Scripting Guys Script Repository: Windows PowerShell ISE Profile and Modules.
I invite you to follow me on Twitter and Facebook. If you have any questions, send email to me at scripter@microsoft.com, or post your questions on the Official Scripting Guys Forum. See you tomorrow. Until then, peace.
Ed Wilson, Microsoft Scripting Guy


 Light
Light Dark
Dark
0 comments