Use the UpdateServices Module to Manage WSUS
Summary: Use the Windows PowerShell and the UpdateServices module to manage WSUS.
Microsoft Scripting Guy, Ed Wilson, is here. Today we have an awesome blog post written by Boe Prox about using the UpdateServices module to manage WSUS. Boe is the 2010 second-place winner of the Scripting Games, and he won a free pass to TechEd 2010 in New Orleans. He is also an Honorary Scripting Guy and a frequent contributor to the Hey, Scripting Guys! Blog. Here is a link to his previous writings. When I suggested that Boe update some of his previous WSUS blog posts, he jumped at the chance.
Here’s Boe…
Continuing from my post, Installing WSUS on Windows Server 2012, this blog post aims to look at the cmdlets that are available in the UpdateServices module. This means that I will not be going into using the WSUS API to manage the WSUS server. I may reference whether something can be done with the API, and for that information, I would recommend that you check out some of my other Hey, Scripting Guy! Blog posts about WSUS. With that, let’s dive into this module!
Also to note, the WSUS team posted recently Installing WSUS on Windows Server 2012 with PowerShell, and they are actively looking for feedback on the module. So if you feel that something is missing or could be enhanced, please do the right thing and leave them some feedback!
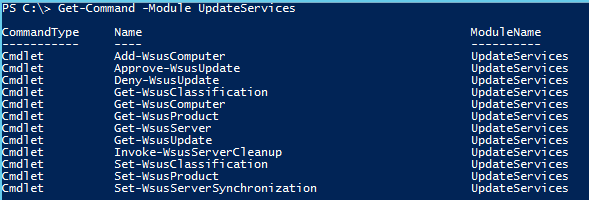
What cmdlets are available in the UpdateServices module, you ask? Let’s take a look and find out by using Get-Module:
Get-Command -Module UpdateServices
Now about each of the cmdlets…
Get-WSUSServer
The command Get-WSUSServer will give you information about your WSUS server. By default, it will only show you the WSUS server name and nothing else.
Get-WsusServer -Name Boe-PC -PortNumber 8530
Also of note is that if you are on the server and you run Get-WSUSServer, you do not need to specify a Name or PortNumber parameters.
To get more information from the output, I can pipe the output into Select-Object * and see everything.
Every command other than this command has a parameter called –WsusServer, which takes an object called Microsoft.UpdateServices.Administration.IUpdateServer. Trying to just use a string name for the server will fail. Instead, first get the object by calling Get-WSUSServer with the required parameters and save this to a variable such as $wsusServer. With this, you can then work with the remote WSUS server using the other commands. Otherwise, if you are on the server locally or through remoting, just continue to use the cmdlets without the –WsusServer parameter.
Get-Product and Set-Product
These cmdlets are used in conjunction to set the products that will be synchronized (enabled) or will not be synchronized (disabled).
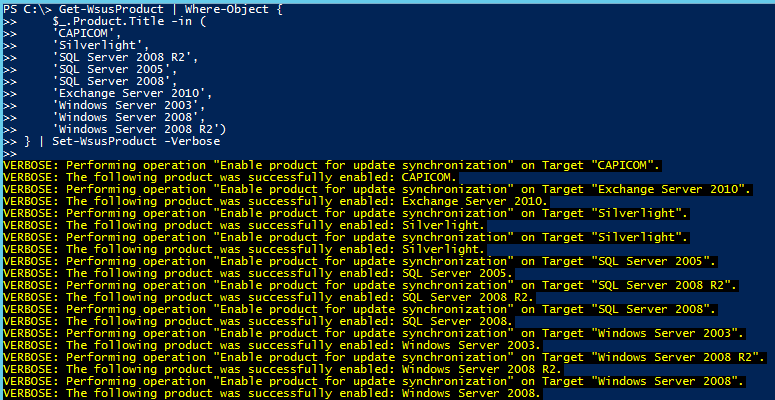
Get-WSUSProduct has a parameter for filtering some of the titles, but sometimes that won’t cut it, and piping the output into Where-Object is more efficient. The big thing to remember is that the Title property is a little misleading, meaning that if you just filter by using $_.title, nothing will happen. It is actually underneath the Product property. So your command will look something like this:
Get-WsusProduct | where-Object {
$_.Product.Title -in (
‘CAPICOM’,
‘Silverlight’,
‘SQL Server 2008 R2’,
‘SQL Server 2005’,
‘SQL Server 2008’,
‘Exchange Server 2010’,
‘Windows Server 2003’,
‘Windows Server 2008’,
‘Windows Server 2008 R2’)
} | Set-WsusProduct –Verbose
As you can see, you can pipe the results of Get-WSUSProduct directly into Set-WSUSProduct and enable the products to be available during the next synchronization. Disabling an item from being synchronized is just as easy by using the Disable parameter:
Get-WsusProduct -TitleIncludes “office” | Where {
$_.product.title -match “^office(\s\d+(?:/XP)?)?$”
} | Set-WSUSProduct -Disable –WhatIf
In this case, I didn’t want to actually disable the Office updates, but I wanted to show what would happen if I did use this action.
Get-WsusClassification and Set-WsusClassification
Similar to Get/Set-WSUSProduct, these cmdlets work with each other to get and set which classifications will be available during the synchronization of the WSUS server. We can follow a similar approach to configure which classifications will be enabled for synchronization:
Get-WsusClassification | Where-Object {
$_.Classification.Title -in (
‘Update Rollups’,
‘Security Updates’,
‘Critical Updates’,
‘Service Packs’,
‘Updates’)
} | Set-WsusClassification –Verbose
You might notice that we had to filter by using $_.Classification.Title instead of just Title—much like we did using Get-Product. The same approach for disabling a classification is possible by using the Disable parameter on Set-WSUSClassification. Usually this is a set it and forget it configuration, so in the odd chance you have to come back and make a change, there should be no problem using these cmdlets.
Set-WsusServerSynchronization
Setting the synchronization source is pretty important if you want to be able to pull update metadata and files from the upstream server. To accomplish this, you can use Set-WSUSServerSynchronization. Note that this does not set the synchronization schedule, just the update source. If all you want to do is pull from the Microsoft Updates server, the command is very simple:
Set-WsusServerSynchronization –SyncFromMU
Specifying an upstream server requires a little more knowledge of the configuration, such as the server name and the port of the remote system:
Set-WsusServerSynchronization -UssServerName UpstreamWSUS -PortNumber 80
And that is all to configuring a source to synchronize from.
Invoke-WSUSServerCleanup
Let’s face it. Sometimes WSUS will get bloated from stale computers, updates that have no purpose being on the server and files from those old updates taking up space without any rhyme or reason. The solution to this is to use Invoke-WSUSServerCleanup to prune your WSUS server of all of these to help storage and performance.
Get-WsusServer | Invoke-WsusServerCleanup -CleanupObsoleteComputers –CleanupObsoleteUpdates
Depending on the amount of data, this could take a while to run. Be patient. It will eventually finish and your server will be that much better!
Get-WsusComputer and Add-WsusComputer
Managing computers in WSUS is very common, and Get-WSUSComputer and Add-WSUSComputer will help save you some time. First off, let’s take a look at using Get-WsusComputer to see what systems are currently being managed by my WSUS server:
Get-WSUSComputer
Sure, this isn’t exactly a huge inventory, but you get the idea. By itself, the command will list every system that is being managed for updates. However, this isn’t all there is to this cmdlet. There are a number of parameters that you can use to filter for specific criteria on the server.
“How many parameters?” you ask?
Simple. Check out the Help for the cmdlet, and you will see what I mean.
This provides a great way to report on anything, ranging from inactive computers to those in specific WSUS Target groups, or simply finding computers that might have updates that failed to install correctly.
Get-WsusUpdate, Approve-WsusUpdate, and Deny-WsusUpdate
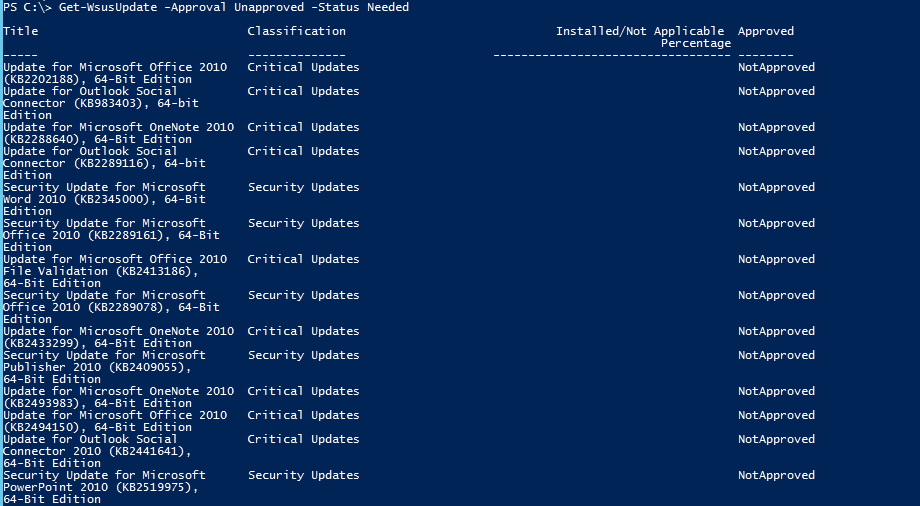
Last on the list are the three cmdlets that represent the update management. Get/Approve/Deny-WsusUpdate allows you to find updates and approve or decline the updates on the WSUS server. By using Get-WsusUpdate, you can filter for what types of updates you want to look at for approval or to decline. To see a list of all updates that haven’t been approved and are needed by your systems, you can run the following command:
Get-WsusUpdate -Approval Unapproved -Status Needed
Yes, quite a few updates are needed for my systems. Definitely time to make some approvals to get caught up on patching.
As with the Get-WsusComputer cmdlet, you can also filter for updates that have failed to install on the computers by specifying Failed and using the Status parameter on the cmdlet. Filtering by classification is also allowed by using the Classification parameter to narrow the scope of the search even more.
Moving on from this, I should really approve these updates so I can have a fully patched system. Fortunately, Approve-WsusUpdate can accomplish this with no effort at all. All I need to know is the target groups of my systems for the approvals. Note that there is not yet a cmdlet that can list all of the target groups, so you will need to hop on to the WSUS Administrator Console to get this information first.
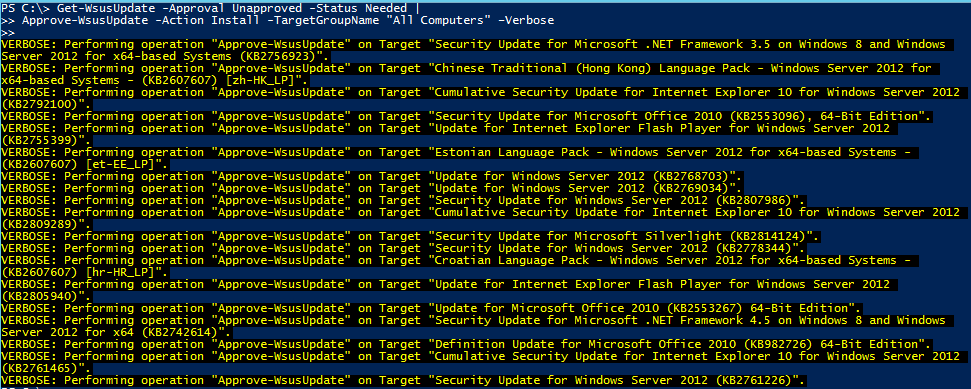
With the information in hand, I can now proceed to approve all of those updates for installation.
Get-WsusUpdate -Approval Unapproved -Status Needed |
Approve-WsusUpdate -Action Install -TargetGroupName “All Computers” –Verbose
Whoops! I didn’t mean to approve the all of those language packs. Guess it is time to look at the Deny-WsusUpdate and decline these updates.
Get-WsusUpdate -Status Needed -Approval Approved | Where {
$_.update.title -match “Language”
} | Deny-WsusUpdate –Verbose
There we go, now those updates have been declined, and I can install these updates on my system.
And with that, we have looked at all of the available cmdlets in the UpdateServices module! Hopefully these examples, while not extensive, have been enough to encourage you to take the leap into managing your WSUS server on Windows Server 2012 with Windows PowerShell.
If you are wondering why there might appear to missing cmdlets here, there is nothing missing! But if you remember, I mentioned earlier that the WSUS team is seeking feedback on things to add and improve for this module. So please go to their site via Installing WSUS on Windows Server 2012 with PowerShell and give them feedback to make this module even better.
~Boe
Thanks, Boe, for an awesome blog post.
Join me tomorrow for more cool Windows PowerShell stuff.
I invite you to follow me on Twitter and Facebook. If you have any questions, send email to me at scripter@microsoft.com, or post your questions on the Official Scripting Guys Forum. See you tomorrow. Until then, peace.
Ed Wilson, Microsoft Scripting Guy


 Light
Light Dark
Dark
0 comments