How to Import Related Data into Dynamics 365
In this post, Senior ADM Justin Scott walks us through how to maintain entity/table relationships when importing data into Dynamics 365.
A recent project I was on involved bringing over customer and contact information from another proprietary CRM application. Being newer to the Dynamics platform, one challenge was to figure out how to maintain the relationships between two related tables (tables are known as “entities” in Dynamics 365), such as the case we had here between Companies and Contacts. In the application that we were importing data from, there was a 1:N foreign key relationship between the companies and contacts. This meant that each company can have many contacts, and each contact could belong to one company as shown in the ERD diagram below:
You can use this relationship during the import, but afterwards, this same foreign key concept would not make sense considering Dynamics 365 takes care of entity relationships without the need to maintain your own foreign keys. Below I shared the steps needed to import the Companies and Contacts while keeping the relationships. The key concept is to map the foreign key just for importing purposes, and then let the system maintain the relationships going forward.
1. Get the data needed to be imported into csv files
a. Export Company table data into an excel file including its primary key as a column. b. Export Contact info into a second excel file, being sure to include the foreign key column that references the Company key column. c. Be sure that both files have their column names as the first row of the files. d. Save the Company and Contact files as separate comma-separated values (csv) files after all data grooming is complete.
2. Open the Dynamics 365 Import Wizard
a. If you don’t already have a Dynamics 365 account, you can sign up for a free trial here.
b. Once logged into Dynamics 365, go to the import wizard by going to Settings > Data Management from the main CRM Dynamics home screen
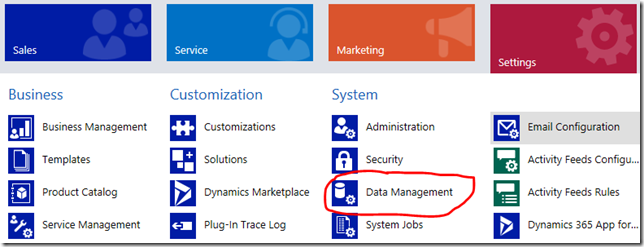 c. Choose Imports from the Data Management form
![]() d. Select the Import Data link at the top of the Imports form
d. Select the Import Data link at the top of the Imports form

3. Import your Contact records
a. Since the contact records will have a column that links to the company records, we must import the company records first. Browse to your Company csv file you created.
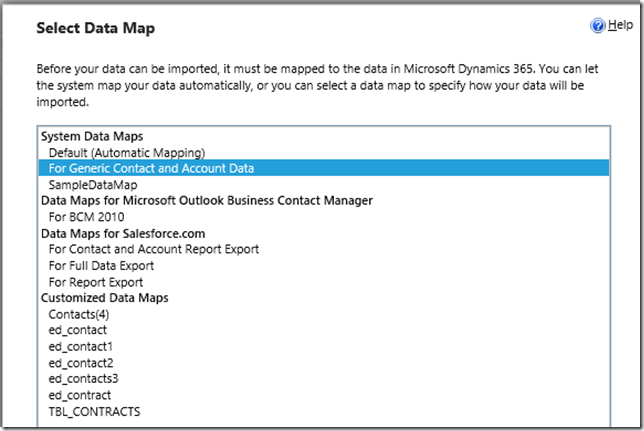
b. For the Company data, I decided to utilize the existing “Account” entity since it holds company-type information. Since I was using an existing entity, I need to choose one of the system data maps to make it easier to map fields:
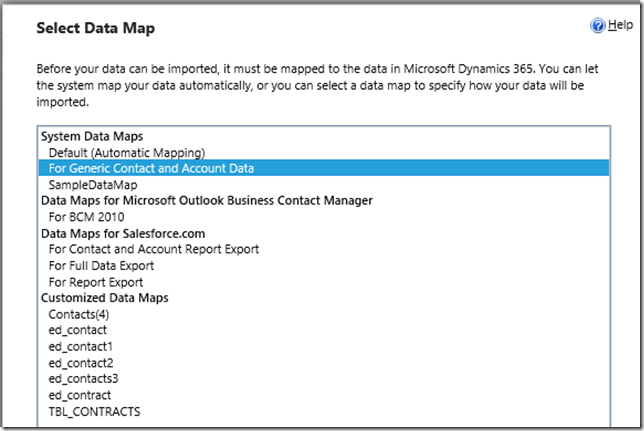 c. You will need to go through each field in your import file and map it to a field in Dynamics 365.
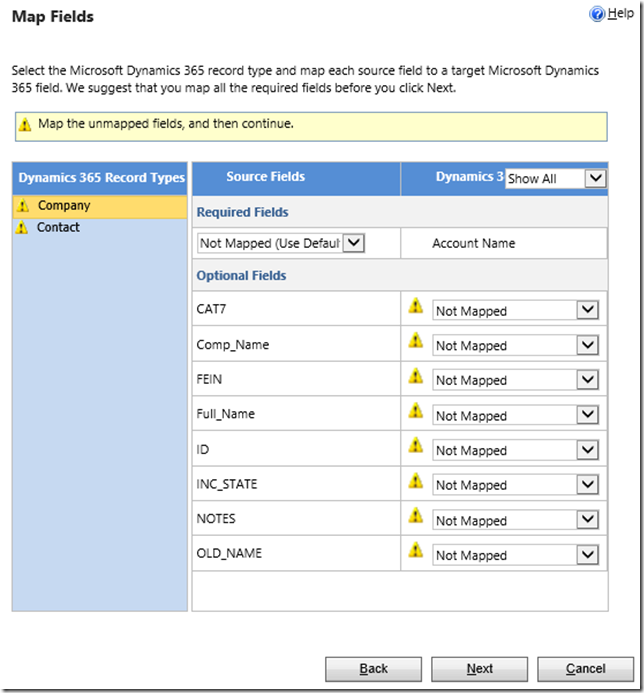
d. The Required Fields section is looking for the main user-friendly way to identify the record. In our case, we would map the Company name to the existing Account Name field.
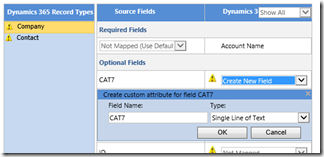
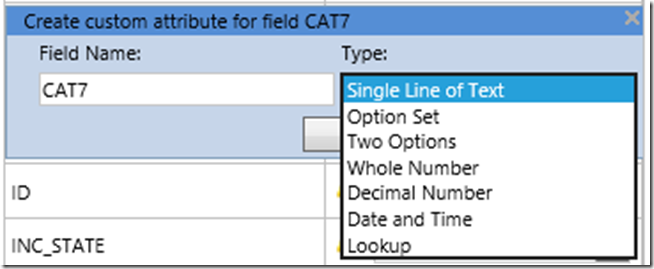
e. Any new fields that can be added by selecting Create New Field and then choosing what datatype it is.
Note: There are only a few datatypes to choose from when using the import wizard, and the field data type cannot be changed later. The data types available are shown below:
f. After all mappings are complete, select Next to begin the import. A job is then submitted to begin the import process. This job can take a while to run, but you can view the progress and status of the run in the My Imports section as shown below. This area will also show you if any errors occurred during the import.
Selecting the file name will give you additional details including information about any import errors that occurred.
4. Import your Contact records
a. See step 2 for how to open the import wizard.
b. Once in the import wizard, browse to your Contact csv file you created.
c. For the Contact data, I utilized the existing “Contact” entity. Since I was using an existing entity, I need to choose one of the system data maps to make it easier to map fields:
d. You will need to go through each field in your import file and map it to a row in Dynamics 365.
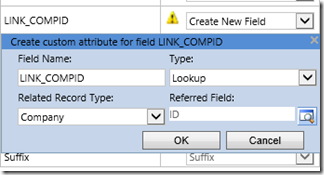
e. The key difference between the overall process of uploading Company verses contact records is that we want to define a field in Contacts that helps us link the contacts to the companies upon doing the import. To do this, we need to map the foreign key given to us by the source system. In the import dialog, the Type should be set to Lookup, the Related Record Type should be set to the entity to relate to (in this case Company), and the Referred Field should be set to the field that will match the foreign key (in this case ID) being imported as shown below.
Note: The imported contact data had a column called LINK_COMP_ID that was a foreign key in the source system to the field named ID in the Company Entity that has already had its data imported.
Summary
In the steps above we showed you how to take related data from another application and maintain that relationship when importing the data into the Dynamics 365. When doing this, Dynamics is designed to understand that you only need this mapping for the import and that after the import, this foreign key relationship will be maintained internally. In other words, you could drop the key and foreign key columns after all the imports were completed, and the relationships would still exist. Taking it a step further, having these relationships in the system sets you up nicely for creating a company form that has all the related company contacts listed on the same form.
Premier Support for Developers provides strategic technology guidance, critical support coverage, and a range of essential services to help teams optimize development lifecycles and improve software quality. Contact your Application Development Manager (ADM) or email us to learn more about what we can do for you.



 Light
Light Dark
Dark
0 comments