This step-by-step guide on getting started with Node.js and Angular comes to us from Premier Developer consultant Crystal Tenn.
Here is a simple step by step guide to getting your Angular application setup with Visual Studio Code and Node. This guide will simply help you know what to install, the commands to run in PowerShell, and some basics about where to start building your app using Visual Studio Code.
- Install Node JS with default settings for everything https://nodejs.org/en/download/
- Download Visual Studio Code: https://code.visualstudio.com/download
- Open PowerShell in admin mode. Install Angular CLI:
npm install -g @angular/cli
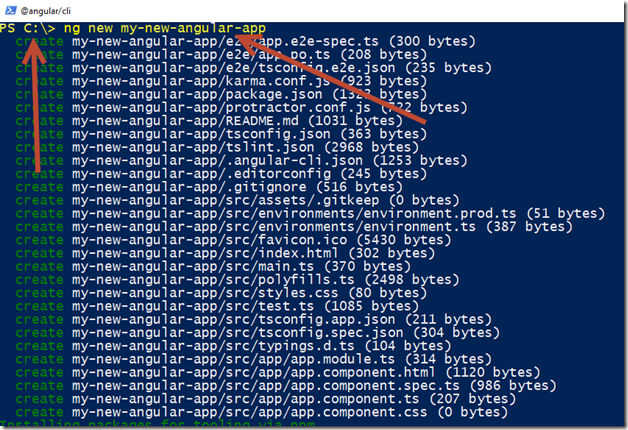
- Navigate to the folder where you want to make your angular app. I went to my C:/ directory in my PowerShell to run the following command. I am calling mine “my-new-angular-app” but you can name it anything you like.
ng new my-new-angular-app

- cd into your new app directory that you just created, in this case
cd my-new-angular-app

- Build app and start server
ng serve
- Navigate to http://localhost:4200

- Open Visual Studio Code
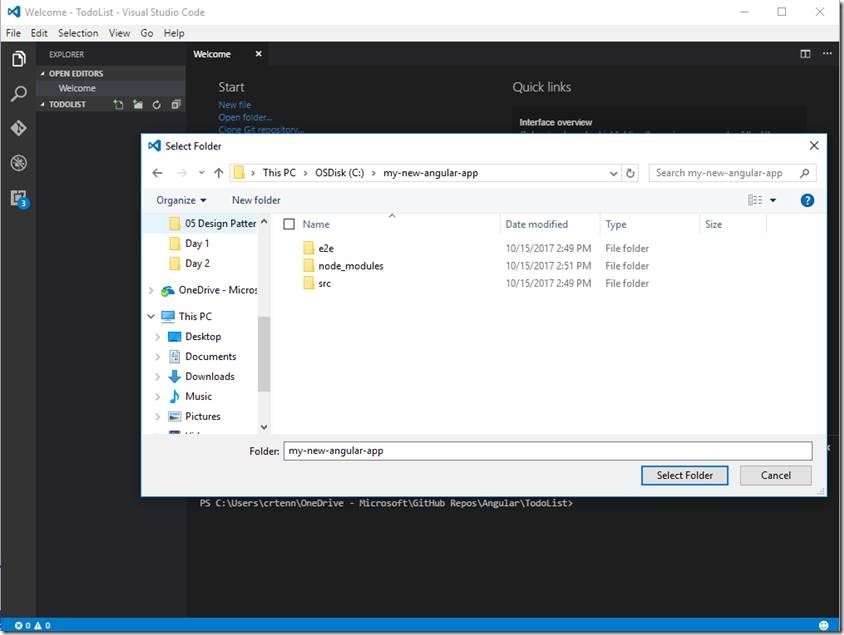
- Click on File, Open Folder

- Open the folder that you created. In this case it would be my-new-angular-app. Hit Select Folder, as seen in screenshot below.

- package.json has all of your angular dependencies and other packages.

- You can add all your components in the app folder.

- In PowerShell, to stop your Server:
- See the following link for docs on how to use Angular: https://angular.io/guide/styleguide


Thanks for this well detailed article.
Anyone can easily setup Angular with this article.
very helpful for beginners to know how to kick start an application using angular
Thanks. Very helpful