
Running a .NET Core Web Application in Docker container using Docker Desktop for Windows
In this post, App Dev Managers Anand Shukla and Sash Kavalaparambil provide step by step instruction to run a .NET Core Web Application in Docker container using Docker Desktop for Windows.
If you do not have Docker Desktop for Windows already installed, we will need to install it from https://docs.docker.com/docker-for-windows/install/ . Please check the system requirements to make sure it is supported on your OS. This will redirect you to https://hub.docker.com/editions/community/docker-ce-desktop-windows where you will need to login, and download the Docker Desktop for Windows. You may have to logout / login or restart your system depending on whether Hyper-V is enabled on your system or not.
Once you have installed Docker Desktop for Windows, you will find the Docker icon in your system tray. You can right click, and access the menu to change some of the settings. As you can see from screen below, we are currently running Linux containers, and can switch to Windows container by clicking the menu option.
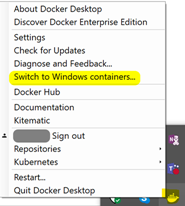
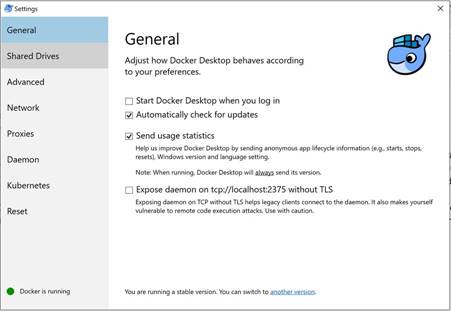
You can access the settings by clicking on Settings and can change some of the behaviors such as “Start Docker Desktop when you log in”
Now we have our Docker Desktop installed, the next step is to create a new ASP.NET core project. You can use VS Code, command line or Visual Studio to create an ASP.NET core project. I will be using Visual Studio to create a new ASP.NET core project but you can use VS Code or command line to create one as well.
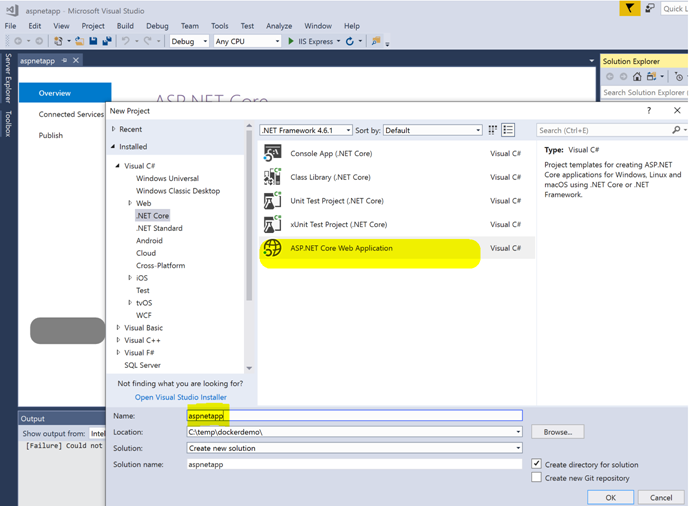
Click on File -> New Project, and then select ASP.NET Core Web Application from .NET Core template. Enter name as aspnetapp, and choose a location for your application.
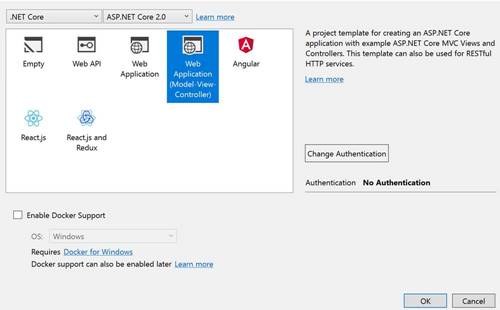
Use “Web Application (Model-View-Controller)” on the next screen and click OK to create the project.
Once the project is created, create 2 files (Dockerfile, dockerignore.txt -> to be renamed to .dockerignore) in the project directory. Alternatively, you could have chosen “Enable Docker Support” and Visual Studio would have created these files for you. The Dockerfile contains instruction to build the container image, and .dockerignore file contains content to ignore when building the image.
Please note that Windows will not allow you to create a file which starts with a dot. That’s why we create the file with name dockerignore.txt and then use the command line to rename it.

Put the following in Dockerfile. This files 10 steps which builds the application using a separate image which contains the SDK to build, and packages it with an image which just has the ASP.NET Core runtime. Description for each of these steps is provided when we will run the Docker command to build the image.
FROM microsoft/dotnet:sdk AS build-env
WORKDIR /app
# Copy csproj and restore as distinct layers
COPY *.csproj ./
RUN dotnet restore
# Copy everything else and build
COPY . ./
RUN dotnet publish -c Release -o out
# Build runtime image
FROM microsoft/dotnet:aspnetcore-runtime
WORKDIR /app
COPY --from=build-env /app/out .
ENTRYPOINT ["dotnet", "aspnetapp.dll"]
Put the following in .dockerignore
bin\
obj\
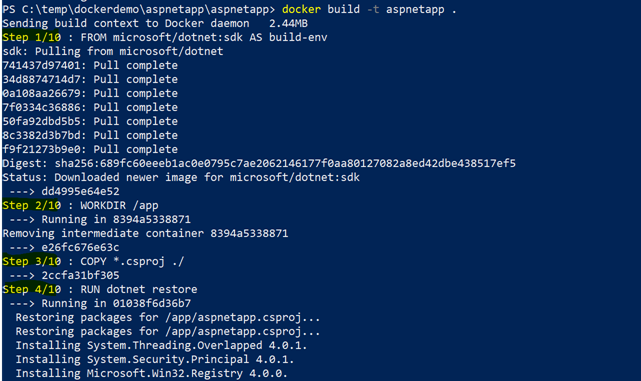
Open PowerShell, and run the command “docker build -t aspnetapp .”. The option -t will tag the image with name “aspnetapp”.
![]()

Here is what happens on each of the step:
- Step 1/10: FROM microsoft/dotnet:sdk AS build-env
Pulls the image with tag “sdk” from Microsoft/dotnet registry on docker hub – https://hub.docker.com/r/microsoft/dotnet/tags
“build-env” name can be given to the new build stage. This will be used to copy file in the later steps.
- Step 2/10: WORKDIR /app The WORKDIR instruction sets the working directory for any RUN, CMD, ENTRYPOINT, COPY and ADD instructions that follow it in the Dockerfile. If the WORKDIR doesn’t exist, it will be created even if it’s not used in any subsequent Dockerfile instruction.
- Step 3/10: COPY *.csproj ./ Copies all CS Project files to the working directory inside the container.
- Step 4/10: RUN dotnet restore This is the .NET command line which restores all the required Nuget packages to build the project.
- Step 5/10: COPY . ./ This copies all the content of Visual Studio project into the working directory.
- Step 6/10: RUN dotnet publish -c Release -o out This step uses .NET CLI to create a release build with output directory as “out”
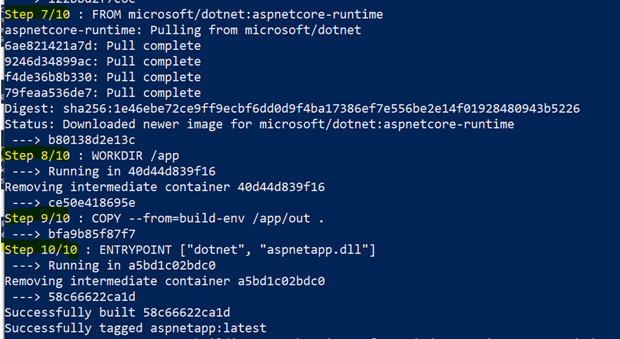
- Step 7/10: FROM microsoft/dotnet:aspnetcore-runtime Pulls the image with tag “aspnetcore-runtime” from Microsoft/dotnet registry on docker hub – https://hub.docker.com/r/microsoft/dotnet/tags which provides the minimum components to run an ASP.NET Core Web Application.
- Step 8/10: WORKDIR /app Same as Step 2 above.
- Step 9/10: COPY –from=build-env /app/out . This copies the content of /app/out folder from the “build-env” to this net container.
- Step 10/10: ENTRYPOINT [“dotnet”, “aspnetapp.dll”] This allows the container to run as an executable.
Now we have our Docker Image created, you can list all the images present by using “docker images ls” command

Now let’s go ahead and create a container from the image by using “docker run -d -p 8080:80 –name myapp aspnetapp”. This command will create a container named myapp from the image aspnetapp, and map port 80 of the container to port 8080 on the host machine.
![]()
Now you can browse to your application by going to http://localhost:8080 and see your application running.

As you can see from steps above, it is very simple and straight forward to get an ASP.NET Core web application running in a Docker container. For more examples, please visit examples on Docker ( https://docs.docker.com/engine/examples/dotnetcore/ ) or ASP.NET Core Website (https://docs.microsoft.com/en-us/aspnet/core/host-and-deploy/docker/?view=aspnetcore-2.2)
 Light
Light Dark
Dark
1 comment
Just small comment: Windows will let you create files with ‘.’ prefix (starting with dot ‘.’), but you need a small trick: when you enter in rename/name mode type the name with leading ‘.’, BUT add dot ‘.’ at the end. Windows Explorer will remove trailing dot ‘.’ leaving leading/starting one intact!Just ask Linux/Mac guy 😎