Integrating with Instagram using ASP.NET WebHooks Preview
In the blog Introducing Microsoft ASP.NET WebHooks Preview, we gave an overview of how to work with Microsoft ASP.NET WebHooks. We described how you get out-of-the-box support for a variety of WebHooks providers such as Dropbox, GitHub, MailChimp, PayPal, Slack, Salesforce, Trello, as well as being able to write your own.
In this blog we describe integrating with Instagram which enables you to get notified as new images and videos are posted to their service. Instagram WebHooks support four kinds of subscriptions:
- Users: receive notifications when users registered with your application post new photos.
- Tags: receive notifications when a new photo is tagged with specific tags.
- Locations: receive notifications when new photos are posted and tagged with a specific location.
- Geographies: receive notifications when new photos are posted in a given geo location defined by a center point and radius.
The last one is my personal favorite as it is very easy to use and provides great opportunities for integration. In this blog we show how to subscribe using a geo location and receive updates as new images are posted.
Note: You can access the latest ASP.NET WebHooks online documentation for updates as well.
Configuring an Instagram Client
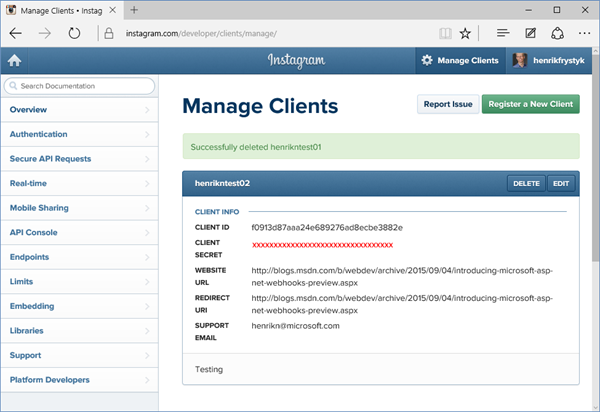
Assuming you have an Instagram account, go to their developer portal and define a Client which we will use for setting up the subscriptions. It should look something like this:
Note the Client ID and Client Secret – you will need these later. Also note that we don’t provide any subscription information here such as the WebHook URI or the kind of subscription. Rather, Instagram supports managing subscriptions through a REST API enabling you to list, create, and delete subscriptions for a given client.
Configuring Receiver
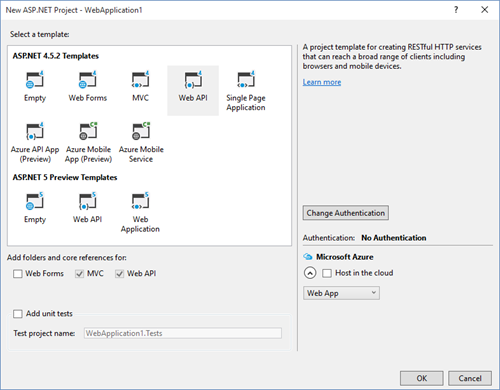
Before we go through the subscription process, let’s create a new Web Application project – a straight up Web API project will do:
Let’s set up the ASP.NET WebHook Receiver. First make sure you install the Microsoft.AspNet.WebHooks.Receivers.Instagram Nuget package into your ASP.NET application. Then the registration happens exactly like in the blog Introducing Microsoft ASP.NET WebHooks Preview by adding this line to the WebApiConfig.Register method:
namespace WebHookReceivers
{
    public static class WebApiConfig
    {
        public static void Register(HttpConfiguration config)
        {
            // Web API configuration and services

            // Web API routes
            config.MapHttpAttributeRoutes();

            config.Routes.MapHttpRoute(
                name: "DefaultApi",
                routeTemplate: "api/{controller}/{id}",
                defaults: new { id = RouteParameter.Optional }
            );

            // Load receivers
            config.InitializeReceiveInstagramWebHooks();
        }
    }
}
This time we set two application settings using the Instagram Client ID and Secret from before. As stated in the blog Introducing Microsoft ASP.NET WebHooks Preview, the preferred way to do this is to set it in the Azure Portal:
<appSettings>
  <add key="MS_WebHookReceiverSecret_InstagramId" value="Instagram Client ID" />
  <add key="MS_WebHookReceiverSecret_Instagram" value="Instagram Client Secret" />
</appSettings>
Configuring Instagram WebHook Client
public static class Dependencies
{
    private static InstagramWebHookClient _client;


    public static void Initialize(HttpConfiguration config)
    {
        _client = new InstagramWebHookClient(config);
    }


    public static InstagramWebHookClient Client
    {
        get { return _client; }
    }
}
public static class WebApiConfig
{
    public static void Register(HttpConfiguration config)
    {
        // Web API configuration and services

        // Web API routes
        config.MapHttpAttributeRoutes();

        config.Routes.MapHttpRoute(
            name: "DefaultApi",
            routeTemplate: "api/{controller}/{id}",
            defaults: new { id = RouteParameter.Optional }
        );

        // Wire up dependencies
        Dependencies.Initialize(config);

        // Load receivers
        config.InitializeReceiveInstagramWebHooks();
    }
}
[
    {
        "subscription_id": "1",
        "object": "geography",
        "object_id": "12345678",
        "changed_aspect": "media",
        "time": 1297286541
    }
    ...
]
Adding WebHook Handler
public class InstagramWebHookHandler : WebHookHandler
{
    public InstagramWebHookHandler()
    {
        this.Receiver = "instagram";
    }

    public override async Task ExecuteAsync(string generator, WebHookHandlerContext context)
    {
        // Get the WebHook client
        InstagramWebHookClient client = Dependencies.Client;

        // Convert the incoming data to a collection of InstagramNotifications
        var notifications = context.GetDataOrDefault<IEnumerable<InstagramNotification>>();
        foreach (var notification in notifications)
        {
            // Use WebHook client to get detailed information about the posted media
            var entries = await client.GetRecentGeoMedia(context.Id, notification.ObjectId);
            foreach (JToken entry in entries)
            {
                // Get direct links and sizes of media
                var thumbnail = entry["images"]["thumbnail"].ToObject<InstagramMedia>();
                var lowres = entry["images"]["low_resolution"].ToObject<InstagramMedia>();
                var std = entry["images"]["standard_resolution"].ToObject<InstagramMedia>();
            }
        }
    }
}
// Get link to the media on the Instagram website
string link = entry.Value<string>("link");

// Get caption for the media
var caption = entry["caption"].ToObject<InstagramCaption>();

// Get information about the user posting the media
var user = entry["user"].ToObject<InstagramUser>();

// Get location information about where the media was recorded.
var location = entry["location"].ToObject<InstagramLocation>();
Subscribing to Instagram
Subscriptions are persisted by Instagram so we only have to subscribe once in order to receive notifications for a long time. You can imagine this being wired up in a variety of ways but here we use a simple controller exposing three actions for subscribing and unsubscribing. Create a new empty Web API controller class called InstagramSubscriptionController and fill it in as follows:
[RoutePrefix("api/instagram")]
public class InstagramSubscriptionController : ApiController
{
    [Route("subscribe")]
    public async Task<IHttpActionResult> PostSubscribe()
    {
        // Get our WebHook Client
        InstagramWebHookClient client = Dependencies.Client;

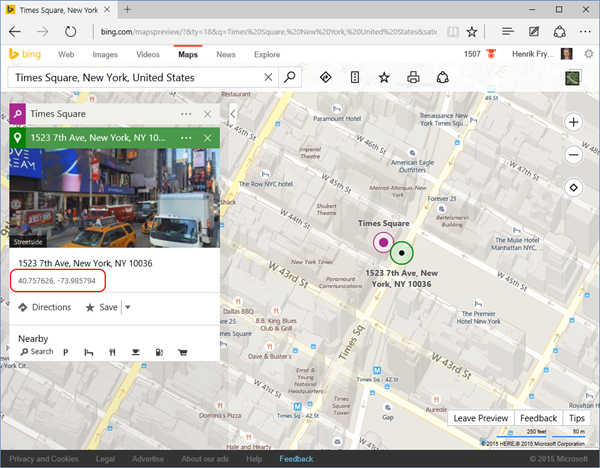
        // Subscribe to a geo location, in this case within 5000 meters of Times Square in NY
        var sub = await client.SubscribeAsync(string.Empty, Url, 40.757626, -73.985794, 5000);

        return Ok(sub);
    }

    [Route("unsubscribe")]
    public async Task PostUnsubscribeAll()
    {
        // Get our WebHook Client
        InstagramWebHookClient client = Dependencies.Client;

        // Unsubscribe from all subscriptions for the client configuration with id="".
        await client.UnsubscribeAsync("");
    }

    [Route("unsubscribe/{subId}")]
    public async Task PostUnsubscribe(string subId)
    {
        // Get our WebHook Client
        InstagramWebHookClient client = Dependencies.Client;

        // Unsubscribe from the given subscription using client configuration with id="".
        await client.UnsubscribeAsync("", subId);
    }
}
Trying it Out!
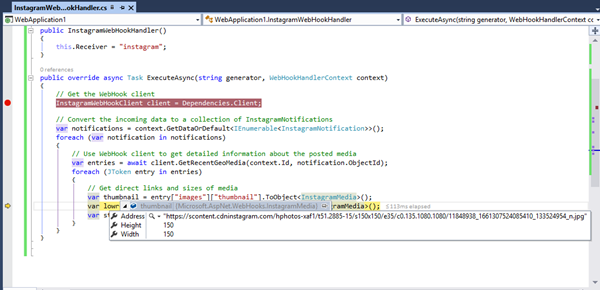
Once you have deployed the project, you can attach the debugger to it and wait for somebody to post a picture within the geo location area. Of course, if you pick your own current location then you can post something to Instagram yourself as well.
To subscribe, send an empty https POST request using Fiddler or similar to a URI like below. Make sure that it is https as this is required by Instagram:
{
    "id": "20048438",
    "object": "geography",
    "object_id": "11286394",
    "callback_url": "https://<host>.net/api/webhooks/incoming/instagram"
}
To unsubscribe, send an empty POST request to a URI like this:
Have fun!
Henrik


 Light
Light Dark
Dark
0 comments