
In the first article of this series, we talked about integrating Cosmos DB with ASP.NET Core application powered by OData using a pre-built solution that was using Cosmos Client to run full CRUD operations.
But that’s not the only way we can work with Cosmos DB from ASP.NET Core – there are two more approaches that we could follow to work with this great technology.
In this article we are going to leverage the power of the Entity Framework to communicate with Cosmos DB then add OData on top of that to supercharge our API with even more functionality that makes querying, filtering and navigating the data in Cosmos DB even easier and simpler to work with.
Second Approach: Using Entity Framework
Before we start talking about leveraging the Entity Framework as a technology to communicate with Cosmos DB. It might be useful here to talk a bit about the Entity Framework, what it is, and how to use it with Cosmos DB.
What is the Entity Framework?
The Entity Framework enables developers to work with data in the form of domain-specific objects and properties, such as students and teachers, without having to concern themselves with the underlying database tables and columns where this data is stored.
Setting things up
Before we start settings things up, I’m going to assume that you have the following already in place:
- An ASP.NET Core API 2.2 project already setup and ready to run (Check this tutorial to learn how to do that)
- A Cosmos DB instance already setup with SQL API. (Check our previous article to learn how to do that)
Now, in order for us to be able to build a connection between the Entity Framework and Cosmos DB – we will need to do the following:
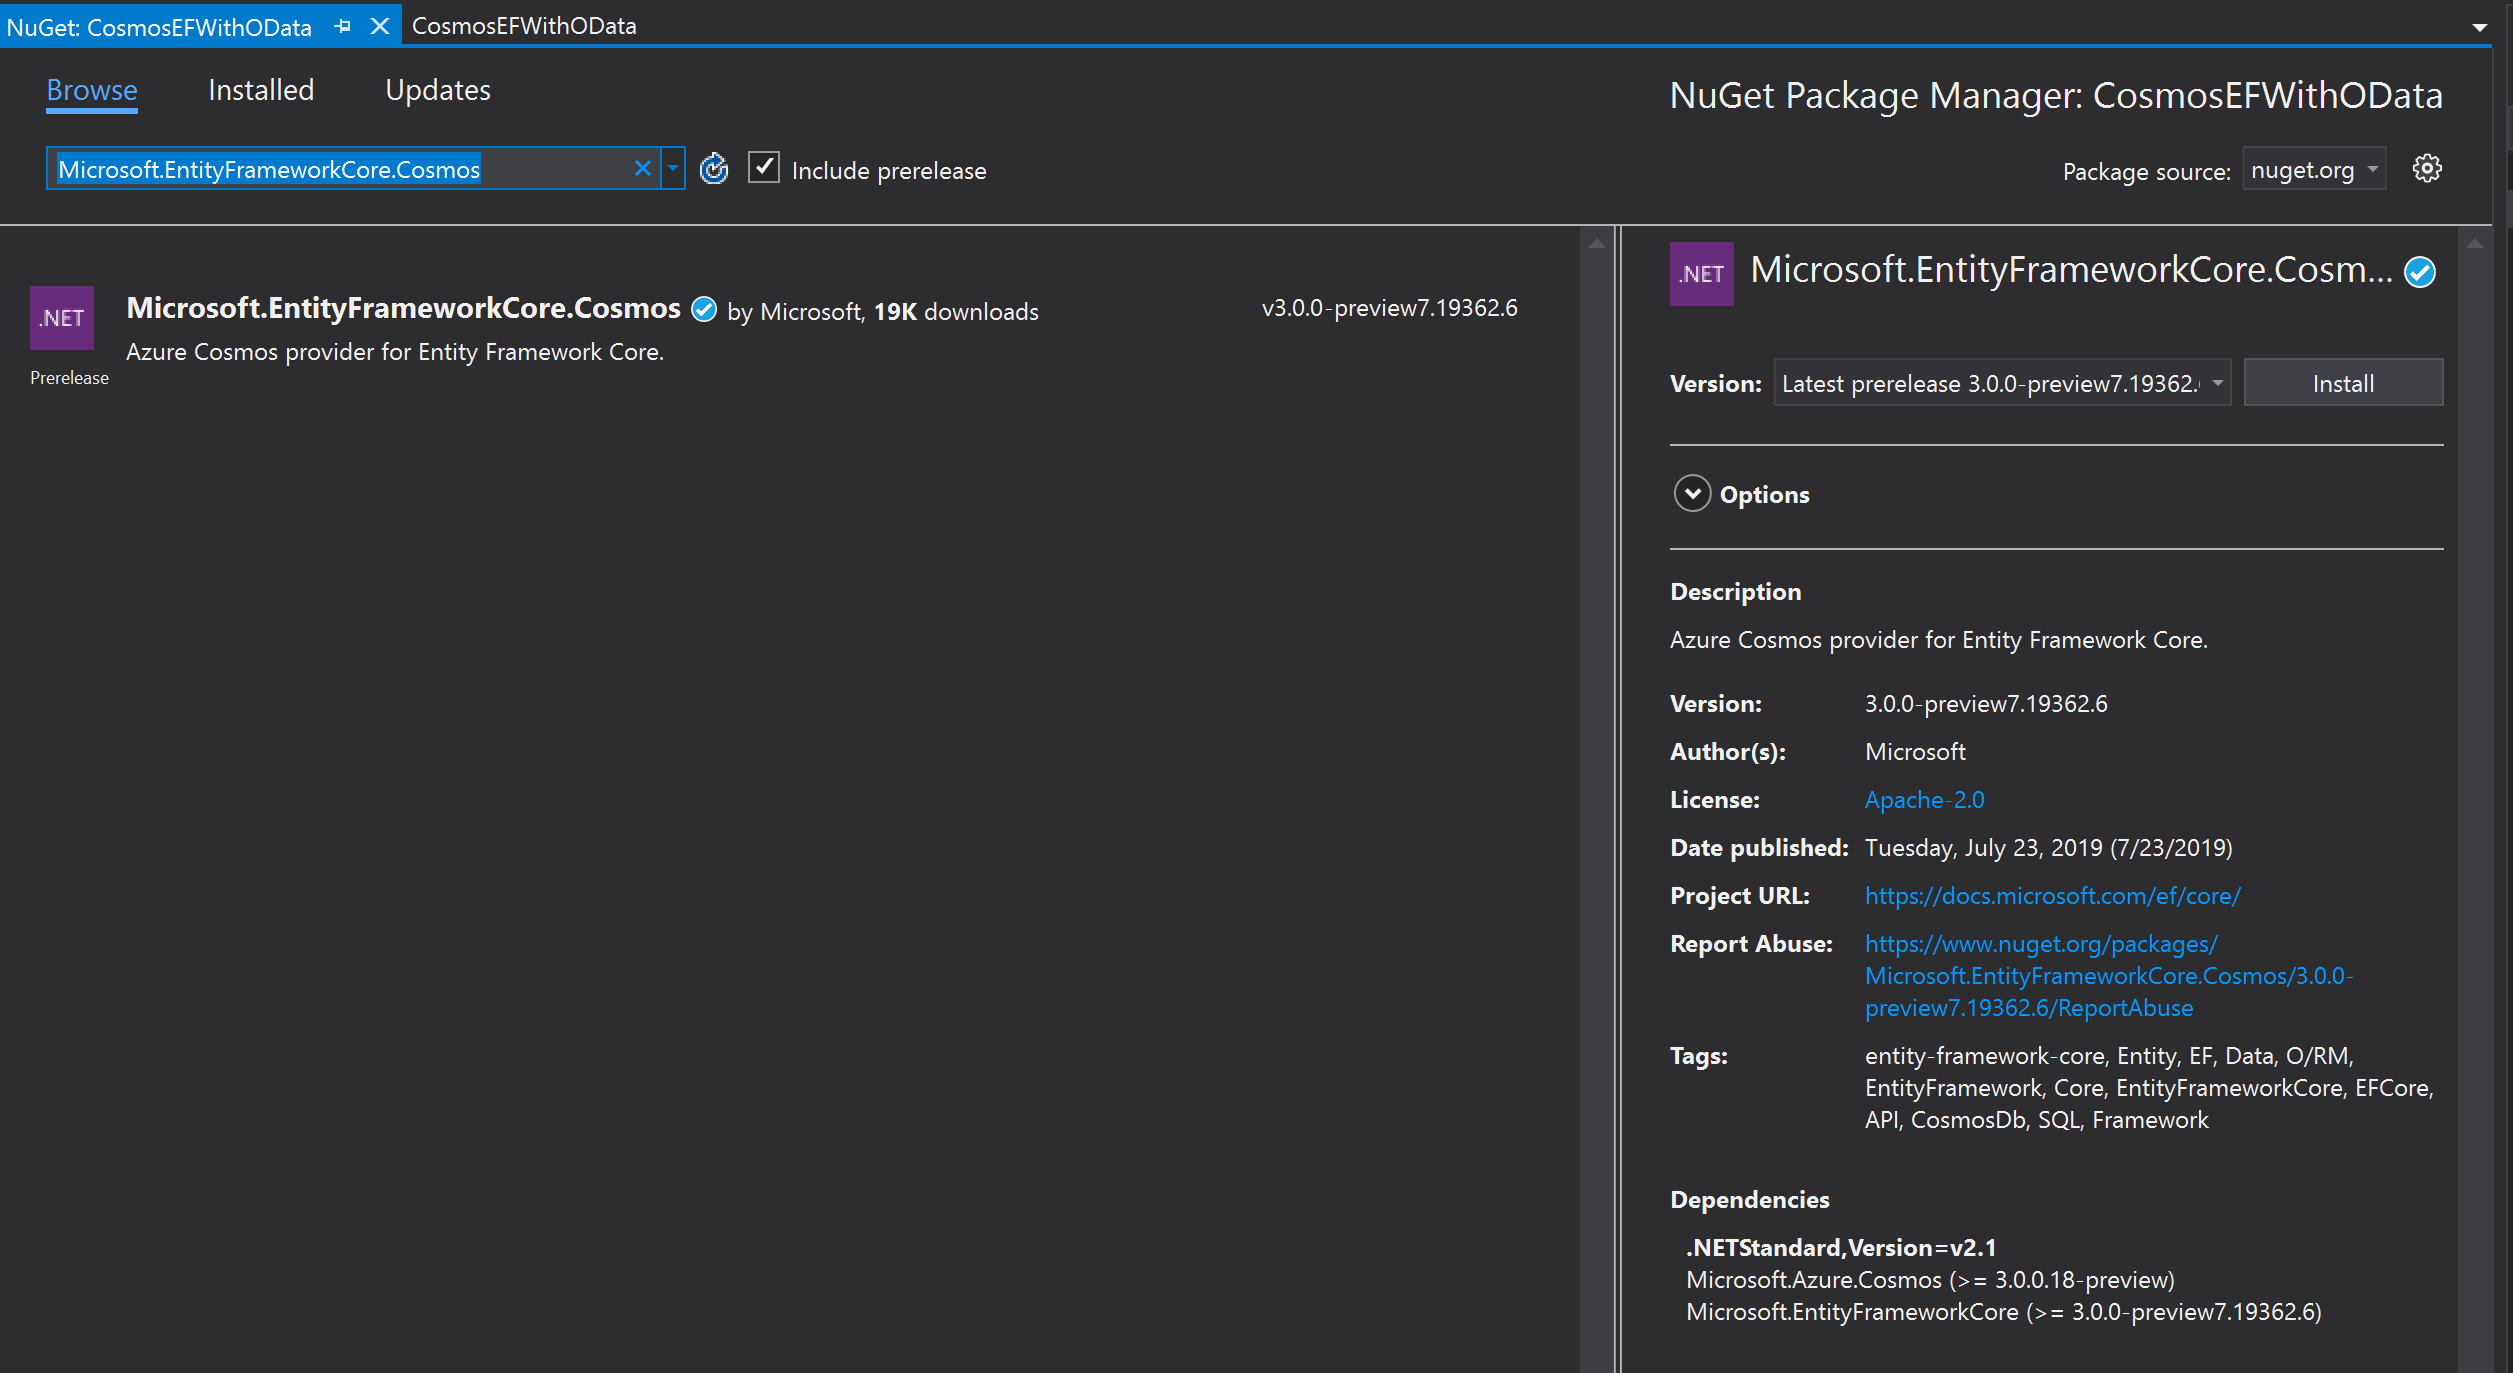
- Download and install NuGet package Microsoft.EntityFrameworkCore.Cosmos version 2.2.0 in your project.
You might need to check the “include prerelease” box to be able to find that package since all the releases that are available so far are pre-releases as shown in the following screenshot:
2. Once the package is installed – let’s go ahead and setup our DbContext class by creating a two files the model and the context as follows:
This is the Student model class we are working with:
using System;

namespace CosmosEFWithOData.Models
{
    public class Student
    {
        public Guid Id { get; set; }
        public string Name { get; set; }
        public int Score { get; set; }
    }
}
And this is the DbContext class – we are going to call it StudentsDbContext:
using CosmosEFWithOData.Models;
using Microsoft.EntityFrameworkCore;

namespace CosmosEFWithOData.Brokers
{
    public class StudentsDbContext : DbContext
    {
        public StudentsDbContext(DbContextOptions<StudentsDbContext> options) : base(options)
        {

        }

        public DbSet<Student> Students { get; set; }
    }
}
3. Now let’s configure our Entity Framework to communicate with our Cosmos DB instance – in the startup.cs file, add the following code in your ConfigureServices method:
        public void ConfigureServices(IServiceCollection services)
        {
            services.AddMvc().SetCompatibilityVersion(CompatibilityVersion.Version_2_2);
            services.AddDbContext<StudentsDbContext>(options =>
            {
                options.UseCosmos(
                    serviceEndPoint: "YOUR_COSMOS_INSTANCE_URL",
                    authKeyOrResourceToken: "YOUR_API_KEY",
                    databaseName: "studentsdb");
            });
        }
You will need to fill in your service endpoint and API key in order for this configuration to succeed, you can find that information by going to your Cosmos DB instance then navigate to the “Keys” option on the left hand menu as shows in the following screenshot:
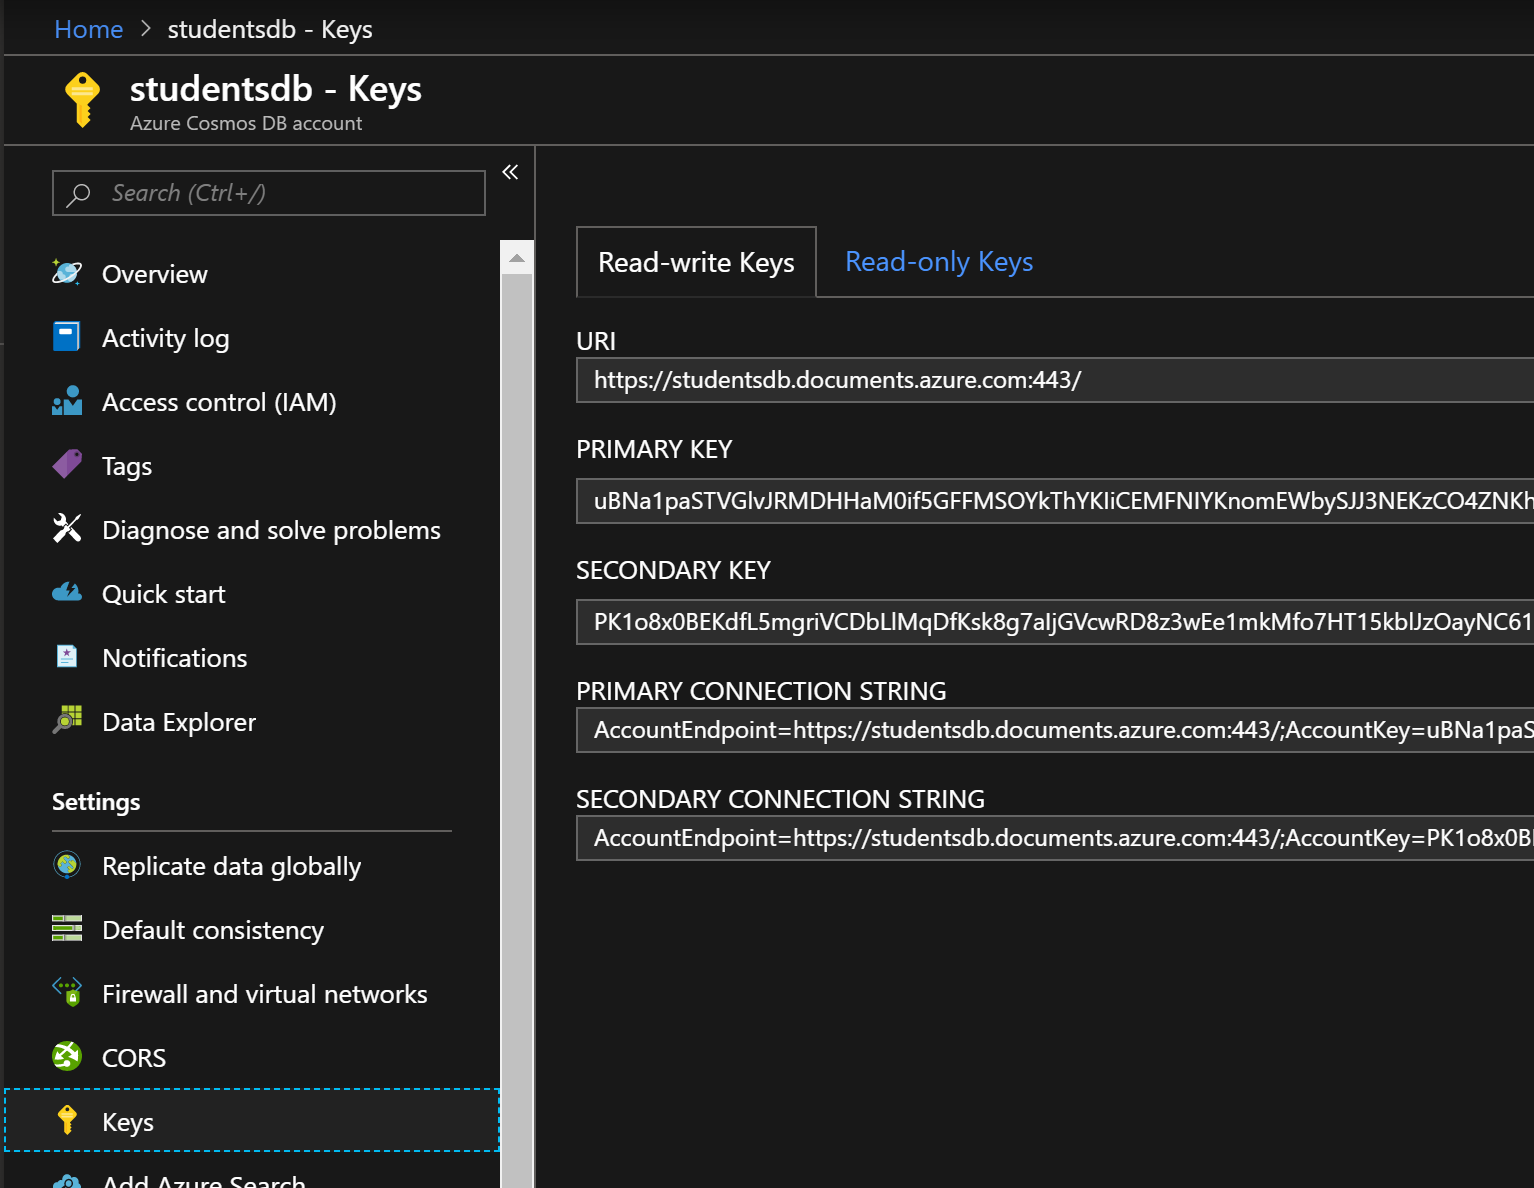
All we need here is the values in the URI and the PRIMARY KEY – once you get that information, fill in the string in your configuration.
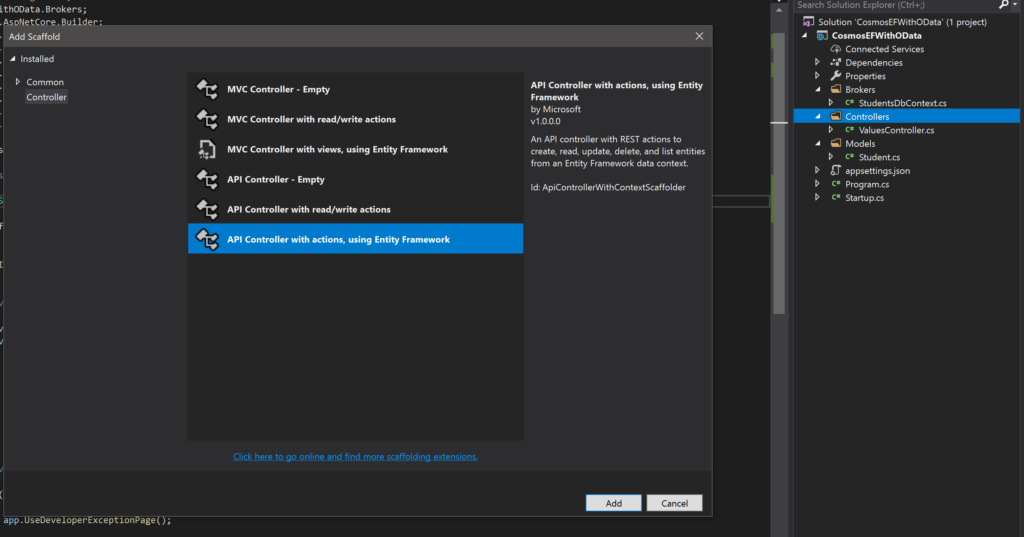
4. Once that’s done – now let’s create the controller endpoints that will leverage our Entity Framework and scaffold all CRUD operations endpoints for us.
This can simply be done by right clicking on the controllers folder in your solution, selecting “Add” then “Controller” then select “API Controller with actions, using Entity Framework” then click the “Add” button at the bottom of your dialog as shown in the following screenshot:
5. Once you click “Add” another dialog will pop-up so you can configure which model you would like the API controller to serve, and what DbContext should the controller use to initialize all communication with Cosmos DB – we will select Student as our model and StudentsDbContext as our context class as shown in the screenshot below:

6. Once you click “Add” Visual Studio will spin up a scaffolding dialog to generate all API methods for all Restful CRUD operations endpoints you would need to communicate with Cosmos DB – the dialog should look as follows:

7. When the scaffolding and code generation is completed a new class will show up in your Controllers folder with all the CRUD operations already in place and ready to be tested – to make sure things are running smoothly post a new student to your POST api/students endpoint and then try to retrieve all students using a GET api/students to make sure things are working as expected.
Note: if this is the first time you interact with that Database instance – I recommend you run the following command to make sure your database exists before running any CRUD operations on it:
await context.Database.EnsureCreatedAsync();
You can call that line of code in your DbContext class or at the constructor level in your API controller class – either way you want to make sure the database you’re interacting with does exist before going any further with this article.
Now that we have completed settings our API up, configured with Entity Framework and Cosmos DB it’s as easy as 4 lines of code to add OData to our new API, here’s the steps we will need to follow to accomplish this.
OData Integration
Now that we have implemented and verified our controller endpoint is functional, let’s do the exact same steps we’ve done in this article to implement OData in our solution. I will summarize these steps here as follows:
- Add a Nuget package Microsoft.AspNetCore.OData 7.1.0 to your solution.
- Add OData service in your startup.cs file, then enable dependency injection along with the functions you want OData to provide through your API.
- Here’s an example of how your startup.cs file should look:
using System.Linq; using CosmosEFWithOData.Brokers; using Microsoft.AspNet.OData.Extensions; using Microsoft.AspNetCore.Builder; using Microsoft.AspNetCore.Hosting; using Microsoft.AspNetCore.Mvc; using Microsoft.EntityFrameworkCore; using Microsoft.Extensions.Configuration; using Microsoft.Extensions.DependencyInjection; namespace CosmosEFWithOData { public class Startup { public Startup(IConfiguration configuration) { Configuration = configuration; } public IConfiguration Configuration { get; } public void ConfigureServices(IServiceCollection services) { services.AddMvc().SetCompatibilityVersion(CompatibilityVersion.Version_2_2); services.AddDbContext<StudentsDbContext>(options => { options.UseCosmos( serviceEndPoint: "https://studentsdb.documents.azure.com:443/", authKeyOrResourceToken: "YOUR_API_KEY", databaseName: "studentsdb"); }); services.AddOData(); } public void Configure(IApplicationBuilder app, IHostingEnvironment env) { if (env.IsDevelopment()) { app.UseDeveloperExceptionPage(); } else { app.UseHsts(); } app.UseHttpsRedirection(); app.UseMvc(routeBuilder => { routeBuilder.EnableDependencyInjection(); routeBuilder.Select().Filter().Expand().OrderBy(); }); } } } - Your controller StudentsController.cs should look as follows:
using Microsoft.AspNetCore.Mvc; using CosmosEFWithOData.Brokers; using CosmosEFWithOData.Models; using Microsoft.AspNet.OData; using System.Linq; namespace CosmosEFWithOData.Controllers { [Route("api/[controller]")] [ApiController] public class StudentsController : ControllerBase { private readonly StudentsDbContext context; public StudentsController(StudentsDbContext context) { this.context = context; } // GET: api/Students [HttpGet] [EnableQuery()] public ActionResult<IQueryable<Student>> GetStudents() { return context.Students; } } } - Let’s verify our new endpoint with OData integration by hitting an endpoint like:
http://localhost:36442/api/students?$select=name
And your response should look as follows:
[
    {
        "Name": "Hassan Habib"
    },
    {
        "Name": "Josh McCall"
    },
    {
        "Name": "Roberto Bortolussi"
    },
    {
        "Name": "Cody Allen"
    },
    {
        "Name": "Daniel Lin"
    }
]
By seeing this result, we verified OData is functional on your API retrieving and processing data from your Cosmos DB instance container using the Entity Framework. In the next article, we will discuss working with OData and Cosmos DB without needing to build an API – stay tuned! 🙂
Final Notes
- You can download the solution I used to run this demo from here (Don’t forget to update the endpoint & key values in startup.cs file).
- The package I’m using to run OData is of Microsoft.AspNetCore.OData 7.1.0 I ran into some issues using August release of the same library (7.2.0) I will communicate with our OData team and update this post accordingly.
- I highly recommend following this link to learn more about Cosmos DB and it’s capabilities.
- Once more, huge thanks to Cosmos DB team for providing such a great documentation around such powerful technology.
- I also highly recommend staying up-to-date with all the new updates in Cosmos DB by following this link to their blog.
Hi,
I have tried the example of Odata without EntityFramework.
It works fine. I am new to Odata so i have few doubts that may be very basic.
1. Filter query in odata without EF : while returning all data as ‘IEnumerable’ list, Odata query run on the returned data set and returns filtered data(for example 5 records out of 10). Is my understanding is correct ?
2. Odata without EF : in real production application, there may be millions of record residing inside DB. In this case bring all data from repository layer to controller and applying odata query...
Love it. Looking forward to part III.
Should you not be returning IQueryable instead of calling ToListAsync in your controller action? Currently, any filtering etc will run in memory instead of being translated by entity Framework
Thank you Dan, good point!
I have updated the post and the code as well.