
Several years ago, with the introduction of Visual Studio 2019, we launched a completely revamped work item experience. This updated view operates entirely on REST, replacing the deprecated SOAP APIs utilized in the legacy version. Although Visual Studio 2022 still includes the option to revert to the legacy view, the majority of our users have transitioned to the new default view. For those who prefer the legacy experience, here is some guidance to facilitate a smooth transition.
How do I turn on the new view?
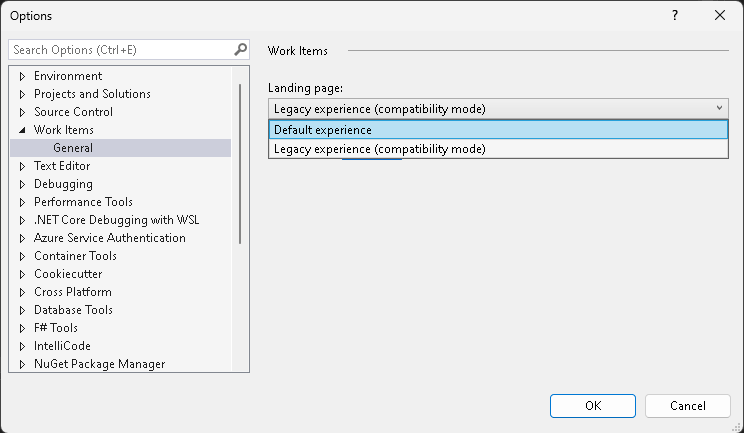
To enable the new default view, launch Visual Studio and navigate to the Search function at the top of the window. In Feature Search, enter the phrase “Work items.” Choose the “Change how work items are opened” option from the list, and then set the Default experience for your landing page.
How do I link work items to a commit?
Let’s begin with the basics, linking a work item to a commit. There are several ways to accomplish this.
Work items Hub
Use the Work Items tile from Team Explorer. This is where you find and select the work items that are related to a code change. Select from a number of different views like Assigned To Me, Following, Mentioned, and My Activity. Filter or search can be utilized to find any specific work item. Once you select an item, select the Relate To Changes option.
#Mention in commit message
Search and select work items directly from the commit message. Associate as many work items to the commit as you would like.
Create branch and relate work
Generate a branch directly from a work item, automatically linking the work item to any ongoing changes. Alternatively, you can relate a work item and an existing set of changes already in progress. Associate multiple work items with a commit as needed.
How do I run queries and see counts?
Over the past decade, we’ve strategically invested in and transitioned the primary query experiences to our web-based platform. As a result, the new work item view no longer incorporates queries. Creating, editing, and running queries in the web portal is pretty straight forward. Here is some documentation as a refresher:
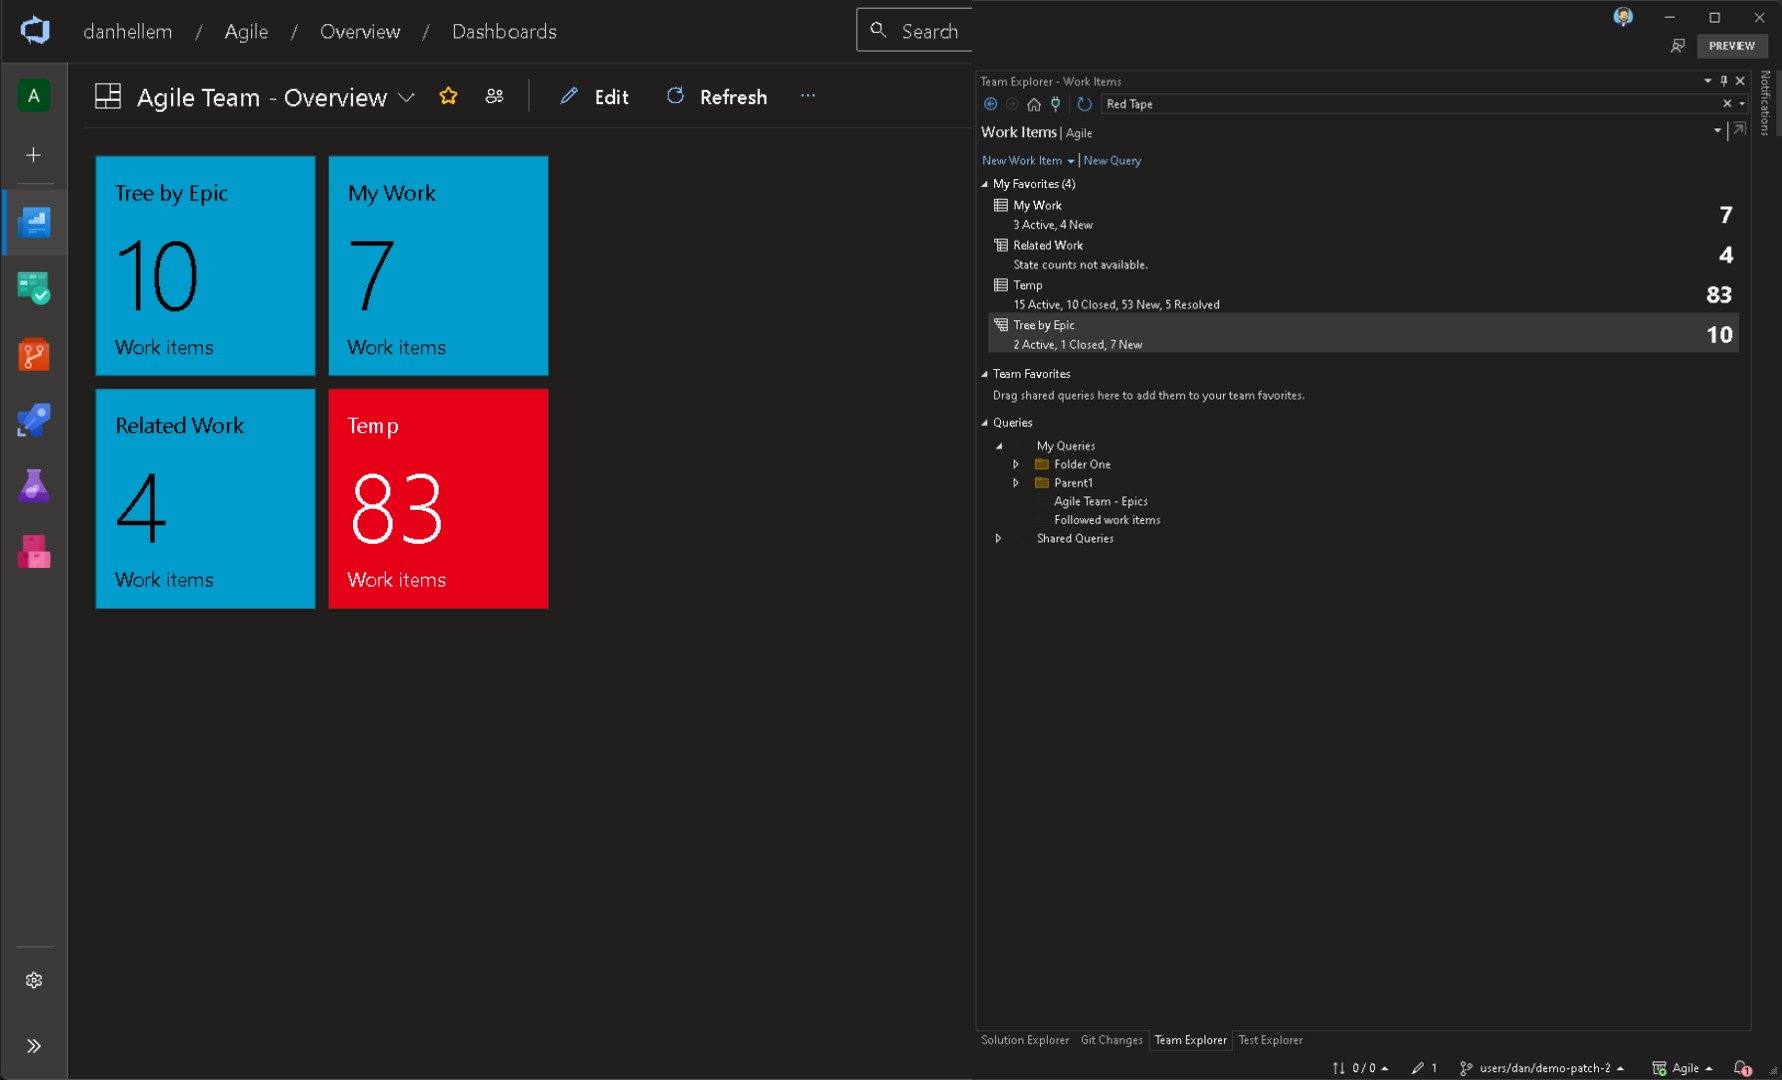
If the counts on the queries are important to you, try using a Dashboard with a set of query tiles to get a similar experience. You can even use rules on the tiles to add conditional colors, making it easier to visualize.
Here is a comparison side by side.
How do I manage queries?
There are two ways to move queries around when using the web experience.
Drag and drop
You can drag and drop a single query or an entire folder into another folder.
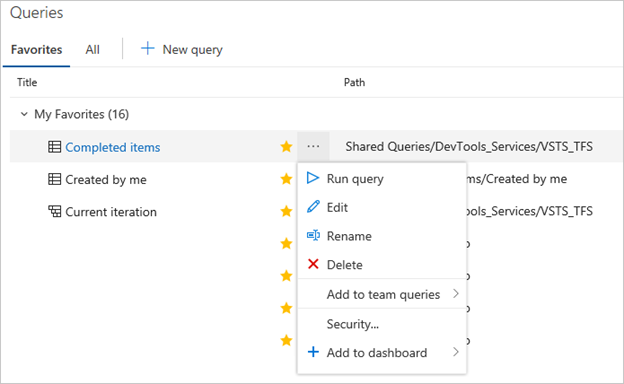
Rename query
Select the query and choose the Rename Query option in the context menu. Choose the folder in the drop down you wish to move the query into.
How do I reparent work items?
While re-parenting cannot be performed directly when running queries on the web, there are several alternative methods available for re-parenting work items.
Drag and drop
From the backlog you can drag and drop child items into another parent. You can do the same with child items between cards on the kanban board and sprint board.
Mapping
The Mapping pane on the backlog screen is a simple way to parent and re-parent items.
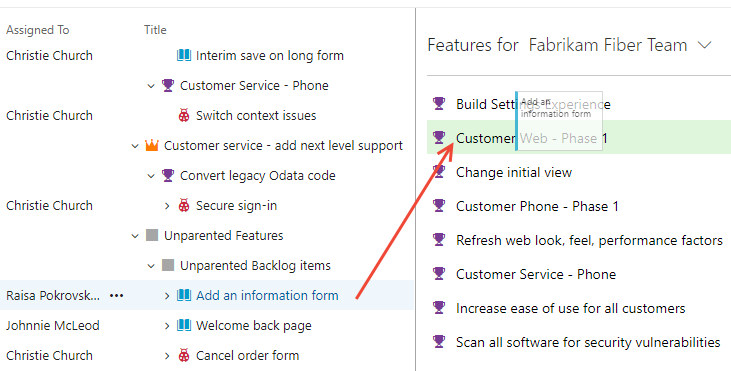
Learn more about how to organize your backlog and map child work items to parents in Azure Boards.
Change parent
From the backlog you can change the parent by selecting the child items and using the **Change parent ** option on the context menu.
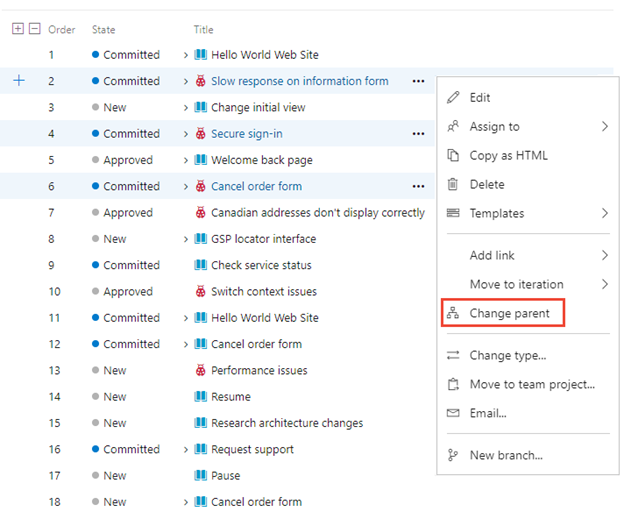
Learn more about how to organize your backlog and map child work items to parents in Azure Boards.
Summary
The workflows may differ between the two experiences. While there is an increased reliance on the web, most tasks can be accomplished across the web and the new view, just as they were in the legacy view. As mentioned earlier, the plan is to phase out the legacy experience in the next major version of Visual Studio, but this transition is expected to take place over the next couple of years, providing ample time for users to adapt to the new experience 😊.
If you have any questions or want to provide some feedback, please email us directly.
0 comments