
This sprint, we’re replacing the “View YAML” experience. This is the feature which helps you migrate designer pipelines to YAML. The new version is more correct and covers more Classic Build features, which I’ll cover in this post. It removes one useful quirk of the old implementation, so I’ll share tips for anyone who depended on that quirk.
The old experience
The previous version of this feature worked on a job or step at a time. If you’ve never used it before, you can see how the old experience worked below.
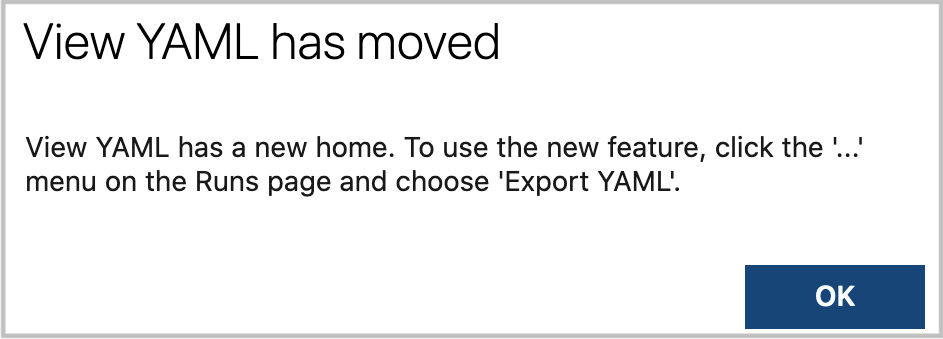
Once the new experience ships, if you click that button, you’ll be greeted with a message telling you that the feature has moved.
The new experience
Following the directions in the dialog box, let’s see how the new experience works. First, we’ll export our pipeline as YAML.
The Classic pipeline is left intact and nothing changes. We get a copy of the pipeline, expressed in YAML.

More correct
The new implementation is more correct. Previously, the feature worked entirely at the web app layer. Using a combination of editor features and translations of platform code, it built a YAML representation of whatever was currently loaded in the editor.
As many users can attest, the “View YAML” experience was sometimes wrong. The differences were typically subtle, small, and hard to spot. Although we’ve fixed many of them over the years, we never gained confidence that we had correctly handled every edge case. We’ve even been known to (accidentally) break what had previously been working, such as when we added new YAML keywords.
The new experience takes a different tactic. It’s implemented in the platform, reusing existing Classic and YAML pipeline infrastructure. This lets us reuse instead of repeating code, for instance our YAML parsing library.
Using a clever testing strategy, we can be much more confident that the implementation is correct today and remains correct in the future. The tests consist of actual Classic pipelines which we run through the designer to YAML conversion process. Then, both the original Classic and resulting YAML pipelines are compiled into their runtime format, as if we were going to schedule them. Finally, we compare the plans – if they’re identical, then we know the conversion was completely lossless.
Covers more features
In addition to being more correct, the new version covers more Classic pipeline features. The old experience couldn’t even export more than one job at a time. And while we could have imagined beefing up the old experience, it would have been subject to the same correctness problems described above.
Building the new version, we stepped back and thought about the problem more systematically. We used the UI and the existing YAML parser as our starting points, working to cover each area. The new system knows how to handle every feature listed here:
- Single and multiple jobs
- Checkout options
- Execution plan parallelism
- Timeout and name metadata
- Demands
- Schedules and other triggers
- Pool selection, including jobs which differ from the default
- All tasks and all inputs, including optimizing for default inputs
- Job and step conditions
- Task group unrolling
In fact, there are only two areas which we know aren’t covered.
Variables
Variables defined in YAML “shadow” (hide) variables set in the UI. Therefore, we didn’t want to export them into the YAML file in case you need an ability to alter them at runtime. If you have UI variables in your Classic pipeline, we mention them by name in the comments to remind you that you need to configure them in your new YAML pipeline definition.
Timezone translation
cron schedules in YAML are in UTC, while Classic schedules are in the organization’s timezone. Timezone handling has a lot of sharp edges, so we opted not to try to be clever. We export the schedule without doing any translation, so your scheduled builds might be off by a certain number of hours unless you manually modify them. Here again, we make a note in the comments to remind you.
Easily editing YAML
As great as the new design is, it takes away one use case. Fortunately, we offer a solid replacement.
If you don’t typically edit YAML pipelines, it can be challenging to get started. We know many of you would create a new Classic pipeline, tweak the settings for a task or two, and then use “View YAML” as a sort of visual editor for YAML pipelines.
For this use, we encourage you to check out the YAML pipeline editor and its built-in Task Assistant. The Task Assistant is a pane on the right side of the screen which helps you correctly create and modify YAML steps. Unlike the “View YAML” button, it works directly in the real YAML file. Go to a YAML pipeline definition and choose “Edit”; you’ll be dropped into a web-based editing experience. From there, open up the Task Assistant and start editing away.
In closing
We hope you enjoy the new, more correct and complete replacement for “View YAML”.
When using the classic release pipeline you can setup “Report deployment status to Boards”. Are there any plans to support this work item deployment tracking feature when using YAML pipelines?
That will be helpful to many…. but also seems like a breaking change (there is tooling used in real client environments that counts on the existing behavior). To the best of my knowledge there is no way to “pre-detect” which experience is going to occur, making it difficult (at best) to update these types of tools…… Was there NO feasible way to do this such that it did not break existing experience???
Sorry to say it but the way this has been done is dreadful
There must have been 100+ useful things that you could have spent time, but you put effort into this which takes away something which worked . How to lose friends and alienate people.
100% agreement (see my other comment for additional reasons this was a poor implementation change.)
Supplemenatary – the old method still works for a release pipeline, so there are two methods for obtaining the Yaml. If looking at a release one uses the old method but if looking at a build one has to use the new one.
This is awesome. We have a bunch of pipelines that use custom tasks. For these pipelines when we export the YAML the file is truncated (ends with …) and doesn’t contain the YAML for the underlying tasks. The JSON that is export is complete.
Will custom tasks be supported for the YAML export (since it appears fine in the JSON export)?
In the meantime, is there a suggested workaround to convert the JSON into a YAML pipeline?
Hi Dan, it should work with custom tasks just the same as it works with in-box tasks. If you want to send me the YAML and JSON exports of your pipeline, I can take a look. I’m mattc@xbox.com.
The
...thing is silly but as it turns out, that’s a valid way to end a YAML file. Our YAML library did it by default so we left it in, but I see how it might look like the file is truncated. We’ll look at suppressing that to reduce confusion.