Impact of new Release Management orchestration features
We are rolling out a number of orchestration improvements in Release management service. These improvements are explained in the release notes here and here. One of the key features in this release is that you will be able to author more complex release definitions, where the deployments can happen to multiple environments in parallel. You do not have to be constrained to a linear pipeline anymore. Also, you can take the same release and manually promote it to certain environments.
If you are used to the current UI in release management, these new features may require some getting used to. In this blog, we would like to call your attention to some of the items that you must check in your account. Also, we list some common questions that you might immediately have.
Using the new features
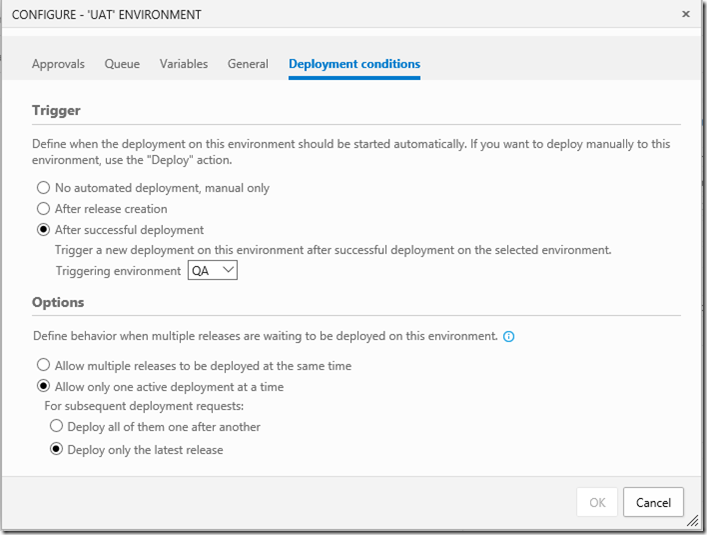
At first, check each of your release definitions and make sure that the “deployment conditions” are set correctly in each of its environments. To do this, open each release definition, select each environment, and in “…” menu on that environment, select the “Deployment conditions”. This is where you define the conditions under which a release will be automatically deployed into that environment. Notice all the flexibility you have here. You can set the deployment into each environment to be triggered right after the release is created, right after deployment to another environment succeeds, or to not deploy automatically at all.
As part of the service upgrade, we have set the conditions for your environments as follows:
- If your release definition had a Continuous deployment trigger and a target environment set on it, then we have automatically set the conditions to match a linear pipeline model until that target environment. We have left the condition on the rest of the environments to be manual.
- If your release definition did not have a Continuous deployment trigger on it, then we set the condition on the first environment to be“after release creation” and the condition on the rest of the environments to be manual.
We took a conservative approach here rather than setting automatic deployment conditions on all environments since we would not want your bits to be deployed into an environment unintentionally.
Frequently asked questions about the new experiences
When I create a new release, I do not get to select the target environments anymore. How do I do that?
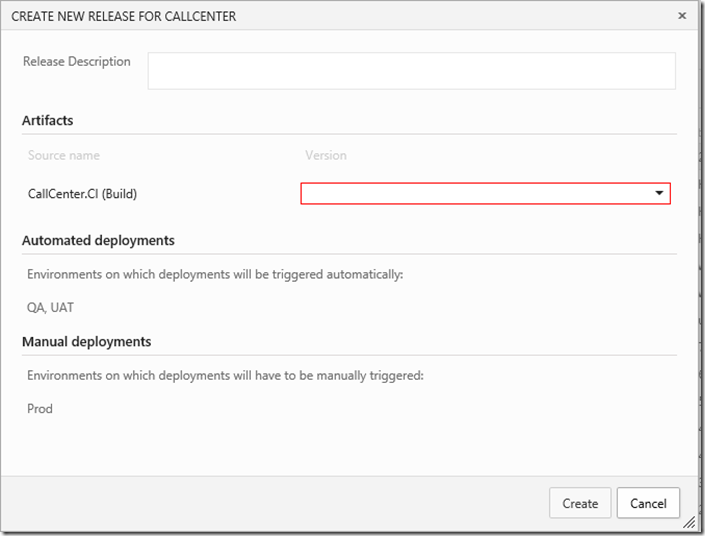
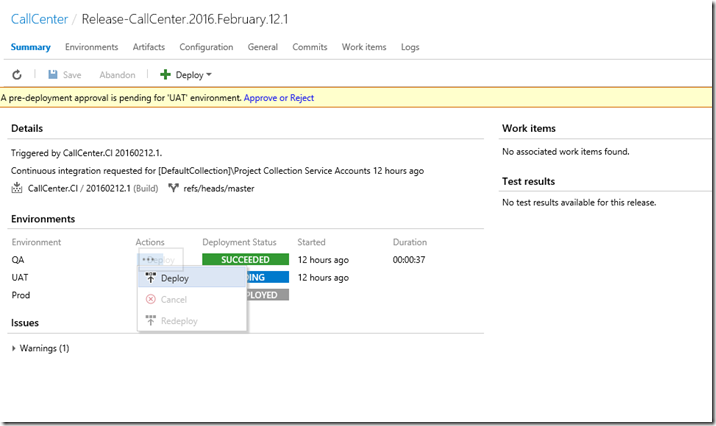
With the changes rolled out today, you have to set the deployment conditions in each environment of the release definition. Depending on how you set these conditions, the create release dialog will show you which environments will get triggered automatically, and which ones won’t. Later when you create a release, you can choose to manually promote that release to any of the environments (for e.g., to those that have the condition set to “manual only”). To do this, open a release instance that you would like to promote, select the “…” next to the environment, and select “Deploy”.
I have a release that is in progress. How do I cancel it?
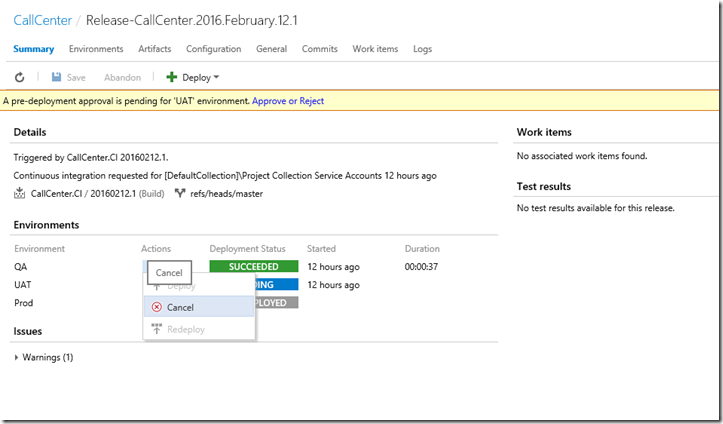
Open the release instance. The summary page will show you all the environments in which the release is in progress. Select the environment in which you want the deployment to be cancelled. Select the Cancel option. The Cancel menu has moved from the release level to each environment since deployments to multiple environments may be running in parallel, and you can choose to cancel only one of them.
I have a release definition that has all the conditions set so that all environments form a linear pipeline. But, I want a new release to only go to the first few environments. Previously, I could ask the release to stop at a certain point (using target environment). I cannot do that anymore. What should I do now?
Now that we have introduced parallel environments, we need to generalize this concept of target environment. That is coming soon. Until then, you have to either edit the release definition and change the conditions, or you have to create a “draft release” and skip all the steps that you do not want to be executed in the last set of environments.
I have created a new release definition. When I create a release, it shows that all the environments are manual. Earlier this wasn’t the case. What should I do?
When you create a new release definition, the deployment condition on each environment is set to “manual” by default. That is why you see this behavior. Edit the conditions on the environments to change this behavior.
Now, it seems that I can directly deploy to a particular environment without going through the earlier ones. I want more people in my team to be able to create releases, but want to restrict who can directly deploy to an environment. How do I do that?
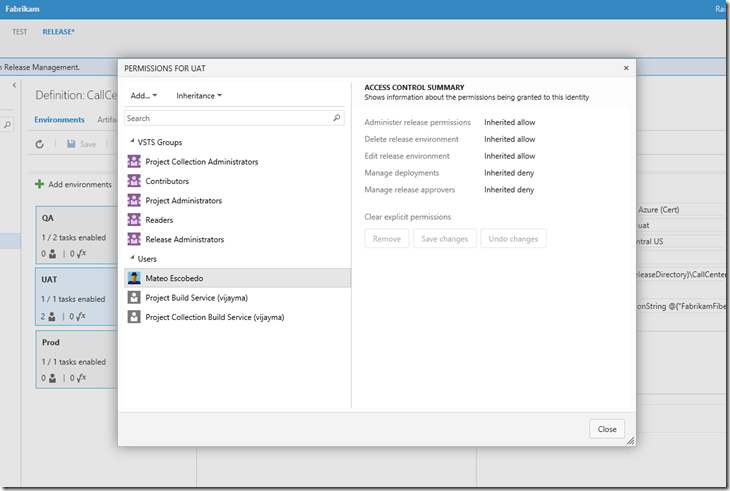
There is a new permission on each environment called “Manage deployments”. Use that to control who can directly promote a release to an environment.
For latest RM updates, follow us on Twitter. For detailed documentation on these new RM features, see our docs. For service updates and incidents, see our service blog.

 Light
Light Dark
Dark
0 comments