Running Xamarin.iOS Unit Tests in Visual Studio Team Services
In previous posts, we’ve discussed how to set up continuous integration for your Xamarin.iOS applications inside Visual Studio Team Services(VSTS) using the new Hosted macOS Agent. Building the application is only part of the full solution, though, as we want to fully test the logic of our application. We can test our app’s user interface with App Center Test, we can test our business logic with test runners, but how do we test platform specific functionality?
We can accomplish this by leveraging the Touch.Server on iOS to run our platform-specific tests on a real device or simulator. This is great for the platform-specific code of an application and ideal for testing libraries, such as plugins, that are purely application-specific code. In this post, we’ll show you how to set up continuous unit tests for SettingsPlugin projects in VSTS.
Getting started
Download the Touch.Server.exe to your project folder, a small tool originally built by Rolf Kvinge on the Xamarin.iOS team (this can be automated with a script later on). Touch.Server will make it easier to execute tests on a Simulator or a Device and pull tests results on the build machine for further processing.
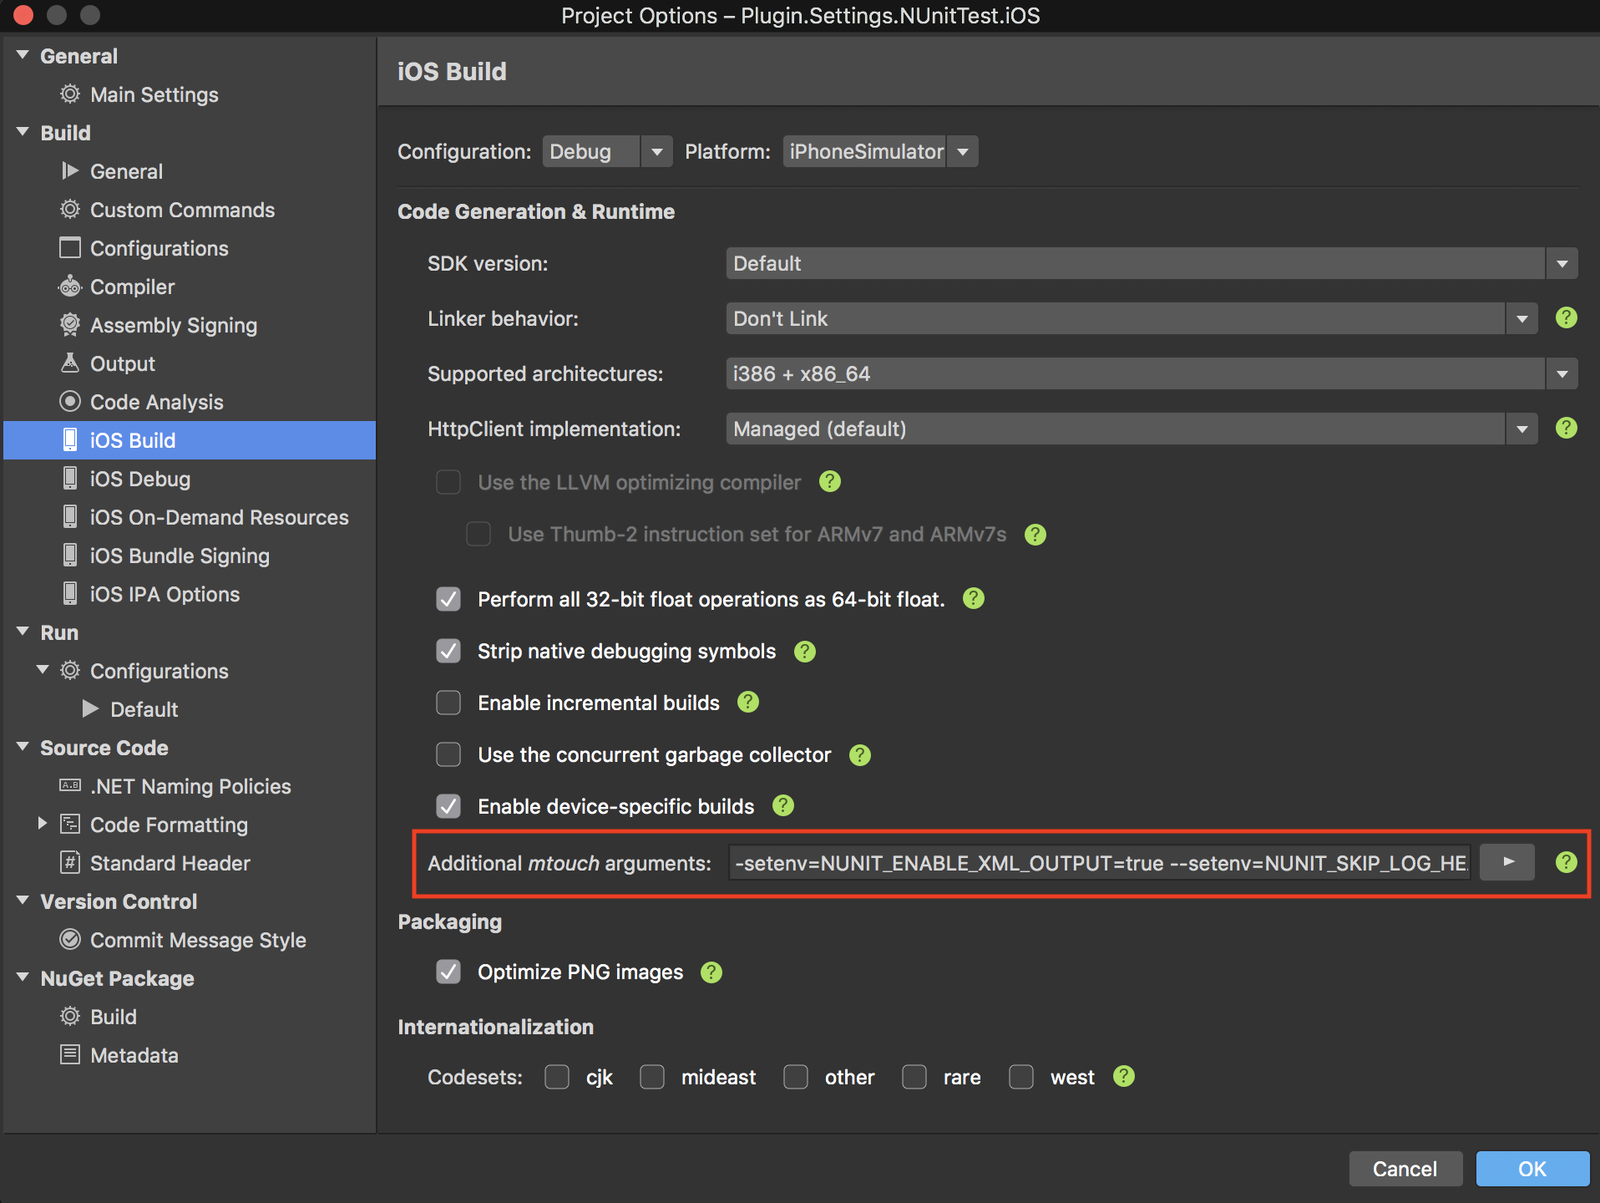
Set the NUNIT_ENABLE_XML_OUTPUT and NUNIT_SKIP_LOG_HEADER environment variables to “TRUE” in Additional mtouch arguments in the Unit test project’s project options/iOS build.

The iOS test project generates an excellent test result report by default; however, it is not compatible with the VSTS build system. Setting NUNIT_ENABLE_XML_OUTPUT to “TRUE” generates the test results compatible to the VSTS build system, and NUNIT_SKIP_LOG_HEADER removes redundant headers in the results file.
Setting up Build Configuration in VSTS
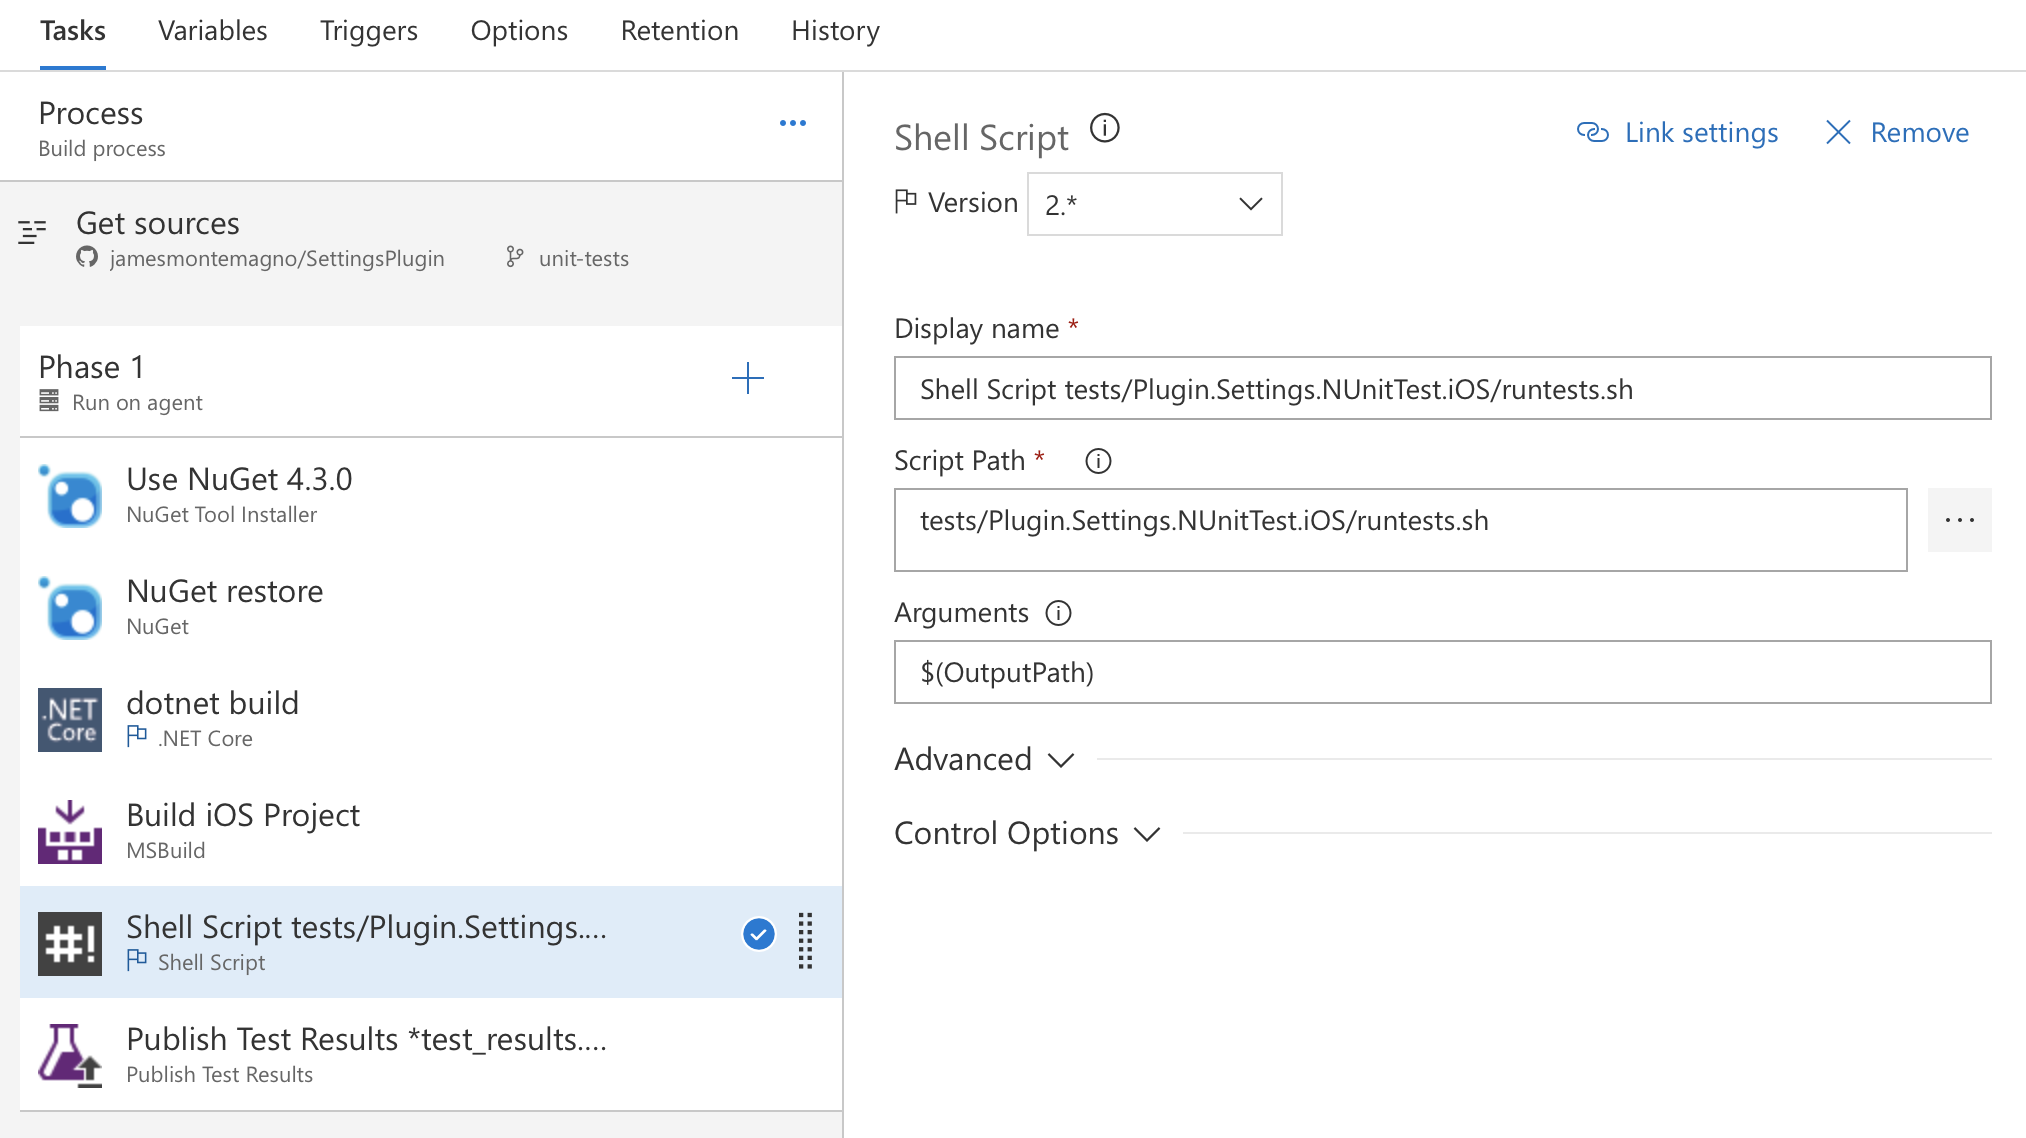
Add the following two additional steps to iOS build process defined on James Montemagno’s blog.
1) Shell Script
In this step, configure the shell script to configure test environment ie., set up the iOS simulator, auto execute tests, and provide a location to store test results.

Here is the simple script that does it all –
#!/bin/sh
echo 'Output path = ' $1
TEST_RESULT=$1/test_results.xml
echo 'Delete test result'
rm -rf $TEST_RESULT
mono --debug unit-test-tools/Touch.Server.exe \
--launchsim  \
-autoexit \
-skipheader \
-logfile=$TEST_RESULT \
--verbose \
--device=":v2:runtime=com.apple.CoreSimulator.SimRuntime.iOS-11-2,devicetype=com.apple.CoreSimulator.SimDeviceType.iPhone-SE"
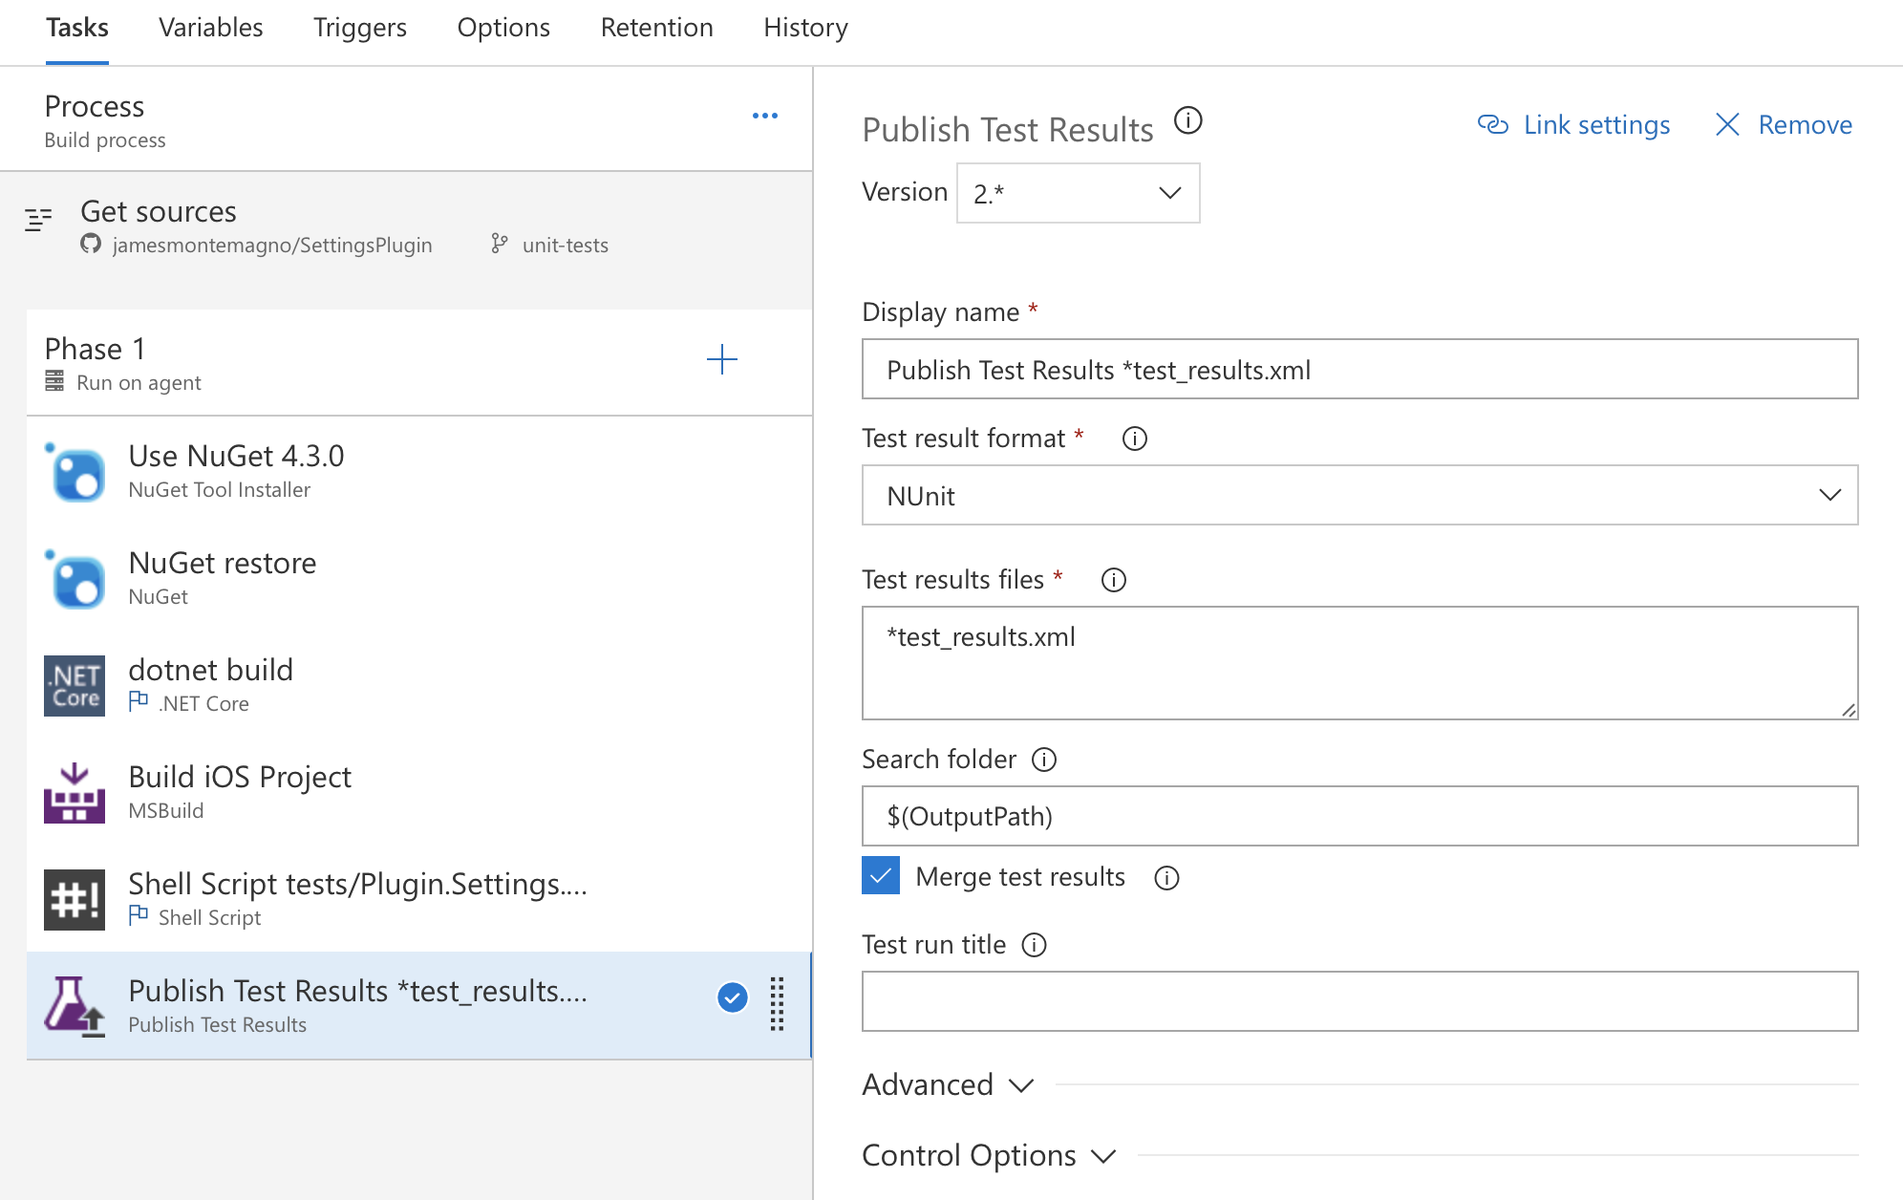
2) Publish Test Results
This is a final step in the process. Once test execution completes, the build process will look for the test_results.xml and publish!

Note that VSTS will report the build successful even when there are failed tests in the published results. This issue is being discussed on GitHub.
Conclusion
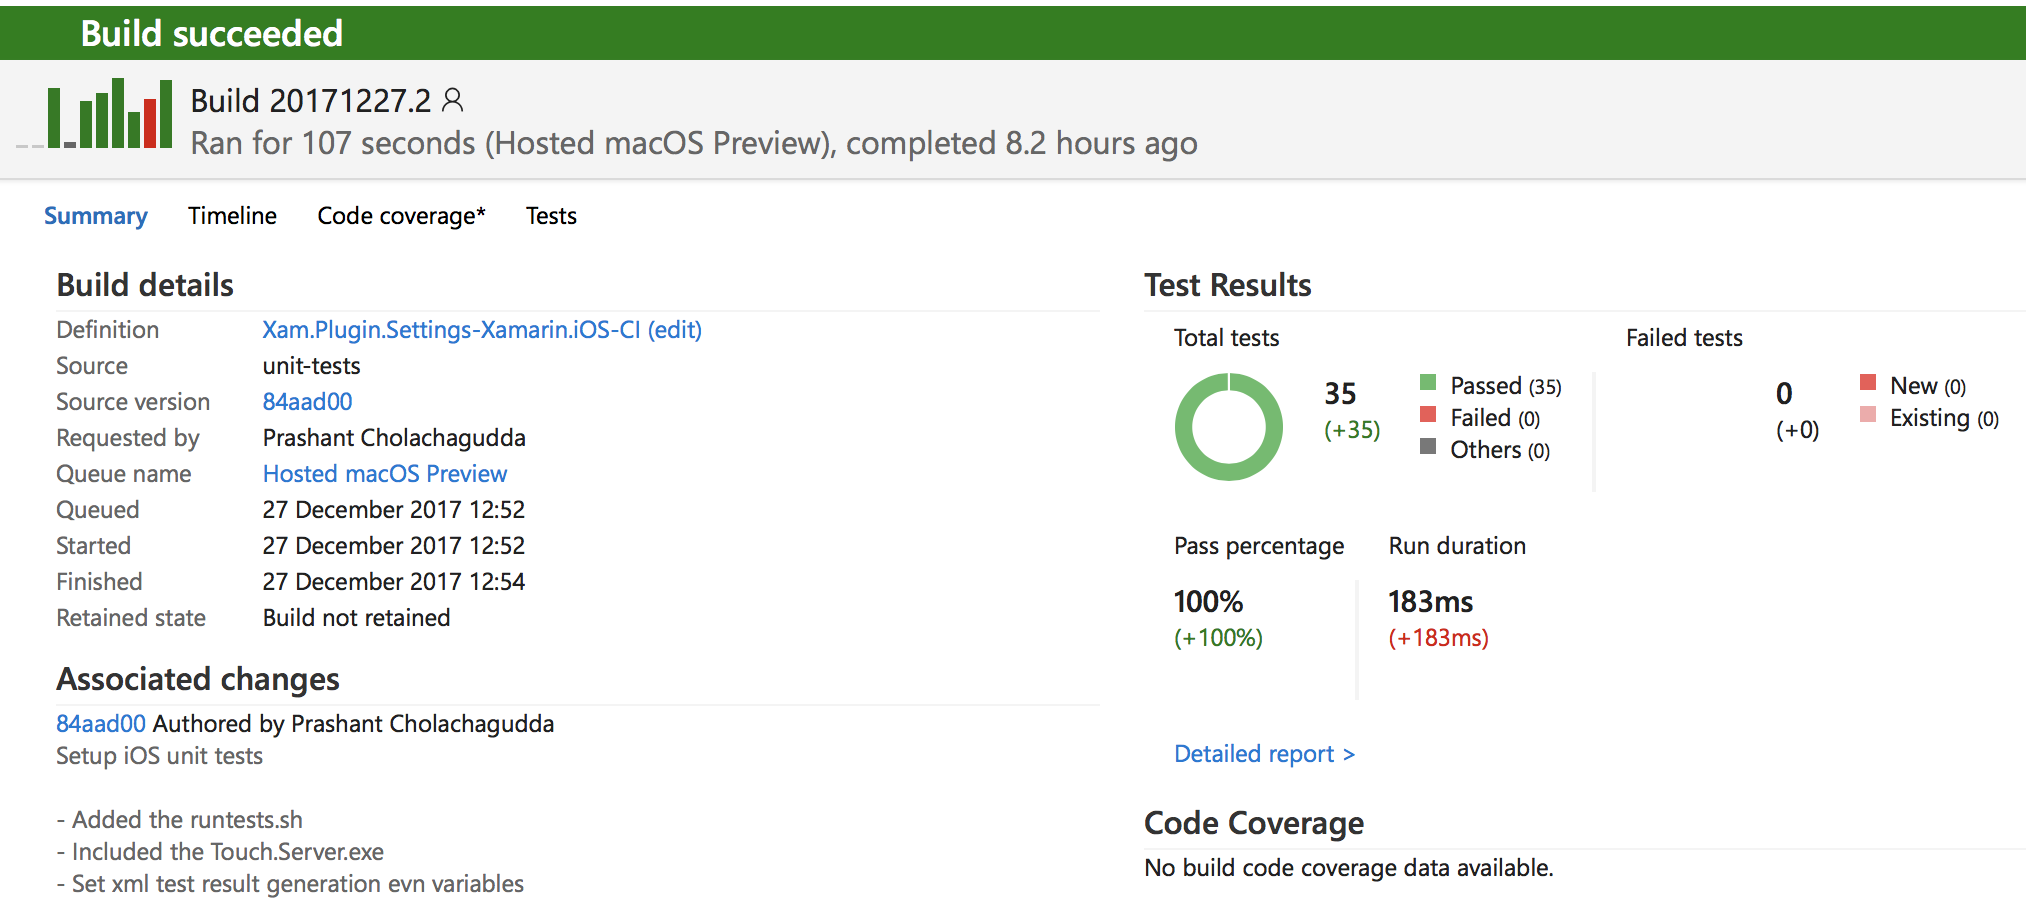
VSTS will report the summary after every successful/failed build process with the test results:

Learn More
Be sure to read through Xamarin.iOS Unit Testing documentation to see how to setup your apps for testing. Then be sure to see how to set up continuous integration and deployment with Visual Studio Team Services with the Quick Start guide.
Discuss this post in the Xamarin Forums.

 Light
Light Dark
Dark
0 comments