
Easily develop and debug Azure IoT Edge C modules with Azure IoT Edge Tools (Preview) 0.3.1
NOTE: Although this post is using Visual Studio 2017 as example, you could also successfully complete this tutorial with Visual Studio 2019 and Azure IoT Edge Tools (Preview) for VS 2019.
With 0.3.1 release of Azure IoT Edge Tools (Preview), you can use Visual Studio 2017 to develop and debug C modules for Azure IoT Edge.
Prerequisites
- OS: Windows 10 with 1809 update
- Visual Studio 2017 with update 7 or later, including workloads “Windows desktop development with C++” and “Azure development workload”; you should include “.NET desktop development” as well if you plan to develop C# modules
- Download and install Azure IoT Edge extension (Preview) for Visual Studio
- You may either use container engine Moby or Docker Desktop for Windows
- To use container engine Moby, first follow IoT Edge quickstart until running iotedge list in the doc, then search and click edit system environment variables in Control Panel, then add environment variable DOCKER_HOST=npipe:////./pipe/iotedge_moby_engine
 Please note you should restart Visual Studio after editing environment variables to make the change taking effect.
 - To use Docker Desktop for Windows, download and install Docker Desktop for Windows.
- To use container engine Moby, first follow IoT Edge quickstart until running iotedge list in the doc, then search and click edit system environment variables in Control Panel, then add environment variable DOCKER_HOST=npipe:////./pipe/iotedge_moby_engine
- Set up your local development environment to debug, run, and test your IoT Edge solution by installing the Azure IoT EdgeHub Dev Tool. Install Python (2.7/3.6) and Pip and then install the iotedgehubdev package by running the following command in your terminal. Make sure your Azure IoT EdgeHub Dev Tool version is greater than 0.7.0.
- To test your module on a device, you’ll need an active IoT hub with at least one IoT Edge device. To use your computer as an IoT Edge device, follow the steps in the quickstart for Linux or Windows.
- Install azure-iot-sdk-c for windows-x64 through vcpkg
git clone https://github.com/Microsoft/vcpkg
cd vcpkg
.\bootstrap-vcpkg.bat
.\vcpkg install azure-iot-sdk-c:x64-windows
.\vcpkg --triplet x64-windows integrate install
 Please note you should restart Visual Studio after editing environment variables to make the change taking effect.
Switch to Windows Containers
This doc will use windows containers to demonstrate how to build, debug and deploy C modules using Windows IoT Edge project (which ending with Windows.Amd64 by default).
- If you’re using container engine Moby, please skip to next section Create Azure IoT Edge project
- If you’re using Docker desktop for Windows, you need to switch to Windows containers.
Note: If you plan to build and debug Linux IoT Edge project (which ending with Linux.Amd64 by default), you need use Docker desktop and switch to Linux containers. Please make sure you have stopped edge related containers, e.g. edgeHubDev, edgeAgent before switching to different docker engine.
Create Azure IoT Edge project
The Azure IoT Edge project template allows you to create IoT Edge project for different platforms, currently supporting linux amd64 and windows amd64, each IoT Edge project could reference one or more IoT Edge modules.
- Run Visual Studio as administrator, select New > Project from the File menu.
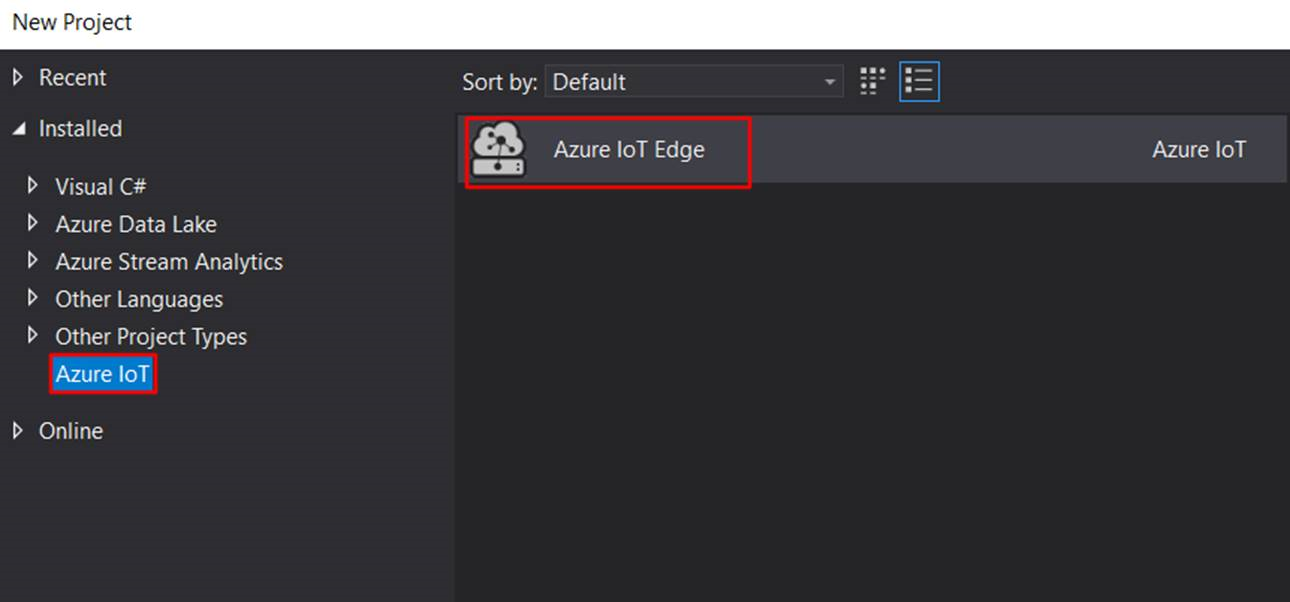
- In the New Project dialog, select Installed > Azure IoT, select Azure IoT Edge, enter a name for your project and specify the location, and then select OK. The default project name is AzureIotEdgeApp1.

- In the project wizard, select both Linux Amd64 and Windows Amd64 for Application Platform, then select C Module, replace localhost:5000 with your own registry info if necessary, then click OK.

- Now you have two IoT Edge projects, one is AzureIotEdgeApp.Linux.Amd64 targeting to linux amd64, the other is AzureIotEdgeApp1.Windows.Amd64 targeting to Windows amd64; you also have one IoT Edge module project IotEdgeModule1 which is referenced by both IoT Edge projects

Develop your module
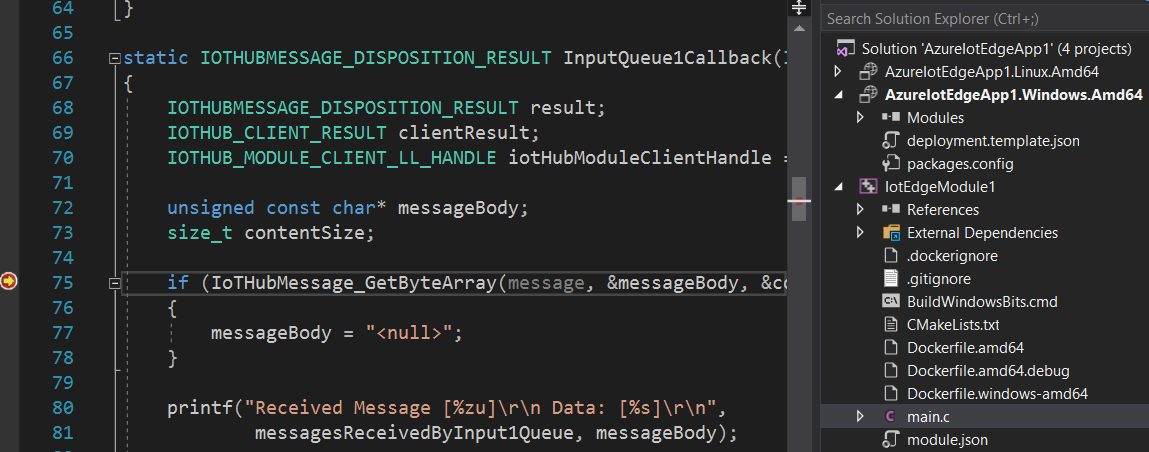
The default C module code that comes with the solution is located at IotEdgeModule1 > main.c. The module and the deployment.template.json file which is in IoT Edge project are set up so that you can build the IoT Edge project, push it to your container registry, and deploy it to a device to start testing without touching any code. The module is built to take input from a source (in this case, the tempSensor module that simulates data) and pipe it to Azure IoT Hub.
Initialize iotedgehubdev with IoT Edge device connection string
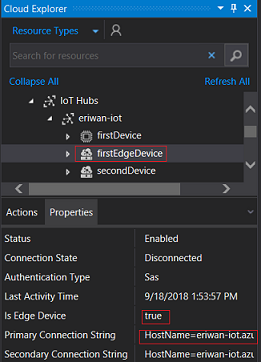
- Copy the connection string of any IoT Edge device from Primary Connection String in the Visual Studio Cloud Explorer. Be sure not to copy the connection string of a non-Edge device, as the icon of an IoT Edge device is different from the icon of a non-Edge device.

- Right-click on any IoT Edge project and then click Set Edge Device Connection String to open the Azure IoT Edge setup window.

- Enter the connection string from the first step and then select OK.

NOTE: You need to follow above steps for initializing iotedgehubdev only once on your development computer as the results are automatically applied to all subsequent Azure IoT Edge solutions. This procedure can be followed again if you need to change to a different connection string.
Build and debug single C module
Typically, you’ll want to test and debug each module before running it within an entire solution with multiple modules.
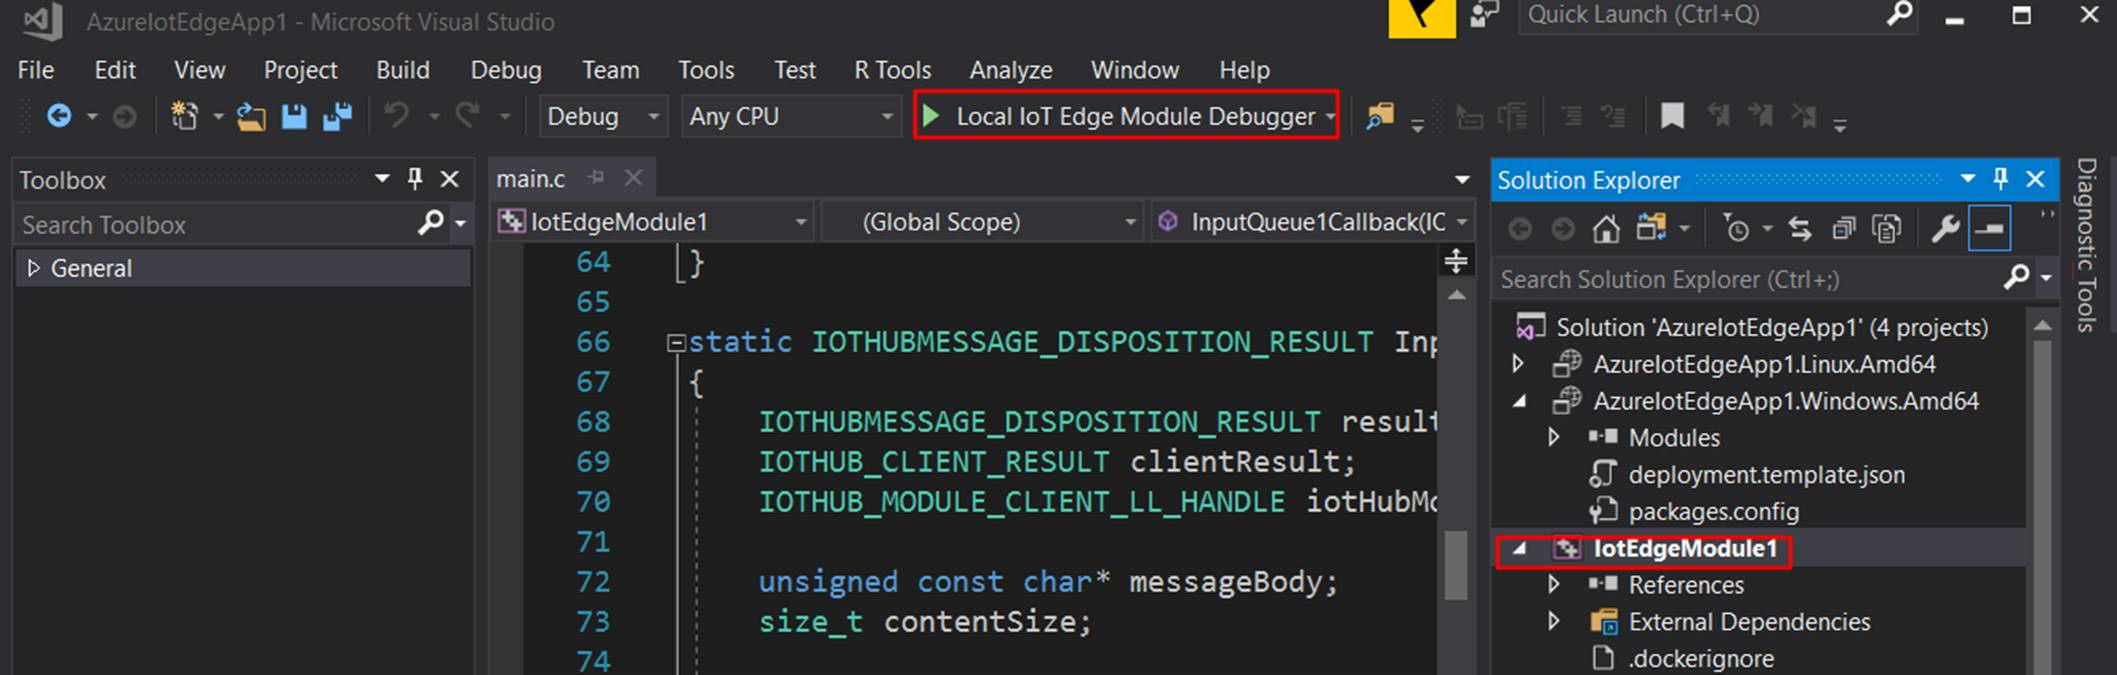
- Right-click IoTEdgeModule1 and select Set as StartUp Project from the context menu.
- Press F5 or click the button below to run the module; it may take 10–20 seconds the first time you do so.

- You could see an executable app start if the module has been initialized successfully.

- Set a breakpoint in the function InputQueue1Callback in main.c
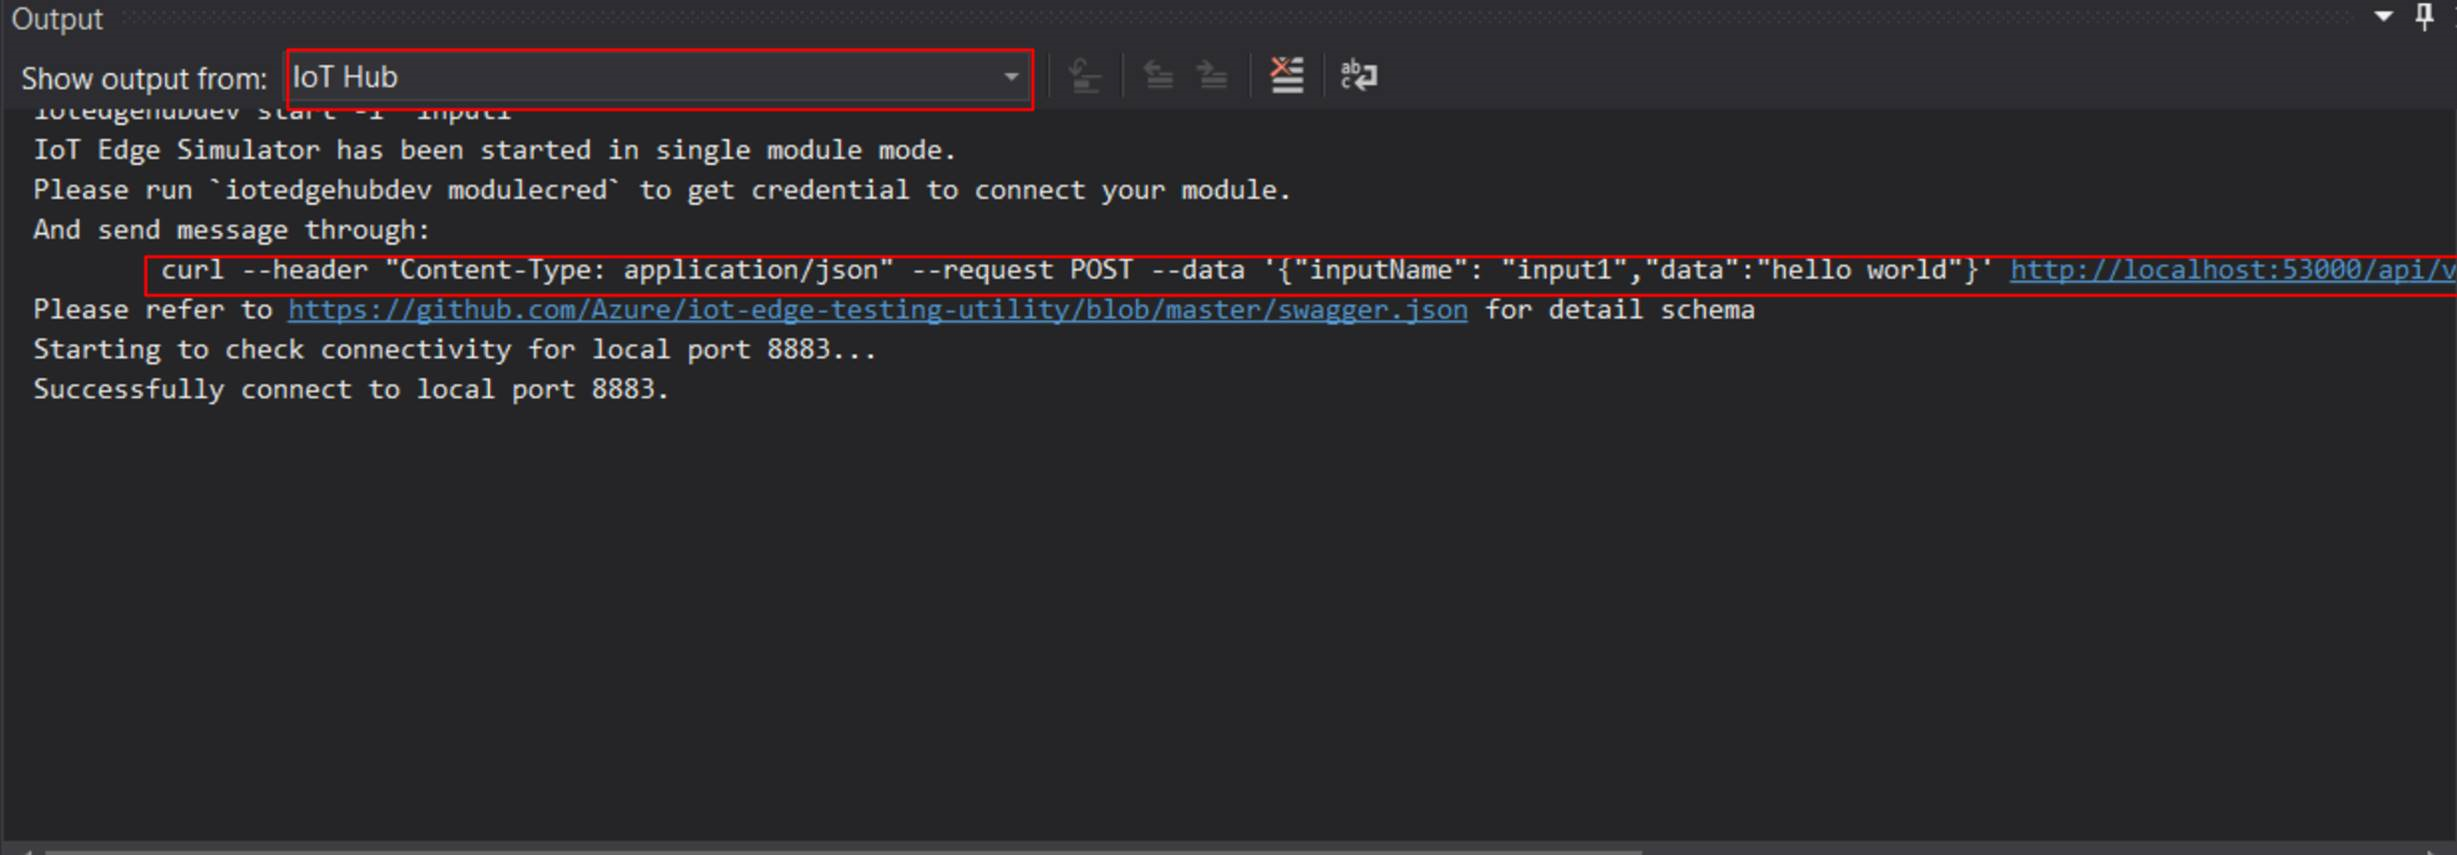
- Open Output windows in Visual Studio and switch to “IoT Hub”, please copy whole line starting with curl as highlighted below, and run it in Git Bash or WSL Bash, then the breakpoint will be hit.


Build and debug IoT Edge project with multiple modules
After you’re done developing a single module, you might want to run and debug an IoT Edge project with multiple modules.
- There’re two ways to add a new IoT Edge module to an existing IoT Edge project. The first way is to right click on IoT Edge project to open context menu, then select Add > New IoT Edge Module; the second way is to right click on Modules node of IoT Edge project, then select Add > New IoT Edge Module.
 In the popup window, you may select the module you want to add, replace localhost:5000 with your registry info if necessary, then click OK.
- Open the file
deployment.template.jsonunder IoT Edge project AzureIotEdgeApp1.Windows.Amd64, and you’ll see IotEdgeModule2 has been added in the modules section. Replace the routes section with the following. If you have customized your module names, make sure you update these names to match."routes": { "IotEdgeModule1ToIoTHub": "FROM /messages/modules/IotEdgeModule1/outputs/* INTO $upstream", "sensorToIotEdgeModule1": "FROM /messages/modules/tempSensor/outputs/temperatureOutput INTO BrokeredEndpoint(\"/modules/IotEdgeModule1/inputs/input1\")", "IotEdgeModule2ToIoTHub": "FROM /messages/modules/IotEdgeModule2/outputs/* INTO $upstream", "sensorToIotEdgeModule2": "FROM /messages/modules/tempSensor/outputs/temperatureOutput INTO BrokeredEndpoint(\"/modules/IotEdgeModule2/inputs/input1\")", }, - Right-click AzureIotEdgeApp1.Windows.Amd64 and select Set as StartUp Project from the context menu.
- Create your breakpoints and then press F5 to run and debug multiple modules simultaneously. You should see multiple executable app windows, which each window representing a different C module.

 In the popup window, you may select the module you want to add, replace localhost:5000

Build and Push images
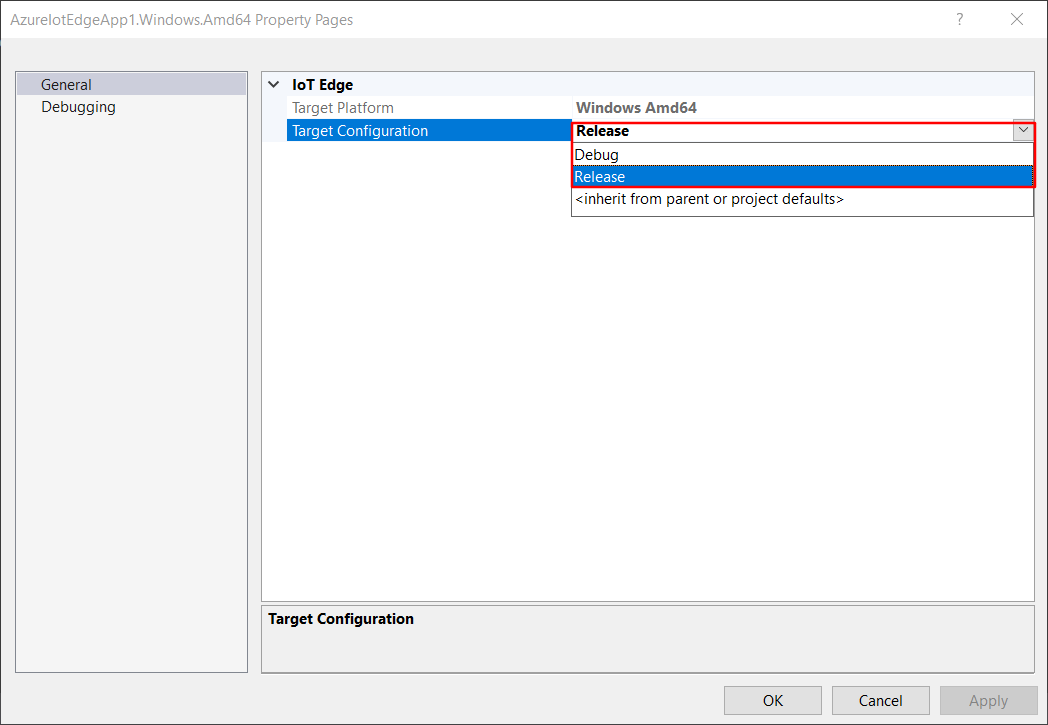
- Right click on AzureIotEdgeApp1.Windows.Amd64 and click Properties, select either Debug or Release as the configuration to build for your module images.
When choosing Release, Visual Studio uses
Dockerfile.windows-amd64to build Docker images; when choosing Debug, Visual Studio first searchDockerfile.windows-amd64.debugto build Docker images, it will useDockerfile.windows-amd64instead ifDockerfile.windows-amd64.debugdoesn’t exist.
- If you’re using a private registry like Azure Container Registry, use the following Docker command to sign in to it. Currently local registry doesn’t support Windows container yet.
docker login -u <ACR username> -p <ACR password> <ACR login server>
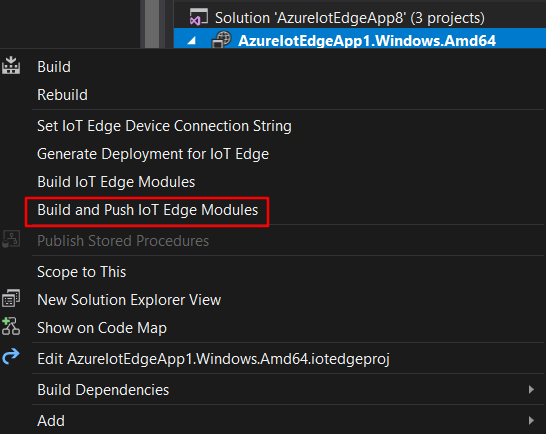
- If you’re using a private registry like Azure Container Registry, you need to add your registry login information to the runtime settings found in the file
deployment.template.json. Replace the placeholders with your actual ACR admin username, password, and registry name."settings": { "minDockerVersion": "v1.25", "loggingOptions": "", "registryCredentials": { "registry1": { "username": "<username>", "password": "<password>", "address": "<registry name>.azurecr.io" } } } - Right-click AzureIotEdgeApp1.Windows.Amd64 and select Build and Push IoT Edge Modules to build and push the Docker image for each module.

Deploy the solution
You can also deploy modules using the Cloud Explorer for Visual Studio. You already have a deployment manifest prepared for your scenario, the deployment.json file and all you need to do is select a device to receive the deployment.
- Open Cloud Explorer by clicking View > Cloud Explorer. Make sure you’ve logged in to Visual Studio 2017.
- In Cloud Explorer, expand your subscription, find your Azure IoT Hub and the Azure IoT Edge device you want to deploy.
- Right-click on the IoT Edge device to create a deployment for it, you need to select the deployment manifest file under the
$AzureIoTEdgeAppSolutionDir\$AzureIotEdgeApp.Windows.Amd64\config\deployment.(amd64|amd64.debug|windows-amd64).json - Click the refresh button to see the new modules running along with the TempSensor module and $edgeAgent and $edgeHub
View generated data
- To monitor the D2C message for a specific device, select the device in the list and then click Start Monitoring D2C Messages in the Action window.
- To stop monitoring data, select the device in the list and then select Stop Monitoring D2C Messages in the Action window.
 Light
Light Dark
Dark
0 comments