Summary: Microsoft Scripting Guy, Ed Wilson, talks about creating bulk users in Office 365.
Microsoft Scripting Guy, Ed Wilson, is here. This morning I spent a bit of time talking to my mentee. It is really cool, because yesterday I spent some time talking to my mentor. So it is sort of like the circle completing itself.
I have been getting quite a few questions about Office 365 and Windows PowerShell here lately, so I thought I would spend a bit of time talking about that.
Note I have written many Hey, Scripting Guy! Blog posts about this topic, including Getting Started with the Office 365 PowerShell, Use PowerShell to Explore Office 365 Installation, and Use PowerShell to Manage Office 365 Users. For more information about the fundamental tasks related to Office 365 and Windows PowerShell, refer to this entire series of Hey, Scripting Guy! Blog posts.
Connecting to Office 365
The first thing to do is to make the connection to the Office 365 tenant installation.
I first store my credentials in an XML file so I can easily reuse them. When I call the Get-Credential cmdlet, a dialog box appears. I type my credentials in the box, and they are now stored in an XML file. I can import the credentials by using the Import-Clixml cmdlet. I use the reconstituted Credential object to make my connection. Here are the commands I type:
PS C:\> Get-Credential “admin@ScriptingGuy.OnMicrosoft.Com” |
>>> Export-Clixml C:\fso\ScriptingGuyCredential.xml
PS C:\> $cred = Import-Clixml C:\fso\ScriptingGuyCredential.xml
PS C:\> Connect-MsolService -Credential $cred
As shown in the following image, no output appears in the Windows PowerShell console:
Note To update the Azure Active Directory (Azure AD) module, you must first uninstall it via the Control Panel. After you do that, you can install it from the TechNet Library: Install the Azure AD Module.
Creating a bunch of users via a CSV file
Today, I am going to create a CSV file and use it to create a bunch of users for my Office 365 installation. I am not going to discuss the license assignment, license options, or usage location assignments. I will look at these tomorrow. For today, I just want to create a bunch of users.
To create a user in Office 365 by using the Azure AD module, I use the New-MSOlUser cmdlet. The syntax for this looks an awfully lot like the New-User cmdlet in the standard Active Directory module. There are not quite as many options, but the process is very similar. Here is the syntax for the New-MSOlUser cmdlet:
NAME
New-MsolUser
SYNOPSIS
Adds a new user to Windows Azure Active Directory.
SYNTAX
New-MsolUser -DisplayName
[-AlternateEmailAddresses
[-BlockCredential
[-ImmutableId
[-LicenseOptions
[-Password
[-PostalCode
[-StreetAddress
[-Title
To use the cmdlet, it is as simple as filling in the blanks. Here is a quick example:
New-MsolUser -UserPrincipalName “ScriptingWife@ScriptingGuy.OnMicrosoft.Com” -City
Charlotte -State NC -Country USA -DisplayName ScriptingWife
In this command, I did not assign a password. The cmdlet returns a user object, and that user object includes a password. I could then pipe the information from the returned object to Send-SMTPMail to send the user information and password to the user. The cool thing is that I do not have to create a password, nor do I have to supply one when I create the new user. Here is the output from the command in the Windows PowerShell console:
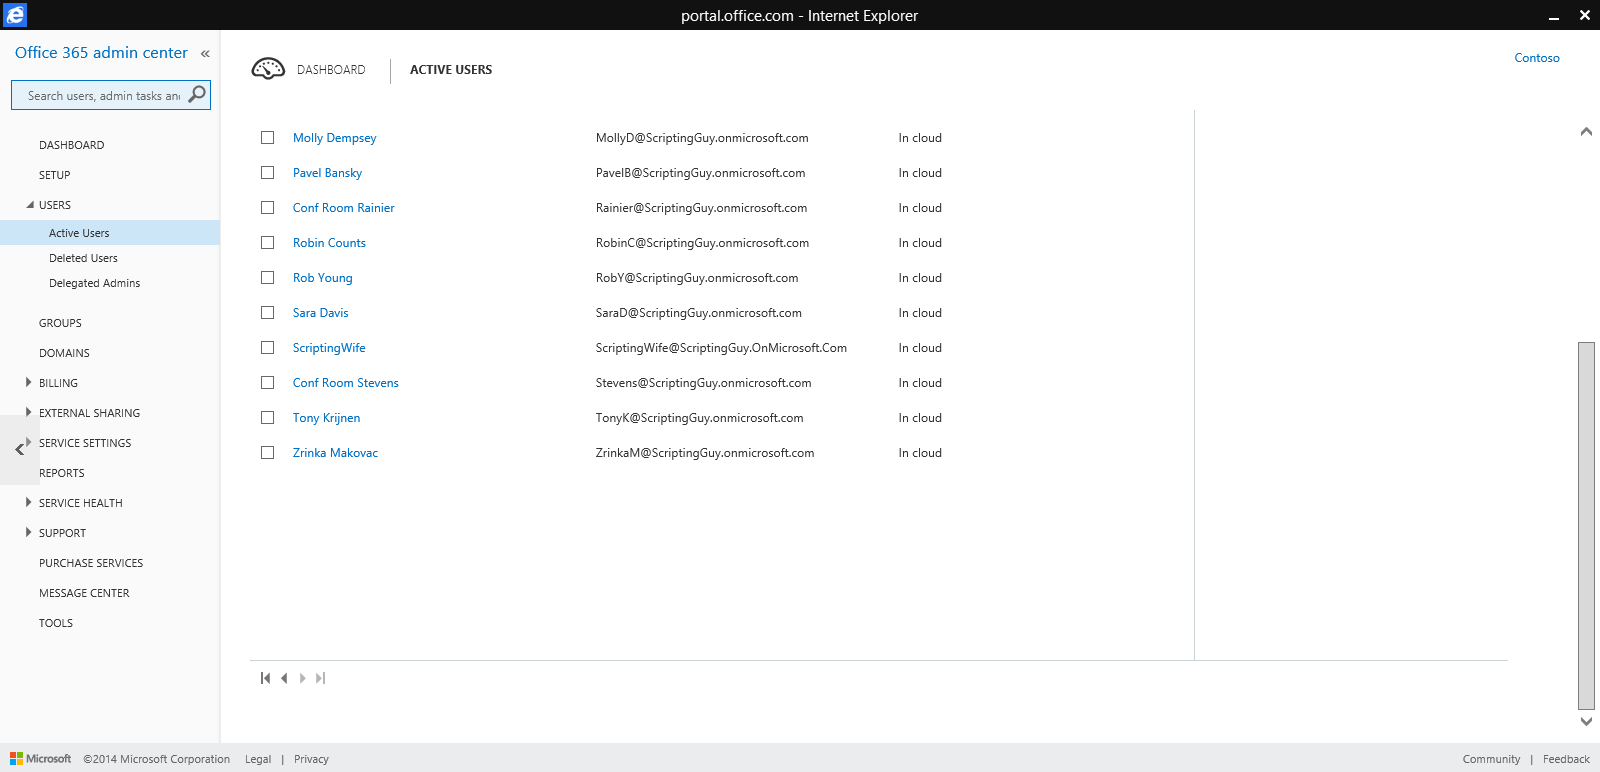
When I go to the Office 365 tenant admin site, I can see that the Scripting Wife user has indeed been created:
Read a CSV file and create the users
So now, I want to read a CSV file and create a bunch of users. To do this, first I create a CSV file. I like to use Microsoft Excel for doing this because it provides a good interface, and the menu offers me the option to save as a CSV file.
I was hoping that I could splat the users from the CSV file to the New-MSOLUser cmdlet, but unfortunately that generates an error. Therefore, I will have to pipe my users via the Foreach-Object cmdlet. The cmdlet doesn’t accept positional parameters very well either, and so I have to do everything manually. This is shown here:
$users = Import-Csv C:\fso\Office365Users.CSV
$users | ForEach-Object {
New-MsolUser -UserPrincipalName $_.UserPrincipalName -City $_.city -State $_.State -Country $_.Country -DisplayName $_.DisplayName }
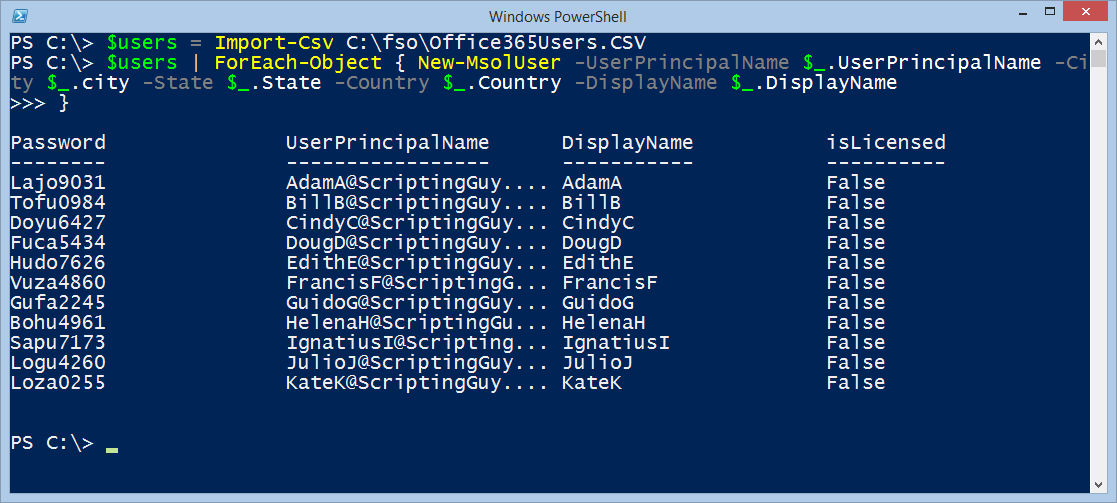
The command and its associated output are shown in the following image:
Removing a group of users
If I need to remove a group of users, I can once again use the CSV file. In fact, if I want to remove the users I just created, it is super simple. All I need to do is to use the Remove-MsolUser cmdlet instead of the New-MSOlUser cmdlet. I want also want to use the –Force parameter. If I do not, the command will prompt for each user, which is probably not what I want to do. Here is the command without the –Force parameter:
PS C:\> $users = Import-Csv C:\fso\Office365Users.CSV
PS C:\> $users | ForEach-Object { Remove-MsolUser -UserPrincipalName $_.userprincipalname}
Confirm
Continue with this operation?
[Y] Yes [N] No [S] Suspend [?] Help (default is “Y”):
So instead, I use the –Force parameter as shown here:
$users | ForEach-Object { Remove-MsolUser -UserPrincipalName $_.userprincipalname -Force}
No output returns from this command.
That is all there is to using the Azure AD module to create a group of users. Office 365 Week will continue tomorrow when I will talk about more cool stuff.
I invite you to follow me on Twitter and Facebook. If you have any questions, send email to me at scripter@microsoft.com, or post your questions on the Official Scripting Guys Forum. See you tomorrow. Until then, peace.
Ed Wilson, Microsoft Scripting Guy


0 comments