In this post, App Dev Manager Keith Beller demonstrates how to use VSTS to host a private package server.
Before you go through the trouble of setting up a private package server to host your Nuget, NPM, Maven or Gradle feeds, consider using Visual Studio Team Services (VSTS). The Microsoft Package Management plugin found in the VSTS Marketplace is easy to use and only takes a couple of minutes to set up. I’ll walk you through the configuration process using a NuGet with Visual Studio scenario to guide you step-by-step. I’ll assume you already have a VSTS account, but if not click here for our quickstart sign up guide which will walk you through setting up a free account.
Installing the Package Management Extension
Once you’ve logged into VSTS, you want to first head over to the VSTS Marketplace.
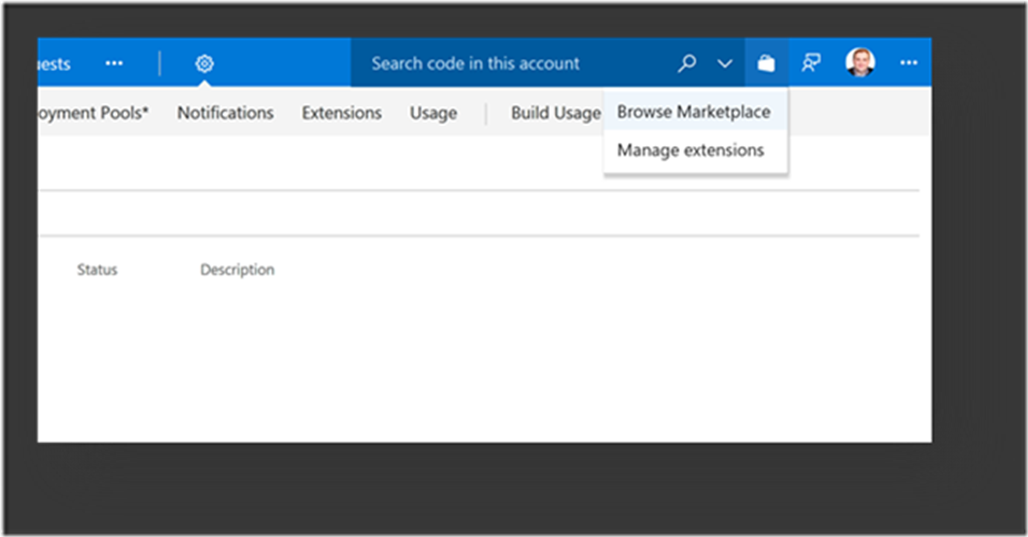
In the upper right navigate to the Marketplace by clicking on the shopping bag then Browse Marketplace.
You’re looking for the Package Management Extension highlighted in red below. Once you’ve found the extension go ahead and click it and follow the installation instructions.
Selected your install option and the install process will take about a minute to complete. Once finished you’re ready to move forward and begin configuring you Feed.
Creating your host feed
If you navigate to the Build and Release header menu item, you will see a new sub tab named Packages. Go ahead and click the menu to reveal the New feed creation page. Click the + New feed button to proceed.
For this demonstration I’m going to create a new private feed called “NugetFeed” that only uses packages published to this feed as shown below. Click Create to continue the process.
Alright the feed has been set up and you’re now ready to connect your feed to Visual Studio. Let go ahead and do that.
Connecting to the feed
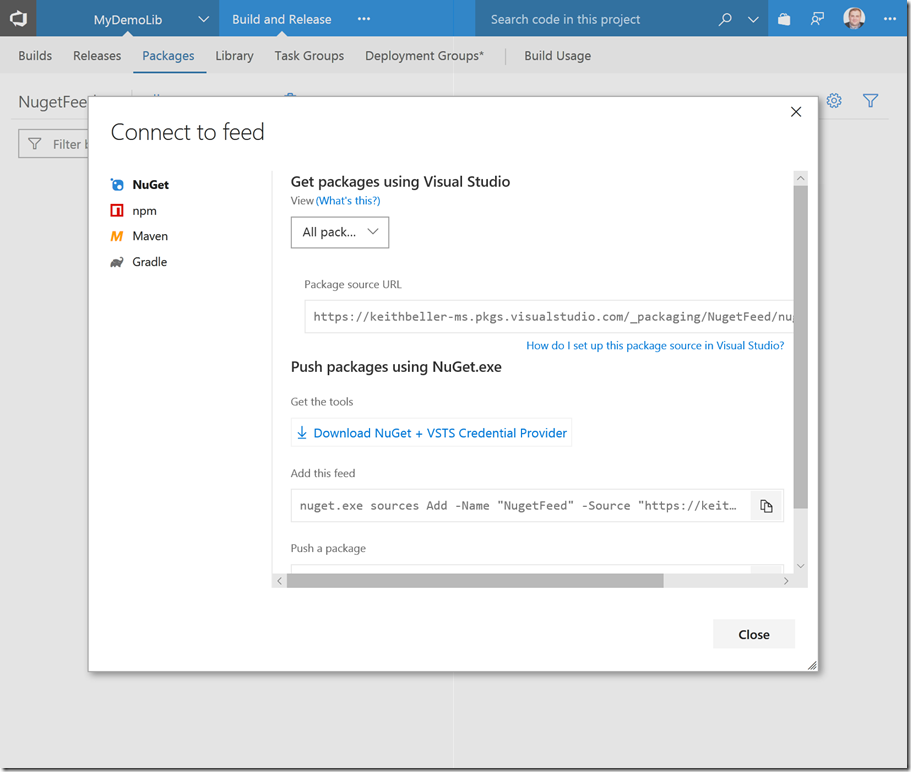
Start the process by clicking on the connect to feed button. A modal popup window will appear giving you several connection options. In this case we are going to utilize the NuGet to Visual Studio connection option. Copy the source URL and hold on to it. Your going to need that URL to connect your feed into Visual Studio.
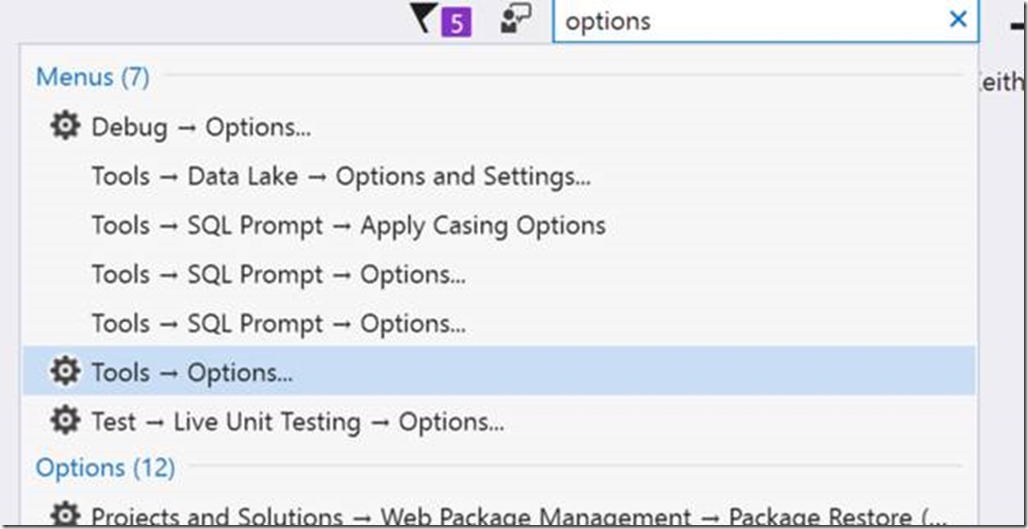
If you’ve not already done so, open up Visual Studio and open the Tools > Options menu. We’re going to add that URL you copied to the list of available NuGet feeds. Use the VS search bar to quickly access the configuration screen.
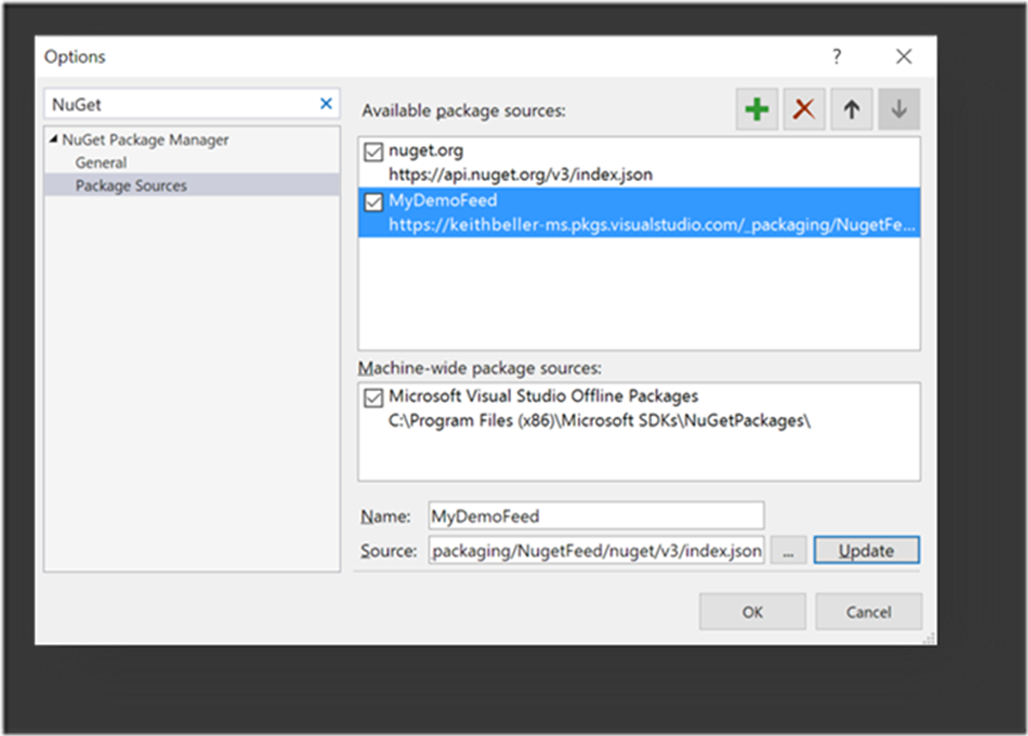
Click the plus button to add you new feed. Set the Source to the URL you copied from the Package connection pop up and give the feed a memorable name.
Now we need to see up our build, release and feed.
Configure your Build, Release and Feed for Consumption
First we are going to configure our build so let’s start by selecting a source. We’re going to leave the defaults so let’s hit continue.
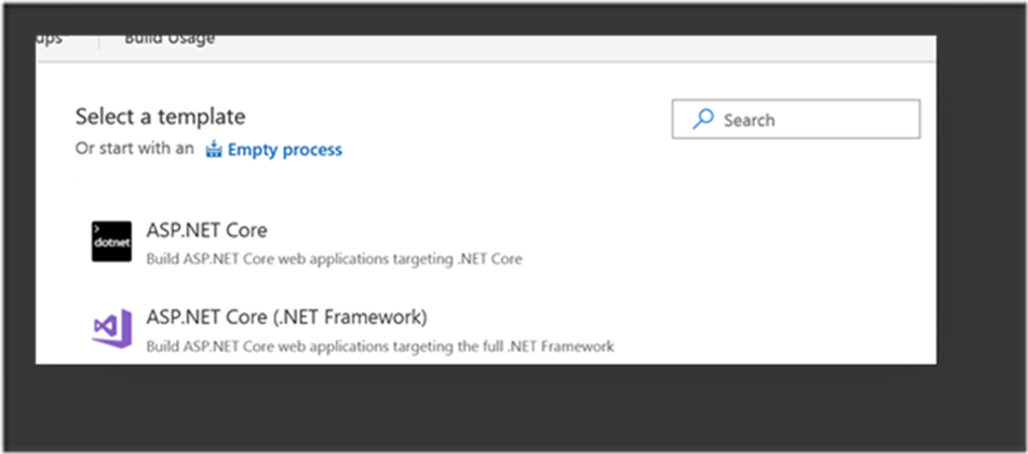
In this example my Library targets the .NET Core 2 framework so in this case we are using the ASP.NET Core template. Go a head and select it and hit Apply.
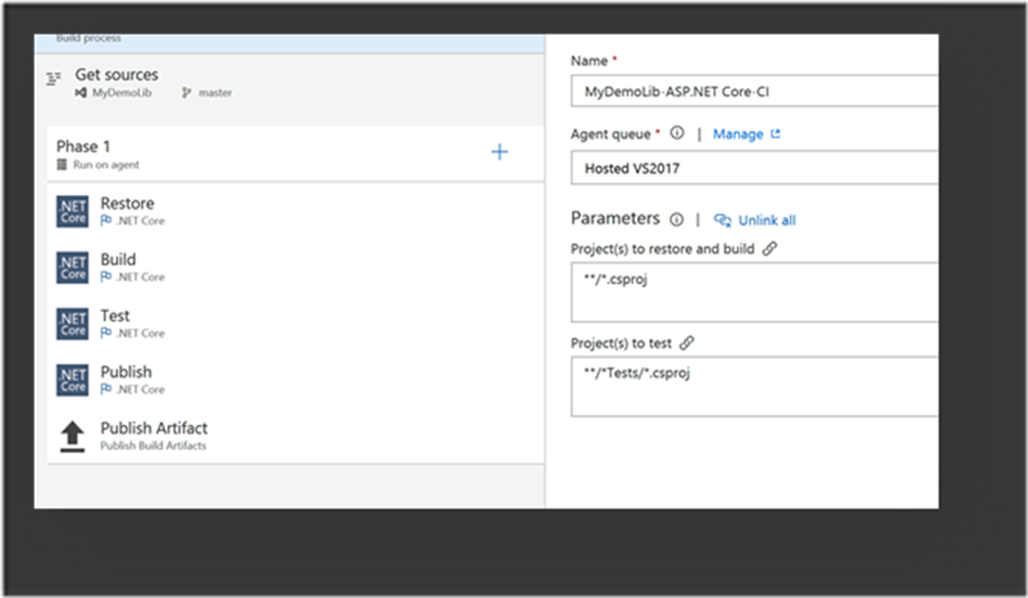
The initial template looks like this, but we’re going to change a few things.
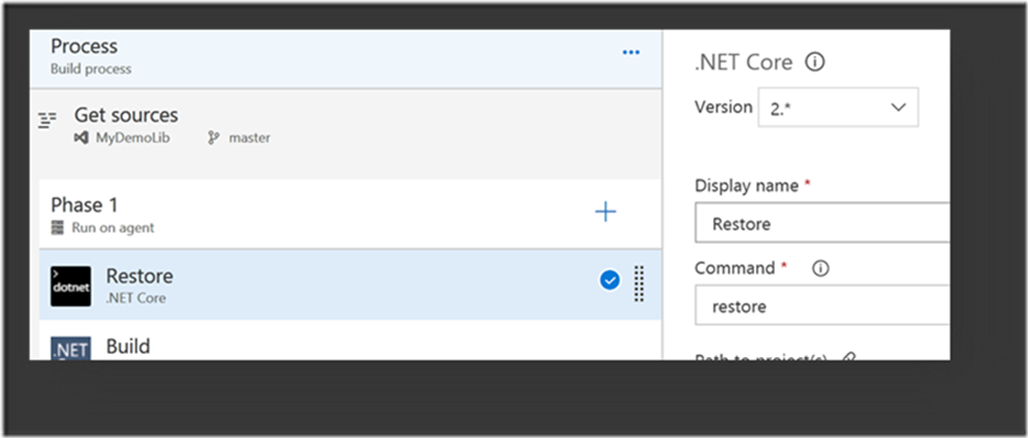
First, I configure each step to use Version 2.* like so. You’ll do this for every step except for Publish Artifact.
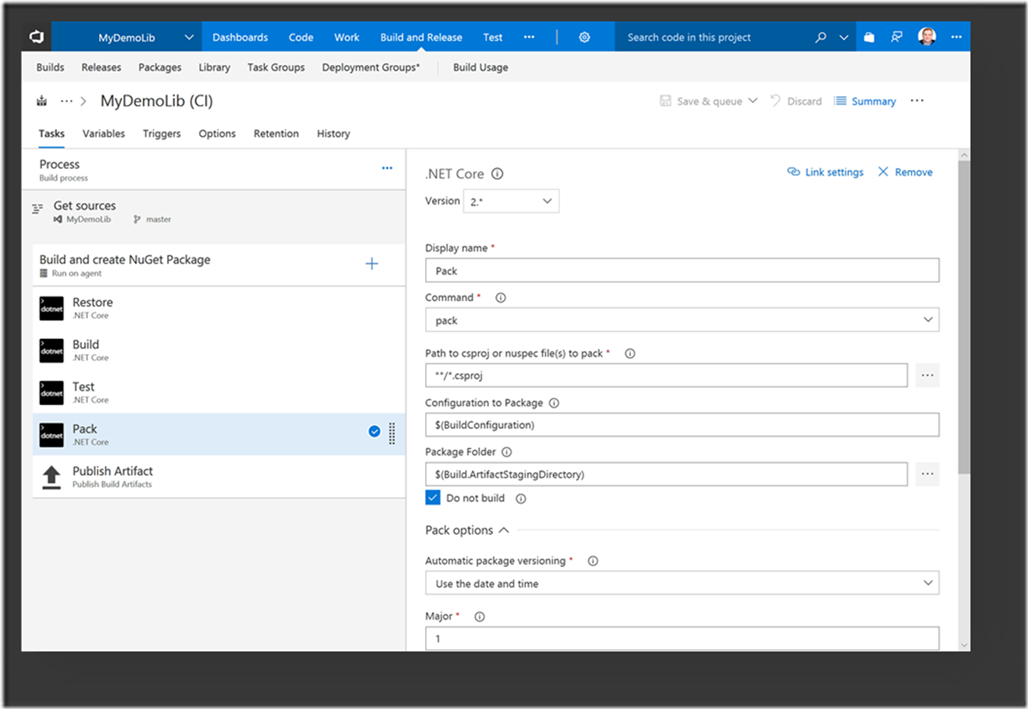
Next, we need to modify the Publish step so that it builds our NuGet package. In the command dropdown change the command to pack. For clarity, change the Display name to Pack as well. Also, under the Pack options section, I’ve selected Automatic package versioning / Use the date and time. Once you’ve completed these step go ahead and save your build and run it.
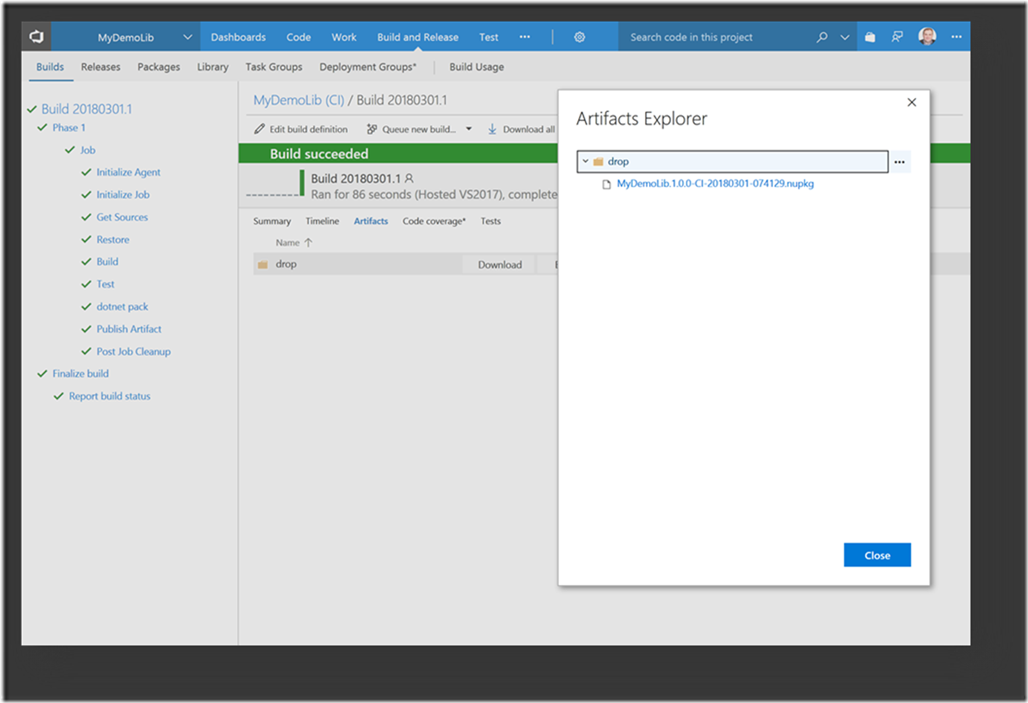
If you’ve done everything correctly your project should build successfully. Navigate to your Artifacts Explorer to confirm you’ve created the *.nupkg in the drop directory similar to the screenshot below.
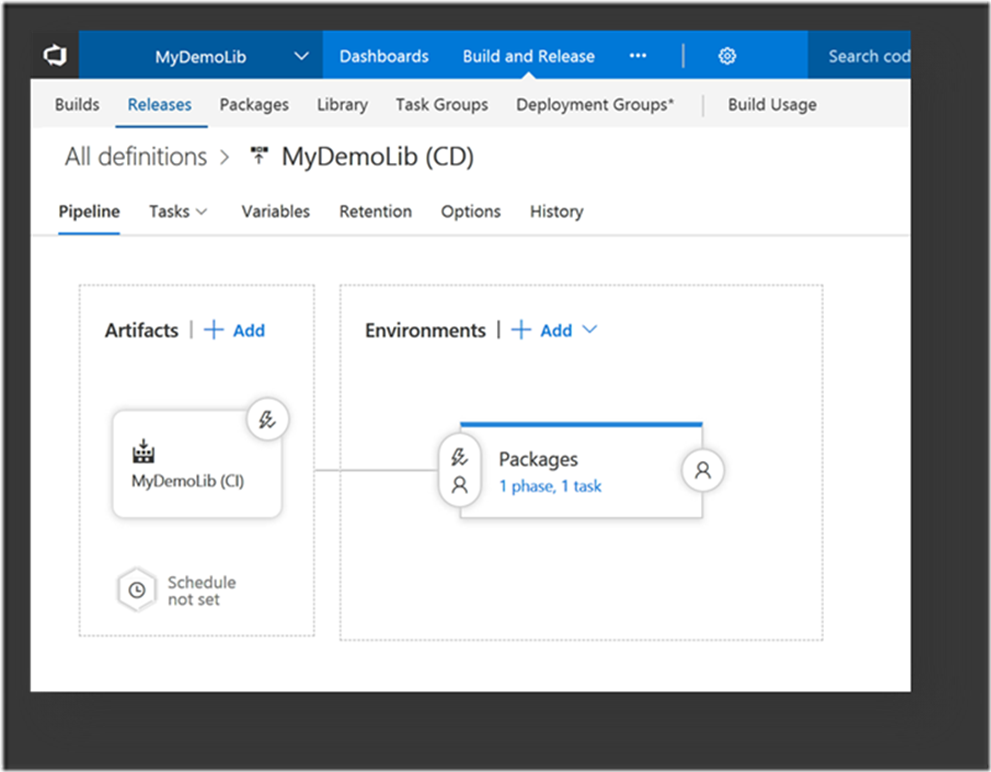
Now we are ready to set up the release which will have just one task. My release definition looks like this. I’ve selected our Artifacts source, set the Continuous deployment trigger so every successful build is auto released and renamed the Environment to “Packages” for clarity. Your definition should looks something like this.
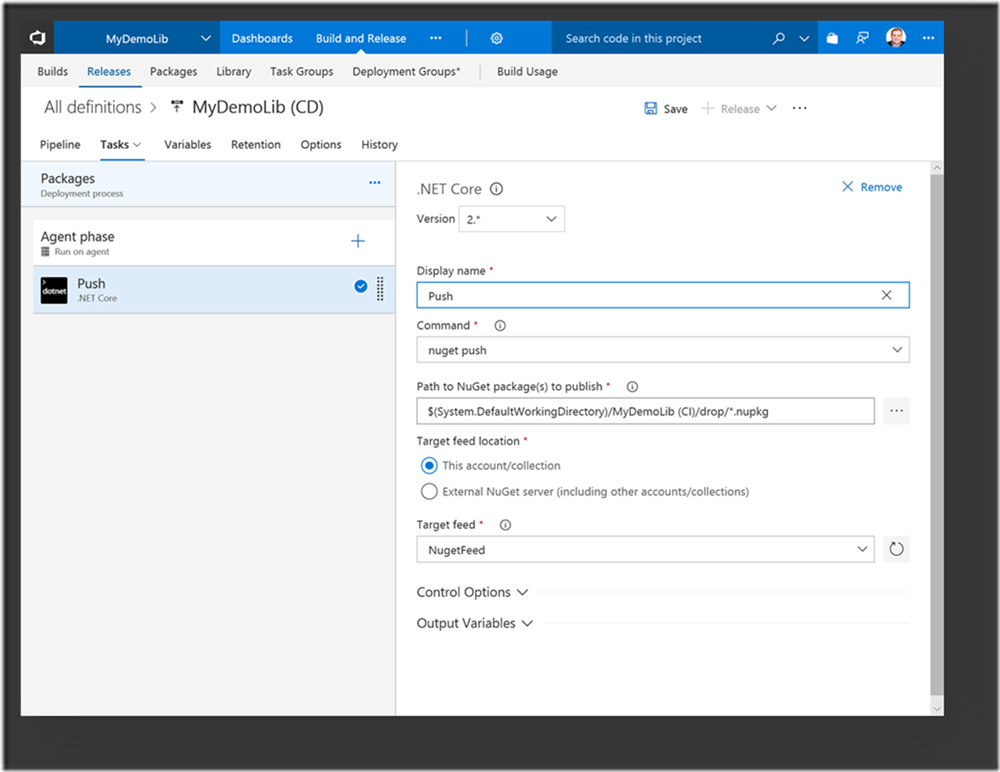
Now navigate over to the Tasks tab and add a single .NET Core task to your process. Select the Task and modify it so the Display name is “Push”, Command is set to “nuget push” and the Target Feed is set to the name of your feed. My feed name is “NugetFeed” as selected below. Now there is one last configuration you need to set and that is the Path to the NuGet package(s) to publish. Click the ellipsis button next to the field and navigate the full path to your nupkg file and select it. Replace the name of the nupkg file with an * because the file name will change as you release new successful builds. Save this and kick of your release.
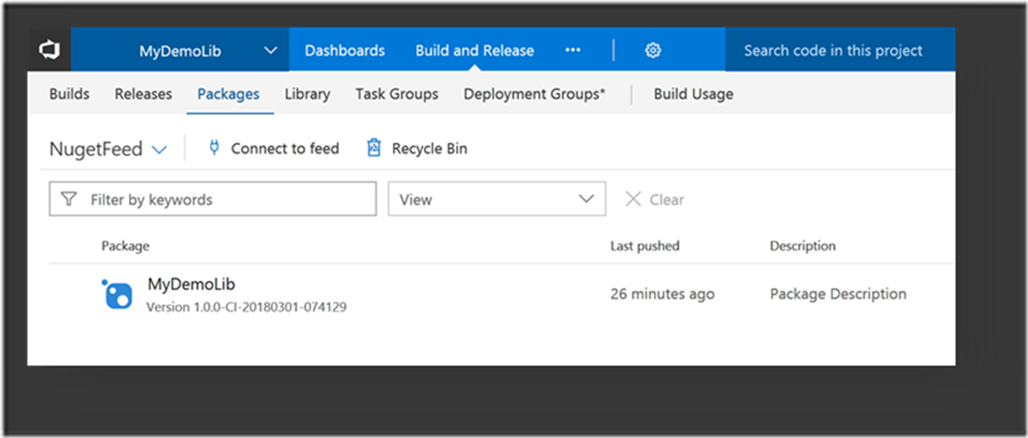
Once the release has completed successfully click the Packages tab and you should see your package. Congratulations, you’ve successfully set up Package Management.
Note: by default the package is assigned a Prerelease designation. Now we’re ready to use the package in Visual Studio.
Connect to the package in Visual Studio
Let’s test this out. Create a new consumer application in Visual Studio and Manage NuGet packages for the Solution…
Change the Package source to the name of the Feed you added at the beginning of the process. Check the Include prelease box and you’re Package is ready for use.
Happy coding!
Premier Support for Developers provides strategic technology guidance, critical support coverage, and a range of essential services to help teams optimize development lifecycles and improve software quality. Contact your Application Development Manager (ADM) or email us to learn more about what we can do for you.






0 comments