In this post, Premier Developer Consultant Sana Noorani details how to integrate SonarQube with VSTS, so you can detect issues in code and trigger builds only when code checks pass.
Introduction to SonarQube
SonarQube is an open source tool used for continuously checking code quality. Many developers will add it to their DevOps pipelines with continuous integration builds to be able to inspect code regularly. It monitors the overall health of an application by tracking bugs, vulnerabilities, code smells, and code coverage.
By connecting SonarQube with VSTS, you can use the tool to detect issues in code every time a developer pushes new code and triggers a build. If the code checks pass, then the code will be integrated into the pipeline with continuous integration. The tool also supports many coding languages and has a library of plugins which aids in integration.
In this post, we are assuming that you have already set up a SonarQube instance. One of the ways you can do this is by going to Azure, and then creating a VM and server for SonarQube. You can find more details here.
Adding SonarQube to a Build
You must first go to the Visual Studio Marketplace and add the SonarQube extension. The extension can be found here.
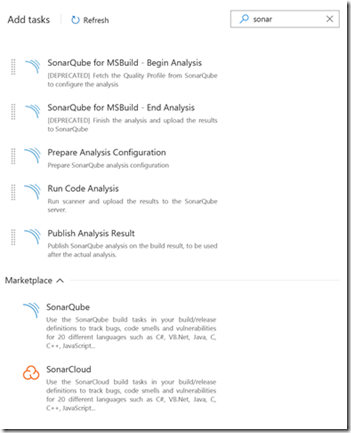
When you go to your build definition in VSTS and search for the SonarQube task, you see the following:
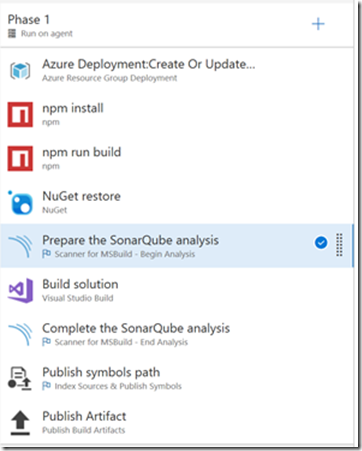
Once you add in the tasks you need, your build process should look something like this:
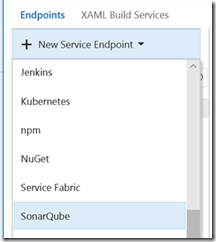
You will now want to prepare the two SonarQube tasks you have added with the correct information it is asking for. For instance, the “Prepare the SonarQube Analysis” task will ask for an endpoint to your SonarQube instance. In VSTS, you can create an endpoint by doing the following:
1. Press gear symbol on top navigation bar
2. Select “services”
3. On left menu, select “+ New Service Endpoint”
4. Select “SonarQube”
Add a name for the endpoint. Next, add the server URL which is the server your SonarQube instance is running on. You will also need to provide an authentication token. This can be acquired by going to SonarQube. Next, go to My Account > Security > Generate Tokens. Add this token to your task in the pipeline, and then save and queue the build definition. Make sure everything is running properly.
There you have it. You now can use SonarQube directly in your VSTS build/release pipeline. With SonarQube, you will now be able to have a quality management tool to ensure that your code is up to standards.


0 comments