
We shipped App Center Auth in early preview on May 7, and it’s been an exciting month and a half since our launch! During this time we’ve actively engaged with our developers and rolled out a couple of product improvements based on your feedback.
App Center Auth empowers app developers to have a simple user experience for an identity management solution that relies on the robust enterprise capabilities of Azure Active Directory B2C (Azure AD B2C). We simplified the in-app Azure AD B2C configuration through App Center’s SDK by wrapping around Microsoft Authentication Library (MSAL). By integrating a couple of lines of code, you’ll be able to connect an existing Azure AD B2C tenant and use the signed in user’s identity to view their data and send push notifications to the user.
Exposing the JSON Web Tokens (JWTs)
You gave great feedback about exposing the JWT so we immediately set out to add this feature in the June release of the App Center Auth SDK for iOS, Android, Xamarin and React Native.
Getting the Access and Id Token
App Center Auth SDK now exposes the two JSON Web Tokens in the Auth signIn() method: the access and ID token. You can parse this token to obtain user profile information that you’ve collected during the sign-in process or use the token to secure an Azure Function App based on the signed-in user’s authorization.
When a user signs-in to your app, you can specify in Azure AD B2C the user profile fields to collect so that they will be available in the tokens. The key benefit of collecting the user profile information such as `display name` is to interact with the signed in user in the display UI. For example, developers can display “Welcome, Lupita!” to better engage and personalize your sign-in confirmation page.
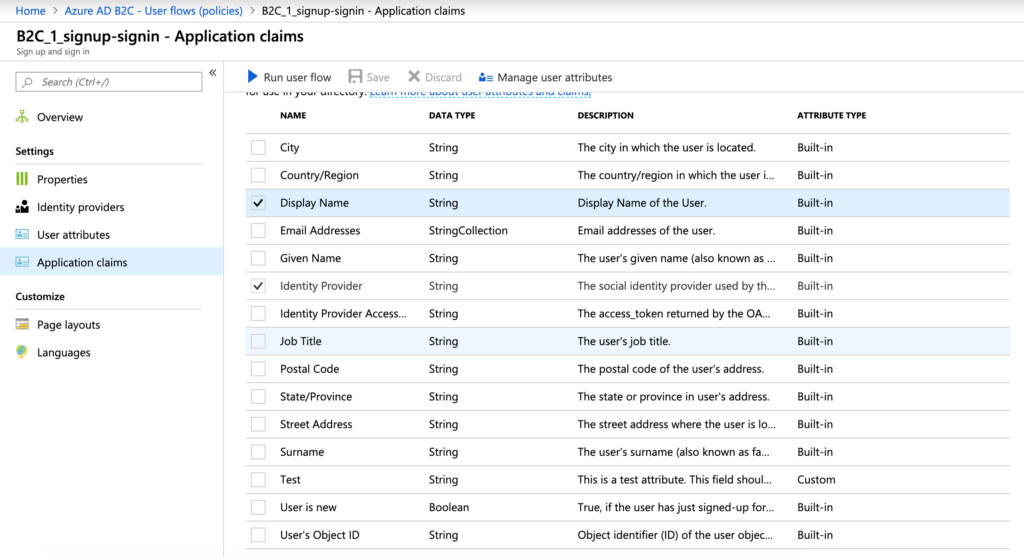
Figure 1 – Application claims in Azure AD B2C
The ID token will contain the user profile attributes that you’ve selected to collect in the Azure AD B2C tenant and is used by your application. The app can decode the token’s contents to get user information such as display name, email and so on, to customize the user experience in the display UI.
The access token is a credential that is used by your application to access APIs and resource servers, and is used by an API. The access token informs the API that the bearer of the token has the right permissions to access the API. This API can then be used to perform actions (determined by the user’s permissions) such as read, write and so on. When the API receives this access token, it must first validate the signature and a few claims to prove that the token is valid.
Here is a code snippet on how you can access the tokens from the signIn() method in C#:
async Task SignInAsync()
{
    try
    {
        // Sign-in succeeded, UserInformation is not null.
        UserInformation userInfo = await Auth.SignInAsync();

        // Get tokens. They are not null.

        string idToken = userInfo.IdToken;
        string accessToken = userInfo.AccessToken;

        // Do work with either token.
    }
    catch (Exception e)
    {
        // Do something with sign-in failure.
    }
}
Learn more about retrieving the access and ID token for your iOS, Android, Xamarin and React Native apps.
Decoding the Tokens
To make sense of the contents of the token, you must decode it. You can decode user profile information such as the display name or the email address from the ID token or the access token.
Before decoding the token to get user profile information, the Azure AD B2C tenant must be configured to include the user profile fields in the tokens. Learn more about decoding the access and ID token for your iOS, Android, Xamarin and React Native apps.
Here is a code snippet on how you can decode the user profile information for Display Name and Email Addresses in the tokens in C#:
using System.Linq;
using System.IdentityModel.Tokens.Jwt;
// Decode the raw token string to read the claims.

var tokenHandler = new JwtSecurityTokenHandler();
try
{
    var jwToken = tokenHandler.ReadJwtToken(userInfo.IdToken);

    // Get display name.
    var displayName = jwToken.Claims.FirstOrDefault(t => t.Type == "name")?.Value;

    if (displayName != null)
    {
        // Do something with display name.
    }

    // Get first email address.
    var firstEmail = jwToken.Claims.FirstOrDefault(t => t.Type == "emails")?.Value;
    if (firstEmail != null)
    {
        // Do something with email.
    }
}
catch (ArgumentException)
{
    // Handle error.
}
You can also paste your token in http://jwt.ms/ to decode it.
Checking if the User is Signed In
To check if the user is signed in, you can call the signIn() method again. The SDK will not show the sign-in UI again, unless the saved sign-in information has expired or has been revoked by the authentication server.
Alternatively, you can also save the result of the signIn() method when it is invoked the first time in a boolean variable. In the example in C# below, if the signIn() method returns a null `account_id`, meaning that the user did not sign in successfully, then we assign a boolean variable `SignInOut` as `false`.
async Task ExecuteSignIn()
{
    if (SignInOut.IsSignedIn)
    {
        Auth.SignOut();
        SignInOut.IsSignedIn = false;
        // Do something
        return;
    }
    try
    {
        // Sign-in succeeded, UserInformation is not null.
        var result =  await Auth.SignInAsync();
        string accessToken = result.AccessToken;

        // Decode the raw token string to read the claims.
        var tokenHandler = new JwtSecurityTokenHandler();
        try
        {
            var jwToken = tokenHandler.ReadJwtToken(userInfo.IdToken);

            // Get display name.
            var displayName = jwToken.Claims.FirstOrDefault(t => t.Type == "name")?.Value;
            if (displayName != null)
            {
                // Do something with display name.
            }

            // Get first email address.
            var firstEmail = jwToken.Claims.FirstOrDefault(t => t.Type == "emails")?.Value;
            if (firstEmail != null)
            {
                // Do something with email.
            }
        }
        catch (ArgumentException)
        {
            // Handle error.
        }

        Analytics.TrackEvent("signin id", new System.Collections.Generic.Dictionary<string, string>(){ { "AccountId", result.AccountId } });
        SignInOut.IsSignedIn = true;
    }
    catch (System.Exception e)
    {
        // Handle error.
    }
    OnPropertyChanged("SignInOut");
    // Do something
}
Auth Support for React Native
During our session at Microsoft Build in May, we mentioned that we would support additional platforms for Auth in our roadmap. We’re excited to announce that support for React Native is finally here! App developers can now configure Auth for React Native apps.
For more details on our latest changes view the full list of the user experience improvements that we rolled out.
Collaborative Feedback
App Center Auth is in early preview and over the coming months, we invite you to collaborate with us in our journey where your feedback will help us build an identity management solution that you will love. Get started with App Center Auth, and comment on what you’d like to see in our GitHub repo here.
Have fun, and happy hacking! ⚡
Look at this article i learnt a lot from this and i definitely agree with, you should post more about this in your blog i have used many method for my studio creation but the most effective method was Klippyo Studio” you can check it out here https://bit.ly/2G68ZM1 i suggest you watch the video which will outline everything you need to know…