
Continuous Integration for Android with Visual Studio Team Services
Commonly referred to as VSTS, Visual Studio Team Services is a developer’s dream, with tools for every step of development, including planning, building, testing, releasing, and insights for your application. Developers can pick just one service or utilize all of the tools in VSTS for their full DevOps pipeline. As I’m developing applications, it’s important that as soon as I push code to my repository that my application is built, tests are run, and it’s ready for deployment. VSTS has the perfect tools to build Xamarin applications in the cloud, and today we’ll take a look at building a Xamarin.Android application in the cloud.
Create Your Account
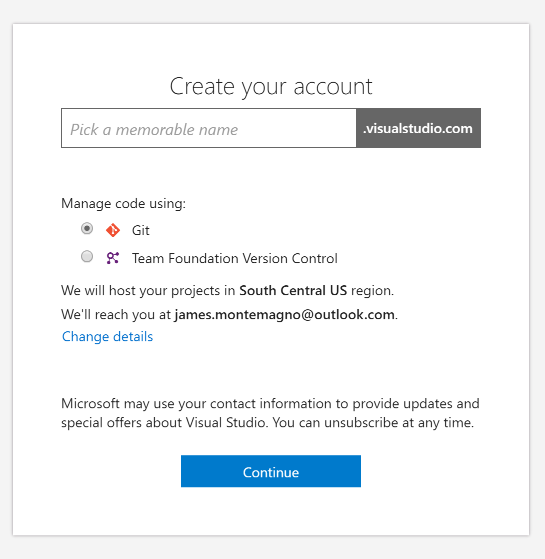
Before we begin, it’s required to create a new account at visualstudio.com and select a VSTS account name under which multiple projects can be created. If you already have an account, simply sign in and select an existing VSTS account or create a new one. During this step it’s possible to create a private code repository with a Git or Team Foundation Version Control for source control. These private repositories are a great option as they are completely free and unlimited, but it’s also possible to connect to an existing Git or on premise Team Foundation service for Continuous Integration.
With the account created, we will be redirected to our team overview page, where a new project has been created automatically. If you already had an account, simply add a new project.
Connecting to Code
If you’re hosting your application inside of VSTS, you can skip this step since you are ready to start automating your builds. Because we are able to connect to an existing code repository service, we can connect to GitHub to automate an existing app, Coffee Tipper. To add a service, we’ll have to go into our project settings on the top right of the page:
![]()
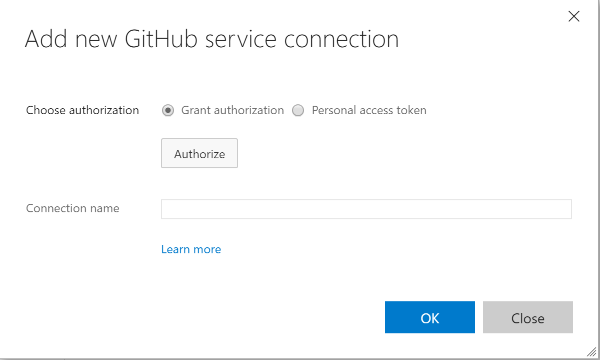
We can add GitHub as a new service endpoint under the services tab. You’ll also find other services here such as External Git and Subversion.

At this point, we can add a personal access token to authorize VSTS to talk to GitHub, or we can simply Grant Authorization by logging into GitHub.
Creating the Build Definition
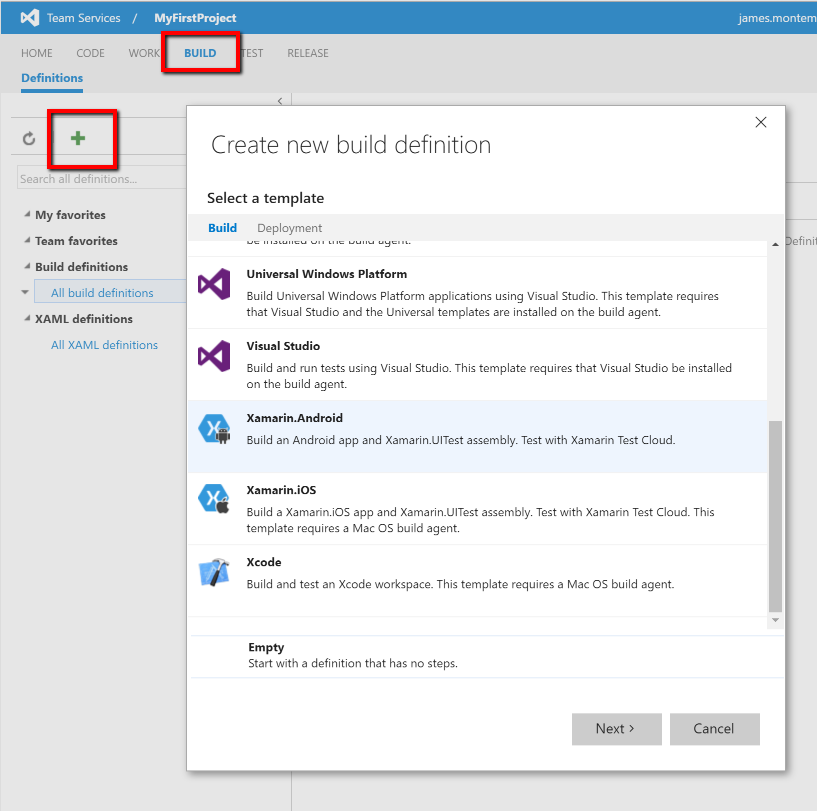
With GitHub connected, it’s time to create our first build definition that defines the workflow steps to build the application. Select Build at the top of our project page and then the Add button to open the Create new build definition, where we’ll find a build for Xamarin.Android.
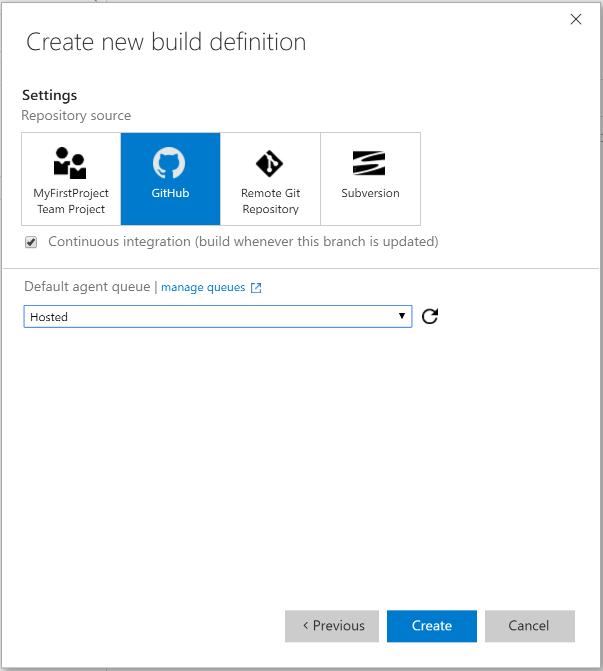
The next step is to select our repository source (in this case GitHub) and then a default agent queue. Think of an agent queue as a machine that will be used to pull down the source code and build the application fully. VSTS offers a hosted solution in the cloud that can be used with Xamarin.Android applications and includes 240 minutes of build time a month on a hosted build agent. It’s also possible to configure a local agent queue that’s running the VSTS agent to perform the builds on a machine of your choosing. For simplicity, we’ll select the hosted machine so there’s no further configuration needed!
Configure Repository
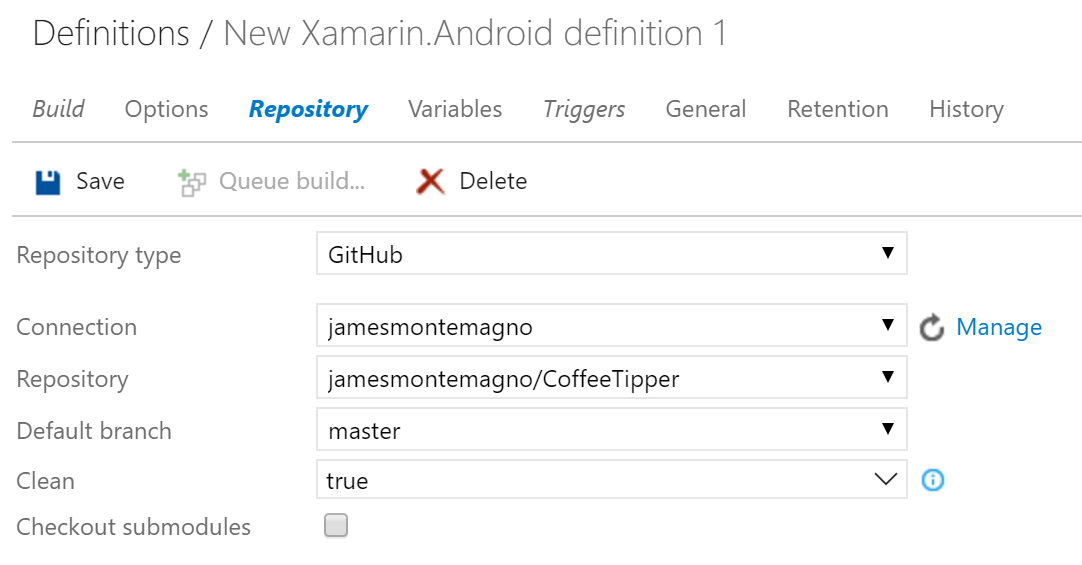
After creating the definition, we can start adding and editing steps, but before we do, let’s finish configuring the repository that should be built under the Repository section of the build definition. Since we already connected to GitHub and selected it when creating the definition, all that’s left is to select and configure the repository:
Configuring the Build Definition
The generated build definition has a few pre-defined steps that most Xamarin.Android applications need in order to be compiled, built, and signed for deployment. There are three steps that need configuration for the Xamarin License and for Xamarin Test Cloud. These can be configured later and are not required for building the application, so let’s simply right click and disable these steps so they aren’t run. If you don’t have any unit tests, the Build test can also be disabled.
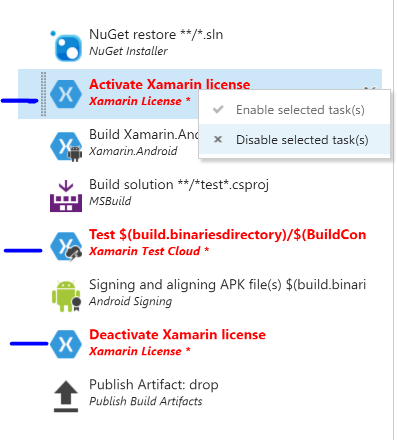
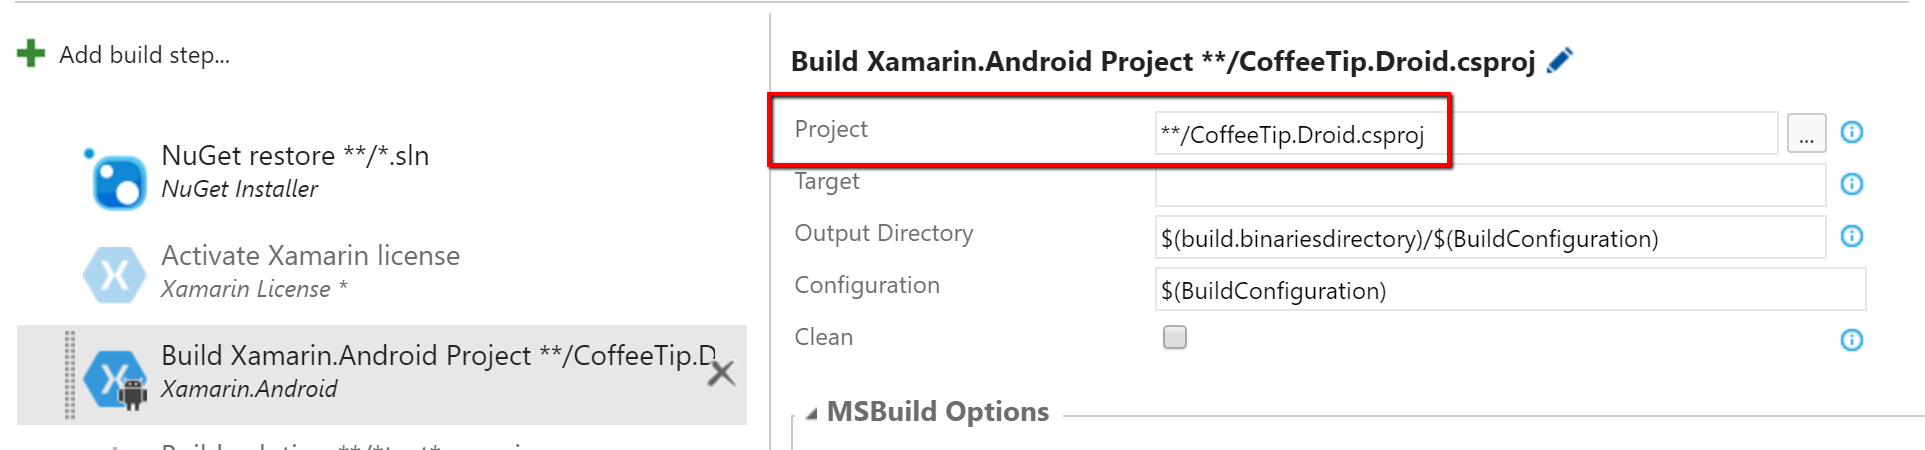
All other steps, including restoring NuGet packages, building the Android project, and packaging the app can remain. Each step can be configured with properties specific for the step. The Build Xamarin.Android Project step allows us to configure the project to be built. By default, it will search any project that has “Droid” in the title. We can change this to point directly to the Coffee Tip Android project:
Save and Queue Build
We’re now ready to test the build. Simply tap on Save to finalize the build definition and give it a unique name of your choosing. I’m going with Android – Release Build. Now, the Queue build… button will become enabled and we can manually queue our first build.
Just like that, our very first build is queued in the hosted agent and the build will start giving us a full readout of everything that’s happening.
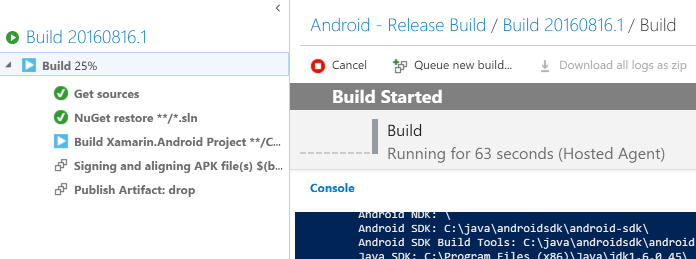
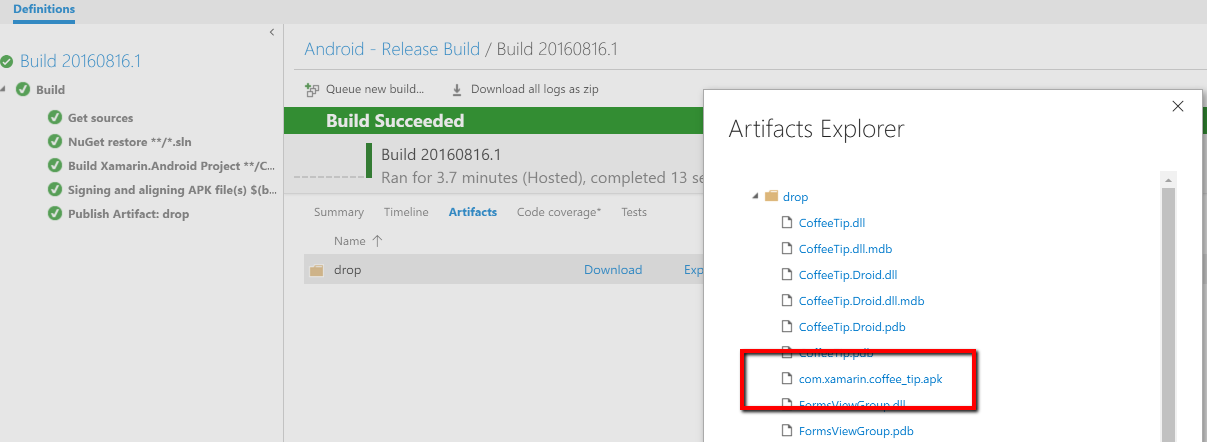
When the build is finished, a full build log is available and a list of artifacts that were built can be downloaded.
Build with Every Commit
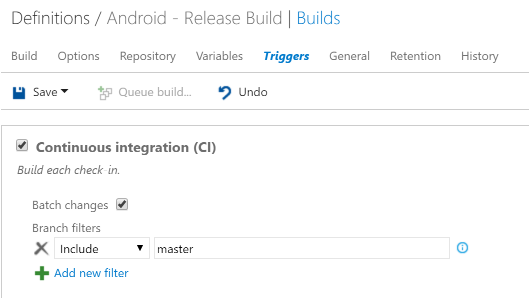
We manually queued this build, but to really integrate this newly created build definition into our DevOps cycle we can turn on Continuous Integration so a new build is started with each check-in. Under the Triggers section of the build definition, simply turn on Continuous Integration and configure as many or as few branch filters as you would like. By default it will only monitor for changes on the master branch.
Going Further
There’s a lot more that we can do with VSTS for an Android application to get it ready for real production.
Signing with Keystore
One of the most important parts of releasing an Android application is signing it with a private keystore. VSTS can handle this easily with the built in Android Signing and Aligning step that was already added to the build definition. To use this step, we’ll need to have created a private keystore and have it accessible for the build agent. This can be accomplished by having it checked into a private repository or by downloading the keystore from secure blob storage.
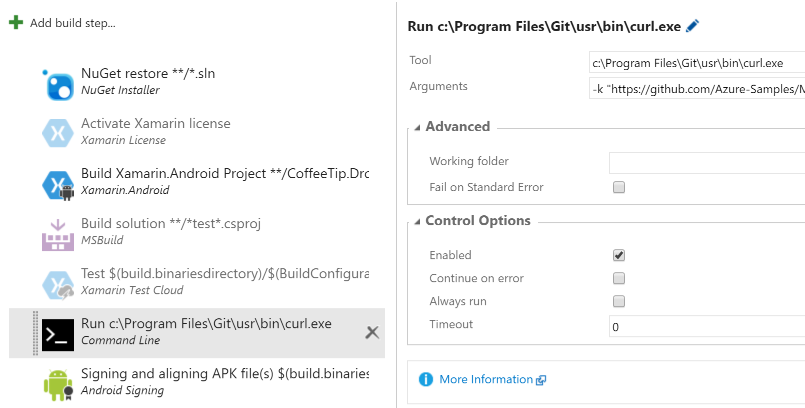
To download the keystore for the build agent, we can use the command line step combined with curl, which is on the hosted agent.
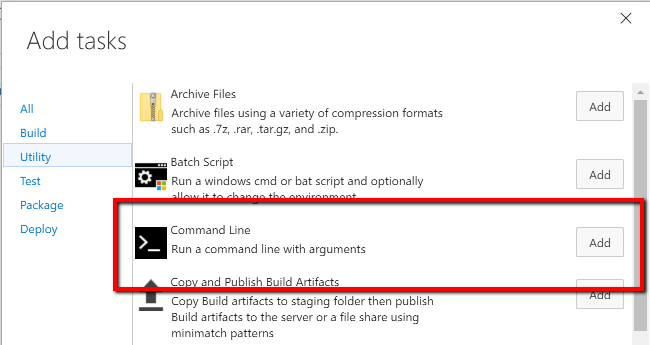
Drag and drop the command line step above the sign step and set the following properties to download and copy the keystore to the root of the repository on the build agent:
Tool: c:\Program Files\Git\usr\bin\curl.exe Arguments:
-k "URL_TO_KEYSTORE" --output $(Build.SourcesDirectory)\NAME_OF_KEYSTORE.keystore
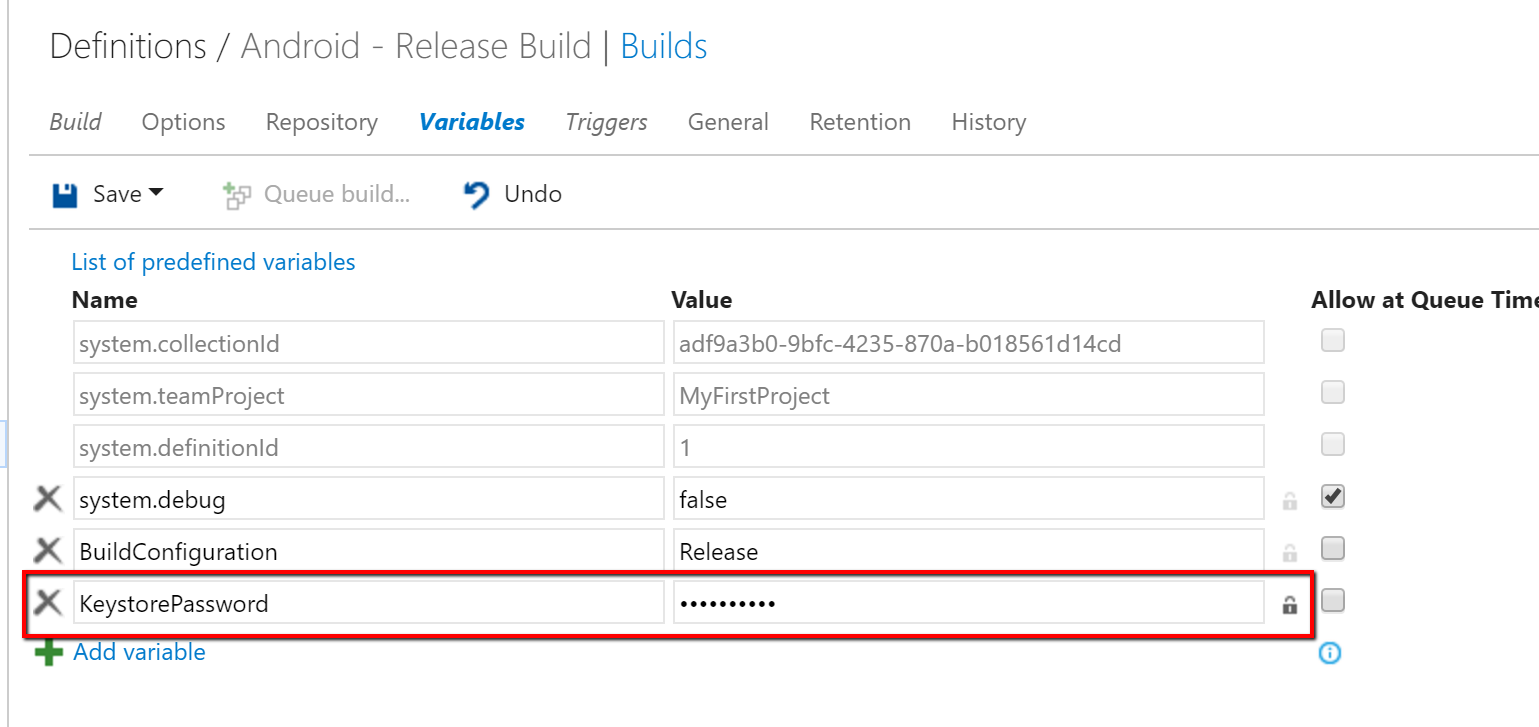
Now, we can create a private Variable for the KeystorePassword that will be encrypted for the Android Signing process. Under the Variables tab, enter the name and value of the password of the keystore and then enable the lock to encrypt it.
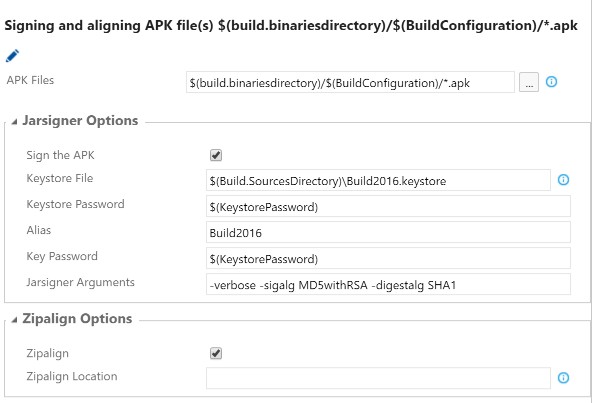
Finally, specify the Jarsigner options and ensure that Zipalign is enabled for the Android APK:
Continuous Deployment to HockeyApp for Testing
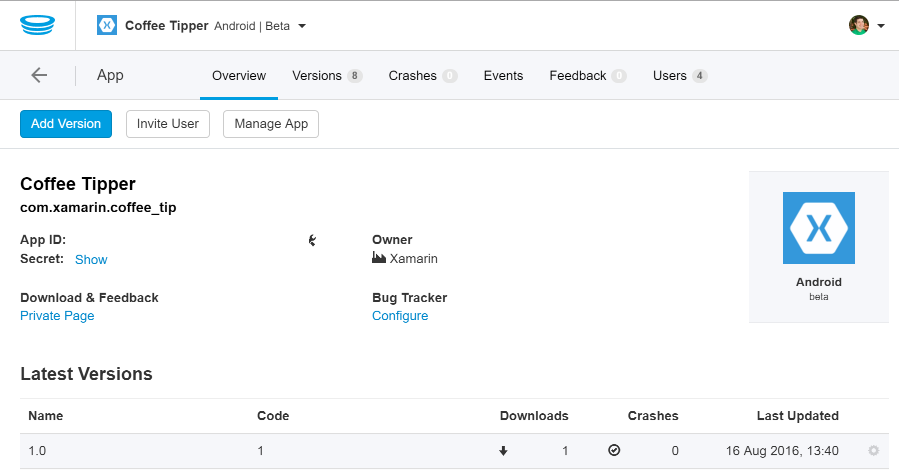
Everything that we’ve done so far is included in VSTS by default, but there’s an entire Marketplace for VSTS that enables developers to extend and add new functionality with new build steps. HockeyApp is a service that enables mobile app developers to easily distribute apps to testers and get feedback from them. We can install the HockeyApp VSTS extension, which will add new build steps to easily deploy to HockeyApp.

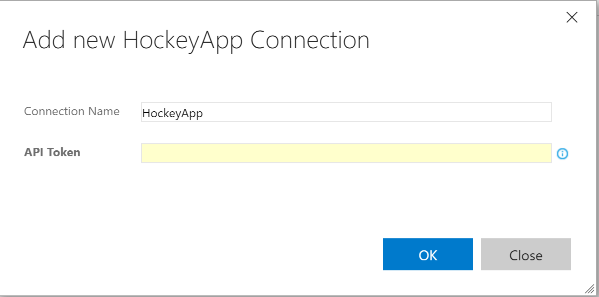
Just like we connected to GitHub under our projects services in settings, we can also connect to HockeyApp to specify our API Token:
Back in our build steps we can add the HockeyApp step under the Deploy category:

The last thing to do is configure the step with the connection, App ID from HockeyApp, and the APK to upload to HockeyApp.
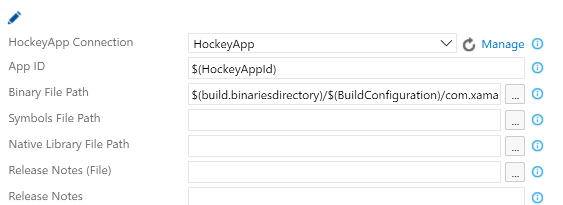
Once the build is completed, it will have been signed and shipped to HockeyApp!
Learn More
We’ve now set up full Continuous Integration and Continuous Deployment for our Xamarin.Android application in Visual Studio Team Services. With every commit, our application will be built, signed, and shipped directly to HockeyApp for testing. There’s still so much more to explore, including testing with Xamarin Test Cloud and exploring the marketplace for VSTS. Be sure to check out VSTS’ full documentation for building and distributing Xamarin applications. To learn how to use the same continuous integration process with Xamarin.iOS applications be sure to read the next blog in this series.
Looking for more? Checkout The Xamarin Show on Channel 9:
 Light
Light Dark
Dark
0 comments