
Creating a game requires many different skill sets, from programmers who write the code dealing with movement, animation, collisions, and scoring, to designers who draw the artwork and build the levels to play. Our CoinTime sample demonstrates both aspects of game development: you can browse the CocosSharp C# code to learn how cross-platform 2D game development works, and you can also view and edit the levels.
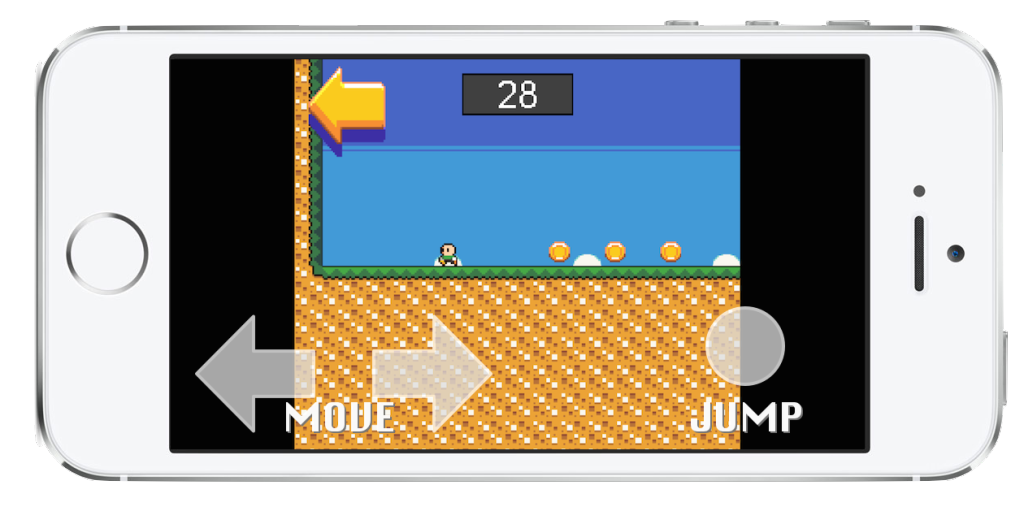
Today, I’m going to quickly cover how to create and edit game levels in CoinTime, so you can do some holiday hacking with our free Xamarin subscriptions for indie game developers and create your own playable game without any programming at all! Before you start, download CoinTime and get it running on your iOS or Android device or simulator. Note that it’s much easier to play on a real device, as the left-right and jump controls are designed for two-handed play. They are invisible, but work as shown in the screenshot below.
Follow these steps to create and edit levels in CoinTime:
1. Locate the level files
Now that you’ve got the game running, find the level data files in the solution. They are in /CoinTime/Assets/Content/levels/ and are named level0.tmx through level6.tmx.
2. Add a new level
In the folder /CoinTime/Assets/Content/levels/, you can edit the existing level7.tmx or duplicate and rename any of the existing levels. The levels must be sequentially numbered in order for the game engine to load them (so the next one would be level8.tmx, and so on).
Now share the new level file in both platform projects. Go to the following directory in each project:
- Android:
Assets/Content/levels/ - iOS:
Content/levels/
Use right-click > Add > Add Files… to choose the new level7.tmx file. When prompted, choose to Add a link to the file (don’t copy it). Finally, set the Build Action:BundleResource on iOS and Build Action:AndroidAsset on Android.
3. Edit the new level
The level files can be edited with the donation-ware tool Tiled (download for Mac and Windows). The screenshot below shows a custom “X” level that I’ve created in Tiled:
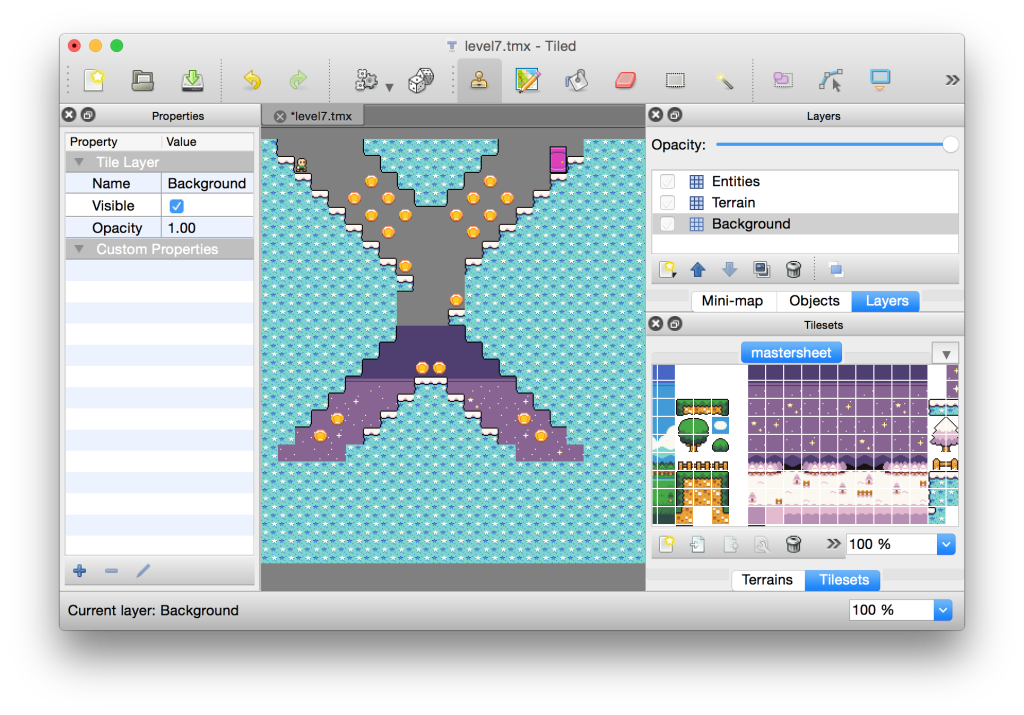
Editing a level with Tiled follows these steps:
- Select from the Layers pad at the top-right (Background, Terrain, or Entities). You can check and un-check layers to show and hide them while editing. The currently selected layer is where tiles will be placed.
- Choose the tile you want to place from the mastersheet pad at the bottom-right. It contains all the background, terrain, and entity (player, coin, enemy, door) tiles you need. Use the scrollbars to see all of the tile options.
- The tile may optionally have custom properties, which will show in the left-side Properties pad when you select it in the mastersheet. Check the Properties pad as you select tiles in the mastersheet, especially for the Entities layer.
- Place the tile in the level designer. When drawing the background and terrain, you’ll need to place lots of tiles to fill in the level.
Each layer has a special purpose in CoinTime, and you should only place tiles that belong in that layer:
- Background: this layer scrolls behind the game play. Use the scenery tiles from the mastersheet in this layer.
- Terrain: this is the layer that contains the ground and obstacles for the player to move around. Use ground tiles from the mastersheet (they have a custom property
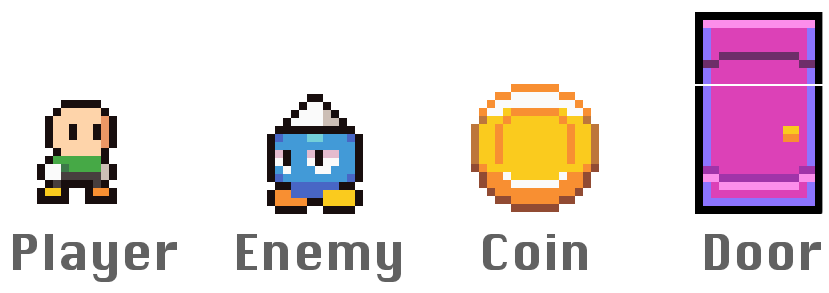
SolidCollision:true) and optionally add trees, fences, and other non-collision tiles for effect. To create a ‘trap’, use the spiky tile with custom propertyEntityType:Spikesin the mastersheet; if the player falls on them, the game will end. - Entities: this is where you place all of the coins to collect, enemies that can attack the player, a single player tile (indicating where the level will begin), and a pair of door tiles (where the level will end). Every tile that is placed in the Entities layer has a custom property so that the game engine code knows how to process it:
- Player: Check the Properties pad for the
EntityType:Player. - Coin: Has
EntityType:Coincustom property. - Enemy: Has
EntityType:Enemy. - Door: The main tile has
EntityType:Door;YOffset:4. When placing the door tile, also add the half-tile above it (RemoveMe:True).

- You can examine the existing level files to see how the different elements are used.
- Player: Check the Properties pad for the
4. Play your new level
Once you’ve saved the changes in Tiled, you should be able to run CoinTime and play your new level. Here’s my custom “X” level, which is in the levels folder already), to also try:

Breaking into game development may seem overwhelming, but CoinTime shows you just how easy it is to program 2D games with CocosSharp and allows you to create your own levels without any programming experience. You can edit all of the existing CoinTime levels, or create as many new levels as you would like. Once you’re comfortable with editing levels, take a look at the CocosSharp C# game engine to see how it works. Maybe your next hack can be adding squashable enemies or another game feature!