
Visual Studio for Mac is retired
Visual Studio for Mac was retired on August 31, 2024 in accordance with Microsoft's Modern Lifecycle Policy. While you can continue to work with Visual Studio for Mac, there are several other options for developers on Mac such as the preview version of the new C# Dev Kit extension for VS Code.
Do you want to make games? Maybe you’re like me and thought it sounded too hard. I’ve tinkered in game development for the past few years and learned it can be simpler than I thought. If you’re curious about game development like I am, follow along to learn how you can get started creating your first game using C# with Unity and Visual Studio for Mac.
Getting started
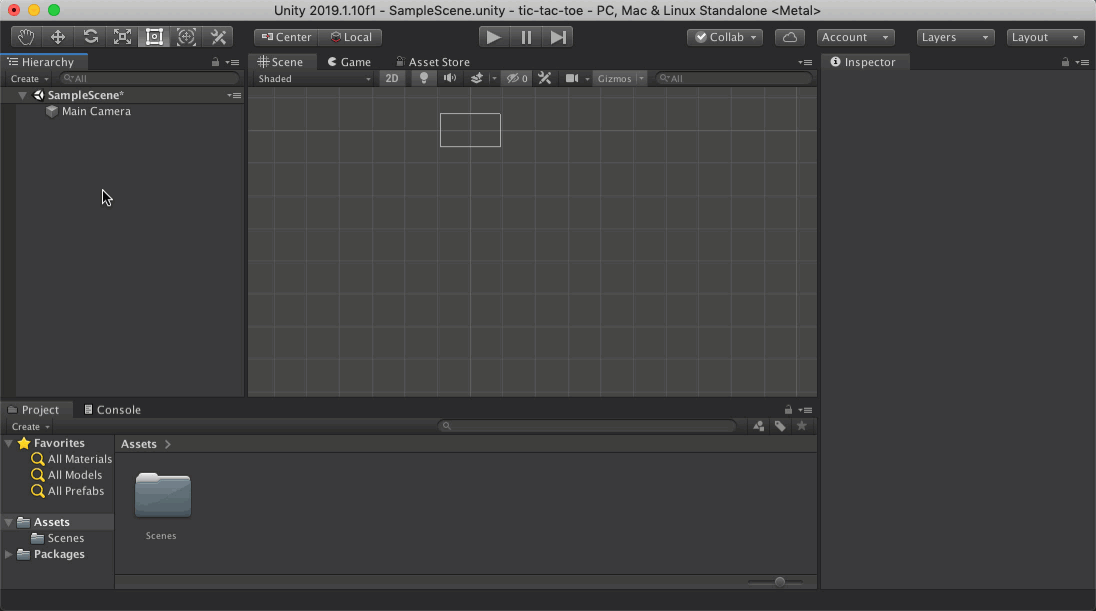
Download and install Unity and Visual Studio for Mac using the Unity Hub. The Unity Hub manages Unity installation, project creation, and links to additional learning resources like sample projects. You can use the Hub to install a version of Unity and create a new project. First, visit the Installs tab, click Add and install the latest Official Release. When that is finished, visit the Projects tab and click the New button to launch the project creation wizard. It’s important to note that project creation is done here instead of inside Visual Studio, though it should feel familiar. Name the project, select 2D, and click Create.

Once the project is created, the Unity Editor will launch. I recommend spending a few minutes on the Unity Basics workshop at Unity Learn for free. The workshop will introduce you to the layout, what each piece of the UI does, and the information it contains.
Creating a game board for tic-tac-toe
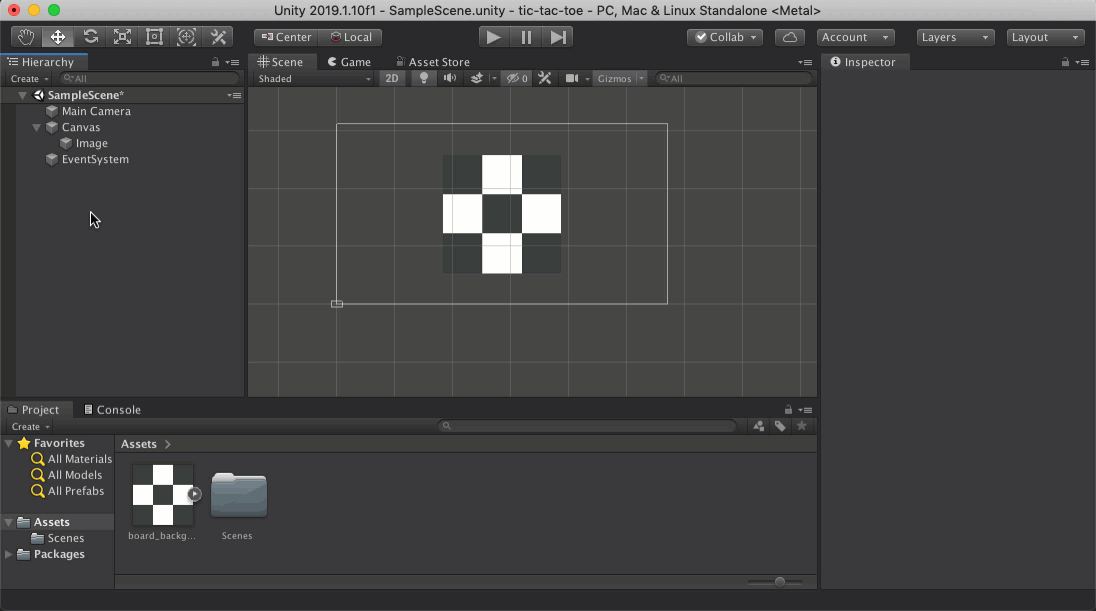
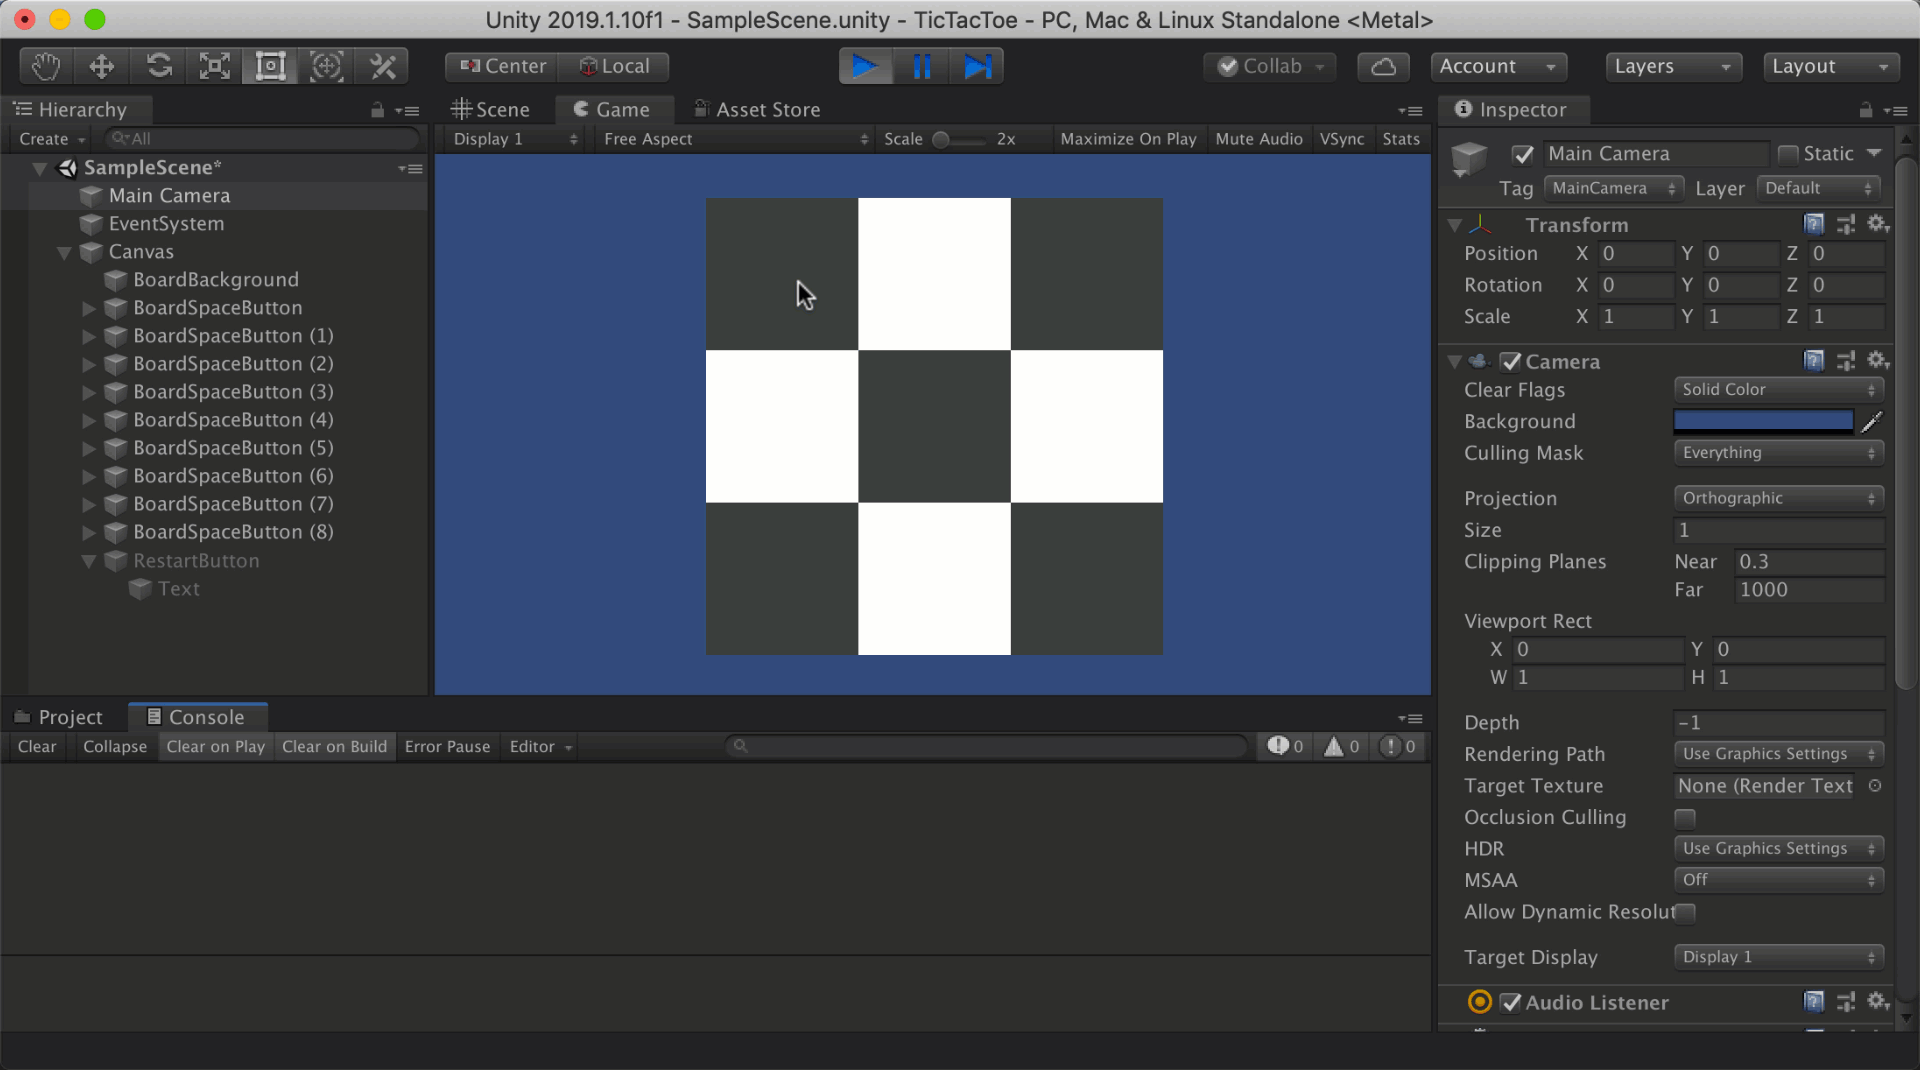
You have a lot of options on how to create a game board for tic-tac-toe – dynamically using code, primitive shapes, and static images just to name a few. A tic-tac-toe board isn’t traditionally dynamic, so let’s keep it simple by using a static image. You can download the image and all the project files on GitHub.

You can display a static image in your Unity project by creating a new Image object in the Scene. To do this, right-click in an empty area of the Hierarchy panel and select UI > Image. You should see a new object created named Image. Clicking on it will reveal its Properties in the Inspector panel where you can customize which graphic it displays. Drag the image file for the game board onto the Project panel of the Unity Editor to import it and then select it from the Source Image property of the Image.
If you’re having trouble seeing the game board in the Scene view, use your middle mouse button or press Q to quick-select the Hand Tool to pan the view. You can also select the Image object in the Hierarchy view and make sure the Transform property in the Inspector panel has an X,Y,Z position of (0,0,0).
Handling user input with a Button
Next, you can start handling how to accept user input to your game. Again, you have a lot of options, but one simple way is to use a Button. To create a Button, right-click in the Hierarchy and select UI > Button. Use the Scene view to move, resize, and align the button to the upper-left space of the game board image. For now, make one button and I’ll show you how to make a reusable component out of it by using a Unity concept called Prefabs.
You can remove the background on the button by selecting the Button object in the Hierarchy and unchecking the Image component in the Inspector. You can also customize the color and font for the Button in the Inspector to improve visibility.
Implementing gameplay using C#
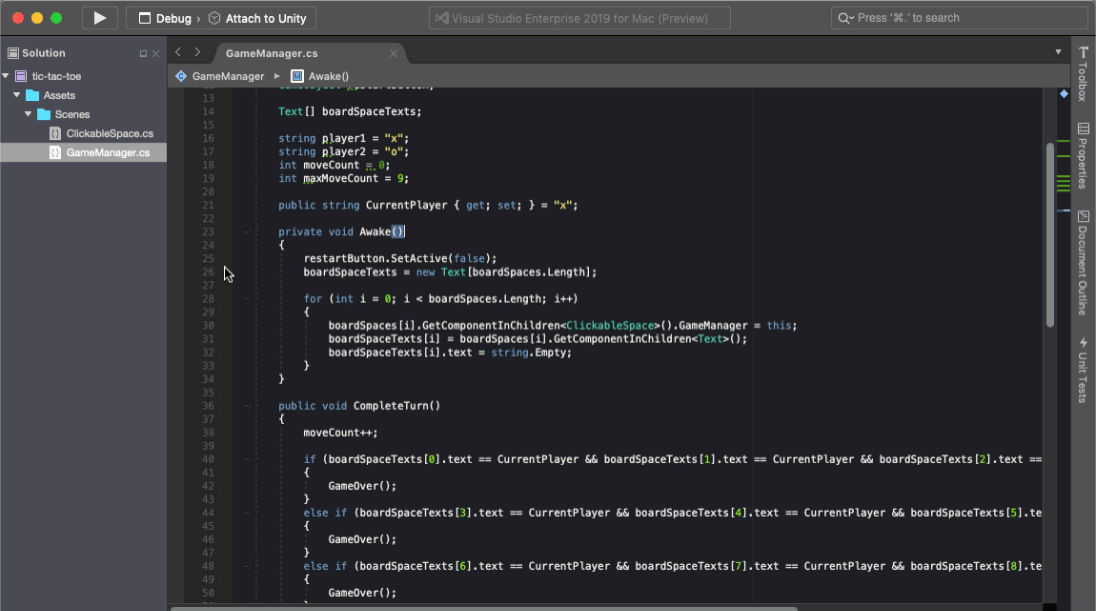
Your scene is now set up and you’re ready to write code to tell the buttons what to do. Create a new C# script from Unity by right-clicking in the Project panel and selecting Create > C# Script and naming it GameManager. Repeat this process and create another script named ClickableSpace. This creates two C# classes that inherit from a special Unity class – MonoBehaviour. The MonoBehaviour class provides Unity-specific functionality to the object which we’ll use Visual Studio for Mac to explore.
Editing C# with Visual Studio for Mac
Double-click on the GameManager class to open the file in Visual Studio for Mac. The Tools for Unity provide you with C# editing, debugging, IntelliSense support, productivity enhancements and are included in Visual Studio for Mac by default.
Exploring the Unity API
To create an entry point for your game logic, you can add a special Unity message function to the GameManager class. The syntax of this method is important, but you can always explore what’s available using the MonoBehaviour Scripting Wizard (Command+Shift+M) and learn about the special Unity message functions that can be called during the lifecycle of a script. In this case, the Awake method is perfect for initializing the game board and will be called when we start the game.
The GameManager class handles the logic for keeping track of all board space values, checking if there is a win or draw condition, whose turn it is, and restarting the game.
public class GameManager : MonoBehaviour
{
    [SerializeField]
    GameObject[] boardSpaces;

    [SerializeField]
    GameObject restartButton;

    Text[] boardSpaceTexts;

    string player1 = "x";
    string player2 = "o";
    int moveCount = 0;
    int maxMoveCount = 9;

    public string CurrentPlayer { get; set; } = "x";

    private void Awake()
    {
        restartButton.SetActive(false);
        boardSpaceTexts = new Text[boardSpaces.Length];

        for (int i = 0; i < boardSpaces.Length; i++)
        {
            boardSpaces[i].GetComponentInChildren<ClickableSpace>().GameManager = this;
            boardSpaceTexts[i] = boardSpaces[i].GetComponentInChildren<Text>();
            boardSpaceTexts[i].text = string.Empty;
        }
    }

    public void CompleteTurn()
    {
        moveCount++;

        if(boardSpaceTexts[0].text == CurrentPlayer && boardSpaceTexts[1].text == CurrentPlayer && boardSpaceTexts[2].text == CurrentPlayer)
        {
            GameOver();
        }
        else if (boardSpaceTexts[3].text == CurrentPlayer && boardSpaceTexts[4].text == CurrentPlayer && boardSpaceTexts[5].text == CurrentPlayer)
        {
            GameOver();
        }
        else if (boardSpaceTexts[6].text == CurrentPlayer && boardSpaceTexts[7].text == CurrentPlayer && boardSpaceTexts[8].text == CurrentPlayer)
        {
            GameOver();
        }
        else if (boardSpaceTexts[0].text == CurrentPlayer && boardSpaceTexts[3].text == CurrentPlayer && boardSpaceTexts[6].text == CurrentPlayer)
        {
            GameOver();
        }
        else if (boardSpaceTexts[1].text == CurrentPlayer && boardSpaceTexts[4].text == CurrentPlayer && boardSpaceTexts[7].text == CurrentPlayer)
        {
            GameOver();
        }
        else if (boardSpaceTexts[2].text == CurrentPlayer && boardSpaceTexts[5].text == CurrentPlayer && boardSpaceTexts[8].text == CurrentPlayer)
        {
            GameOver();
        }
        else if (boardSpaceTexts[0].text == CurrentPlayer && boardSpaceTexts[4].text == CurrentPlayer && boardSpaceTexts[8].text == CurrentPlayer)
        {
            GameOver();
        }
        else if (boardSpaceTexts[2].text == CurrentPlayer && boardSpaceTexts[4].text == CurrentPlayer && boardSpaceTexts[6].text == CurrentPlayer)
        {
            GameOver();
        }
        else if(moveCount >= maxMoveCount)
        {
            Draw();
        }
        else
        {
            if (CurrentPlayer == player1)
                CurrentPlayer = player2;
            else
                CurrentPlayer = player1;
        }
    }
    void Draw()
    {
        Debug.Log($"It's a draw!");
    }

    void GameOver()
    {
        Debug.Log($"Player {CurrentPlayer} wins!");
        restartButton.SetActive(true);
    }

    public void Restart()
    {
        moveCount = 0;
        restartButton.SetActive(false);

        for (int i = 0; i < boardSpaceTexts.Length; i++)
        {
            boardSpaceTexts[i].text = string.Empty;
        }
    }
}
You might notice the special [SerializeField] attributes on the fields. This Unity-specific attribute signals that the Unity Editor should show this property in the Inspector so it can be customized from the Editor. To see that in action, switch back to the Unity Editor. Right-click in the Hierarchy panel and select Create Empty. Name the new object GameManager and click it to select it. With it selected, click the Add Component button at the bottom of the Inspector panel and choose your GameManager class. Only MonoBehaviour classes can be added to a GameObject.
With your GameManager added to the object, select it again. You should see the GameManager component in the Inspector panel with two customizable properties for Board Spaces and Restart Button. Unity automatically transformed the naming of the fields with [SerializeField] to be Title Case.
Saving time with Prefabs
Earlier, you created a single Button object to handle user input. You need eight more of these to complete the board. You could copy paste the one you already created, but what if you wanted to make a change to it? Then you would have to update each object in the scene. Prefabs let you create reusable objects that let you make a change to a single instance and choose to propagate those changes to all children copies of it. First, set up what a button should do for your game.
Adding behavior to a button
Next, define what happens when a space is selected by implementing some logic in the ClickableSpace class. Switch back to Visual Studio for Mac and copy this code into it:
using UnityEngine;
using UnityEngine.UI;

public class ClickableSpace : MonoBehaviour
{
    public GameManager GameManager { get; set; }

    public void SelectSpace()
    {
        GetComponentInChildren<Text>().text = GameManager.CurrentPlayer;

        GameManager.CompleteTurn();
    }
}
Head back to the Unity Editor to finish configuring the button.
Linking the C# script to the Button object
Select the Button you created in the Hierarchy view and click the Add Component button at the bottom of the Inspector panel. Choose your ClickableSpace class. Next, click the + icon under the On Click() section in the Inspector to add a new event handler for the Button. Click the small circle icon to open the Select Object window where you can select the Button object. This tells the Button component to look for event handlers on itself, and you can choose the ClickableSpace.SelectSpace method we just created from the drop-down.
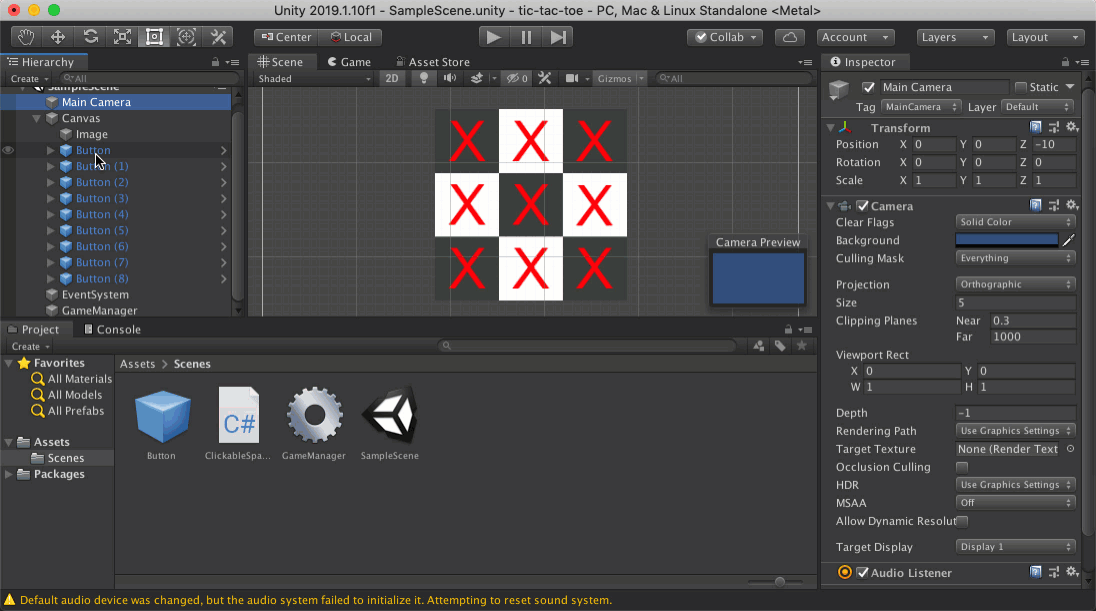
Now that a single Button is configured, drag it to an empty area of the Project panel to save it as a Prefab. You’ll know it’s a success because it will be blue in color and have a special icon. To add more instances of your new Prefab to the scene, drag them from the Project panel to the Hierarchy. Do this for each of the remaining spaces on the board.
Connecting the final pieces
Remember the inspector fields on GameManager? You can now configure those by first clicking on the GameManager object in the Hierarchy panel. You’ll need to view the Inspector for the GameManager but select a few different objects while doing that. Normally, every time you select an object the Inspector panel will update with that objects properties. To prevent that, click the small Lock icon in the upper right of the Inspector panel to stay focused on the GameManager. Now, select all of the Button objects in your scene with Shift + left-click and drag them onto the Board Spaces variable. This fills in the array with the Button objects.
When the GameManager detects a win or draw condition, it will unhide a button that can be used to restart the game. Create that button now using the same methods as before, except there is no need to make a prefab this time. Like before, register an On Click method to the Restart function of the GameManager class.
Playing the game
Test out your game by clicking the Play button at the top of the Unity Editor. Click around on some of the board spaces to trigger the Button objects and test out your game. If you’ve hit an error, you can debug it using Visual Studio for Mac.
Debugging your game
A powerful feature of Tools for Unity in Visual Studio for Mac is the ability to set breakpoints and debug C#. If you’re familiar with debugging in any other .NET project, you’ll know what to expect. Set your breakpoints and press the Play button in Visual Studio for Mac to attach the debugger to Unity. Switch over to Unity and make sure the Play button is pressed. When the code with your breakpoint is executed, it will halt and you’ll be able to step through code using the debugger controls. You can attach the debugger and play Unity all in a single step directly from Visual Studio for Mac by first selecting the Attach to Unity and Play configuration next to the Play button. This can save you some time and make the workflow smoother.
Conclusion
If you’ve made it this far – congratulations! You just created tic-tac-toe using your skills in C#, .NET, and Visual Studio for Mac. I encourage you to make the game your own. Here are some ideas:
- Add a scoring system
- Animate when a space is selected
- Play sounds
- Make it truly multiplayer
Unity Learn has a great tutorial for creating tic-tac-toe using only Unity UI components, too. If you have any feedback or questions about working with Unity and Visual Studio for Mac, reach out to the team on the Visual Studio for Mac Twitter.
0 comments