

In Visual Studio 2022 17.3 Preview 1.1 we added support to port tunneling (forwarding) to your ASP.NET Core web projects. Port tunneling enables connections between machines that cannot directly connect to each other. Port tunneling is also referred to as port forwarding, or web tunneling. Some cases where you may want to use port tunneling while developing an ASP.NET Core app include:
- Developing an API that is consumed by Power Platform.
- Developing a web hook for an external service.
- Testing a web app on an external device.
These are just a few examples of when you may want to use port tunneling with your web projects. This feature depends on a private preview which you must sign up for.
To get started follow these steps.
- Sign up for the private preview of port tunneling in Visual Studio.
- Download the 17.3 Preview 1.1 Visual Studio update.
- Enable the preview feature in Visual Studio.
- Configure your project.
1: Sign up for the private preview of port tunneling in Visual Studio
To get started with the, sign up for the private preview at the link below. You should sign in with the same account that you are using in Visual Studio. Port tunneling will not work without signing up for this preview.
After signing up, download the Visual Studio preview and enable the feature in Visual Studio.
2: Download the latest preview Visual Studio update
We added support for this preview feature in Visual Studio 2022 17.3 Preview 1.1, but you should use the latest current preview available. You can download that at the link below.
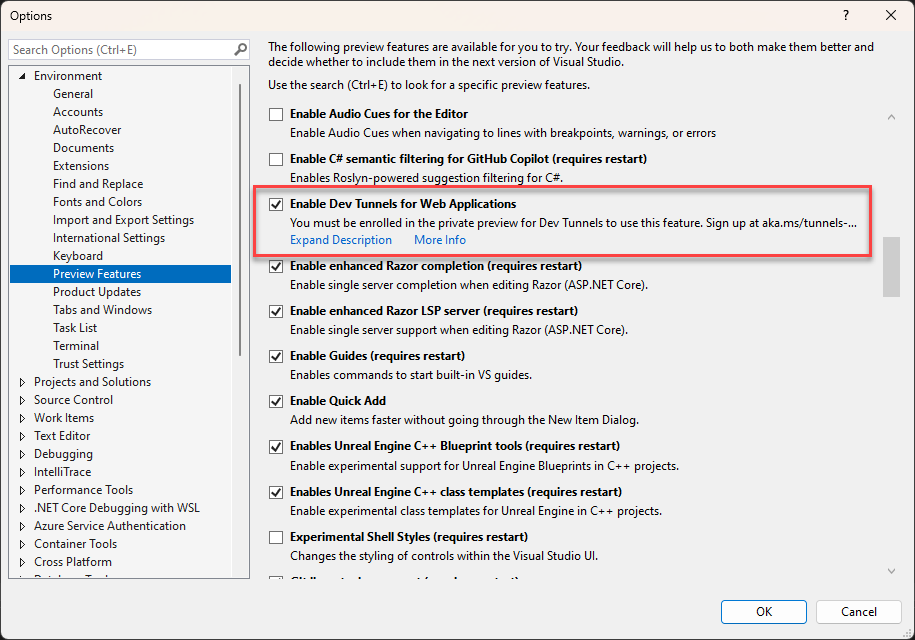
3: Enable the preview in Visual Studio
In Visual Studio go to Tool > Options > Preview Features and check the Enable port tunneling for Web Applications option.

4: Configure your project
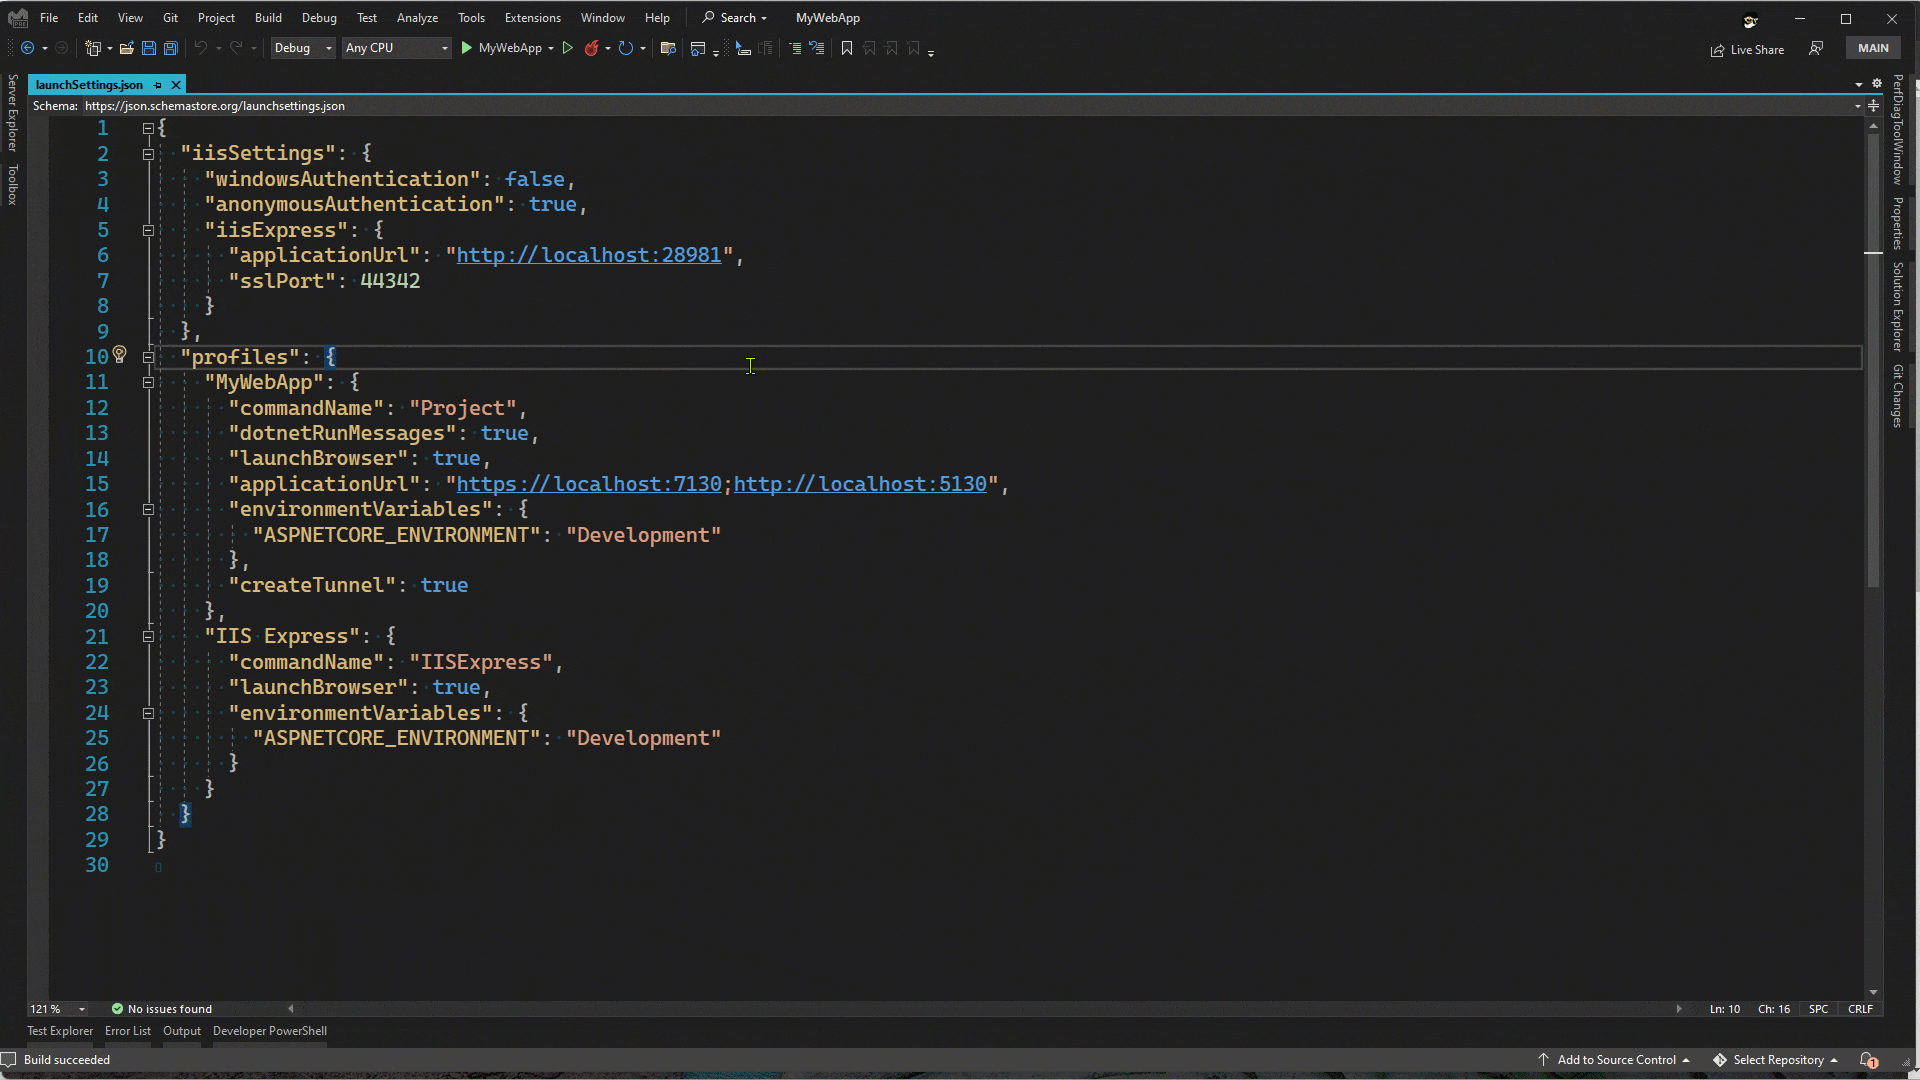
When developing ASP.NET Core projects in Visual Studio, the settings to launch your application are stored in the file at Properties/launchSettings.json. This file contains one, or more, launch profiles for your web app. In order to enable the tunnel to be created, or connected, when you run your app, add the property “createTunnel”: true in the launch profile. For example, below is a full launchSettings.json file for an ASP.NET Core web project.
{
  "iisSettings": {
    "windowsAuthentication": false,
    "anonymousAuthentication": true,
    "iisExpress": {
      "applicationUrl": "http://localhost:28981",
      "sslPort": 44342
    }
  },
  "profiles": {
    "MyWebApp": {
      "commandName": "Project",
      "dotnetRunMessages": true,
      "launchBrowser": true,
      "applicationUrl": "https://localhost:7130;http://localhost:5130",
      "environmentVariables": {
        "ASPNETCORE_ENVIRONMENT": "Development"
      },
      "createTunnel": true,
      "tunnelAuthentication": public
    },
    "IIS Express": {
      "commandName": "IISExpress",
      "launchBrowser": true,
      "environmentVariables": {
        "ASPNETCORE_ENVIRONMENT": "Development"
      }
    }
  }
}
The property that needs to be added is in bold above. When you run, or debug, your application in Visual Studio. Instead of launching the localhost URL, the tunnel URL will be launched, which will then connect to the localhost endpoint. Take a look at the animation below.
Note: when this feature was originally implemented the access was set to public by default. In more recent updates, we default to private access, where only the signed in user has access to that tunnel. You can control the access with the property “tunnelAuthentication”, which can be set to “private”, “org” or “public”. For org access, the user accessing that tunnel must have access to the organization in which the tunnel was created.
When the web app is launched, you can see that the browser is not navigating to the localhost URL, but instead using the public tunnel URL. This URL can be accessed outside of your local environment. You could share the public URL with a friend or colleague to test out the application. If you wanted to test your web app on an external device like a phone or tablet, you can navigate to the URL on the device. To simplify this, you can generate a QR code to the URL in the Edge browser. To create the QR code in Edge, click on the URL bar and the QR code button should appear. Click on that to generate, and view, the QR code.
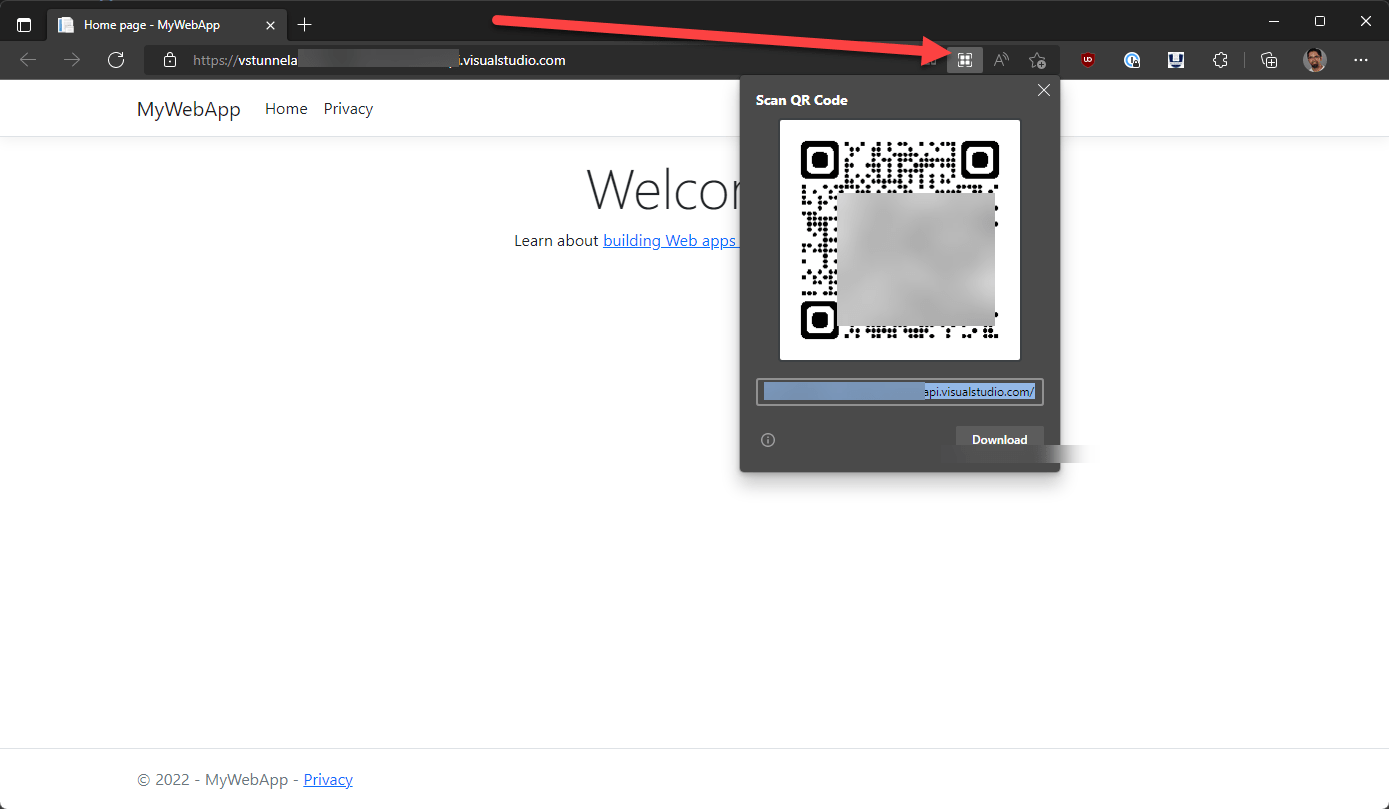
You can scan this QR code with your phone, or tablet, to navigate to the URL.
Changes in Visual Studio 2022 17.4 Preview 3
In the 17.4 Preview 3 release of Visual Studio 2022, several changes have been made. Those changes are summarized below.
The property names used in launchSettings.json have changed
| Old property name | New property name |
| createTunnel | devTunnelEnabled |
| tunnelAuthentication | devTunnelAccess |
Preview Features name has changed
The name of the tab in Preview Features was initially set to “Enable port tunneling for web applications” and now has been changed to “Enable dev tunnels for web applications”.
Supported account types
In 17.4 Preview 3 we have added support for both MSA and GitHub accounts when using dev tunnels. In the signup form, you’ll now see an option to input your GitHub username.
Environment variable to get the dev tunnel URL
When a project is started with tunnel support, an environment variable is added to the process VS_TUNNEL_URL which can be used to get the tunnel URL which is being used. In a multi-project start scenario, when a project is started with a tunnel, projects that start after that project will get an additional environment variable named VS_TUNNEL_URL_{PROJECTNAME}, where {PROJECTNAME} is the name of the project that started earlier with a tunnel.
For example, consider the following. You have a solution with a web API project as well as a Web project. The multi-project start is configured to start the API project first, and then the web project, and they both have tunnel enabled. In the API project it will get the VS_TUNNEL_URL for its own tunnel. Let’s say that the API project is named “MyApi” and the web project is named “MyWeb”. When the web project is started it will have an environment variable named VS_TUNNEL_URL which has the URL for its own tunnel. It will also have an additional environment variable named VS_TUNNEL_URL_MyApi, which is the tunnel URL for the API project which launched before the web project.
What to do if you run into issues?
This is an early preview, so you may run into some issues when using this feature. The best method to report issues is using the built in Report a Problem support in Visual Studio. You can also leave a comment here or reach out to Sayed on Twitter at @SayedIHashimi.
Known Issues
GitHub.com accounts are not currently supported.We will add support for GitHub.com accounts in a future update.
- Multiple accounts in Visual Studio
- If you are signed in with multiple Azure accounts in Visual Studio, the tunnel will be created with the first Azure account detected.
- Later we will add the ability to select a specific account to create the tunnel with.
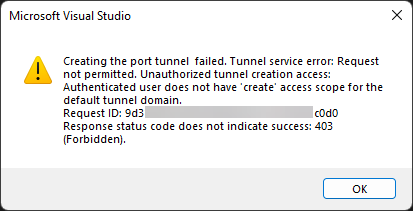
- If you see a dialog with the following message, the account that is signed into Visual Studio doesn’t have access to create the tunnel. Ensure that you are signed in with an Azure account in Visual Studio.
- Tunnel authentication
- Currently all tunnels are created with anonymous authentication enabled.
- We are planning to make all new tunnels secure by default in a future update, with the ability to configure the auth settings.
- 302 Error
- When accessing the tunnel URL the request may be redirected, if the client is not following redirects you may encounter a 302 error.
- When you get a 302 error you can modify the global URL to point to the specific data center where the tunnel exists. For example if your global URL is https://vstunnel123456.rel.tunnels.api.visualstudio.com, instead use https://vstunnel123456.use.rel.tunnels.api.visualstudio.com.
- We have seen 302 errors when configuring GitHub web hooks. We are going to work with GitHub to resolve this issue.
Wrap Up
In this post we introduced the new web tunneling feature for ASP.NET Core apps in Visual Studio, and what steps you should take to try it out. This is just an early preview; we will continue to improve this experience so that we can release this in a non-preview build. Please try it out and let us know how it’s working for you.
Registration seems to be bugged, it registered me for a webinar on azure containers and functions
Hi William,
Oh no! I’d love to help you here and add you to the private preview. Could you reach out to us at tunnelsfeedback@microsoft.com? Thank you!
Best,
Carolina
Hello Sayed,
After you apply how long should it take before you are approved or know if you are going to accepted to the private preview?
Thanks
I would like to also know, it’s been almost a week and we would really like to try out this preview feature.
Thanks!
Hi dotnet noobie and Toan,
We are gradually adding tenant IDs to the Preview Program throughout June and July 2022, I’ll contact you once you’re added. Please DM or reach out to me on Twitter if you have additional questions! @caurgo
Best,
Carolina
OK Thanks for the update
This is an interesting feature, but could you also add a standard SSH tunnel port forwarding (may be next release, or two)? I know about marketing (Azure, Azure, Azure), but this will be a killer feature for developing some enterprise API with callbacks.
I think this feature is very interesting specially for
dealing with webhooks, I am wondering if the generated domains are static or they change in each run ?