

In this blog post we will discuss the updates to the dev tunnels (port forwarding) experience in Visual Studio when working with ASP.NET Core projects. If you have read the previous posts here about these features, you’ll want to read this one as well because we have a lot of big changes in Visual Studio 2022 17.5 Preview 2. You can download the latest preview at Visual Studio Preview (microsoft.com). We will cover those updates here, as well as the overall support since a lot has changed in this release. If you would like to view these updates in a video instead of reading a blog post, watch this video by Sayed.
In this release we are adding many significant updates, including the following.
- Support for persistent and temporary tunnels. A persistent URL uses the same URL throughout its lifetime.
- Create and use tunnels with different accounts.
- UI to create and manage dev tunnels.
- UI to easily select the active tunnel to be used.
- No longer uses properties in launchSettings.json.
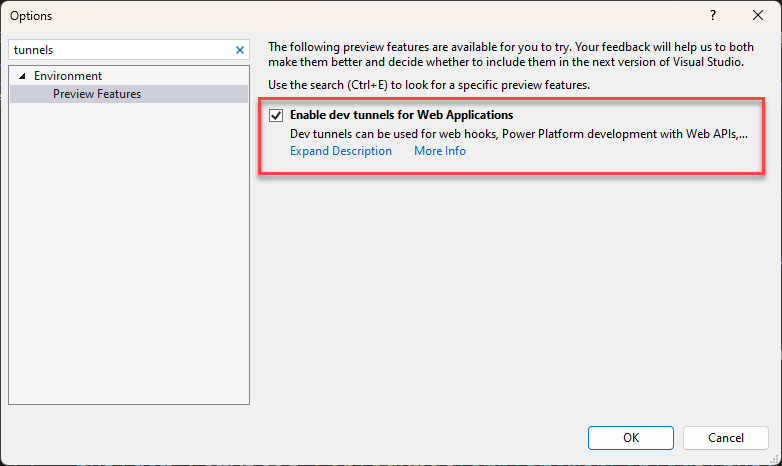
To get started, you must first enable the dev tunnels preview feature. You can find this at Tools -> Options -> Environment -> Preview Features, and select the option Enable dev tunnels for Web Applications.
You will also need to be signed into Visual Studio to create and use dev tunnels.
If you have used this feature in the past, you may recall that you needed to add two properties to launchSettings.json. These properties are no longer required and can be removed from that file, if they are not removed, they will be ignored.
When you have a solution loaded in Visual Studio with an ASP.NET Core project set to start, you should see a new entry in the debug dropdown for dev tunnels.
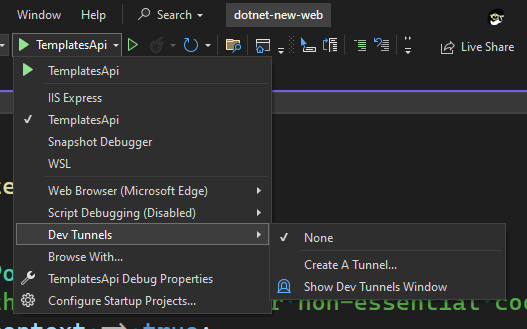
In this flyout you can select the active tunnel, you can create a new tunnel and you can open the new dev tunnels tool window. Let’s get started by creating a new tunnel with the Create a Tunnel menu option. You should see the dialog shown below.
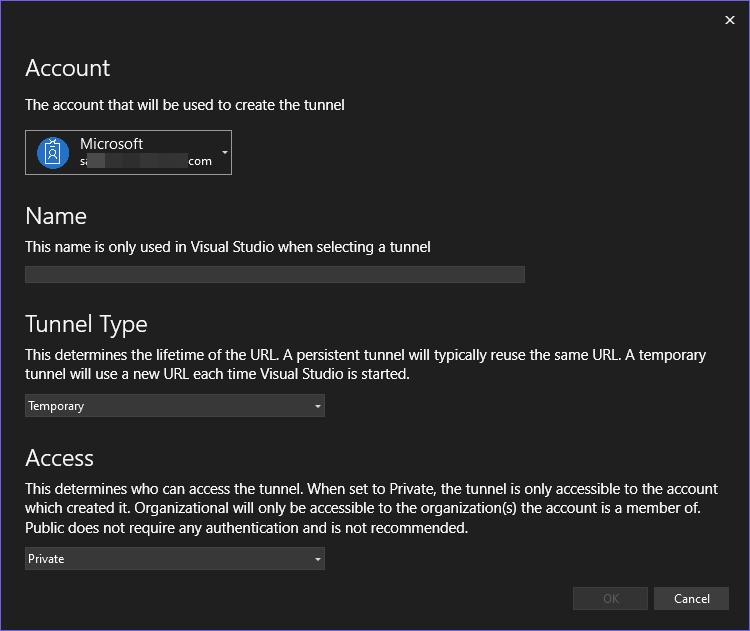
In this dialog, you’ll specify 4 pieces of information.
- Account – the account selected in the account picker is the account that the tunnel will be created with.
- Name – this value is only used for display in Visual Studio, it doesn’t impact the URL, or any other property of the tunnel being created.
- Tunnel Type – Persistent is a tunnel that uses the same URL throughout its lifetime. Temporary is a tunnel that uses a new URL each time that Visual Studio is started. For persistent tunnels, if the tunnel is not used for an extended period of time (weeks), the URL may change. There are other cases where the URL may change, but we make our best effort to preserve the URL.
- Access – Private means that only the signed in user has access to use that tunnel. Organizational means that only users in the same organization as the account which created the tunnel can access it. Public means that no authentication will be used, and anyone can access it.
After you provide these values and click OK, a new dev tunnel will be created. Since we created this tunnel from the debug dropdown, it will also be set as the active tunnel. When you go back to the debug dropdown, you should see the active tunnel in the flyout. See below.
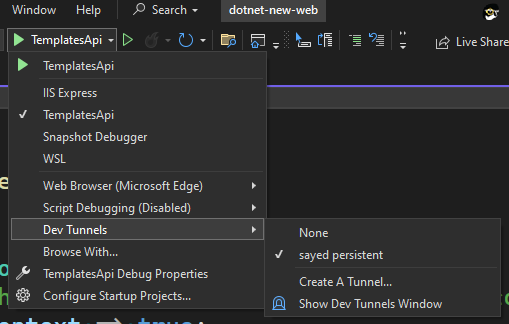
In this flyout we can see that one tunnel has been created, named sayed persistent. Since it has a checkmark next to it, that indicates that it is the active tunnel. To change the active tunnel, click on the name of the tunnel, or None for no tunnel.
When there is an active tunnel, it will be used for all ASP.NET Core projects that are started in Visual Studio. When Visual Studio is restarted, it will default back to None which means that no tunnel will be used. Once a tunnel is selected as active, it will remain active until Visual Studio is closed.
When you start an ASP.NET Core project and a tunnel is selected as active, a dev tunnel URL will be associated with that project, and it can be used to access it outside of your local machine. Take a look at the animation below.
As you can see from the animated gif, when the API project was launched, instead of using the localhost URL a dev tunnel URL is used. You can copy/paste this URL so that it can be used outside of your local machine. Before we move on to discuss the dev tunnels tool window, let’s take a minute to discuss when to use a persistent, and temporary, tunnels.
Persistent versus Temporary Tunnel
As mentioned earlier a persistent tunnel is one that uses the same URL throughout its lifetime. This is great for when you are integrating your web app with an external service. For example, you’re implementing a GitHub webhook, or developing an API to integrate with a Power Platform app. In these cases, you’ll need to specify the call back URL with the external service. When you use a persistent tunnel, you should only need to configure the external service with that URL once. If you used a temporary tunnel, each time you restart Visual Studio, you will need to reconfigure the external service to point to the new URL.
Using a temporary tunnel is great when you only need that dev tunnel URL to work for a short amount of time. For example, you’re working on a web app, and you want to share your in-progress work with coworkers, or you want to test your app on an external device. In this case, you want to enable your coworkers to try out your app for a short amount of time. You would not want that URL to work in the future. It’s important to note that a tunnel URL will only connect to your local machine if you have Visual Studio open, a tunnel is selected as active, and one or more ASP.NET Core projects are running on the port indicated in the URL of the public tunnel URL. If you have a persistent tunnel, the URL will not work if there are no ASP.NET Core projects running in Visual Studio. Now that we’ve described the different cases for Persistent versus Temporary, let’s move on to look at the new tool window.
Dev tunnels Tool Window
To open the dev tunnels tool window, you can use the Show Dev Tunnels Window menu option in the debug dropdown. You can also open this window with View -> Other Windows -> Dev Tunnels. Once it is opened, you should see a window like the following.

As you can see from the above screenshot, I have created two tunnels, one is a persistent tunnel and the other a temporary tunnel. These were created with different accounts. From this tool window, you can create a new tunnel with the green ➕ button. That will open the same dialog that was shown earlier in this post. When you create a tunnel from the tool window, it will not be set as the active tunnel like it is when a tunnel is created from the debug dropdown.
You can also remove (delete) tunnels with the red X button on the right side. There is a refresh button in the toolbar that can be used to refresh the list of tunnels, but you typically will not need to refresh this list. We currently don’t have the ability to show the active tunnel, or to make a selected tunnel as active in this tool window, but we are planning to add those capabilities soon. Now that we have discussed the new tool window to manage dev tunnels, let’s move on to discuss how you can get the tunnel URL programmatically.
Tunnel URL Environment Variable Support
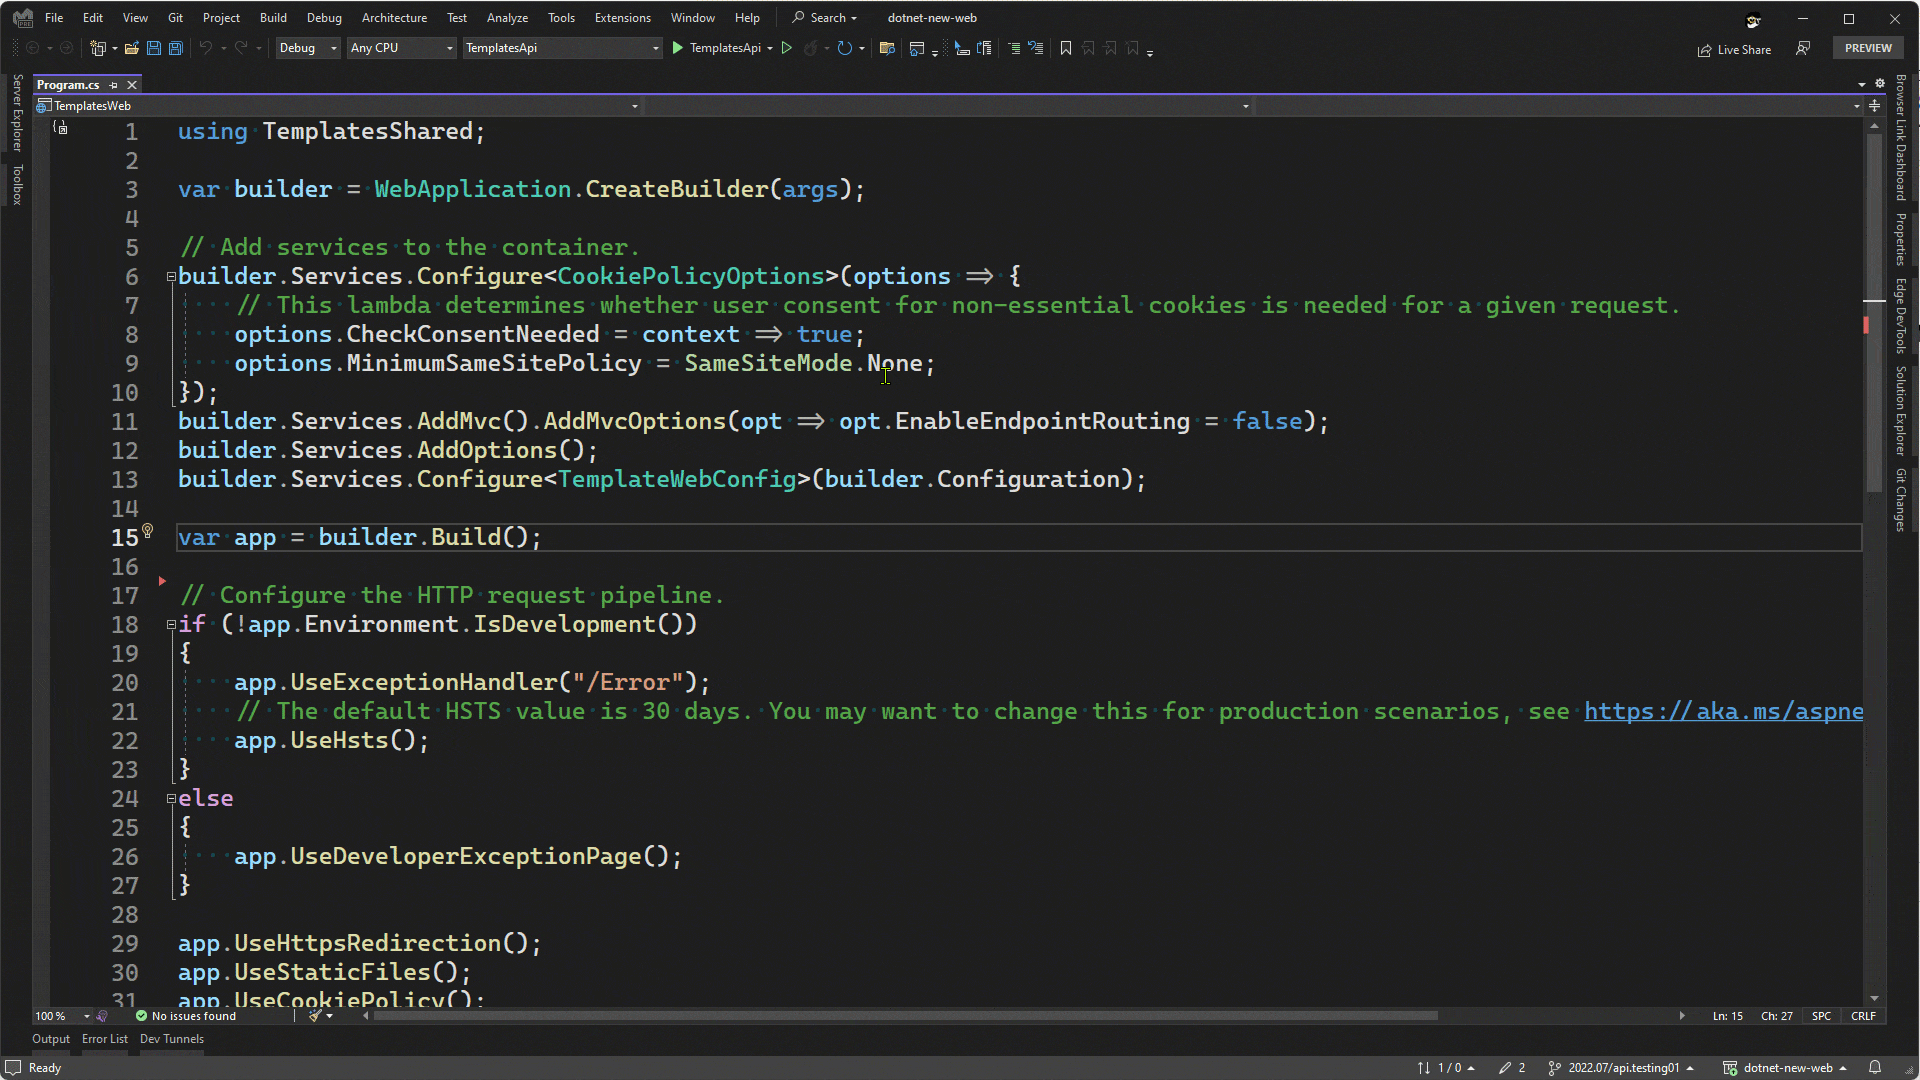
When you launch an app that has a tunnel, Visual Studio will add a new environment variable named VS_TUNNEL_URL. This is the URL for the tunnel that is used for the current project. This can be useful when you are integrating the application with an external service, and you need the URL to pass to the external service. If you have multiple ASP.NET Core projects configured to start in Visual Studio, the app that is starting up will also get an environment variable for any project that started before it. For example, consider this sample where we have two projects set to start. Take a look at the image below that shows the Startup Projects. You can get to this dialog by right clicking the solution in the Solution Explorer and selecting Configure Startup Projects.

Here you can see that there are two ASP.NET Core projects configured to start, TemplatesApi and TemplatesWeb. Since TemplatesApi is above TemplatesWeb, it will be started before the TemplatesWeb project. When the TemplatesApi project is started, it will receive the VS_TUNNEL_URL. When the TemplatesWeb project is started it will get its own tunnel URL via VS_TUNNEL_URL, but it will also get the tunnel URL for the other project in the VS_TUNNEL_URL_TemplatesApi environment variable since that project was launched before the TemplatesWeb project. The syntax for this variable name is VS_TUNNEL_URL_[ProjectName], where [ProjectName] is the name of the other project. Now that we have covered the environment variable support, we’ll take a look at what is coming next for dev tunnels and then wrap up this post.
What’s next?
We’ve made a lot of progress with the dev tunnels support in ASP.NET Core in Visual Studio over the past few months. In this release we have unlocked a lot of new functionality. We are still working to improve the quality of these features as well as adding new features. We are planning to update the tool window to show the active tunnel, enable setting a tunnel as active and getting a tunnel access token that can be used when a non-interactive app needs to authenticate to use the tunnel.
Feedback
Most of the updates that we delivered in this release were inspired by feedback from users like yourself. You can share feedback with us via Developer Community: report any bugs or issues via report a problem and share your suggestions for new features or improvements to existing ones. You can also leave a comment here or reach out to Sayed on twitter at @SayedIHashimi.
Resources
- Video tutorial of the updates
- Using dev tunnels in the Power Platform
- Previous blog post introducing the private preview
- Previous blog post introducing the public preview
- Azure Samples: Call Automation – Appointment Reminder Sample
- Configure Twilio Webhooks automatically with Visual Studio dev tunnels during ASP.NET Core startup
Is there a way to make it work in .net framework 4.x ?
Some sample over there ??
Thanksss
Thanks for this great feature, my question is is there any chance to support subdomains
too?
Hi Ali,
Thank you for your question! We are looking at offering subdomains in the future, keep an eye out on future blog posts.
Best,
Carolina
Dev Tunnels is going to be a great feature! I have a couple of comments/questions:
1. In the Dev Tunnels tool window, the Account column lists my display name whereas in the modal dialog for creating a tunnel, accounts are listed by username (e.g., email). I think it would be good to use the username in both places as it would be easier to distinguish in case the display name is the same on two accounts.
2. Do you plan to add a column for Access in the Dev Tunnels window?
3. What does it mean to set Organizational access for...
Hi Brian, thanks for the comment.
1. Yes, we have already made those changes and it should be in the next preview release of Visual Studio 2022. I just tweeted a screenshot for you to take a look at (I can’t add images here) https://twitter.com/sayedihashimi/status/1603436953529208832?s=20&t=vQ0RhRAWW7spY2gzkQpE9A.
2. Yes, that is there as well.
3. I think it’s the same as selecting Private.
Thanks!
Sayed