
…and Why My Grandma Invented the Concept!

Meet late Grandma Grete Schindler. I’d like to introduce you to my grandma, because this post will be about the essence and purpose of unit testing in Visual Basic, and Granny Grete basically invented the concept of unit testing. Yes, she really did, I kid you not – she was a very wise woman! When she saw someone in our family doing their work in a hectic rather than a thoughtful way, she always quoted her most favorite Silesian proverb: “Kinder, schmeißt nicht mit dem Hintern um, was ihr mühsam mit den Händen aufgebaut habt” – which roughly translates to “Kids, do not push over with your behinds, what you build so arduously with your hands!”. Well, and that’s actually quite simple to understand, is it not? – Just think of building a sandcastle: You can spend so much effort to build that, and it takes just one misstep to ruin the work of hours.
Doesn’t that also ring a bell when it comes to software development? Especially with large code base software projects, and especially when you and your team need to develop and maintain that over a really long period of time? When a customer calls you and claims to have found a bug, according to that bug’s severity, you will most likely act very, very quickly! Depending on the customer and how mission critical their application is, you may as well act a little frantically or even stressed out. And probably you let yourself be carried to do some imprudent code patches, you would never have done, had you taken some time and kept your cool! And, yes, you fixed the bug with those code edits comparatively quickly. But at the same time, with the code you patched, you changed another behavior in a totally unrelated situation as well, and you are completely unaware of that fact–either because you wrote the code a long time ago, and cannot remember “what else it did”, or you did not write the code yourself at all! You just broke the code by fixing a bug. You remember that Facebook meme: “Half a year ago, only God and I knew what this code did. Now, only God knows!” Doesn’t that sound familiar? Well, that is exactly what Granny Schindler always warned us about: we’re improving here and breaking there. Unit tests prevent that. They are your watchdogs, so that premature code edits like that are becoming more and more unlikely to happen, the higher the coverage of your code base by unit test (watchdog) code becomes.
On top–know this: Introducing unit tests to your projects can have another very positive effect: Unit tests can considerably speed up your turnaround times with that ongoing cycle “code edit, compile, deploy, debug, code edit, compile…”: Imagine, you have a huge WPF, UWP or ASP.NET solution with tens of libraries, a login procedure, a complex database in the backend, thus with a startup time of about 30 to 60 seconds. When you’re developing a certain algorithm, you need to restart that app countless times, and you’re wasting a lot of time with starting it up, logging on, navigating to the function you are currently implementing and only then testing the code you just wrote. In total, it can easily take you 2 minutes to find the right spot to debug. Do that as often as 30 times a day, and you already lost a full hour just for waiting for your app to come up. So, let’s take a look at this first aspect of unit testing, speeding up your development turnaround cycles.
Speed up your turnaround times with Unit Testing
Let’s develop a little UWP App, which converts decimal integer numbers to Roman numerals. An app, with which you type in ‘1234’, and out comes that value with the roman representation in the form of ‘MCCXXXVI’. Let’s do this, and let’s fire up Visual Studio 2017!
-
- Create a new Universal Windows App by picking New and Project from the File menu. In the dialog Visual Studio shows now, find the section Visual Basic and Universal Windows. From the templates, pick Blank App (Universal Windows).

-
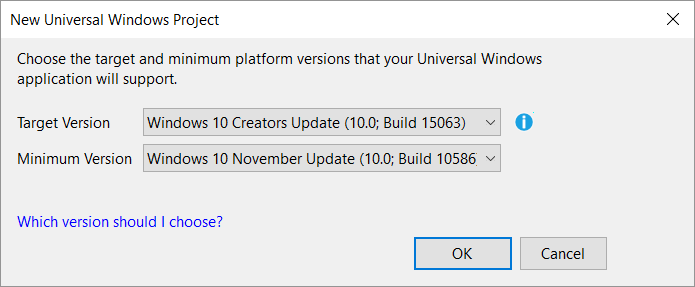
- Visual Studio asks you, what versions of Windows 10 you want to target. In this example, we go with the latest Windows 10 version – but since we do not need the latest Windows 10 functionality for this example, the version at this point does not really matter.
-
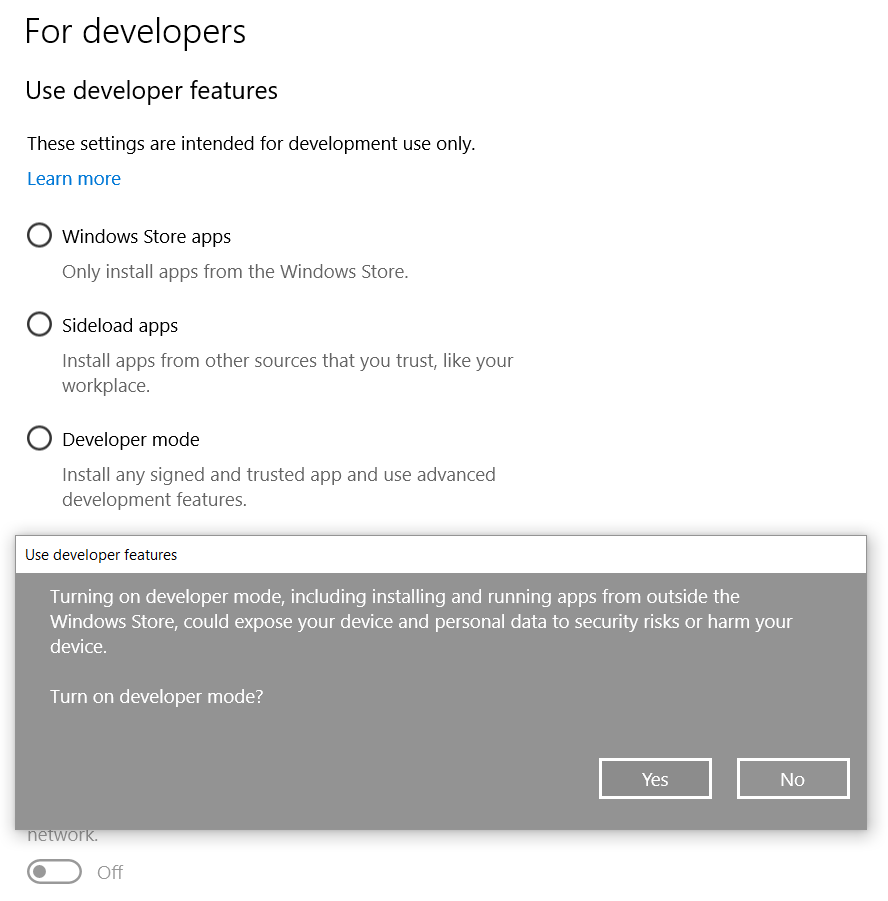
- If you never created an UWP app with Visual Studio on your developer machine, you need to bring Windows 10 into the so-called developer mode. Usually, Windows 10 protects you against viruses and other malicious code by only allowing apps from the Windows Store to be installed on your machine. You have to loosen these constraints slightly to deploy a Windows 10 App which you’re developing directly to your machine from within Visual Studio. So, in the dialog, which Windows shows now, allow your machine to be set to the developer mode.
- Let’s quickly design the UI. In UWP apps, as you probably know, we do this in XAML. I don’t want to address XAML here in more detail – that would be way beyond the scope. So, to get quick results for the demo, just copy the following Gist code, double-click MainPage.xaml in the solution explorer to open it, and simply replace the existing XAML Code by pasting it over.
As you will see in a couple of seconds: We did not program much yet, we just designed the UI. Still, we can start our app already, so let’s do this, and this is where you instantly spot a problem: A UWP app needs to be deployed every time you worked on its code and restart it, so the turnaround times even on fast machines are considerable. And this is “only” a UWP app which does not have any substantial code yet! When you’re developing a Xamarin Forms App, for example, and you need to deploy to an iOS or Android emulator, turnaround times can be even worse – the same applies for ASP.NET projects!
So, let’s do something about that:
NOTE: For this sample, we use Visual Studio 2017 Update 3 (actually, only the first Preview of Update 3 is the current version, while these lines are being written). Update 3 introduces .NET Standard and .NET Core for Visual Basic. You can also use Visual Studio 2017 with an earlier version, but for the following steps, you would alternatively need to create a Portable Class Library project in step 2, for which you should choose all available target platforms.
-
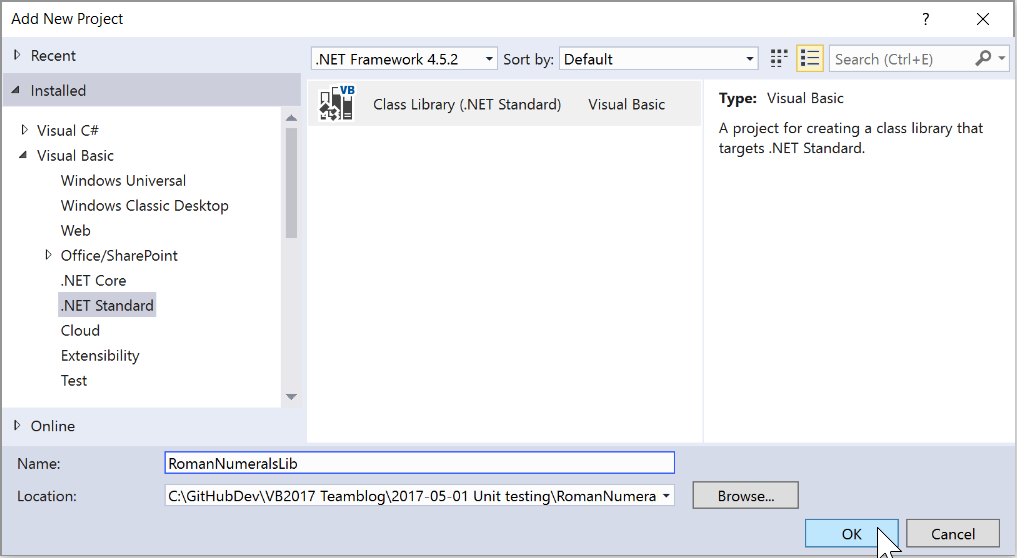
- In the solution explorer, add a new project to your solution by bringing up the context menu of the solution’s main node, and clicking Add new project. When Visual Studio shows the Add New Project Dialog, from the Visual Basic section pick Class Library (.NET Standard). Name the new Project RomanNumeralsLib. Since there are several types of class libraries project templates, make sure, you got the right one (.NET Standard). Click OK, to add the project.
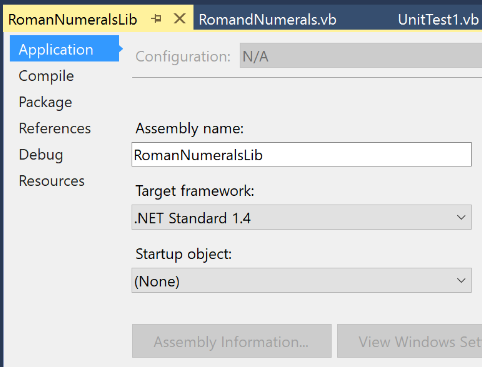
- As the name implies, .NET Standard is not really a new platform. Rather, a .NET Standard library project defines a standard which makes sure that the code uses only a certain set of APIs, so a project type, which agrees to it, guarantees to have available all the APIs according to that standard. In our sample, we’re using an UWP project. At the time, UWP only supports .NET Standard up to version 1.6; if you create a new .NET Standard library project, however, its version is set to 2.0 by default. It’s good to know though, that a .NET Standard library makes real sense when it can be used on multiple platforms. Even this does not apply to our example, but if you wanted our library to be used on Android or iOS in Xamarin projects as well, you would need to find the highest .NET Standard version, which is supported by all the target platforms –for Android, iOS and UWP Apps that would currently be .NET Standard 1.4. Let’s pick this version by setting the target framework with the project’s properties dialog, which you can show via the project’s context menu in the solution explorer, and clicking Properties.
-
- And while we’re at it, let’s also add yet another project: the actual unit test project. You integrate a unit test in your solution by adding a related Unit Test Project to it. If you want to unit-test the code of a library, you need a Unit Test Project, which can consume that library. If you want to unit-test the code of a UWP app, you need an additional Unit Test Project (Universal Windows) in your solution. But pick wisely! A UWP unit test takes almost as much time to start as a simple UWP app does. In most cases, the actual code to test will not at all be in the UWP app, but in a library–as in our case. This is the reason, that even though we have a UWP app, we add a Unit Test Project (.NET Framework) to our solution, and not one of type Unit Test Project (Universal Windows)!

-
- Before we start unit testing, let’s have something to test! First, let’s make the library accessible in our UWP app and also from the unit test project by adding the necessary references. For this to end, in the solution explorer find the branch References of the project RomanNumeralsUnitTest, from the context menu pick Add Reference, and check the project RomanNumeralsLib in the dialog, which Visual Studio shows now.

-
- IMPORTANT: Don’t forget to add the same reference in the UWP project RomanNumerals (Universal Windows)!
- Now, let’s do some coding. In the Project RomanNumeralsLib, replace the code of Class1.vb by the following code, and rename the file to RomanNumerals.vb
.
-
- This will be our primary subject to unit testing. Let’s do this now: Bring up the file UnitTest1.vb from the project RomanNumeralUnitTest.
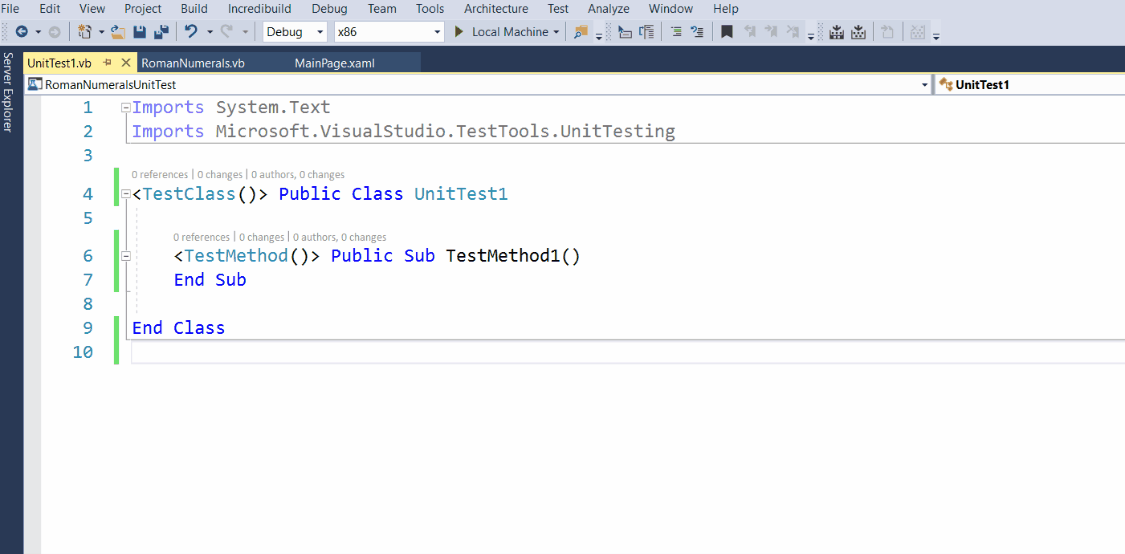
- What you see here is the basic stub for a unit test class and a unit test method. Unit test classes are annotated by the TestClass attribute, while a unit test method is tagged with the TestMethod attribute. If you do not annotate test classes and test methods with those attributes, they cannot be discovered. Let’s replace the content of that file with our first test method. Just copy the code from the following Gist snippet to your code file:
- The key code line at this point is the method Assert: When the test method Test1to20 runs, Assert provides a series of methods to ensure a certain behavior of the tested code. In our example, we’re using Assert’s AreEqual method, which tests if the expected first parameter equals the value of the second parameter. If it does, the check passes, otherwise, it fails and with it, the whole test fails. Since the second parameter is the return value of the method we’re actually testing, this test asserts for the future, that this method always works as expected. And this is basically, how unit tests methods are being written!
- Now, to actually run this unit test, we do not need to start our app. We control the execution of the various test classes and test methods with the Test Explorer tool window, which you can show by clicking Windows/Test Explorer from the Test menu. When you now rebuild the Solution, you should see your first Test in the Test Explorer. Take a look at the following animated GIF, which shows you in details, how it’s done:
- Starting the test method now is simple. Just open the context menu for the Test1to20 test, and click either Run Selected Test or Debug Selected Test. With Run Selected Tests, the method (or, if you select more than one test method once you got them, the methods) gets executed and tested. Alternatively, you can also Debug Selected Tests, which allows you that breakpoints in the test methods and in the code that is being tested are considered. You can debug through the code as you would do it normally during a debug session.
And here now is the first important takeaway: Compare the starting time of the test with the app’s starting time. The test is firing up in not even a second while starting the app itself takes about 10-20 seconds – and we did not include any meaningful code in the UWP app, yet! Developing complex algorithms, which do not have dependencies to a UI or fixed data source like a database, are much easier, quicker and more durable to develop when using unit tests.
Secure the code you wrote with unit tests
Now let’s extend the unit test projects by a couple of additional test methods, which you can simply copy from the following Gist snippet into the UnitTest1.vb file:
When you recompile your solution and click on Run all in the test explorer, you see this:

The test explorer tells you, that the unit test method TestTensAndHunderds has failed. And, according to the exception message text, the actual and the expected results were different. You can open the context menu of TestTensAndHunderds now, and Debug the selected test. In that case, the debugger stops at the code line whose assert method caused the exception, which you see here:
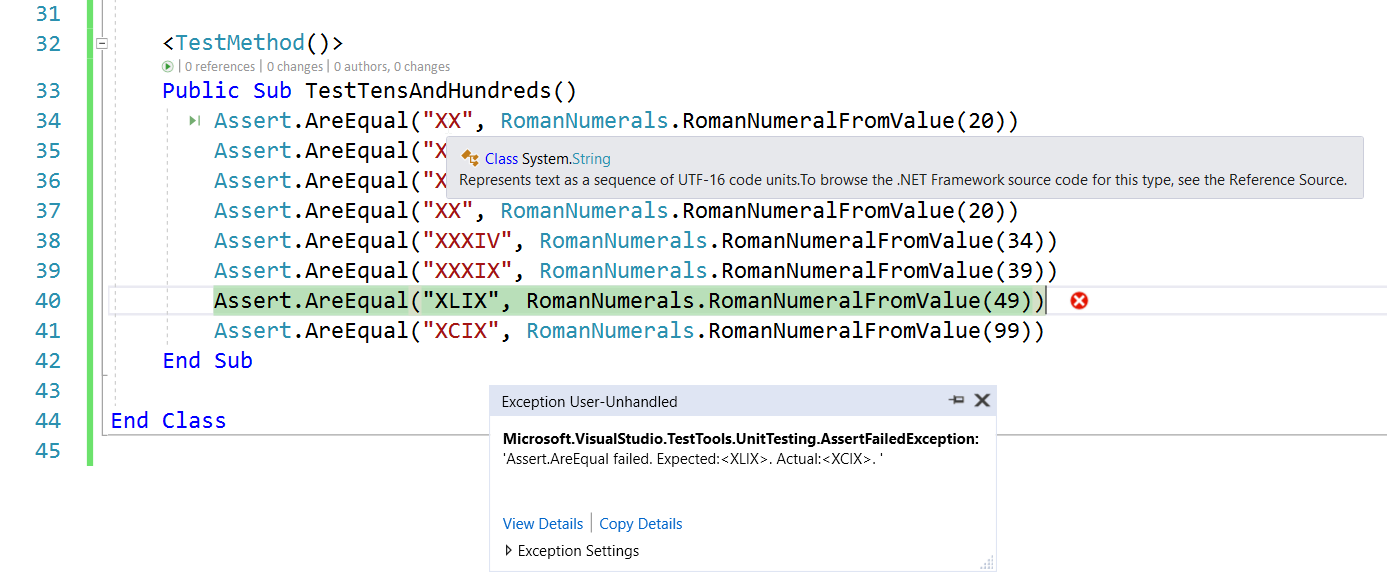
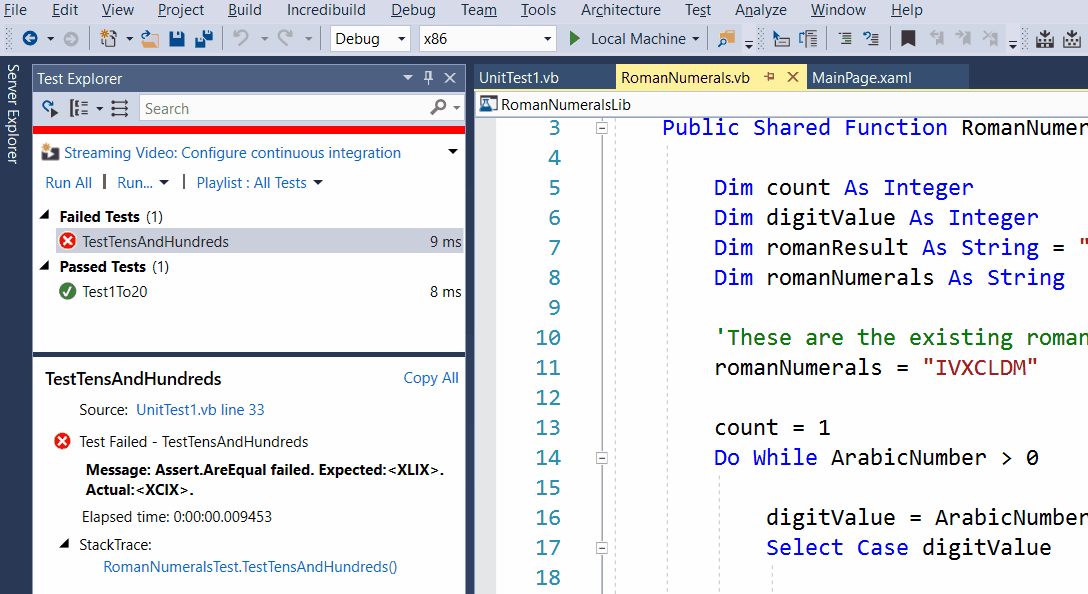
When we look closer at the unit test code, we must admit that it looks absolutely OK: “XLIX” is the roman numeral for 49. Which means: There must be a bug in our algorithm code, and – low and behold – if we look closer at the algorithm, we quickly find out, that there is a typo in the code line which defines all the existing letters for the roman numerals. So, let’s see what happens when we correct that bug!
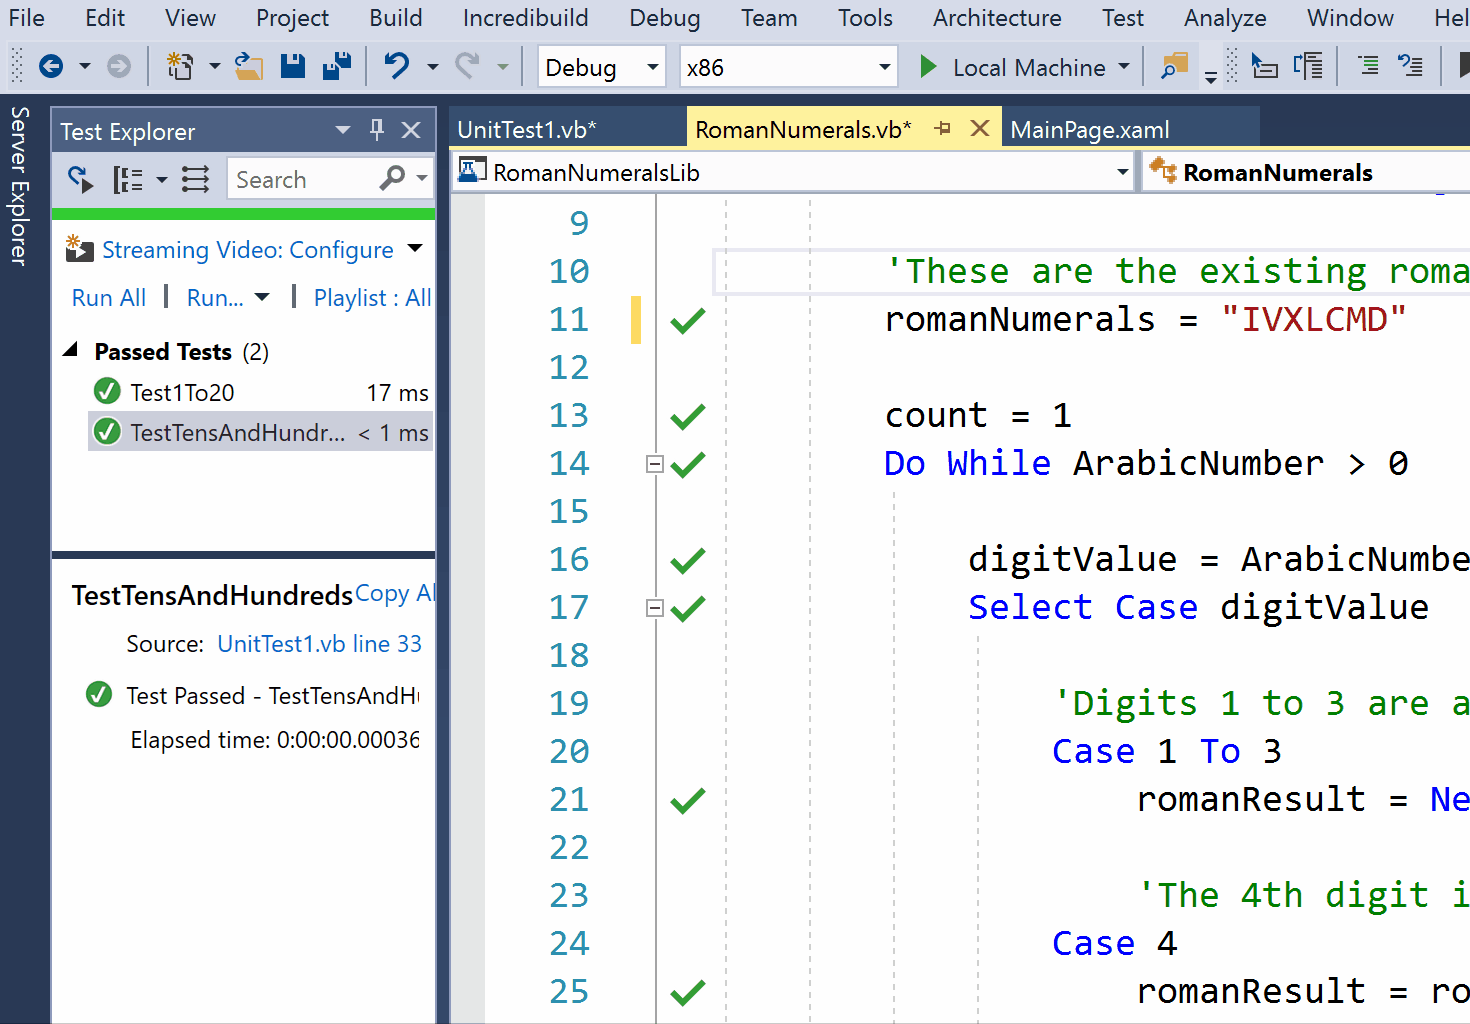
Bug fixed, life is good! As you can see: Developing with the aid of unit tests in most scenarios can speed up the process enormously. But the most important purpose of unit tests is neither the increased turnaround times nor is it that your code is bug-free for the tested parts from the beginning. The most important aspect is, that you are not introducing any breaking changes to the behavior of your solution, as you and your team are going forward in modifying and extending the already existing, tested and deployed code.
“I changed the code – does the rest still work?”
Consider for example, that you found the bug, and while correcting it you introduced a new one, since your fingers kind of “slipped” over the keyboard. Or somebody called you at that exact moment you were editing the code line which contained the bug! You then changed the definition of the roman numerals from “IVXCLMD” to “IVXLLMD”: You accidentally corrected the first occurrence of the “L”, but you forgot to also replace the following existing “L” by the “C”. Now, without unit tests, what would happen? You would test the app by entering 49 and check if the result was “XLIX”, would you not? Because that was the value, that failed before. And now it works! So, you tested your change by starting the app, verified it to be OK, checked in your changes, and deployed the new version to your customers. But should you not rather have really tested every other combination that you tried out while you were developing the algorithm? Because only then you would have caught the bug, you just accidentally introduced! In a stressful situation, you simply would have not. It is just too much of an effort to test the same cases, you tested manually while developing the algorithm, over and over and over again. And this is the biggest in-favor-argument of unit tests: Writing the test code for it, while you’re developing such an algorithm, or – if you want to start introducing unit tests for solutions, which weren’t previously covered by them – writing unit test for every bug you eliminated, kind of captures, saves, and makes repeatable via code what you usually would have done manually to test your code. And therefore, writing unit tests does not really mean additional effort. It is just a different kind of effort. On top, there is no need to have a 100% coverage of your code through unit tests. If you aim for 70-80%, and you finally come up with 50% that’s a respectable outcome! But even if you only make 0.1%, it is still more than worth it – the quality of your code is much better beginning with the first unit test you introduced to the solution.
Live Unit Testing with Visual Studio 2017 Enterprise
The Enterprise Edition of Visual Studio 2017 provides an even better unit testing experience. It introduces a feature called Live Unit Testing, and if you look at the following animated GIF, you will understand instantly, what’s it all about, especially now, after you just read the previous paragraphs.
[UPDATED for Visual Studio 2017 Update 3 Preview 3] With the introduction of Visual Studio 2017 Update 3 Preview 3, Visual Basic contains the same Unit Test Templates as C# does. An earlier version of this post stated, that there are some additional steps necessary, to get Live Unit Testing working in VB. This is no longer the case. Rather, the one thing left to do is to switch on Live Unit Testing! For that, from the Test menu, pick Live Unit Testing, and click Start.
You should now be able to experience Live Unit Testing, as you can see it in the animated GIF above!
IMPORTANT: Live Unit Testing uses considerable processor workload and with that battery power, and you probably do not want to use it, when you’re developing with a notebook running on battery.
Also, Live Unit Testing allows you to perform some basic configurations. To that end, from the Tools menu, select Options, and find the section Live Unit Testing. Here, you can configure your Live Unit Testing experience by setting the appropriate parameters.
That’s it for today! And as always: try all that amazing stuff for yourself, explore, and test, test, test! So long, and don’t forget to follow me @loeffelmann on Twitter!
0 comments
Be the first to start the discussion.