
Hello Android developers,
Previously we looked at how to pre-process image inputs for an ONNX model using Kotlin. It’s useful to understand this process because the principles apply to any model that you wish to use. On the other hand, having to write boilerplate code for input processing can be tedious – it also means there’s more code that could be buggy and require testing.
The ONNXRuntime-Extensions project simplifies this by including custom operators for common pre- and post-processing of model inputs. This means you can build, test, and deploy models that include the necessary input pre-processing and output post-processing, making it even easier to incorporate into application projects like Android.
The super resolution sample demonstrates how to add pre- and post-processing to a model and run it with just a few lines of code.
Add pre-processing to the model
Instead of having to write the input image resizing and other manipulations in Kotlin, the pre- and post-processing steps can be added to the model using operators available in newer versions of the ONNX runtime (eg. ORT 1.14/opset 18) or in the onnxruntime_extensions library.
The super-resolution sample is a great demonstration of this feature as both the input and output are images, so including the processing steps in the model greatly reduces platform-specific code.
The steps to add the pre- and post-processing to the superresolution model are in the Prepare the model section of the sample documentation. The python script that creates the updated model can be viewed at superresolution_e2e.py.
The superresolution_e2e script is explained step-by-step on pytorch.org
When you run the script as instructed, it produces two models in ONNX format – the basic pytorch_superresolution.onnx model and another version that includes additional processing pytorch_superresolution_with_pre_and_post_proceessing.onnx. The second model, including the processing instructions, can be called in an Android app with fewer lines of code than the previous sample we discussed.
Comparing the models
Before we dive into the Android sample app, the difference between the two models can be observed using the online tool Netron.app. Netron helps to visualize various neural network, deep learning and machine learning models.
The first model – requiring native pre-processing and post-processing of the input and output – shows the following:

Figure 1: superresolution model converted to ONNX and viewed in Netron
This is a relatively simple model, and it’s not important to understand the graph for now, just to compare it to the model that includes the pre- and post-processing operations shown below:

Figure 2: superresolution model with input and output processing, converted to ONNX and viewed in Netron
The additional operations for format and resize image bytes are chained before and after the original model. Once again diving into the details of the graph isn’t important, it’s included here to illustrate that additional operations have been packaged into the model to make it easier to consume with less native code on any supported platform.
Integrating with Android
The Android sample that can host this model is available on GitHub. The initialization step in MainActivity.kt is similar to the image classifier sample but with the addition of the sessionOptions object where the ONNX runtime extensions are added to the session. Without the extensions, the model with extra processing might be missing operations required to function.
This code snippet highlights the key lines for creating the ONNX runtime environment class:
  var ortEnv: OrtEnvironment = OrtEnvironment.getEnvironment()
  // fun onCreate
  val sessionOptions: OrtSession.SessionOptions = OrtSession.SessionOptions()
  sessionOptions.registerCustomOpLibrary(OrtxPackage.getLibraryPath())
  ortSession = ortEnv.createSession(readModel(), sessionOptions) // the model is in raw resources
  // fun performSuperResolution
  var superResPerformer = SuperResPerformer()
  var result = superResPerformer.upscale(readInputImage(), ortEnv, ortSession)
  // result.outputBitmap contains the output image!
The superResPerformer.upscale function is shown below.
The code to run the model in SuperResPerformer.kt has a lot less code than the image classifier sample, because there is no native processing required (like the ImageUtil.kt helper class, which is no longer needed). Image bytes can be used to create a tensor and image bytes are emitted as the result. ortSession.run is the key function takes the inputTensor and returns the resulting upscaled image:
fun upscale(inputStream: InputStream, ortEnv: OrtEnvironment, ortSession: OrtSession): Result {
    var result = Result()
    // Step 1: convert image into byte array (raw image bytes)
    val rawImageBytes = inputStream.readBytes()
    // Step 2: get the shape of the byte array and make ort tensor
    val shape = longArrayOf(rawImageBytes.size.toLong())
    val inputTensor = OnnxTensor.createTensor(
        ortEnv,
        ByteBuffer.wrap(rawImageBytes),
        shape,
        OnnxJavaType.UINT8
    )
    inputTensor.use {
        // Step 3: call ort inferenceSession run
        val output = ortSession.run(Collections.singletonMap("image", inputTensor))
        // Step 4: output analysis
        output.use {
            val rawOutput = (output?.get(0)?.value) as ByteArray
            val outputImageBitmap =
                byteArrayToBitmap(rawOutput)
            // Step 5: set output result
            result.outputBitmap = outputImageBitmap
        }
    }
    return result
}
A screenshot from the Android super resolution demo is shown below:
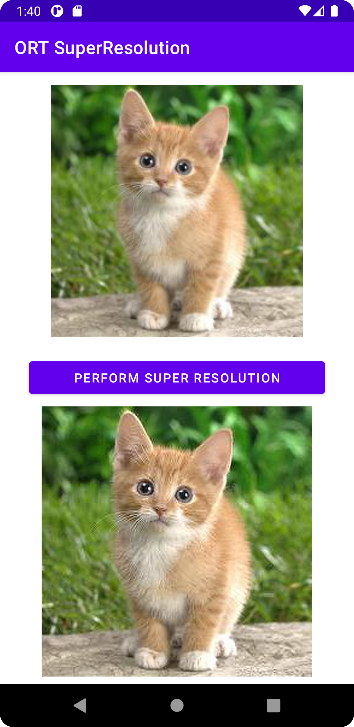
Figure 3: Android demo “superresolution” that improves resolution of an image
This particular upscaling model is relatively simple, but the concepts behind packaging models to make them easier to consume can be applied to other models with pre- and post-processing requirements.
Resources and feedback
More information about the ONNX Runtime is available at onnxruntime.ai and also on YouTube. You can read more about Netron.app as well as find the source and downloads on GitHub.
If you have any questions about applying machine learning, or would like to tell us about your apps, use the feedback forum or message us on Twitter @surfaceduodev.
There won’t be a livestream this week, but check out the archives on YouTube. We’ll see you online again soon!
Wow. Someone inside Microsoft knows about the word “built-in”! You are gold, Mr. Dunn.
You might be wondering whether the above sentence is serious or ironic sarcasm. It is serious! Your colleagues at Microsoft used a different, incorrect word in their communications with me, thus causing me much hardship.