

Hello prompt engineers,
The last three blogs have been about exploring the OpenAI API completion, edit, and image endpoints from Android, using HttpClient and crafting JSON requests and responses. This post is about implementing the chat API in an Android app, using the open-source client library openai-kotlin on GitHub. The library makes it easier to interact with the chat endpoint because the JSON schema for the request and response is more complicated than the other endpoints which have just one or two parameters and a single response field.
“Chatting” is a common way for people to experience working with large language models (LLMs), such as interacting with ChatGPT or the New Bing. In this post we’ll piece together an Android app to chat with OpenAI.

Chat API
The chat API provides an interaction model where OpenAI can respond with the next message in a conversation using the previous messages as context. You can also provide an initial prompt (not displayed to the user) to set context for how the server responds in the chat. A basic example you can test in cURL could look like this – it contains just a single chat message that could be entered by the user:
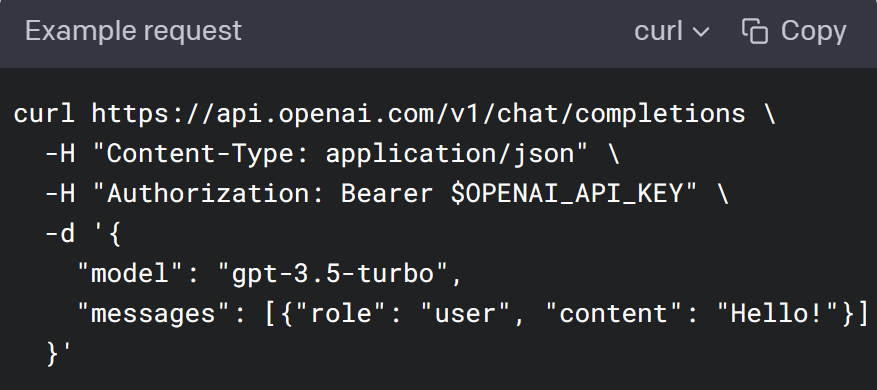
Figure 1: Example initial request in a chat conversation
The request in figure 1 would return a response (such as “Hello there, how may I assist you today?”). In order to continue the conversation future requests should include both the user and server messages so that subsequent responses have all the context in the thread. A more complete example is shown below, including an initial “system” message and the first server response:
  curl https://api.openai.com/v1/chat/completions \
    -H "Content-Type: application/json" \
    -H "Authorization: Bearer $OPENAI_API_KEY" \
    -d '{
      "model": "gpt-3.5-turbo",
      "messages": [
          {"role": "system", "content": "You are a helpful assistant."},
          {"role": "user", "content": "Hello!"},
          {"role": "assistant", "content": " Hello there, how may I assist you today?"},
          {"role": "user", "content": "Suggest a travel itinerary for San Francisco"},
      ]}'
Figure 2: cURL example of a chat request after a previous successful response
Because we need to keep track of the conversation and update the JSON sent with each request, we’d have to write more code than our previous examples to construct the request and parse the response each time. Using one of the suggested client libraries helps simplify writing code to access the OpenAI endpoints by providing data structures to help construct requests and parse responses.
Use the client library
The Kotlin library can be added to your Android project’s build.gradle file, after which you can initialize an OpenAI object that manages the request and response interactions with the server.
The client library neatly represents the chat endpoint as a collection of ChatMessage objects which are serialized and deserialized for each request. ChatMessage objects consist of two properties:
-
role– Can beSystemfor the initial context,Userfor data entered in the app, orAssistantfor previous responses from the server. -
content– the string entered by the user, or previous response from the server.
The following code shows how to configure a “chat session” – first by creating some fields to hold the security token and the client library instance, and then to initialize the conversation collection of ChatMessage objects with the System prompt:
  private val openAIToken: String = "{OPENAI_TOKEN}"
  private var conversation: MutableList<ChatMessage>
  private var openAI: OpenAI = OpenAI(openAIToken)

  init {
      conversation = mutableListOf(
          ChatMessage(
              role = ChatRole.System,
              content = """You are a personal assistant called JetchatGPT.
                          Your answers will be short and concise, since they will be required to fit on
                          a mobile device display.""".trimMargin()
          )
      )
  }
Once these have been set up, the following code is run for each user-entered message. This code creates an object with the user’s input, adds it to the conversation history, sends it to the server, parses the response and adds the response to the conversation history as well:
  // add the user's message to the chat history
  conversation.add(
      ChatMessage(
          role = ChatRole.User,
          content = message  // user input
      )
  )

  // build the OpenAI network request
  val chatCompletionRequest = ChatCompletionRequest(
      model = ModelId("gpt-3.5-turbo"),
      messages = conversation
  )
  val completion: ChatCompletion = openAI.chatCompletion(chatCompletionRequest)

  // extract the response to show in the app
  val chatResponse = completion.choices[0].message?.content ?: ""

  // add the response to the conversation history
  conversation.add(
      ChatMessage(
          role = ChatRole.Assistant,
          content = chatResponse
      )
  )
Repeating this process for each user message gradually builds up the conversation, providing more context for each response. This cannot go on infinitely – there are token limits for how big a conversation could get. Refer to the chat API documentation for more details and FAQ on the endpoint.
Chat app
To show off the API we’re going to use the existing Jetchat Compose sample from Google. This demo app already has a chat-bubble design and user input framework – we’ll add a wrapper class called OpenAIWrapper to provide an easy-to-consume way to make chat requests, and reference that new class from a fork of the Jetchat code.
Don’t forget to add <uses-permission android:name="android.permission.INTERNET" /> in the AndroidManifest.xml – by default the sample does not have any permissions and we need internet access to call the OpenAI APIs.
The OpenAIWrapper.kt file contains an implementation based on the code above, with a chat() method to integrate into the existing demo.
In the file conversation/Conversation.kt there is an onMessageSent handler for user input – this gets called each time the app user types some text and triggers Send. To interact with OpenAI we’ll add the chat() method here to send the request to the server and include the response into the chat history.
  // add user message to chat history
  addMessage("me", content)

  // fetch openai response and add to chat history
  viewModelScope.launch {
     addMessage("bot", openAIWrapper.chat(content))
  }
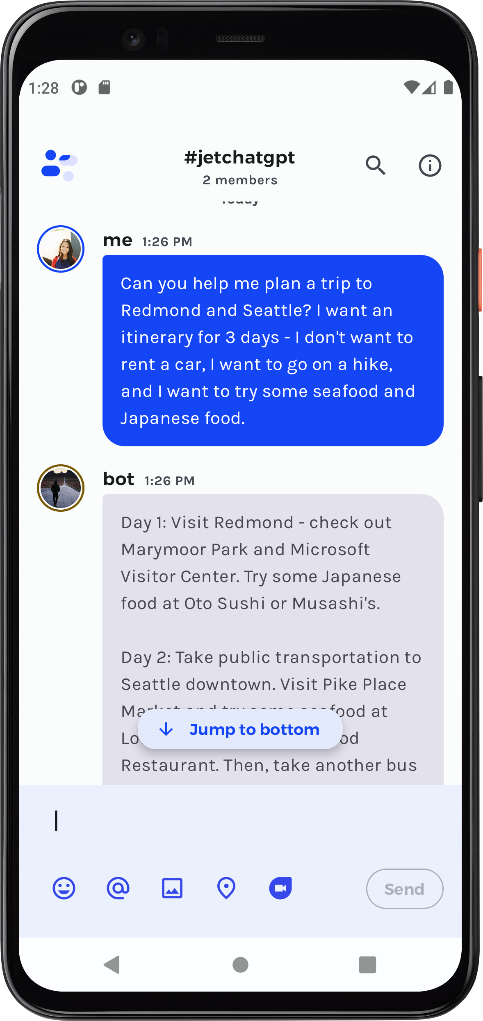
Figure 3: Example content with ChatGPT response
Generate an image
Last week’s blog discussed image generating prompts, and these are also available from the client library wrapper. The following Kotlin snippet shows how the request is made, and the first result URL is extracted:
  val imageRequest = ImageCreation(prompt)

  // OpenAI network request
  val images: List<ImageURL> = openAI.imageURL(imageRequest)

  return if (images.isEmpty()) "" else images[0].url
The API returns a URL to the generated image. To display the image, you will need to add another package to your build.gradle file implementation("io.coil-kt:coil-compose:$coilVersion"), which can be used to update the existing ChatItemBubble implementation to support images specified by URLs. First, you’ll have to update the Message data class to add a new imageUrl field, and then in ChatItemBubble, you can check if the image or imageUrl field is non-null to display an image message:
  @Composable
  fun ChatItemBubble(
      message: Message,
      isUserMe: Boolean,
      authorClicked: (String) -> Unit
  ) {

      ...
      message.image?.let {
      ImageMessage(backgroundBubbleColor) { modifier, contentScale, contentDescription ->
         Image(
              modifier = modifier,
              painter = painterResource(id = it),
              contentScale = contentScale,
              contentDescription = contentDescription
          )
      }
  }
  message.imageUrl?.let {
    ImageMessage(backgroundBubbleColor) { modifier, contentScale, contentDescription ->
        Image(
              modifier = modifier,
              painter = rememberAsyncImagePainter(it),
              contentScale = contentScale,
              contentDescription = contentDescription
          )
      }
  }

  }
  @Composable
  fun ImageMessage(backgroundBubbleColor: Color, imageContent: @Composable (Modifier, ContentScale, String) -> Unit) {
      Spacer(modifier = Modifier.height(4.dp))
      Surface(
          color = backgroundBubbleColor,
          shape = ChatBubbleShape
      ) {
           imageContent(Modifier.size(300.dp), ContentScale.Fit, stringResource(id = R.string.attached_image))
      }
  }
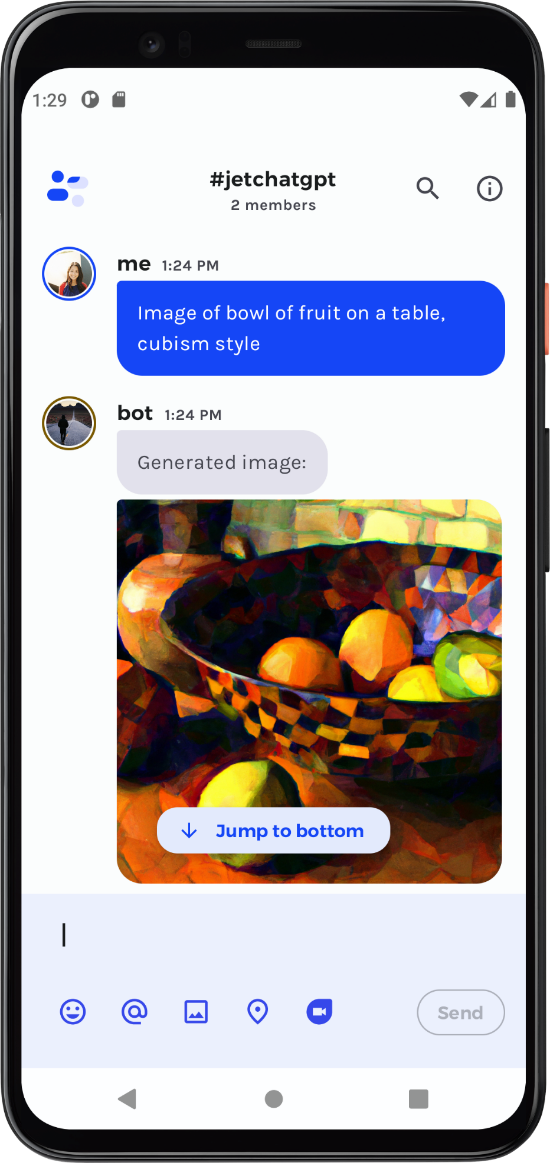
Figure 4: Example image prompt with image result
Resources and feedback
Here’s a summary of the links shared in this post:
If you have any questions about ChatGPT or how to apply AI in your apps, use the feedback forum or message us on Twitter @surfaceduodev.
No livestream this week, but check out the archives on YouTube.
0 comments