
Hello prompt engineers,
We’re back with another blog post on using OpenAI in Android applications!
So far in this blog series, we’ve covered:
Last week, we talked about the different API endpoint options and showed you some examples of how to use the Edits API. Today, we’ll be focusing more on the Images API and how you can set up some interesting interactions in your Android apps, such as a camera filter with editing capabilities.
Images API overview
The Images API uses DALL-E models to interact with or generate images based on user prompts. You can use the API in three ways:
- Generations: provide a text prompt to generate a new image
- Edits: provide a text prompt and an existing image to generate an edited image
- Variations: provide an existing image to generate random variations of the image
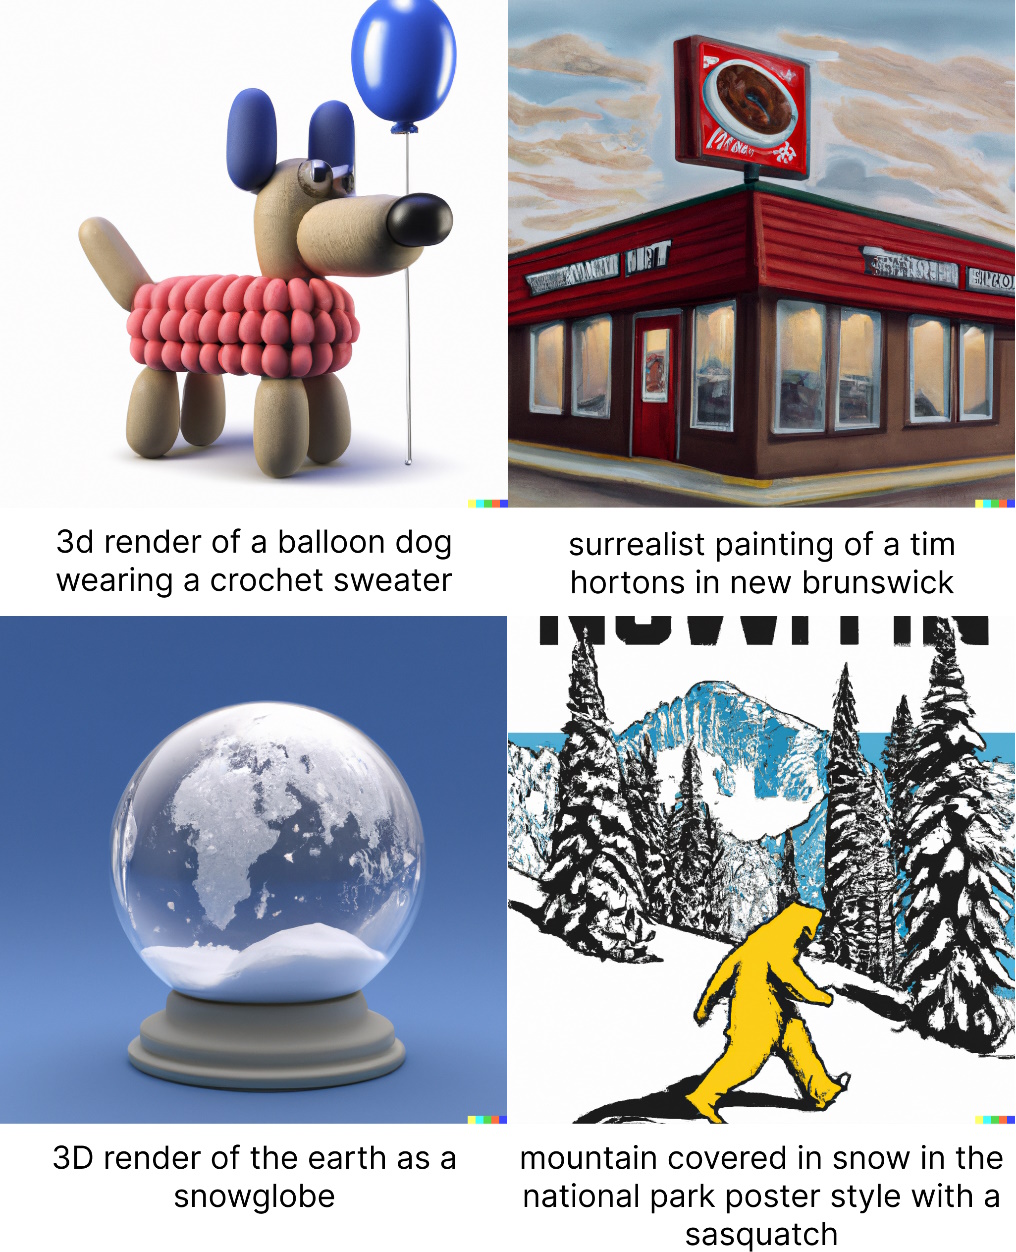
If you’re curious about the output from the Images API, you can check out the DALL-E preview app and provide some of your own prompts. You can describe image style and content with lots of details, or provide more abstract concepts to see what the model will come up with! The preview app shows examples of prompts and generated images to give you an idea of where to start – here are some image prompts we tested out ourselves:
In this blog post, we’ll be focusing specifically on the image edits endpoint. As mentioned above, this endpoint accepts two inputs: a text prompt and an image. The text prompt describes what the final edited image should look like, while the image provided should contain a masked transparent area to show which parts of the image can be edited. As with all the image APIs, the image input must be square and less than 4MB. To learn more, check out the API reference and use the editor portion of preview app.
Integrating image editing into an Android app
Now that we understand what the image editing endpoint requires for inputs, let’s try to build an Android app that targets this endpoint. Our end goal will be to create a camera filter that lets users capture and edit their photos with OpenAI.
We’ll need to write code to:
- Capture images
- Apply a transparent mask to an image
- Build an OpenAI request to the image editing endpoint
Capture images
There are multiple ways you can do this in Android, but today we’ll be using CameraX. CameraX is a Jetpack library designed to make camera app development easier, with lots of documentation, samples, and codelabs available for use.
To capture images with CameraX, you must:
-
Request the necessary permissions –
android.hardware.camera.any,android.permission.CAMERA,android.permission.RECORD_AUDIOandandroid.permission.WRITE_EXTERNAL_STORAGE -
Add a
PreviewViewso users can see a preview of their photo – this requires setting up aProcessCameraProvider, aCameraSelector, and aPreviewobject with aSurfaceProvider -
Add a capture button and call
takePhotowith the appropriate image file metadata
For more detailed implementation information, check out the documentation on image capture with CameraX.
Create image mask
The next step is to let users apply a transparent mask to part of the captured image, which will allow OpenAI to fill in the masked area based on the text prompt.
We can do this by creating a simple custom view that overrides the onDraw and onTouchEvent methods to let the user color in the desired mask area. To learn more about setting up custom views for drawing input, check out the documentation on custom drawing with Canvas and tracking touch input.
Once the user is satisfied with the mask they’ve drawn, then all that’s left to do is combine the original image with the mask drawing. We can accomplish this with the help of the PorterDuff.Mode.SRC_OUT, which will delete pixels from the original image wherever the mask overlaps it.
// customView – reference to custom view that tracks user input
// imageBitmap – reference to (cropped) original image bitmap
// extract masked area from custom view
val maskBitmap = Bitmap.createBitmap(imageBitmap.width, imageBitmap.height, Bitmap.Config.ARGB_8888)
val canvas = Canvas(maskBitmap)
customView?.draw(canvas)

// combine mask with original image
val paint = Paint()
paint.xfermode = PorterDuffXfermode(PorterDuff.Mode.SRC_OUT)

canvas.drawBitmap(imageBitmap, 0f, 0f, paint)
Build OpenAI request
Finally, once we’ve processed the masked image, and collected additional user input for the text prompt, we just need to build an OpenAI request to the image editing endpoint. If you need help getting started with OpenAI API keys and other setup, please refer to our previous blog post.
As described in the API reference, the image editing endpoint accepts 2-7 fields in the request body:
- image (string) – required, must be square PNG < 4MB
- prompt (string) – required, max length 1000 characters
- mask (string) – must be square PNG < 4MB
- n (integer) – must be between 1 (default) and 10
-
size (string) – must be
256x256,512x512, or1024x1024(default) -
response_format (string) – must be
url(default) orb64_json - user (string)
All of the default values work well for our purposes, so we’ll only need to supply the image and prompt fields when building our request. Since an image file is included in the request, we will need to build a multipart request.
This code snippet shows how you can use the OkHttp library to build a multipart request with a masked image bitmap and prompt string:
val maskedImage = ByteArrayOutputStream().use {
    maskBitmap.compress(Bitmap.CompressFormat.PNG, 100, it)
    it.toByteArray().toRequestBody("image/png".toMediaType())
}

val requestBody = MultipartBody.Builder()
    .setType(MultipartBody.FORM)
    .addFormDataPart("prompt", prompt)
    .addFormDataPart("image", "image.png", maskedImage)
    .build()

val request = Request.Builder()
    .url("https://api.openai.com/v1/images/edits")
    .addHeader("authorization", "Bearer ${OPENAI_KEY}")
    .post(requestBody)
    .build()

val client = OkHttpClient.Builder().build()
val response = client.newCall(request).execute()
The image edits endpoint response will send back n images in the specified response_format. It’s not uncommon for the requests to take 5-10 seconds, so don’t worry if it takes a bit. Since we used the default values for the request, we’ll only be getting back one image in url format. To parse this from the response body, we can add just a few simple lines of code:
val jsonContent = response.body?.string() ?: ""
val data = Json.parseToJsonElement(jsonContent).jsonObject["data"]?.jsonArray
val imageUrl = data?.map { it.jsonObject["url"] }?.get(0).toString()
And just like that, you have your edited image! You can display this in your app with coil’s AsyncImage if you’re using Jetpack Compose, or open an InputStream to download the image bitmap from the url – depending on which method you choose, you may also need to add the android.permission.INTERNET permission to your Android manifest.
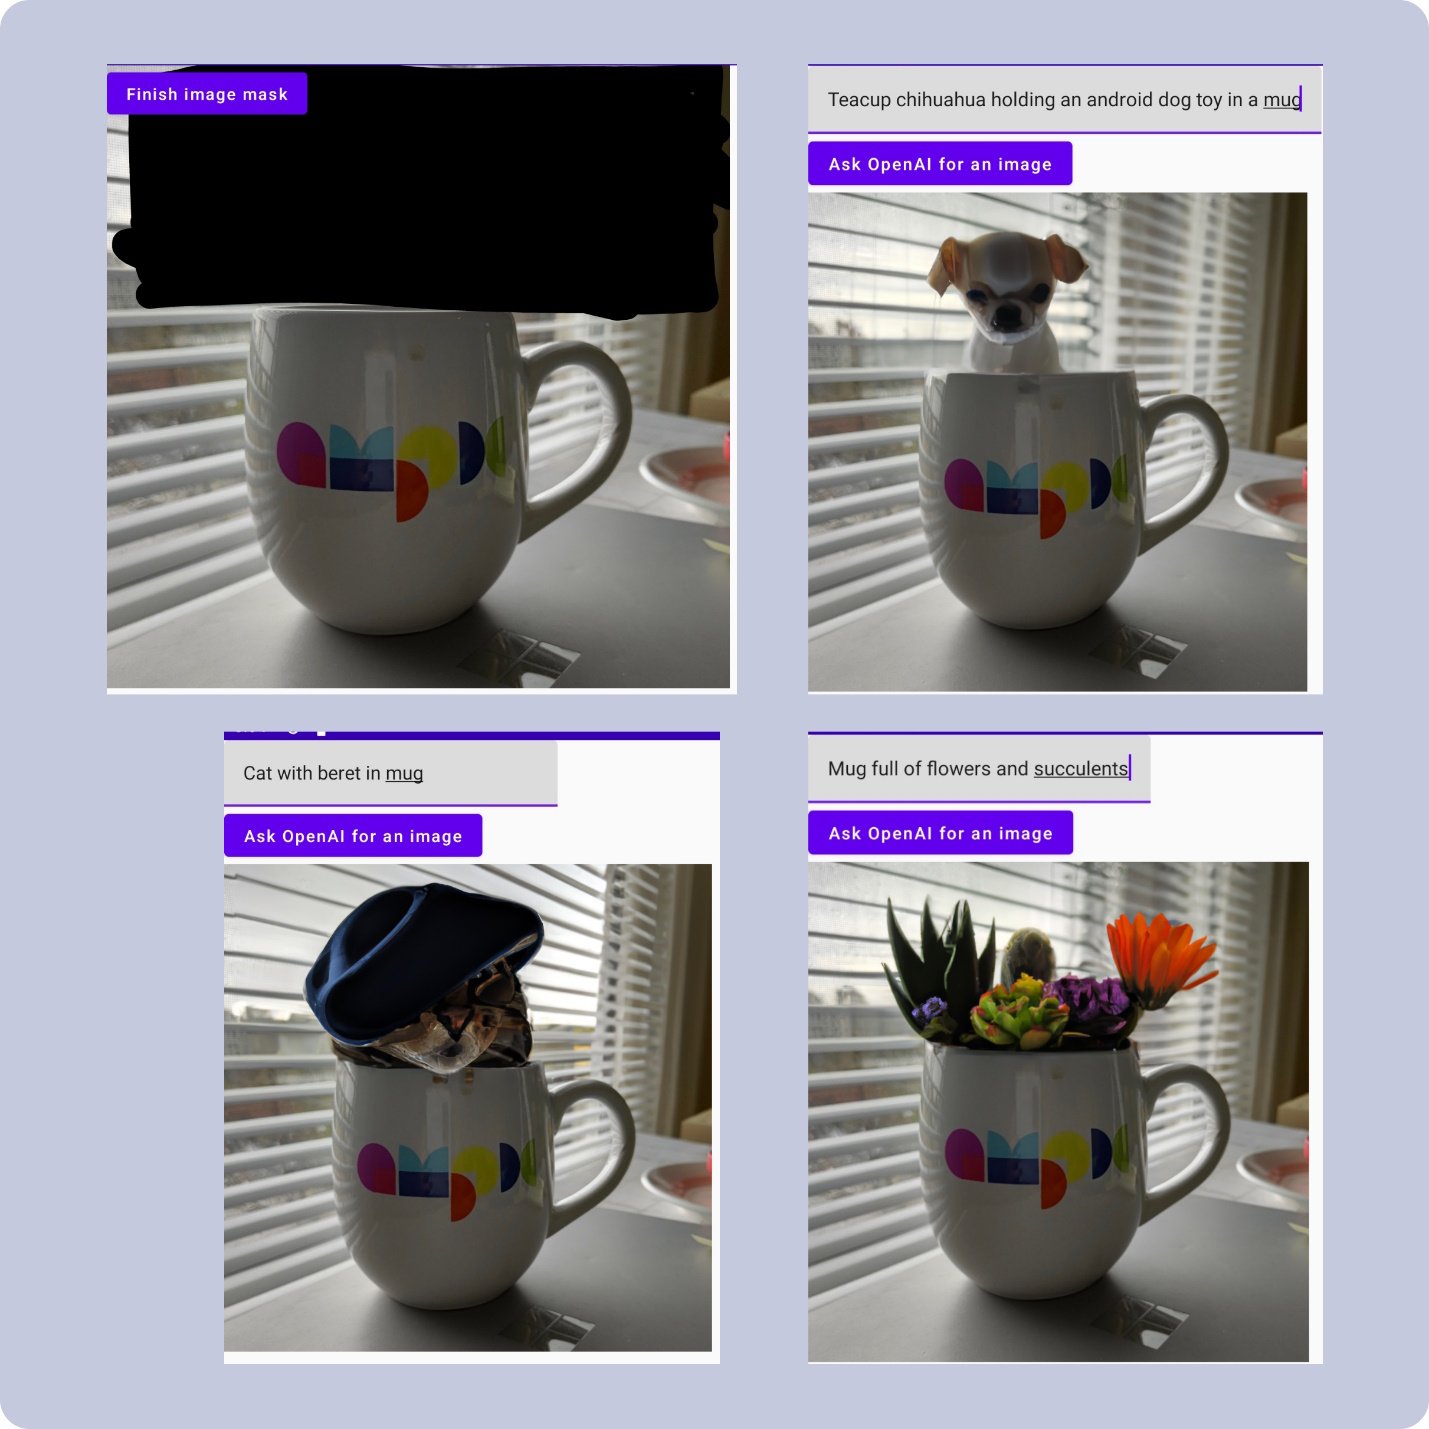
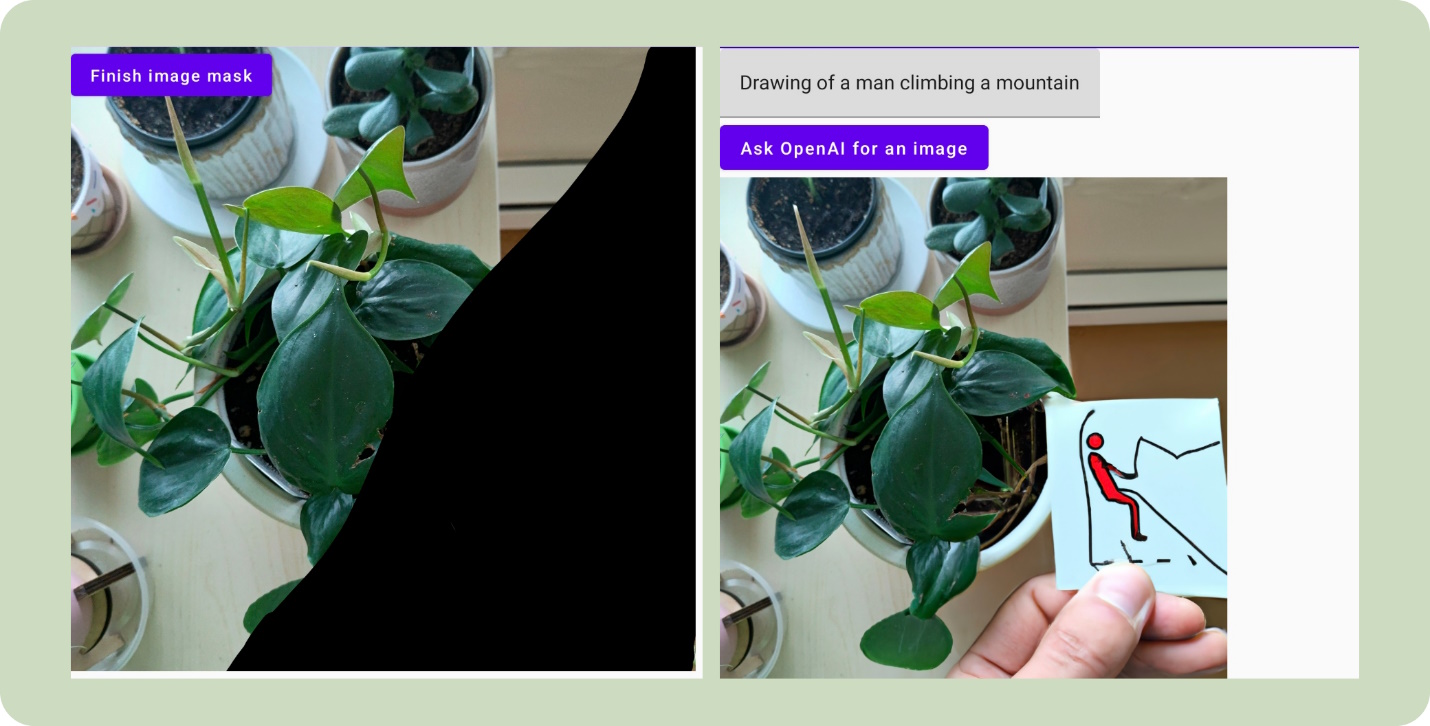
Here are some examples of the image editing camera filter in action:
Additional thoughts on crafting prompts
As we have discussed in other blogs related to ChatGPT and Dalle-2, crafting the perfect prompt for generating content is as much of an art as it is science. When working with the image editing endpoint in particular, there are some general tips that can help improve the quality of generated images.
-
Describe the entire image, including the part that you want replaced and how it interacts with the rest of the image.
In the images above, prompts like “Cat with beret in mug” produced better results than “Drawing of a man climbing a mountain”. Specifically because the mug was not part of the masked-out area, the model had more context on how to fit the cat into the image as a whole.
Imagine someone handing you a drawing of a computer and saying, “now draw a robot”. With all that artistic freedom you may draw a robot typing on the computer, or a robot movie playing on the computer screen. In comparison, if someone came to you with the computer drawing and requested “now draw a robot carrying a computer like a backpack” you have much more information on what the person wants. The image editing model operates in a similar fashion, producing better results with more context not just on what you want to create, but also how it interacts with everything that is already there.
-
Sometimes the model will ignore prompts if they are too far from expectation.
Say for example, instead of giving the prompt “Cat with beret in mug” for the images above, it is replaced with “Mug of coffee, digital art”. It is very likely that the model cannot reconcile the realistic photograph with the digital art request. Additionally, the mug is at an angle where coffee would not even be visible.
In this case, no part of the prompt can be used to fill in the masked area of the image. The masked area becomes open for interpretation and is often just filled with what Dalle-2 determines is a reasonable background.
Resources and feedback
To learn more about OpenAI and DALL-E, check out these resources:
If you have any questions, use the feedback forum or message us on Twitter @surfaceduodev.
We won’t be livestreaming this week, but you can check out the archives on YouTube.
0 comments