Summary: Microsoft IIS MVP, Terri Donahue, talks about using Windows PowerShell to update SSL bindings.
Microsoft Scripting Guy, Ed Wilson, is here. Today, please welcome back IIS MVP, Terri Donahue. Terri is an IIS MVP, but she also attends the Charlotte PowerShell User Group meetings and events. Take it away, Terri…
I recently spoke about IIS at the Charlotte PowerShell User Group monthly meeting. One of the questions that I was asked related to updating SSL bindings after a certificate is renewed. As anyone that manages SSL certificates across multiple servers knows, this can be a time consuming task. I found a great article by Jason Helmick, IIS: Manage multiple certificates on multiple Web servers, and I used that as the basis for this quick script to update the SSL bindings to a newly issued certificate.
Because all companies use different methods of SSL administration, there isn’t going to be a perfect answer to capture the most important piece of data that is needed for the script. The thumbprint is a unique identifier for a certificate that is located in the certificate store. This is the identifier that is used for completing the crucial piece of the script to actually bind the certificate to the IP.
If you want to script updating certificate bindings, I recommend adding a friendly name with a year designation to your certificates (if you do not already do that). For the purpose of this blog post, only one SSL certificate will be used. You can modify the script to include steps for as many certificates as needed.
Prep work
For this example, we are going to ensure that the friendly name is set and it has a unique identifier of the year the certificate was issued. To do this, open the Certificates add-in for the local computer in the MMC. Browse to Personal, and then click Certificates. You will see a list of the certificates that are installed on the computer, for example:
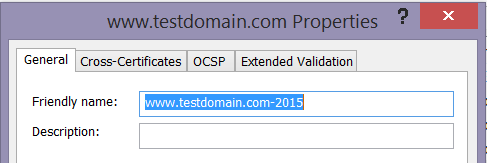
Right-click the certificate to which you want to add a friendly name and select Properties. Enter a distinguishable friendly name and click OK. For example, you can add the year to the end of the name. This will allow you to have multiple pieces of information available to ensure that you capture the correct certificate. Here is an example:
After you have assigned a friendly name, export the certificate to a .pfx file. Then create a text file named webservers.txt that contains the list of servers where this certificate will need to be installed and the IIS bindings updated.
Copy and install the .pfx file
Begin by creating the reference to the list of servers where this process should run and instantiating a Windows PowerShell remote session:
$servers = Get-Content d:\temp\webservers.txt
$session = New-PsSession –ComputerName $servers
The script copies the .pfx file from your computer to the servers where it will be installed:
$servers | foreach-Object{copy-item -Path d:\temp\*.pfx -Destination "\\$_\c$"}
CertUtil.exe is used to install the .pfx file into the certificate store:
Invoke-command -Session $session {certutil -p td -importpfx c:\testdomain.pfx}
The .pfx file is then deleted from the remote machine:
$servers | foreach-object {Remove-Item -Path "\\$_\c$\*.pfx"}
Update certificate bindings
You need to capture the thumbprint of the installed certificate:
Invoke-Command -session $session {$CertShop=Get-ChildItem -Path Cert:\LocalMachine\My |
where-Object {$_.subject -like "*testdomain*" -and $_.FriendlyName -like "*2015*"} |
Select-Object -ExpandProperty Thumbprint}
The WebAdministration module provides access to the IIS drive, which allows you to modify the SSL bindings:
Invoke-Command -session $session {Import-Module WebAdministration}
The next step is to remove the existing binding from the IP address:
Invoke-Command -Session $session {Get-Item IIS:\SslBindings\10.238.82.89!443 | Remove-Item}
And finally, update the SSL binding to use the new certificate:
Invoke-Command -Session $session {get-item -Path "cert:\LocalMachine\My\$certShop" |
new-item -path IIS:\SslBindings\10.238.82.89!443}
Hopefully, you will find this as useful as I have.
~Terri
Thanks, Terri—awesome as always.
I invite you to follow me on Twitter and Facebook. If you have any questions, send email to me at scripter@microsoft.com, or post your questions on the Official Scripting Guys Forum. See you tomorrow. Until then, peace.
Ed Wilson, Microsoft Scripting Guy


Hi Scripting Guy,I think there is a little misstake in your article in the "Update certificate bindings" section.
You say that you get the currently installed certificate and store it in $CertShop.Then you remove the current SSL binding which you got by the IP. And then you update the binding with the new certificate and use $CertShop for it.Maybe it's just me not understanding this correctly but for me it would make more sense to use the thumbprint of the new certificate in "get-item -Path "cert:\LocalMachine\My\$certShop" instead of $certShop which contains the thumbprint of the old already installed certificate.
Kind regardsPaul