Summary: Microsoft Scripting Guy, Ed Wilson, talks about using Windows PowerShell to add files to an offline Windows image.
 Hey, Scripting Guy! I have a number of VHDs that I need to add files to. I know that I can use File Manager to mount the VHD and then copy the files, but I am hoping that I can use Windows PowerShell to do this. The VHDs are for virtual machines that I run in my lab. Can you help?
—AM
 Hello AM,
Microsoft Scripting Guy, Ed Wilson, is here. Today I am a bit sore. I finally made it back into the gym yesterday, and my trainer seemed to have it in for me. Anyway, I am listening to Alan Parsons on my Zune, sipping a nice cup of Earl Grey tea, and going through my email to scripter@microsoft.com. I am thinking that later tonight I might make it back to the gym to work out the soreness.
Speaking of sore…
AM, just reading about all that mousing around makes my wrist hurt. The good thing is that Windows PowerShell can indeed mount and service offline Windows images. (This functionality was introduced in Windows 8 and Windows Server 2012.)
One of the things I like to do is to put things back where I found them—this includes my current working directory. So, I love to use Push and Pop. Push-Location stores the current working location. I use it before I set my location using Set-Location. I do not need to use a variable and Get-Location because Windows PowerShell already knows about a “location stack.” All I need to do is call Push-Location, and Windows PowerShell will automatically remember where I start from. Here is the code:
Push-Location
Set-Location c:\
Because I want things to occur in a specific order, I create a simple workflow—and I do mean simple. It is no more complicated than a very basic Windows PowerShell function. I use the Workflow keyword, specify a name, and create some variables. This is shown here:
WorkFlow Service-Image
{
$image = "E:\vms\vhd\c1\c1.vhdx"
$path = "c:\image"
$scripts = 'C:\PoshScripts'
Now I create the folder that will hold my mounted image, and I use the Sequence keyword to specify that I want commands to appear in a certain order:
MD $path
Sequence {
I want to first mount my Windows image, then I want to copy some Windows PowerShell scripts to a folder, then I want to dismount my Windows image and remove the folder that I created. All this is shown here:
Mount-WindowsImage -ImagePath $image -Path $path -Index 1
Copy-Item -Path $scripts -Destination "C:\image\poshScripts" -Recurse
Dismount-WindowsImage -Path $path -Save
RD $path -Force
} }
The last things I do is call my workflow and pop back to my original working directory. This is shown here:
Service-Image
Pop-Location
Here is the complete script:
Push-Location
Set-Location c:\
WorkFlow Service-Image
{
$image = "E:\vms\vhd\c1\c1.vhdx"
$path = "c:\image"
$scripts = 'C:\PoshScripts'
MD $path
Sequence {
Mount-WindowsImage -ImagePath $image -Path $path -Index 1
Copy-Item -Path $scripts -Destination "C:\image\poshScripts" -Recurse
Dismount-WindowsImage -Path $path -Save
RD $path -Force
} }
Service-Image
Pop-Location
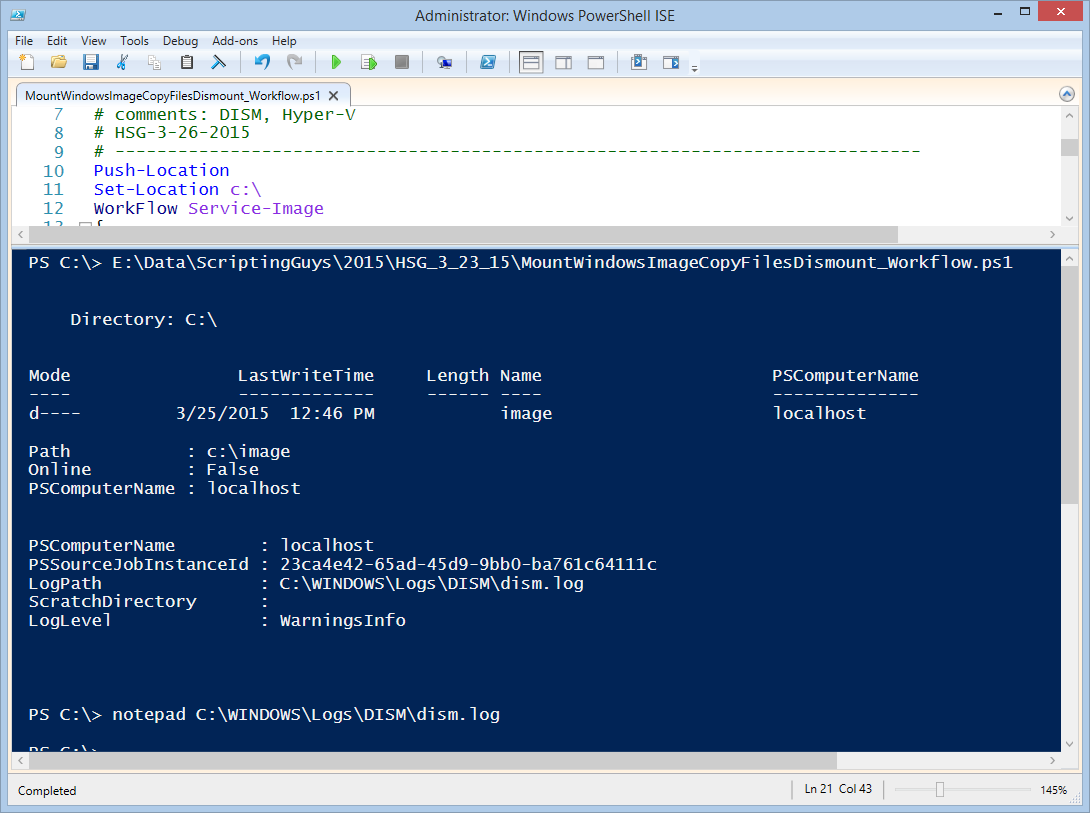
As shown in the following image, when I run the script, I see a few things in the output:
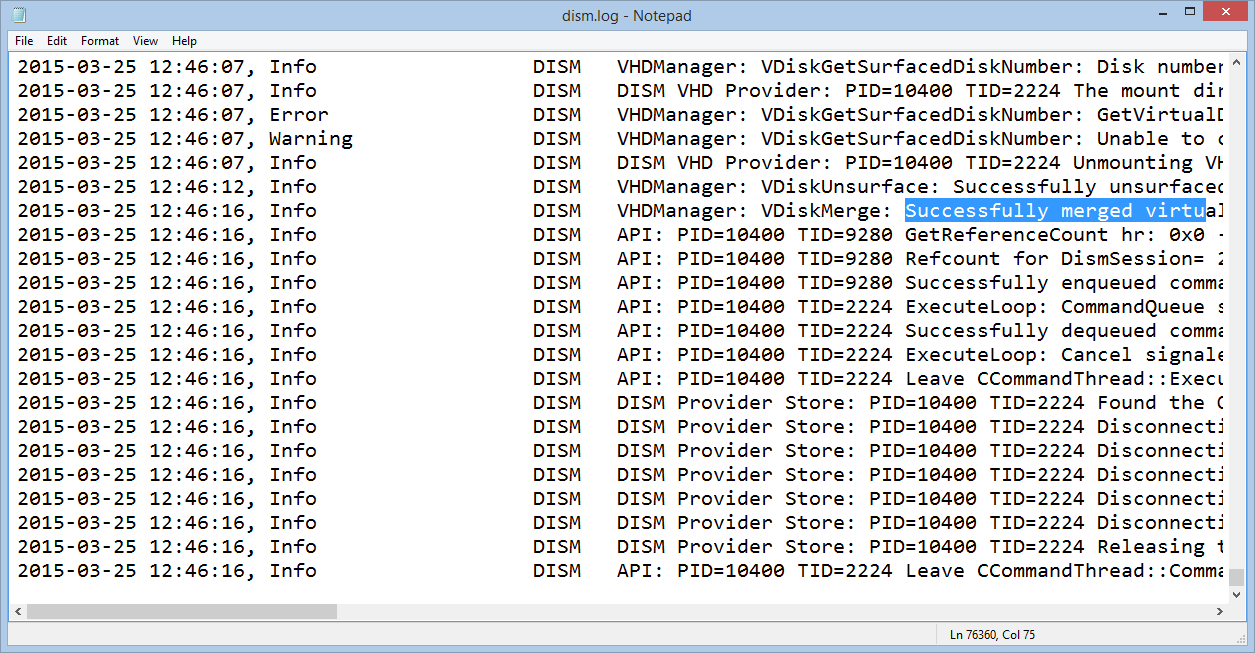
One thing I see is a path to the DISM log. So I go there and open the log in Notepad. The log is shown here:
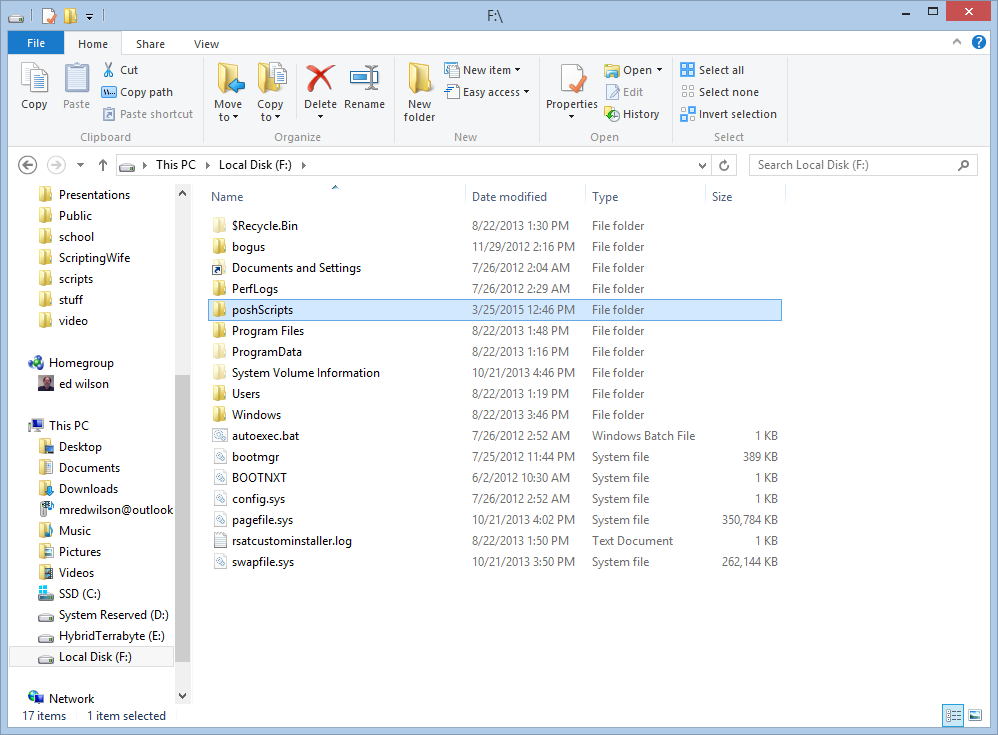
One thing to note is that the DISM log appends to the end. So I need to go all the way to the end of the log to see what happened during my Windows PowerShell script. I see that it said everything was successful. Cool. I decide to mount the image via the Windows Files Explorer so that I can check to ensure that my Windows PowerShell scripts were indeed copied. As shown in the following image, it was a success:
AM, that is all there is to using Windows PowerShell to add files to a Windows image. Join me tomorrow when I will talk about more cool Windows PowerShell stuff.
I invite you to follow me on Twitter and Facebook. If you have any questions, send email to me at scripter@microsoft.com, or post your questions on the Official Scripting Guys Forum. See you tomorrow. Until then, peace.
Ed Wilson, Microsoft Scripting Guy


0 comments