Summary: Microsoft PFE, Georges Maheu, further optimizes the Windows PowerShell script that he presented in his previous two blogs.
Microsoft Scripting Guy, Ed Wilson, is here. Our guest blogger today is Georges Maheu. Georges presented a script two days ago to gather Windows services information in an Excel spreadsheet: Beat the Auditors, Be One Step Ahead with PowerShell
Although that script did an adequate job for a small number of servers, it did not scale well for hundreds of servers. Yesterday, he optimized the script to reduce the runtime from 90 minutes to less than three minutes: Speed Up Excel Automation with PowerShell
Today, Georges wants to do even better.
Note: All of the files from today, in addition to files for the entire week are in a zip file in the Script Repository. You can read more from Georges on the PFE Blog: OpsVault.
Take it away Georges…
Today, we will see if yesterday’s script can be optimized further. As already seen, the script makes an inventory of all services running on your servers, and it identifies services that are using non-standard accounts. The inventory is presented in an Excel spreadsheet.
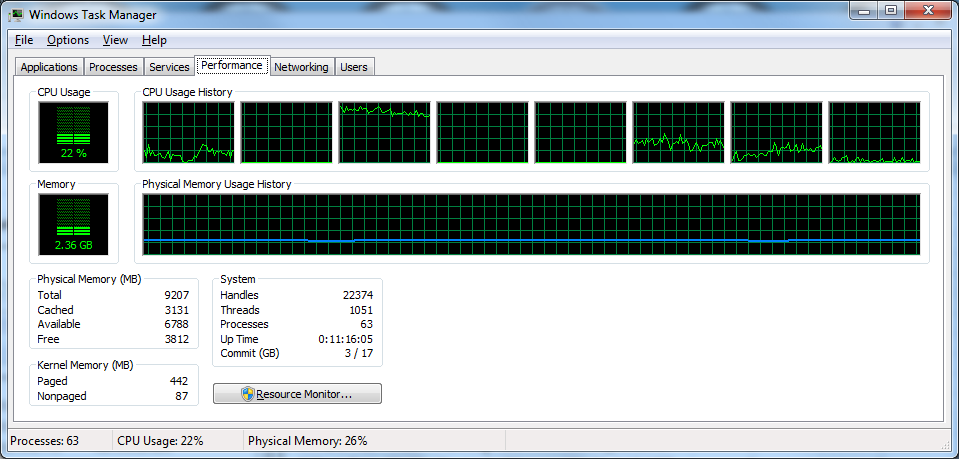
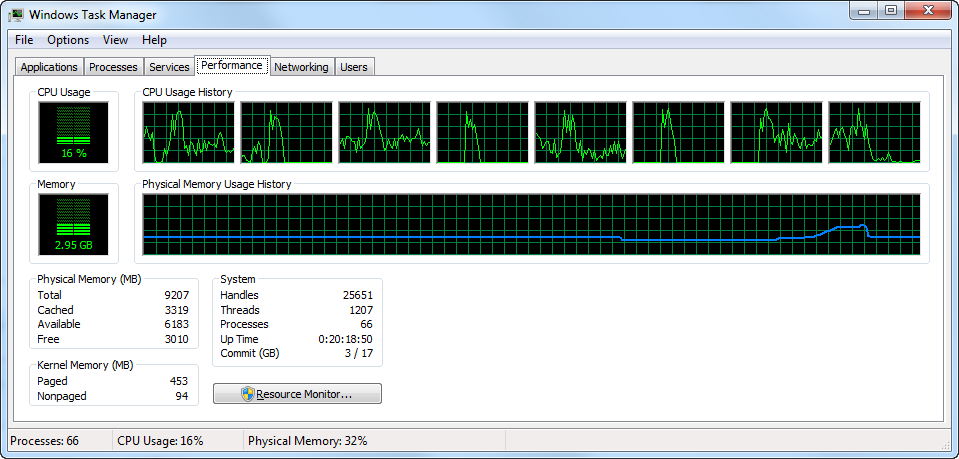
The first version of the script was linear and simple but somewhat slow. Here is a screen capture of the WTM while the script is running. The script took 90 minutes to perform a 50 computer inventory. CPU on the test computer remained in the 20% utilization range during this test.
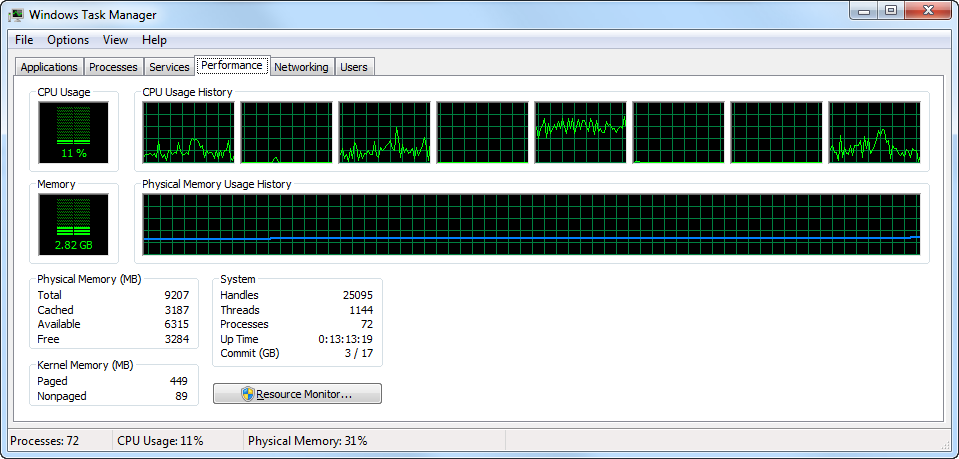
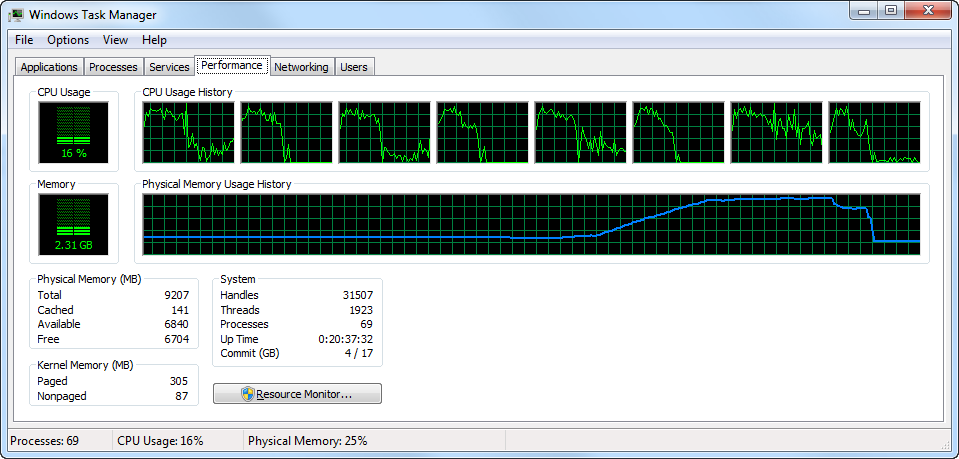
Yesterday, the performance of this script was improved by focusing on a few bottlenecks. Runtime has been reduced dramatically—down to two minutes and 31 seconds for the same 50 computer inventory. Not bad!
CPU utilization varied, but it was mostly around 15%.
Now the question is, “How can we improve this further? Is it even possible?”
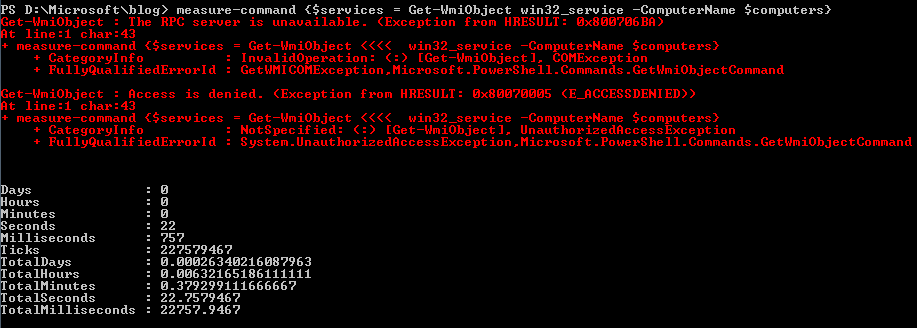
Using the same technique as yesterday, let’s start with the Measure-Command cmdlet:
Measure-Command {$services = Get-WmiObject win32_service `
-ComputerName $computerName}
This script provided the following information:
WMI query: < 0.25 seconds for responding local computer
WMI query: < 1.00 seconds for responding remote computer
WMI query: < 20.00 seconds for non-responding computer
Ping dead computer: < 2.5 seconds
In the test scenario, I used my desktop computer (no, I do not have 50 computers in my lab). The projection is 47*0.25 + 3*20 = 72 seconds. Knowing the script actually takes 148 seconds, the overhead is about 50%. Knowing that it is impossible to improve the time to make the WMI query, the only option is to run the queries in parallel. The total amount of data will be the same, so the gain will have to come from the latency time it takes to perform a WMI query.
Windows PowerShell 2.0 has functionality to support concurrency.
First method: Get-WMIObject –ComputerName
WMI can be used directly. The next screen capture shows the time it takes WMI to query 50 computers in a single statement:
The performance is great, but the data would need to be parsed based on the systemName field, and the script structure would have to be modified considerably.
Second method: Invoke-Command
invoke-command -ScriptBlock `
{
param($computerName);
Get-WmiObject `
-class win32_service `
-ComputerName $computerName
} `
-asJob `
-JobName “$i – $computerName” `
-ThrottleLimit 3 `
-ArgumentList $computerName `
-ComputerName LocalHost
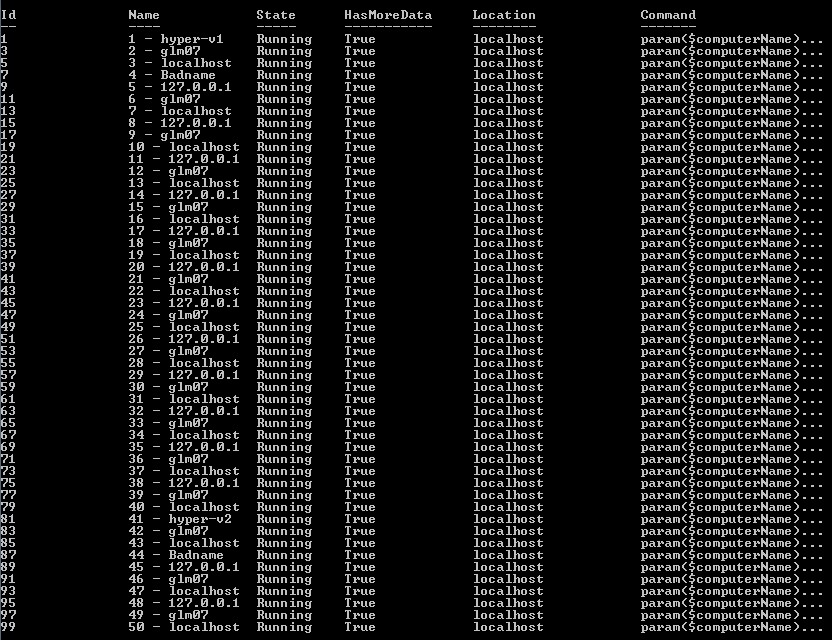
Invoke-Command looks promising. It has a ThrottleLimit parameter, which limits the number of network connections, not the number of jobs running on a computer, as demonstrated in the following screen capture.
Invoke-Command would be nice if the queries were run on remote computers, but this is not the case. However, spreading the load across multiple computers would certainly be something to consider for the next round of optimization.
Invoke-Command needs the shell to be run as administrator. Permissions could be delegated to run Invoke-Command as a regular user, but this would increase the complexity.
Third method: Start-Job
Start-Job -ScriptBlock `
{
param($computerName);
Get-WmiObject `
-class win32_service `
-ComputerName $computerName
} `
-Name “$i – $computerName” `
-ArgumentList $computerName
Start-Job creates a background process for each WMI query. The result is great. Our script can now do 50 computers in about 42 seconds.
However, the script had to be modified—the first part now starts all the jobs, and the second part processes the results. The main differences are the following lines:
foreach ($computerName in $computers)
{
$workBook.workSheets.add() | Out-Null
$workBook.workSheets.item(1).name = “$computerName”
Start-Job -ScriptBlock `
{
param($computerName);
Get-WmiObject `
-class win32_service `
-ComputerName $computerName
} `
-Name “$computerName” `
-ArgumentList $computerName
} #forEach computer
To generate all the jobs, use the following code to retrieve the information from the job queue.
while (@(Get-Job -State Completed).count -gt 0)
{
“============”
$currentJobName = (Get-Job -State Completed |
Select-Object -First 1).name
$services = Receive-Job -name $currentJobName
Remove–Job -Name $currentJobName
#same code to paste in Excel…
When the jobs are running, they can be in one of several states: Running, Completed, or Failed. There are other states, but these are the states of interest for this script. To process the jobs, the data needs to be retrieved when the job is completed. This is done with the Receive-Job cmdlet. Note that the data returned is serialized—this means that the script is not receiving the real objects as in the previous scripts, but rather a XML representation. In this scenario, this is irrelevant because this data will be converted to an Excel spreadsheet. When the data has been retrieved, the job is removed to free up resources.
WOW, we went from 90 minutes, down to three minutes, down to 42 seconds to document 50 computers. The end result, the Excel report (for the auditors), is the same for all three versions. This is great performance but can it scale up? The test desktop computer can handle 50 computers. Can it do 100, 200, 500, or even 1000 computers?
Well, let’s try!
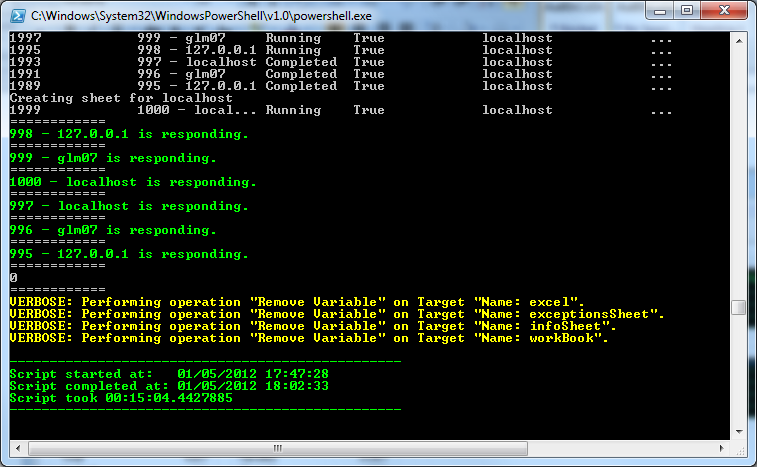
Here are the results for 100 computers:
The computer list includes some nonexistent computers to test nonresponding computers.
Here are the script results:
97 seconds (01 minute 37 seconds) for 100 computers.
380 seconds (06 minutes 20 seconds) for 250 computers.
1228 seconds (20 minutes 28 seconds) for 500 computers.
3450 seconds (57 minutes 30 seconds) for 1000 computers.
Scaling up requires additional care. For example, the computer may run out of resources and the script performance could seriously degrade. Worst, some data might be lost. Fortunately in this case, resolving this issue has an interesting side effect. It actually increases the performance!
To avoid running out of resources, the script will be tweaked based on a rude implementation of a producer–consumer design pattern. In other words, by limiting the number of concurrent jobs based on the speed the data is generated versus the speed it can be imported into Excel. This improved the script down to these numbers:
94 seconds (01 minute 34 seconds) for 100 computers.
215 seconds (03 minutes 35 seconds) for 250 computers.
450 seconds (07 minutes 30 seconds) for 500 computers.
904 seconds (15 minutes 04 seconds) for 1000 computers.
The last modification to the script was to move the code that retrieves the data from the job, to paste it into Excel to a function (the consumer), and to call this function from the loop that generates the jobs (the producer).
foreach ($computerName in $computers)
{
$computerName = $computerName.trim()
$workBook.workSheets.add() | Out-Null
$workBook.workSheets.item(1).name = “$computerName”
“Creating sheet for $computerName”
Start-Job -ScriptBlock `
{
param($computerName);
Get-WmiObject `
-class win32_service `
-ComputerName $computerName
} `
-Name “$computerName” `
-ArgumentList $computerName
if (@(get-job).count -gt 5) {Get-CompletedJobs}
} #forEach computer
The key line is:
if (@(get-job).count -gt 5) {Get-CompletedJobs}
This line stops the creation of new jobs while removing completed jobs from the job queue. You may want to experiment with the count greater than 5, depending on the time it takes to complete the WMI query versus the time it takes to paste it into Excel. Starting to process the data as it is being generated overlaps the overhead mentioned previously and produces the performance gain.
Optimizing is always a question of balance. How much time do you want to invest to further optimize a script? There comes a point where the gain is not worth the pain.
Having optimized the performance, the next challenge will be to scale this script from one thousand to several thousand computers. As we will see tomorrow, we will need to take a new approach to address this.
BTW, I shaved one additional minute off the 1000 computer data by changing this line:
$excel.visible = $true
To this:
$excel.visible = $false
~ Georges
Thank, Georges. The zip file that you will find in the Script Repository has all the files and scripts from Georges this week. Please join us tomorrow for the conclusion of the series.
I invite you to follow me on Twitter and Facebook. If you have any questions, send email to me at scripter@microsoft.com, or post your questions on the Official Scripting Guys Forum. See you tomorrow. Until then, peace.
Ed Wilson, Microsoft Scripting Guy




0 comments