Summary: Use the Azure Resource Manager cmdlets to create a virtual machine.
This blog post is part of a series about how to retrieve Azure Resource Manager virtual machine properties by using PowerShell. To get the most out of this series, read the posts in order.
If you’re new to PowerShell, you might want to first read the preceding five-part series about how to work with Azure Resource Manager cmdlets.
- Retrieve Azure Resource Manager virtual machine properties by using PowerShell – Part 1
- Retrieve Azure Resource Manager virtual machine properties by using PowerShell – Part 2
- Retrieve Azure Resource Manager virtual machine properties by using PowerShell – Part 3
- Retrieve Azure Resource Manager virtual machine properties by using PowerShell – Part 4
- Retrieve Azure Resource Manager virtual machine properties by using PowerShell – Part 5
After you finish this series, move on to the next series to learn more about the Azure Resource Manager cmdlets.
 I was curious about something. Could you show me a simple example to create a virtual machine (VM) in Azure Resource Manager?
 Honorary Scripting Guy, Sean Kearney, is here to show you one of the coolest features of Azure Resource Manager: an easy way to get the information you need to build VMs!
In the old Azure system (the Service Model), you could run cmdlets to get a list of available virtual machine sizes or to access a list of templates. You’d then try to guess which one your machine used.
Let’s show you the easy way this week. Do it once in the Azure portal, and then have PowerShell ask the machine the questions.
Consider this. If I perform the actions in the GUI and didn’t know JSON, wouldn’t it be great if I could ask the VM the exact size that was used for it? With the new Azure Resource Manager cmdlets, we can!
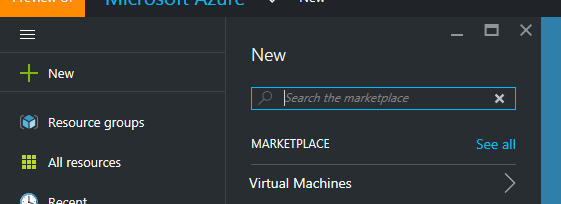
Let’s first step through the process of creating a VM in Azure by using the new method.
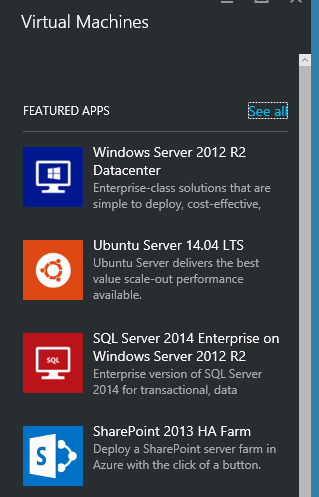
You can now either choose See all to choose from the massive selection of predefined JSON templates for networks or just a single machine. We’re going to select Ubuntu Server 14.04 LTS for one big reason.
This is so that you can see that the process to identify and work with properties is identical for both Linux and Windows VMs.
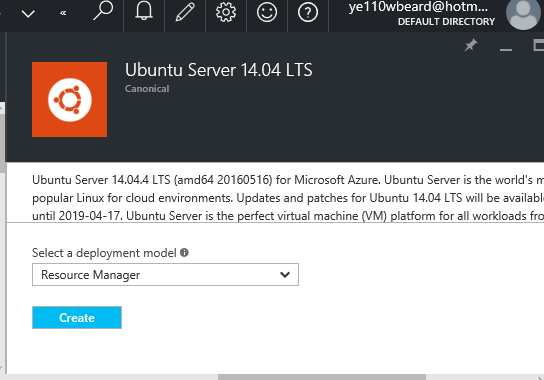
The next window will be a description of the environment that we are about to spin up. Click the Create button to continue.
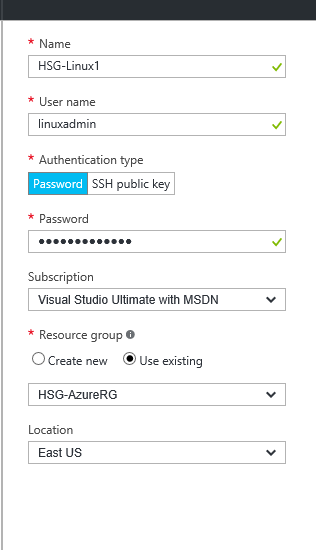
We now need to populate some details for this VM:
- Name for the VM
- Default administrator name
- Default administrator password
- In this scenario, we are using a UserID and password to authenticate, so we will provide a password. It could also be a Secure Shell (SSH) public key to connect to the Linux environment.
- Our subscription
- A resource group (We will use the one, HSG-AzureRG, that we created last week.)
- Our location
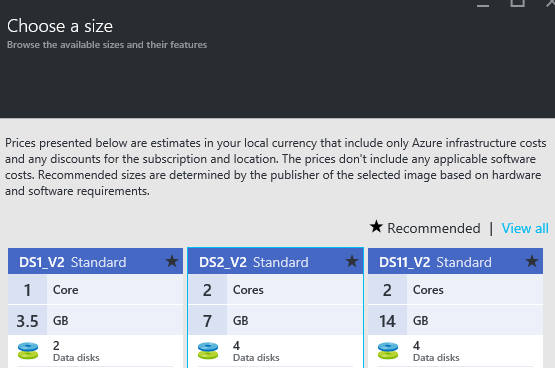
The next option is to choose the size for the VM. Because I want to keep my subscription under control, I’ll click View all to try and find the smallest and slowest machine possible. A0 is fine for a slow running demo or for somebody who is trying to not wipe out a budget with one VM.
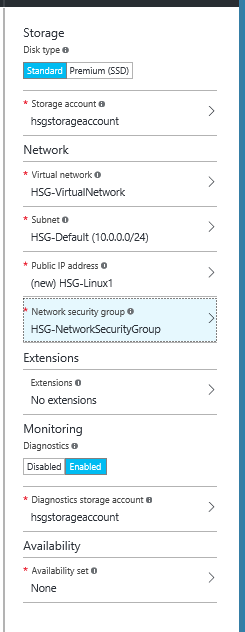
After I select the size of the VM, I can proceed to configure additional features, such as the virtual network that it will exist on and the storage account. You’ll note that we are using the existing virtual network and security group and the storage account that we used last time. Because this is a new VM, we’ll need a public IP in the short term to connect and configure afterwards.
At this point we’ll get a quick summary from Azure Resource Manager that all is okay so that we can click OK to create the VM.
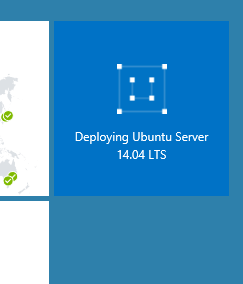
You’ll now see a summary on the screen while it is deployed.
For now, we’ll sit down and relax. Tomorrow, we’ll start the fun stuff when we show you just where and how to access all the properties from this VM by using PowerShell. Because we can access all these properties from PowerShell, we can use them to create additional VMs easily.
I invite you to follow the Scripting Guys on Twitter and Facebook. If you have any questions, send email to them at scripter@microsoft.com, or post your questions on the Official Scripting Guys Forum. See you tomorrow.
Until then always remember that with Great PowerShell comes Great Responsibility.
Sean Kearney Honorary Scripting Guy Cloud and Datacenter Management MVP

0 comments