Summary: Microsoft Scripting Guy, Ed Wilson, talks about creating XML files.
Microsoft Scripting Guy, Ed Wilson, is here. I will be the first to admit that I am not a huge fan of XML. I mean, if I can use a CSV file to store and retrieve the information I need, why do I need XML? Well, there are many times when the nested structure of XML is a more robust option. When dealing with objects inside of objects, a CSV file breaks down. In addition, reading a CSV file is a bit cumbersome when I need to look at the actual CSV file in something like Notepad. For XML, there is Notepad and XML Notepad.
XML Notepad
XML Notepad is still the best choice, in my opinion, for working with XML files for the average network administrator/ IT pro/dev ops type of person. For one thing, it is free. For another thing, it is really simple to use. I have written about XML Notepad in the past, in particular about exploring XML files to discover schema and data relationships. Unfortunately (or maybe fortunately depending on your perspective), we have not done anything to XML Notepad since 2007. I did notice that now there is a CodePlex site for XML Notepad. But the download link still takes one to the Microsoft Download Center for XML Notepad 2007.
One of the things I do not like about creating XML from scratch is typing all the tags. This is where XML Notepad shines. I can add in Elements, Attributes, and Text, and it automatically creates the right scheme. After I have created my relationships, I can then duplicate my node and fill in the data that I need to complete.
This makes it really easy to create an XML document. I could play around with trying to write a script, and at some point I may do so, but for now, I like using XML Notepad. By the way, even though the program was last updated in 2007, it works fine on my laptop running Windows 8.1. After installation, all I needed to do was find the program, right-click, and pin it to my Start page.
Getting started
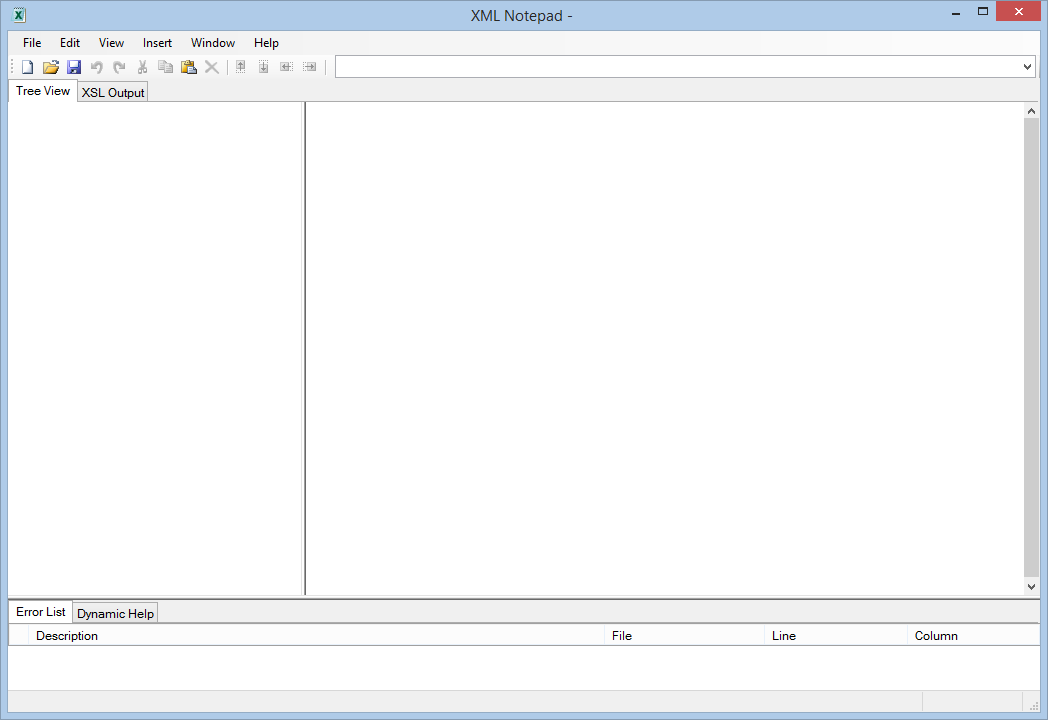
The first thing I do after opening XML Notepad is select File > New to create a new blank XML document. There are two tabs, XML Tree View and XSL Output. As shown in the following image, neither have very much going on when the program opens a blank XML document:
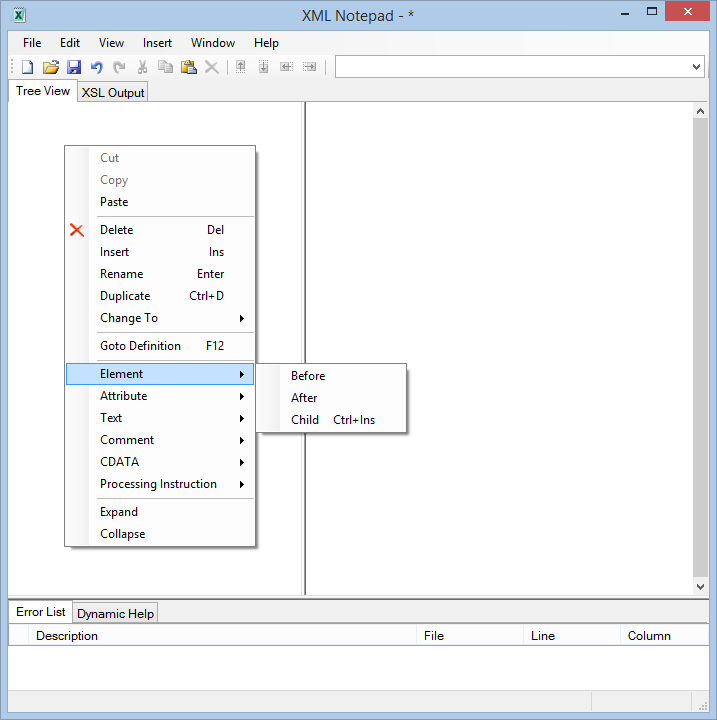
Now I need to add in an element. To do this, I right-click the Tree View tab, and click Element from the action menu. That part makes sense, but then I have to click Before from the where to place it question to get it at the top.
Now I give it a name. In this example, it will be named Users. At this point, what I have is a Users node that appears with a little blue ball. This will change in a second.
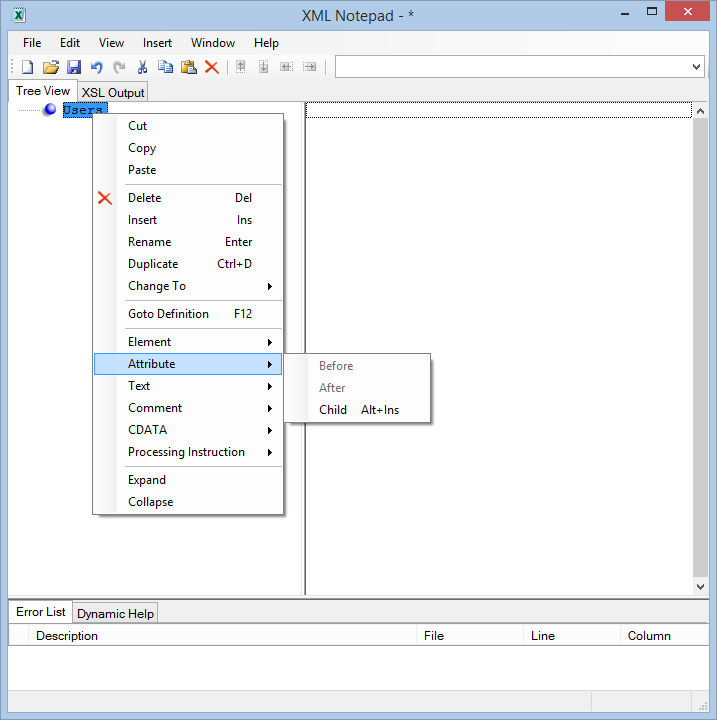
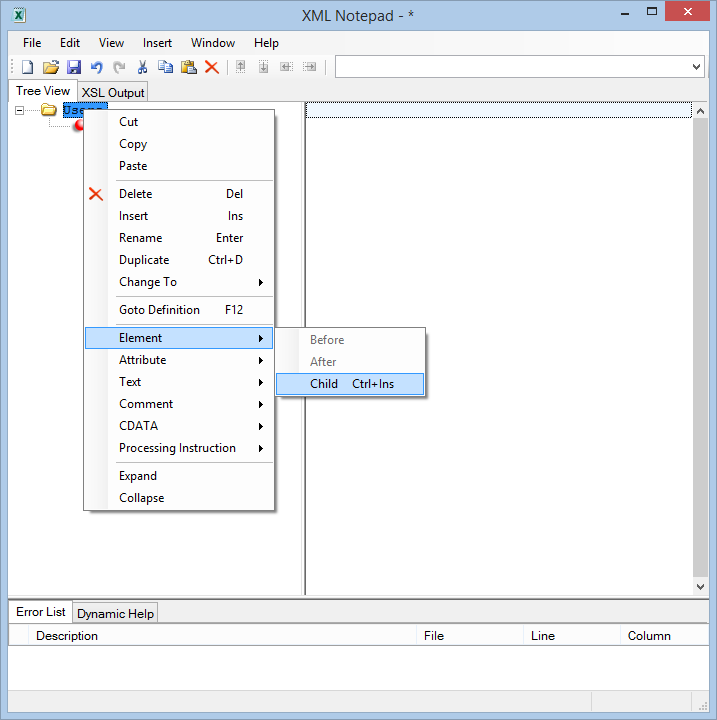
I want to add an attribute to my element that I will call ID. I right-click the Users element, and click Attribute from the action menu. There is only one thing I can do here, and that is add a Child element to the Users element. This will be an internally used user ID. This is shown here:
If I click the XSL Output tab, I see that the following XML has been generated:
<Users ID=""/>
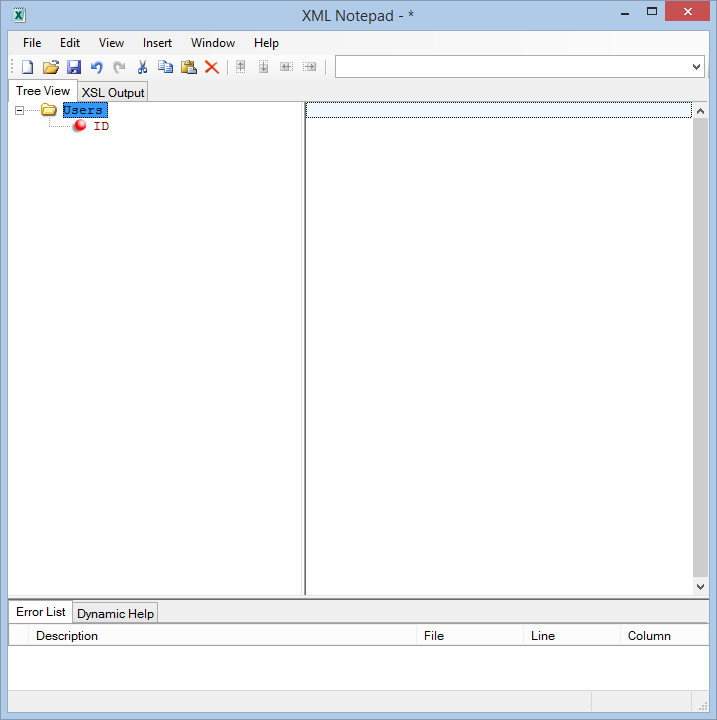
The Tree View tab now has the Users element and the ID attribute, as shown here:
I click, then right-click the Users element, and I add a Child element. I give it the name UserName. This is shown here:
I continue with this process:
- Click the Users element.
- Right-click Users.
- Click Element in the action menu.
- Click Child from the menu.
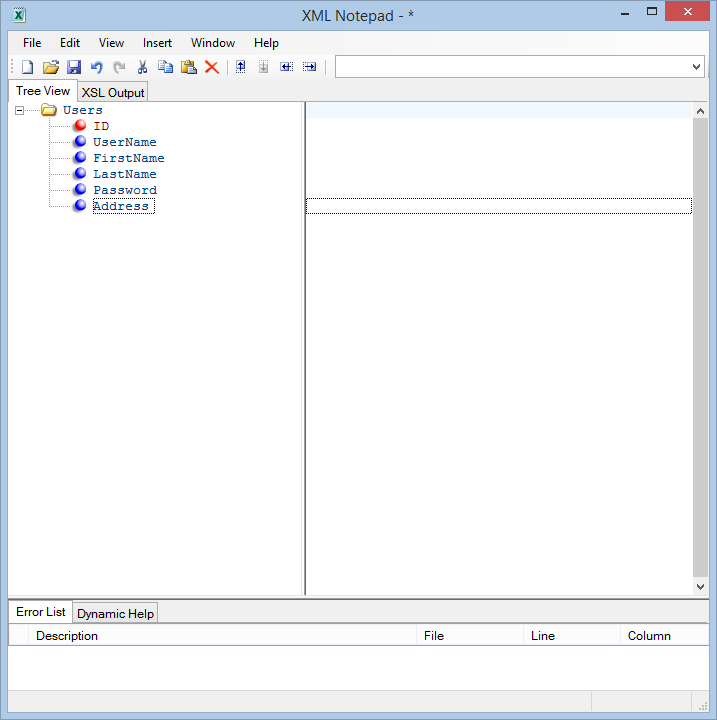
- Type a name for the element. I do this for UserName, FirstName, LastName, Password, and Address.
The XSL output now looks like this:
<Users ID="">
<UserName/>
<FirstName/>
<LastName/>
<Password/>
<Address/>
</Users>
And the Tree View looks like this:
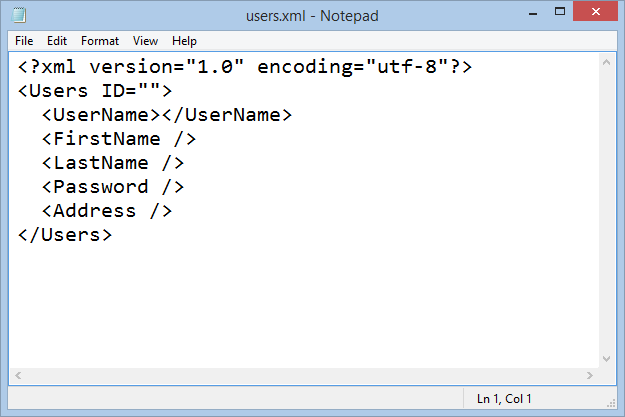
It is probably a good time to save the XML file to ensure that it is working properly and that things are going as I expect them to. I click File > Save, and I give it a name. I open the XML file to see if it looks like what I might expect:
I now add Child elements for the Address, which include Street, City, State, and Zip. I use the same process:
- Click the Address element.
- Right-click, and click Element.
- Click Child.
- Type Street, City, State, and Zip.
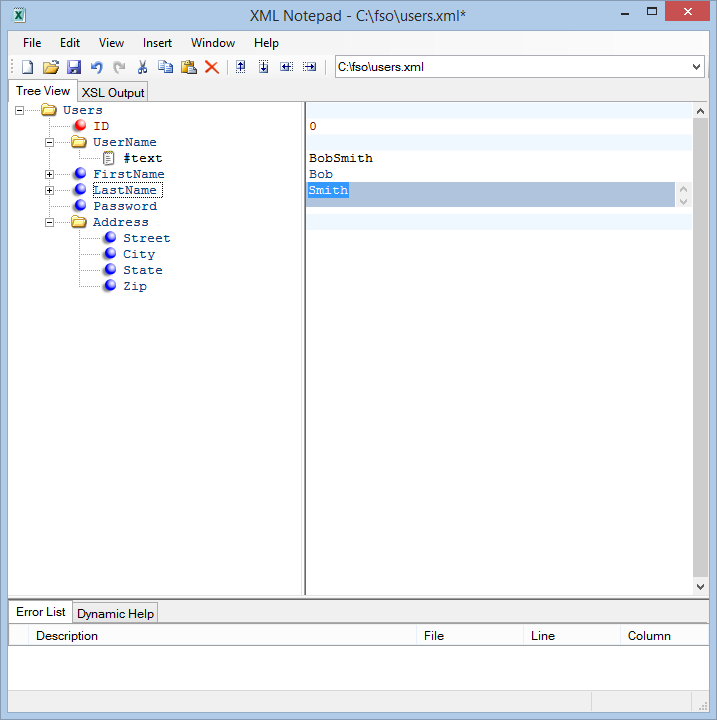
I can now fill in the XML file by clicking each element and typing the value I want to store. I select the element from the left side of the Tree View, and I type the value on the right side of the screen. For Attributes, nothing happens, except that the tool stores the value. For Elements, it automatically adds a #Text child.
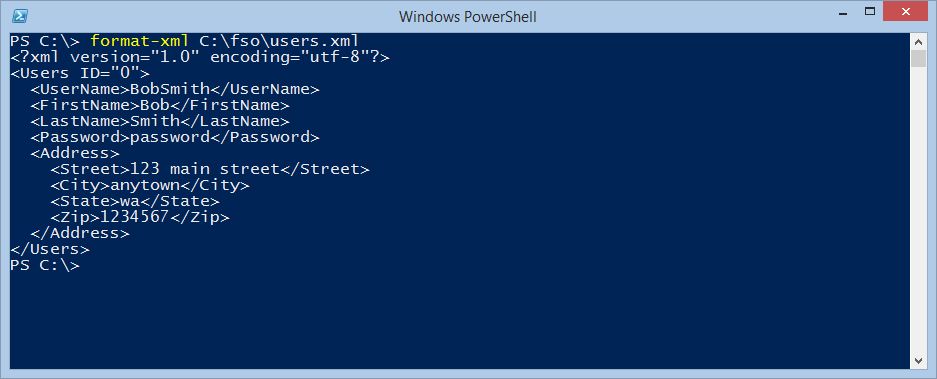
To see if it looks correct, I use the Format-XML cmdlet from the PSCX. The output is shown here:
Now all I need to do is to go back to the Tree View tab, and click Duplicate. But there is a problem. Users is the root node, and each element of Users is actually an element for User. So how can I fix it?
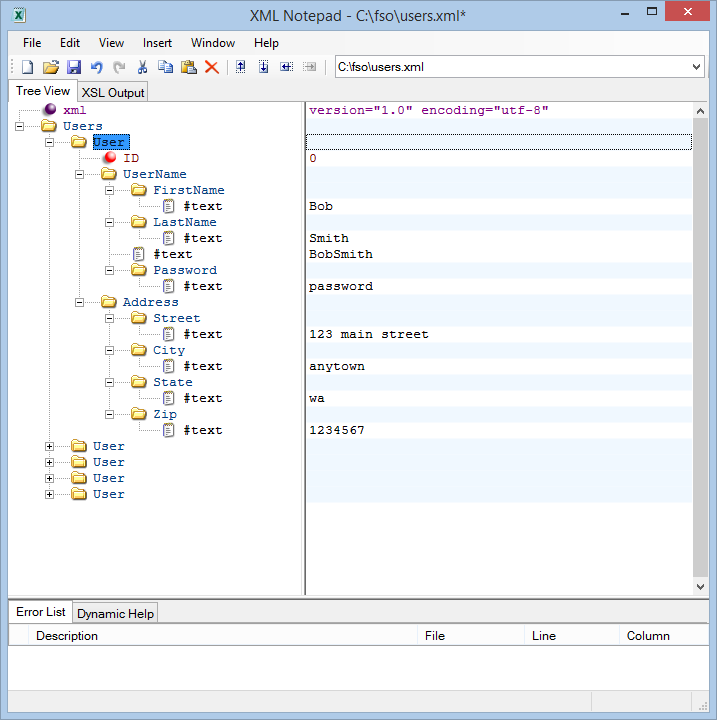
This is easy! Right-click Users, and add a Child element named User. Now drag-and-drop each of the other elements under User. The only thing I cannot drag-and-drop is the ID attribute of Users. But that is simple enough to re-create. I delete the ID attribute of Users, and I re-create it in the User element. Now I can right-click User and click Duplicate, and that gives me everything I need. Now I can simply click and type to fill the User object.
The rearranged and modified Users.xml file is shown here:
I didn’t do any coding today, but I have a custom XML file that I can use if I need it. It gives me a great template to use and shows how easy it is to create an XML file by using XML Notepad.
That is all there is to creating an XML file. XML Week will continue tomorrow when I will talk about more cool stuff.
I invite you to follow me on Twitter and Facebook. If you have any questions, send email to me at scripter@microsoft.com, or post your questions on the Official Scripting Guys Forum. See you tomorrow. Until then, peace.
Ed Wilson, Microsoft Scripting Guy

0 comments