Summary: Guest blogger and Microsoft PFE, Gary Siepser, talks about the basics of the Windows PowerShell pipeline.
Microsoft Scripting Guy, Ed Wilson, is here. This week we have a series of five posts that are written by PFE Gary Siepser as we head back to the basics with the Windows PowerShell pipeline.
Gary Siepser here (@PowerShellPFE). For Microsoft, I am a senior premier field engineer specializing in everything PowerShell. These days I find myself mostly teaching several Windows PowerShell classes to Microsoft customers. Check out Support: Premier Support Services to learn more.
Windows PowerShell has been around for a while and version 5.0 is coming soon. But every day we get new folks who want to learn about Windows PowerShell. I have taught beginner classes several times a month for years now.
As deep as I try to geek-out with Windows PowerShell, I always try to remember how much you can accomplish with so little work. In this series, we'll look at the simplicity and power of using the pipeline in Windows PowerShell to string together simple cmdlets into valuable and effective solutions.
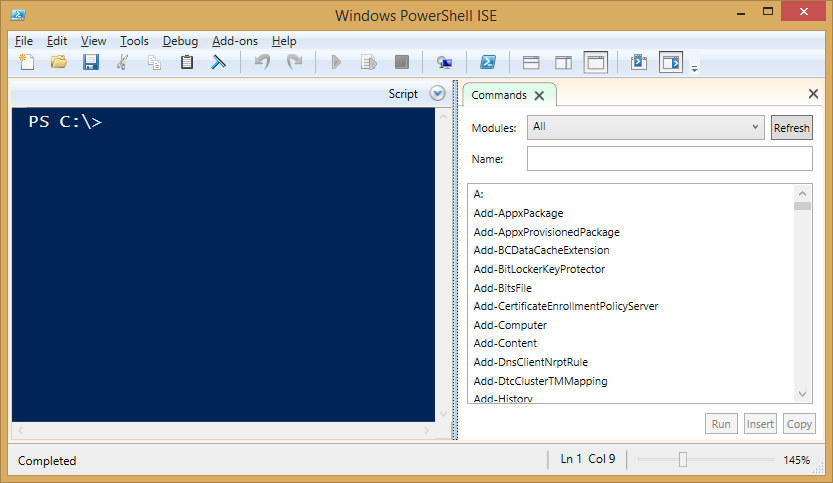
Introduced in Windows PowerShell 3.0 (including the Windows PowerShell ISE), we have this awesome Show-Command pane that is on by default. This is such a wonderful way for a beginner to get started using Windows PowerShell. You can easily browse through commands, pick a command, get Help about that command, and even see what options a command has. Then to top it all off, you can fill out that command's parameters and execute, insert, or copy it. All of this makes getting started using Windows PowerShell a piece-of-cake and you don’t really have to know a thing about how it really works.
In the following image, you can see the Commands pane on the right side of the Windows PowerShell ISE screen. You can get to a similar GUI by running the Show-Command cmdlet from the Windows PowerShell console or the ISE.
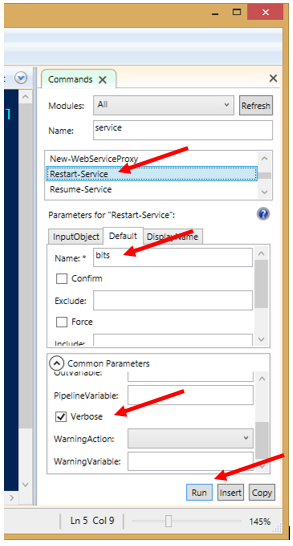
The following image shows that a command was chosen, the Name parameter field was filled in with a service name, the Verbose common parameter was selected, and the Run button was pressed.
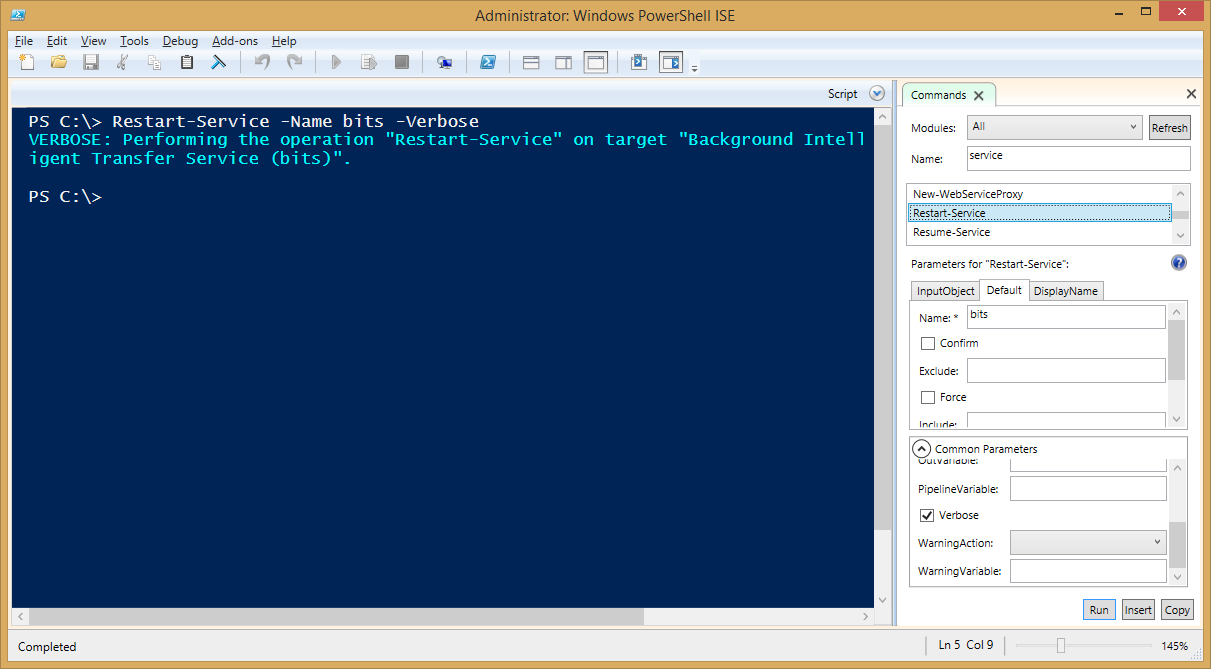
This command is automatically built for you and executed as shown in the following image:
Using the Show-Command GUI or Get-Command will help you to find a command and enable you use that command with little work. This is a great start, but the nature of most commands (both cmdlets and functions) are to be single-purpose.
Cmdlets do one job and do it well. To explain what I mean, think about a simple cmdlet like Get-Service. There is no way to control the sort order or filter services by their status. Those two needs are addressed by other single-purpose cmdlets. This might sound confusing at first, but it’s worth it. When you learn certain commands, like sorting or filtering, you can constantly apply that knowledge to new situations.
To solve our actual business problems, we often need to use several of these commands together to form the real solution. The Windows PowerShell pipeline takes simple commands, combines them, and solves our problems.
The pipeline in Windows PowerShell is a simple and elegant solution that you can use to string together multiple commands. The pipeline character in Windows PowerShell is the vertical bar (also called the pipe: | ). On most U.S. keyboards, it is found on the key with the backslash. You can press Shift + Backslash to get the pipe character. I’ve seen it in different places on keyboards in other languages, so look for it on yours.
The pipe character is used between commands to create the pipeline. We work from left to right down the pipeline. The output of one command effectively becomes the input of the next command.
In the following example you can see the basic structure of the pipeline followed by a simple example that gets all the services on your machine, sorts them by their status (such as Running or Stopped), and then formats them into a table that shows the Status and Name columns. This is a simple pipeline solution.
In Windows PowerShell, we can think about the output of each command “flowing” down the pipeline, and this output is called Objects. Objects flow down the pipeline, not simply the text you see on the screen when you run each command by itself. This makes the pipeline considerably more powerful as objects are more structured data than plain text.
Although there is no limit on how you choose to use the pipeline and what commands you choose when structuring your pipeline, there are some common elements we see regularly in Windows PowerShell pipelines.
The pipeline has to start somewhere. We start by getting some data. We have to put something into the pipeline to do anything useful. I call this first part of the pipeline the "Getters.” Often this first command starts with the verb Get. However, there are plenty of commands that don’t start with Get that provide a great way to start things, for example Import-CSV, or maybe an external command we know from using the command prompt, such as nbtstat.exe.
The next phase of the pipeline we commonly see is “doing something with your data”—massaging it in some useful way. This ranges from commands like Sort-Object or Select-Object to filtering the pipeline with Where-Object. Plus there are many other commands that exist for the sole purpose of manipulating your objects (your data) in useful ways as part of the solution.
The last phase of common pipeline structure is to output or present your data. You can use one of the Format commands to present your data in a readable way, or maybe you want export your data to another format like CSV, XML, or JSON.
The following is a graphical representation of a common pipeline structure and two examples of pipelines that use this structure:
You can see that by using the pipeline in Windows PowerShell, we are able to easily bring together multiple single commands into a small, but effective, solution.
~Gary
Thank you, Gary. Be sure to join us tomorrow. In Part 2 of this series, Gary will more deeply explore the “Getters” and see how to start a typical pipeline.
I invite you to follow me on Twitter and Facebook. If you have any questions, send email to me at scripter@microsoft.com, or post your questions on the Official Scripting Guys Forum. See you tomorrow. Until then, peace.
Ed Wilson, Microsoft Scripting Guy


0 comments