App Dev Manager, Richard Newell explores HoloLens as a remote monitoring tool for IoT devices using Azure.
In this post we will cover all the steps from the setting up of the backend infrastructure, setting up your IoT environment, and connecting it with Azure Services deploying it onto a device. A brief overview of the different aspects of this blog are as follows:
- Setting up the backend infrastructure
- Building up the Azure IoT solutions
- Connecting a holographic app with Azure
By the end of the post, we will have covered the complete end-to-end development process that requires building connected devices using several Azure IOT services.
This is going to be an IoT solution, which receives data from connected devices, stores the data and makes it available for consumption by a holographic or mobile application. So, you will first learn to set up the backend infrastructure–where you will have a device–which connects with a Cloud Gateway. Data received by the Cloud Gateway is stored within persistent storage, and finally, this data will be made available to a Holographic or Mobile app through Web APIs.
In this solution architecture, we use an IoT Hub as a Cloud Gateway for event data ingress coming from the sensor.
Setting up the Infrastructure
First, we want to create an event hub, you will need a valid Azure subscription, navigate to https://ms.portal.azure.com
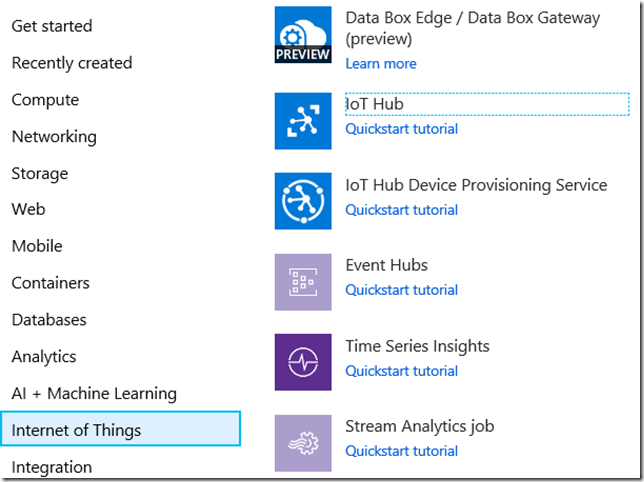
- From New, select Internet of Things and create a new IoT Hub by providing a name, resource, and other required details, such as pricing tier or location.

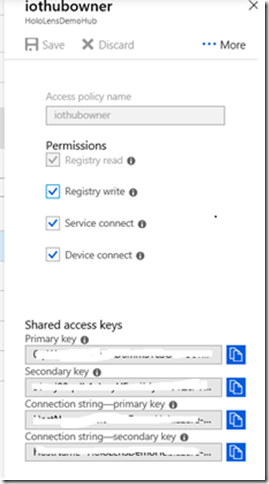
- Once the IoT Hub is created and deployed, open the IoT Hub and navigate to Settings | Shared Access Polices and select ‘iothubowner’.
- Write down its connection string-primary key for further reference.

Second, we want to create the Azure Cosmos DB
- From New, select Azure Cosmos DB service and create a new Cosmos DB by providing ID, resource group, location, and your subscription. You must make sure that you select SQL (DocumentDB) from the API Dropdown.
- Once “Azure Cosmos DB account” is created, add a collection by clicking on the “Add Collection” button and add a database with it.
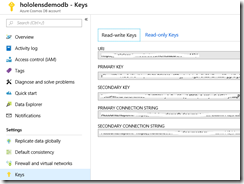
- Write down the URI, Primary Key and the Primary connection string.

Now that the IoT Hub and the Azure Cosmos DB are created we can go ahead and create the Stream Analytics Job which will take up the data input from the IoT Hub and store the data in the Azure Cosmos DB. Once you create the newly created job, do the following configurations:
- Select the Input tab and add a new input of type IoT Hub, connecting to the IoT Hub which you have just created above.
- Select the Output tab and add a new output of type SQL-DocumentDB, connecting with SQL-DocumentDB.
- Select the query tab and add a simple query to connect the input and output stream.
SELECT
*
INTO
HoloLensDemoAOutput
FROM
HoloLensDemoAInput
Install Visual Studio Code if you haven’t already done so. Look for Azure IoT Workbench in the extension marketplace and install it.
In this project we are using the IoT Kit with the AZ3166
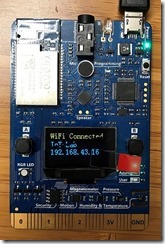 MXCHIP IoT DevKit – Where to buy on Amazon: http://a.co/d/6a7xmny
-
- Download and install Arduino IDE. It provides the necessary toolchain for compiling and uploading Arduino code.
- Open File > Preference > Settings and add following lines to configure Arduino;
· Windows:
“arduino.path”: “C:\\Program Files (x86)\\Arduino”,
“arduino.additionalUrls”:”https://raw.githubusercontent.com/VSChina/azureiotdevkit_tools/master/
- Click
F1to open the command palette, type and select Arduino: Board Manager. Search for AZ3166 and install the latest version. - Download and install USB driver from STMicro.
- Install the Arduino extension in Visual Studio Code.
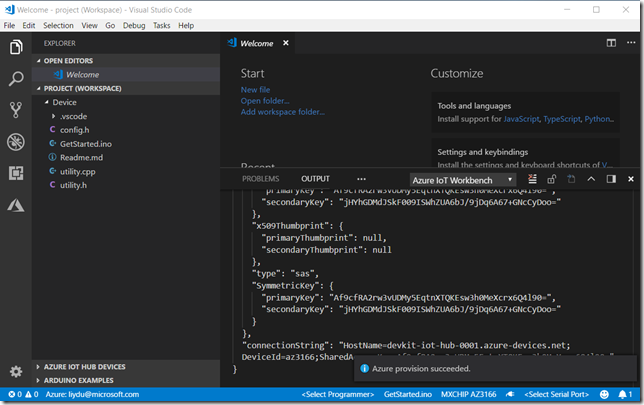
In the new opened project window, click F1 to open the command palette, type and select IoT Workbench: Cloud, then select Azure Provision.
NOTE: Follow the prompts to select your subscription and the IOT hub you created earlier
- Click
F1to open the command palette, type and select IoT Workbench: Device, then select Config Device Settings > Select IoT Hub Device Connection String. - On IoT DevKit, hold down button A, push and release the reset button, and then release button A. Your IoT DevKit enters configuration mode and saves the connection string.
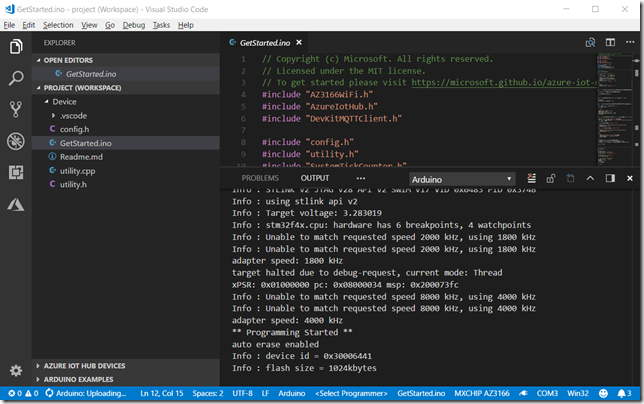
Click F1 again, type and select IoT Workbench: Device, then select Device Upload.
That’s it you have successfully connected your device to Azure, if you are looking to use a different board please see the chart below I have also included simulator example code if you don’t have a physical device.
| IoT device | Programming language |
| Raspberry Pi | Node.js, C |
| IoT Devkit | Arduino in VS Code |
| Adafruit Feather HUZZAH ESP8266 | Arduino |
Developing the Web API
The Web API consumes the Azure Cosmos DB – SQL (DocumentDB) data received from sensors and exposes the REST API to be consumed by other applications. Here are the steps to follow to build the service. The solution consists of three projects;
https://github.com/sysrichn/HoloLensDemo.IoT.git
- HoloLensDemo.Model – consists of all entities related to building, floors and rooms
- HoloLensDemo.Simulator – consists of simulated simulator for building sensors, and pushes data to Azure EventHub on periodic interval
- HoloLensDemo.Web – Web API project, reads data from Document DB, and exposes as API
To make it work, make following configuration changes;
- Within HoloLensDemo.Simulator\Program.cs file, update following EventHub connection settings:
private const string EhConnectionString = "[Connection string for Event Hub]";
private const string EhEntityPath = "[Event Hub Entity Path Name]";
- Within HoloLensDemo.Web\Data\BuildingCreator.cs, update following settings related to DocumentDB:
private const string EndpointUri = https://[Name of DocumentDB].documents.azure.com:443/;
private const string PrimaryKey = "[Primary or Secondary Key of DocumentDB]";
private const string DatabaseName = "[Database name within DocumentDB]";
private const string CollectionName = "[Collection name within DocumentDB]"
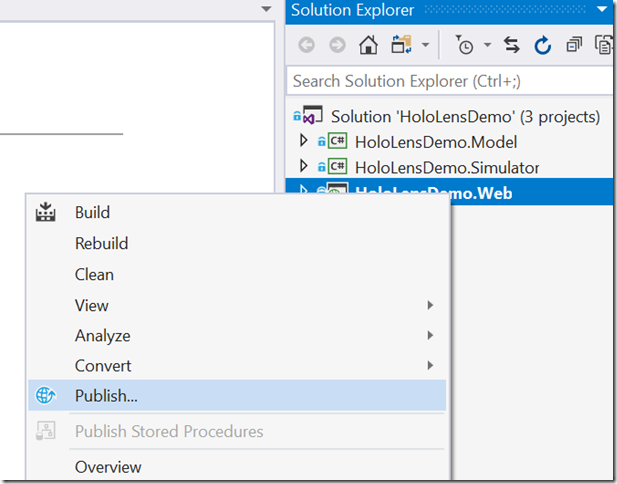
In the next step, deploy the services in Azure. There are several ways to do that. The easiest and fastest way that you can do it is from Visual Studio itself. Right-click on the WebAPI project and select Publish.
Publish the Web API
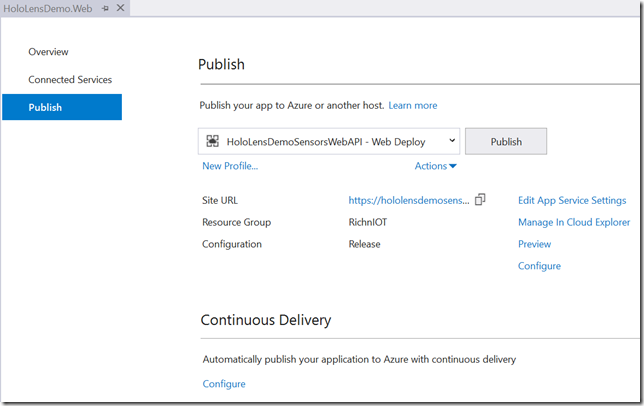
It will launch the Application Publish wizard, from where you can select the Microsoft Azure App Service option and follow the wizard steps to complete the deployment process.
Web API Publish Wizard
Once your service is hosted and deployed on Azure, you can hit the endpoints with any of the Rest API clients (such as the Postman REST API Client) or consume the data in your Holographic or Mobile app.
Connecting a holographic app with Azure
First in your holographic application the data model will hold the data returned by the Rest Services you just created, hence it should be same structure. Using the data class in the example code I provided add that same data model to your assets in your project;
Example the building class
[Serializable]
public class Building

{

public string BuildingName; public string Id; public string Address; public List<Floor> Floors;

}
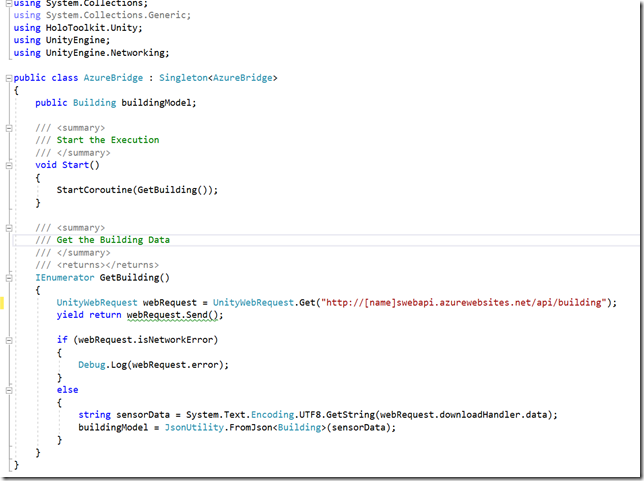
Now we will create an Azure Bridge, which fetches the data from the services and maps it with the Building Data Model, which we have just defined in the preceding section:
- Navigate to the Assets| Scripts folder.
- Add a new script by navigating to context menu | Create | C# Scripts and name it AzureBridge
- Open the script file in Visual Studio
As in the first step, we will make this class a Singleton to use only one instance of it. You can achieve this by just inheriting the class from the Singleton class, by passing the same class type as parameter:
Attach the script with the Root object of your holographic app, by just dragging the script into the Root Object, either in Object Hierarchy or in the Inspector window.
With this, our Azure Bridge is ready to connect and fetch the live data. If you run the application by placing a breakpoint inside the GetBuilding() method, you should be able to explore the data retrieved from the services.
The objective of this blog was to build an enterprise scenario with HoloLens with integrated IoT, there are several enhancements that you can do to extend this solution.


0 comments