

Reed Robison spotlights Graph Explorer as a great place to start with Microsoft Graph API.
One of many challenges for developers today is choosing the right API when it comes to integrating software. Some SDKs may be better tailored for a particular environment or language, but just about everything supports basic REST calls. That’s what makes Microsoft Graph API so attractive. Not only does it provide simple REST interfaces for all kinds of Microsoft products and services, but it’s relatively easy to work with.
When I first started exploring Graph API, the initial hurdle was getting acquainted with app registrations in Azure AD. There can be a lot of configuration options to work through depending on how deep you want to dive. As a developer, you might also not have access to your company AAD, so this is where a O365 Developer Subscription comes in handy. You can set one up for free and get your own tenant to explore and test with. If you are doing any O365 development work—SharePoint Online, Power Platform, etc. – or trying to learn more about AAD, I strongly encourage you to join the Microsoft 365 Developer Program as a first step. Get your free E5 license and developer tenant to learn in.
Getting your own tenant to work with is especially helpful since many production environments may have policies in place that block development activities and authentication scenarios. It’s always easier to start in an environment that you control – get it working there, then you have a baseline to compare to other environments if you run into a problem or something doesn’t work as expected in your production tenant.
Some Helpful Tools
There are a couple of other Tools that I find extremely helpful with Graph API– Graph Explorer, Fiddler, and Postman.
Graph Explorer is a developer tool that lets you conveniently make Microsoft Graph REST API requests and view corresponding responses. Use Graph Explorer to try APIs in a development tenant to explore capabilities and use it as a prototyping tool to fulfill your app scenarios. This tool includes helpful features such as code snippets in C#, Java, JavaScript, and Objective C; Microsoft Graph Toolkit and adaptive cards integration; and more.
As simple as REST calls are (in theory), they can be finicky with syntax and frustrating to debug at times.
Fiddler allows you to capture web traffic so you can examine requests and responses – to see exactly what is going across and being returned as raw data. Depending on the language you use to implement the REST APIs and how you capture the responses, sometimes errors may be masked or lost in translation. When something isn’t working and you aren’t sure if it’s in your app or in the call itself, Fiddler allows you to inspect the raw HTTP/S traffic to see what was sent and what was returned.
Postman is just another super helpful tool to build, test, and inspect REST calls. If you just want to test an API to see how it works without writing an app first, you can use Postman to jump right in. Postman is slightly more complicated than Graph Explorer when it comes to dealing with authentication.
We should start with a word about tokens and permissions.
It’s temping to jump right in to building with Graph API calls, but you’ll find that you won’t get very far without first understanding some basics with authentication and permissions.
You’ll find extensive documentation on using Microsoft Graph as well as samples of calls, but most of them assume you have a security token to work with. When you drill into the actual samples, most require a Bearer token in the request header. If you take a step back, you must get some things in place before you can acquire a token.
Microsoft Graph is a RESTful web API that enables you to access Microsoft Cloud service resources. After you register your app and get authentication tokens for a user or service, you can make requests to the Microsoft Graph API.
To develop apps with Graph API, you are going to need to get familiar with how to register an app in Azure AD and decide on how to get auth tokens to use in your calls. There are a few different libraries out there to help you deal with auth token, namely Azure Active Directory authentication library (ADAL) and Microsoft authentication library (MSAL). They both have pros and cons – work well in some scenarios, not so well in others. MSAL is the newer, recommended solution for most Microsoft development scenarios. You might also just decide to handle tokens on your own or use a 3rd party library. Like all things Microsoft, there are a lot of options.
When you start this learning exercise, Id’ recommend starting with Graph Explorer and a developer tenant. It’s the simplest scenario to “get things working” initially, so let’s start there.
Once you have joined the Developer Program and setup your own tenant, you have everything you need to get started. You should be able to sign-in to the Azure Portal and see your Azure Active Directory as well as access most O365 services under your developer tenant. You’re an admin in this tenant so you can add users, provision services (with some limitations), and start building apps.
I created a new subscription as I started this post. It took all of 5 minutes to sign up with a fresh account and I had a nice new E5 O365 license to work with.
After your setup your developer tenant, navigate to Graph Explorer and sign in.
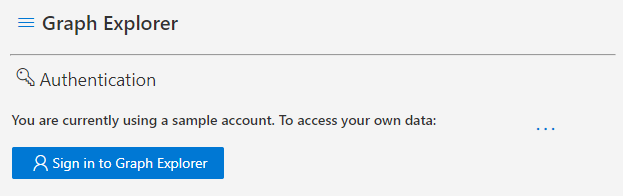
The first time you do this, you will see a popup asking for consent to use some basic APIs in your tenant.
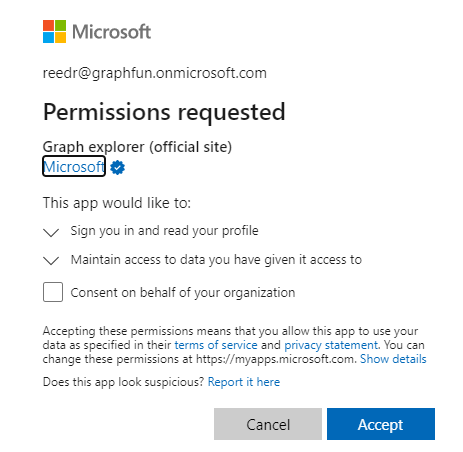
By accepting this prompt, you are authorizing the Graph Explorer application to make Graph API calls to Azure AD authorized under your account. Graph Explorer will appear in your Azure AD under Enterprise Applications. To learn more about consent flow, check out Understanding Azure AD application consent experience. Consent is working exploring in detail, but for simplicity we’re going to table that for now.
Once you have logged in and accepted the prompt, you should see Graph Explorer signed in along with a list of pre-configured queries for common Graph API calls. Keep in mind, you consented to a very limited scope of permissions when you first logged in, so some of these queries will work – other will require additional consent.
Click on “my profile” and check out the results:
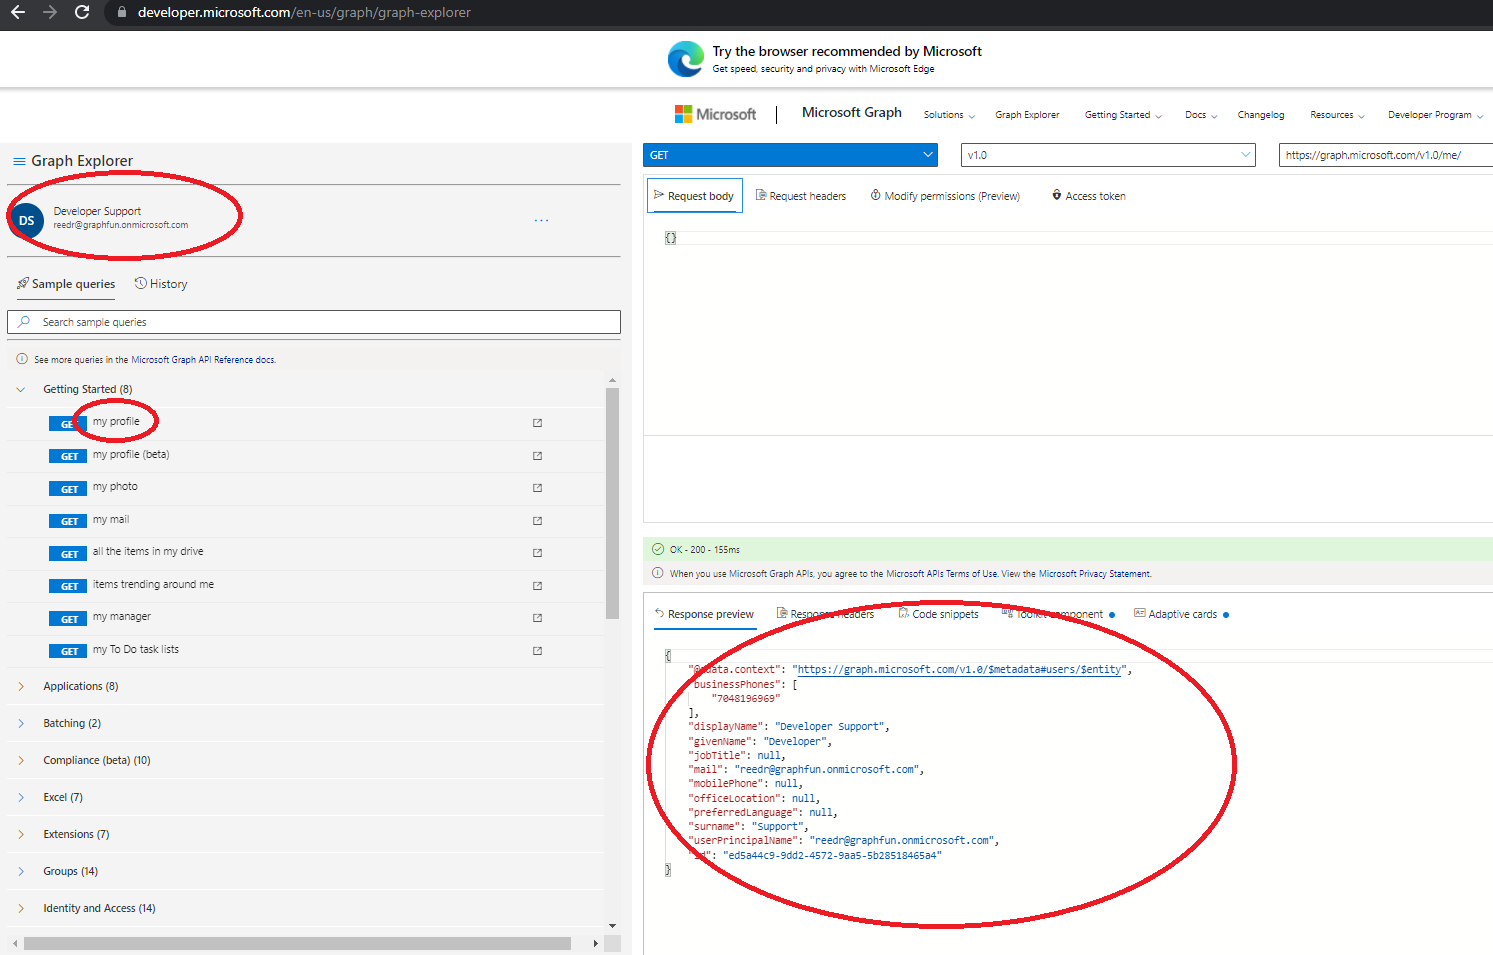
At this point, you have just executed your first Graph API call to get some basic profile information for yourself. It generated a GET request to https://graph.microsoft.com/v1.0/me/ and you can explore the results in the Response Preview window. This is the same REST call you find in the Graph API docs to “get user”, only Graph Explorer packaged it all up for you and handled the authentication.
You didn’t have to deal with any App Registration or deal with tokens – and that’s the beauty of Graph Explorer. If you click on the “Access Token” tab in the query window, you can see the Bearer token it acquired for your login and included in the call automatically.
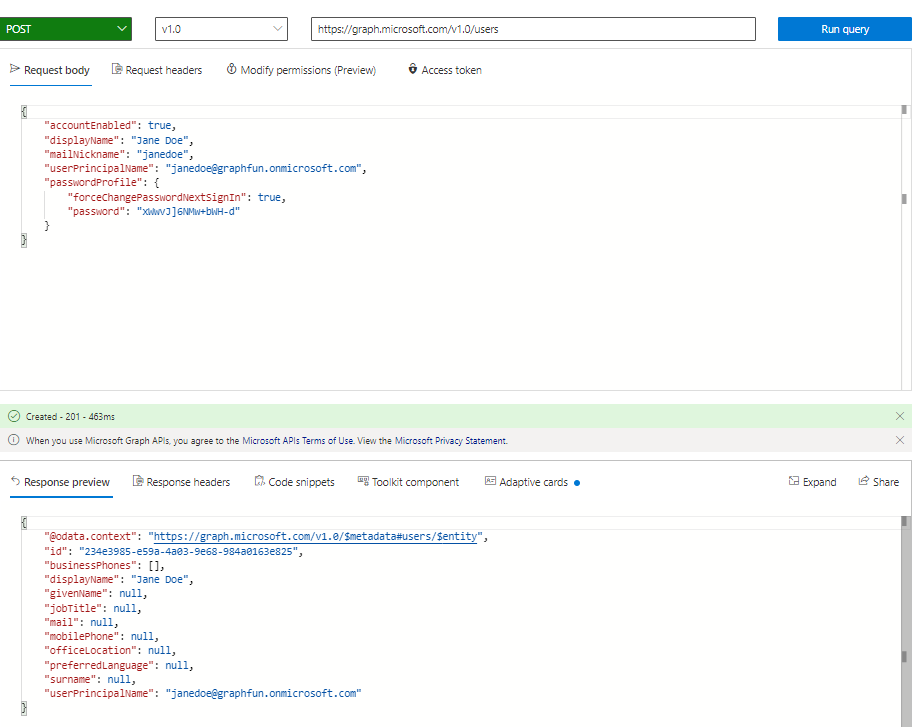
Let’s try something a little more interesting like creating a user. According to the Graph API docs, I just need to issue a POST to https://graph.microsoft.com/v1.0/users with some basic JSON info. This isn’t listed in my sample query list, but I can simply paste the documented URL into the query and change the action to POST. You can copy the request body right out of the docs, make some minimal changes, and click Run Query.
When I issue this POST, notice the permissions error in the response:
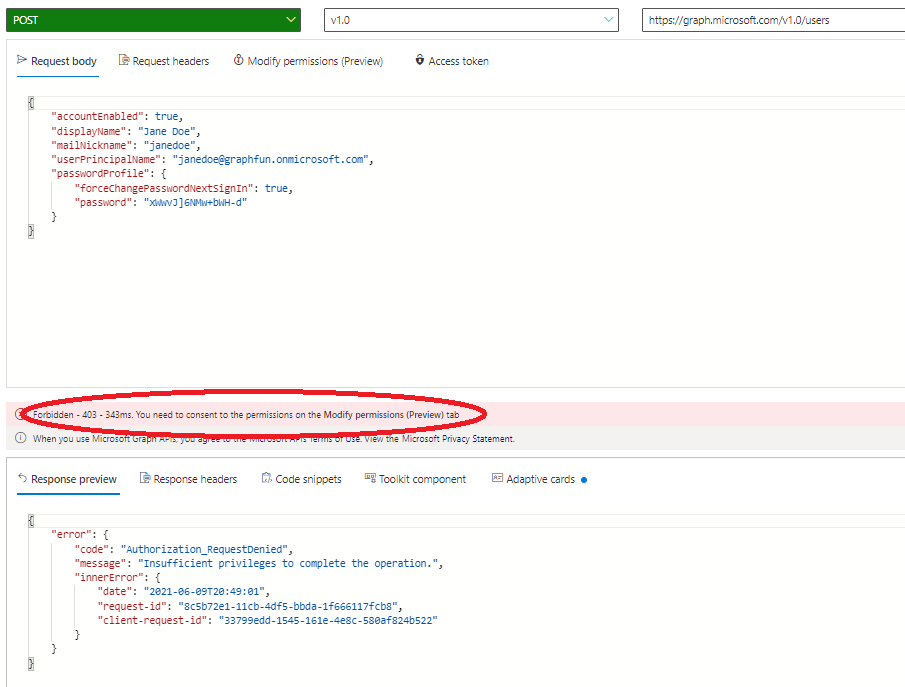
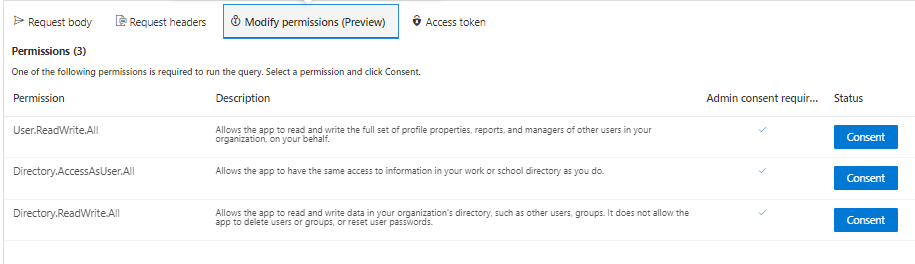
Every Graph API call is documented with a set of required permissions. For this particular operation (create user), they are defined here.
| Permission type | Permissions (from least to most privileged) |
|---|---|
| Delegated (work or school account) | User.ReadWrite.All, Directory.ReadWrite.All, Directory.AccessAsUser.All |
| Delegated (personal Microsoft account) | Not supported. |
| Application | User.ReadWrite.All, Directory.ReadWrite.All |
Graph Explorer provides a Modify Permissions tab to allow you to consent to these added permissions.
If you go through and consent to the extra permission requests, I can try executing the same query again to create a user and this time, it should succeed.
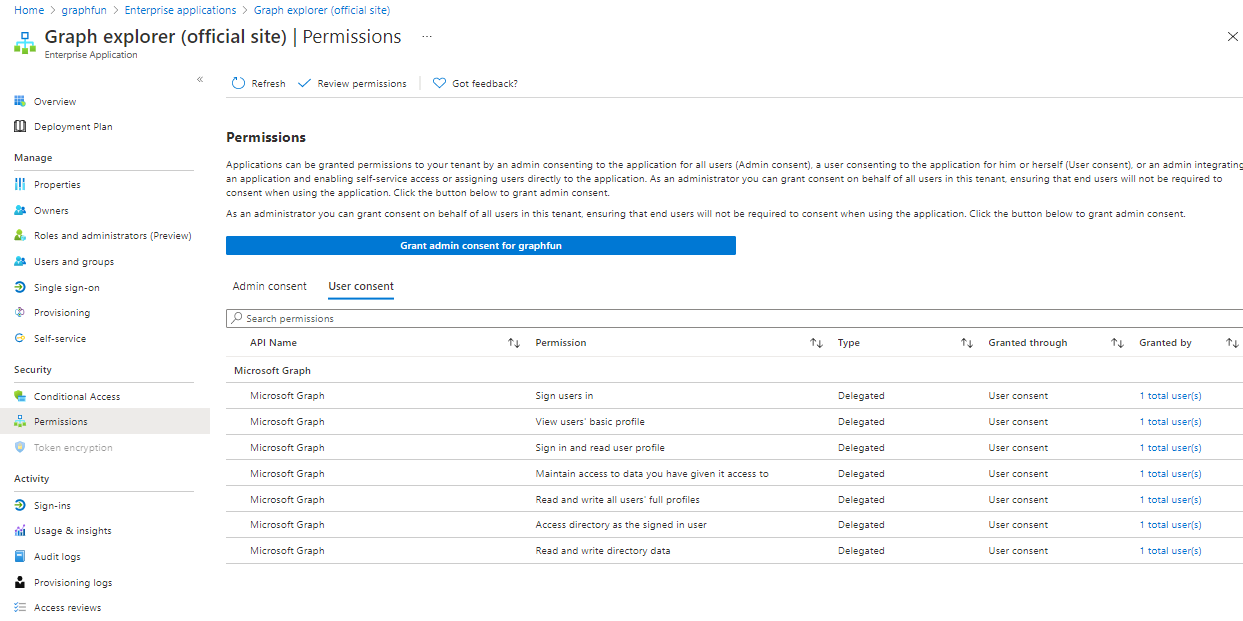
If you want to look at what is happening with the configuration inside Azure AD with Graph Explorer when you add permissions, navigate to the Azure Portal and drill into your Azure Active Directory. Check out your Enterprise Applications and drill into Graph Explorer and Permissions.
You’ll see all the individual permissions that you have consented to listed for your account. Since you are both a user and an administrator of your tenant (remember, we’re using the developer tenant here) this is an easy way to test Graph APIs in a safe environment that you control with a minimal amount of work.
There’s an extensive list of different APIs you can use to interact with Graph API. They all work similarly so once you get the hang of working with a few, it’s easy to use them all.
Using Graph Explorer is a great way to get started with Microsoft Graph API. Once you test out APIs there, you will move these concepts to an application that you build and register on your own. In that scenario, you will want to configure your own app registration and setup these permissions scoped specifically to your application. We’ll look at that in my next post.
0 comments