
In a previous blog, Using Azure Cognitive Services Text Analytics API Version 3 Preview for Sentiment Analysis, App Dev Manager Fidelis Ekezue demonstrated how to use the Text Analytics AP Version 3 to analyze the sentiment expressed in the Public Comments of the 2016 North Carolina’s Medicaid Reform. In this blog, I will expand on how Text Analytics API Version 3 Preview of the Microsoft Azure Cognitive Services can be used to further extract more information like the key phrases out of the comments.
The previous blog used REST APIs to extract the sentiments from comments, however, this blog will use the recently released new SDKs that greatly simplify coding and hide all the complexities in the previous blog. Using the SDK, I will demonstrate how to use four out of the six functions of Text Analytics to further analyze large unstructured data. As in the previous blog, I will be using the public comments from the North Carolina Medicaid Reform of 2016 to create a visualization in the form of word clouds to highlight the common words used by those with positive, negative or neutral sentiments as analyzed by Text Analytics. Word clouds attempt to extract the most used words in a document and present them in different sizes based on the frequencies of occurrence. The larger the text size the more such words appeared in the document. An example of a word cloud is figure 1 below

Figure 1: Example of a word cloud
Given that the Text Analytics does not produce word clouds without any code, I developed a small python code in Jupyter notebook to do the following:
- Read the CSV file into a Pandas data frame
- Cleanse the data to eliminate blank rows, obvious duplicates and irrelevant data like attachment-only comments and non-English language comments. This step leverages the Language Detection function of Text Analytics SDK.
- Using the Sentiment Analysis function of the Text Analytics SDK, analyze the cleaned data to retrieve the sentiments expressed by each comment in the data frame.
- Generate stop words – These are words that will be excluded from the visualizations. Building the STOPWORDS required either using the NLTK STOPWORDS or the Unine.ch EnglishST STOPWORDS. For this blog, I will be using the latter. Additionally, since the data for this blog is from North Carolina and related to the Public Comments for Medicaid Reform, some specific information like city names, businesses, persons that were part of the comments data were added to the STOPWORDS. The Named Entity Recognition function of the SDK will be used to create a list of the entities that are organization, location or person. This list in addition to such words as Medicaid, Healthcare, Reform, etc. will be added to the generated STOPWORDS list. This ensured that the final word list, generated by using the SDK Key Phrases Extraction, used for the words cloud visualization will exclude these entities.
The python code does not perform any error checking and it’s not tuned for performance, but they will be available as a Jupyter notebook on my GitHub page.
Create Azure Resource Group

Figure 2: Create Azure Resource Group
Create Azure Cognitive Services
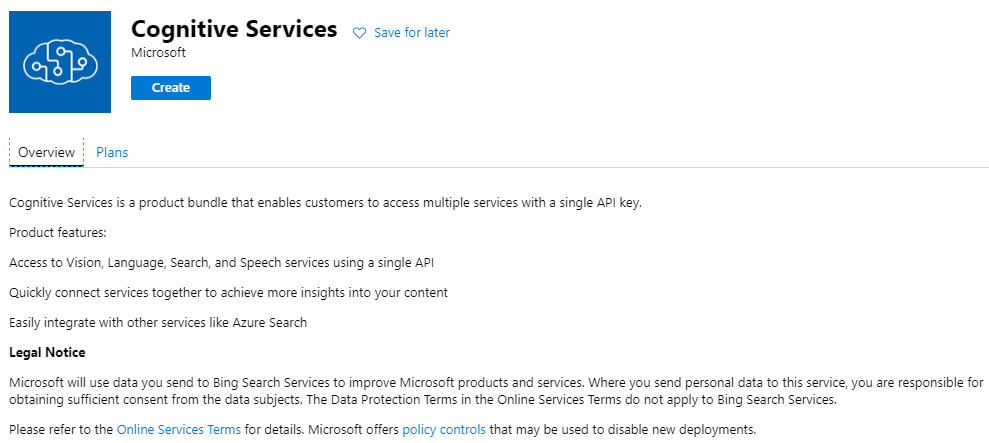
Figure 3: Create Azure Cognitive Service
Supply the name, subscription, location, service plan and resource group. For the resource group, use the resource group created in the figure 2 and then click Create.
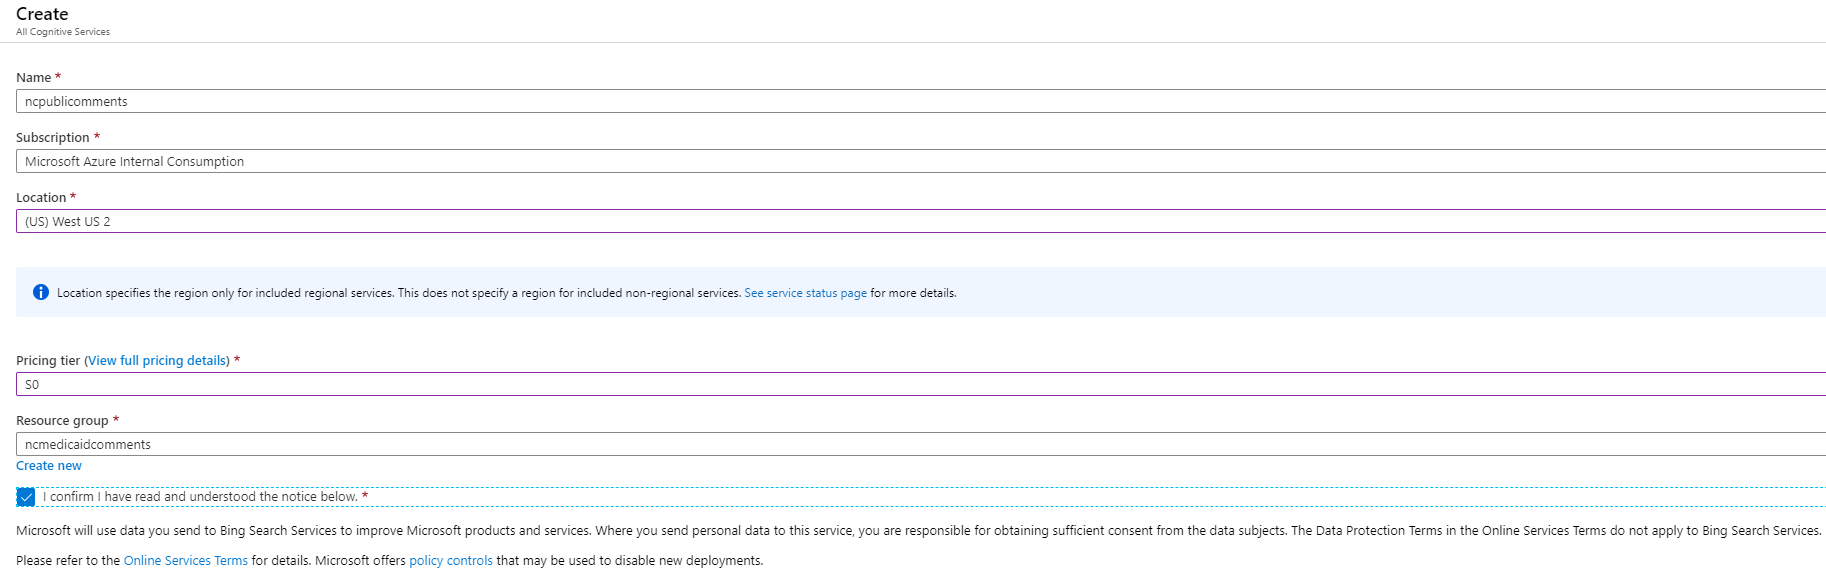
Figure 4: Provide name, subscription, location, service plan and resource group
After the resource is created, click on the Go to resource
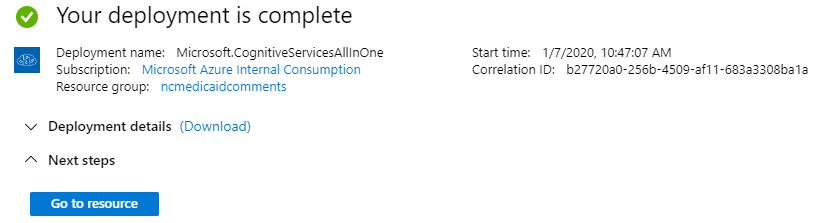
Figure 5: Deployment complete screen
Make Note of the Key and Endpoint
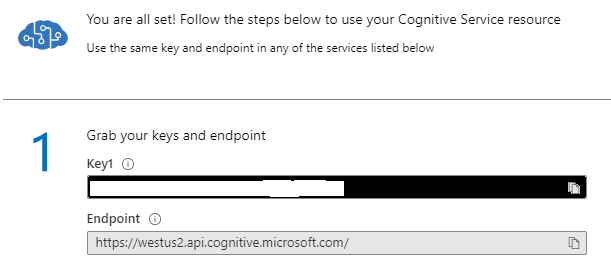
Figure 6: Make note of the key and endpoint
Also, note that the Text Analytics API offers six different endpoints (as of the time of this writing in February 2020). These endpoints are:
- Detect Language – Detects the language in a document and the score between 0 and 1, with 1 being 100% certainty.
- Entities – Identify known entities, for example, Person, PersonType, Organization, Location, Currency, Datetime, etc., in a document.
- Entity Linking – Returns a list of recognized entities with links to a well-known knowledge base”
- EntityPII – Return know PII entities, for example, Credit Card Number, Driver’s License, etc., in each document
- Key Phrases – Return the list key words in a document.
- Sentiment – Returns the overall predicted sentiment of the given document. Additionally, the API also predict individual sentences in the document. At the sentence level, the prediction is either positive, negative or neutral. At the document level the sentiment prediction can be one of the following:
- Mixed – When the document has multiple sentences and there is at least one sentence with Positive sentiment and at least one sentence with negative sentiment. For example, if a document has two sentences, if the sentiment of one of the sentences is negative and the other is positive. The document sentiment is assumed to be Mixed.
- Positive – The entire document has positive sentiment
- Negative – The entire document has negative sentiment
- Neutral – The sentiment expressed is neither negative nor positive
Load All the Necessary Libraries in Jupyter Notebook
The code is written in Jupyter Notebook from Anaconda and the entire notebook is available on my GitHub page. To use the SDK, you must install the library using the following command from the console:
pip install azure-ai-textanalytics
After this, the next important step is to setup the variables needed as follows using the information from figure 6 above:
key = "<paste-your-text-analytics-key-here>"
endpoint = "<paste-your-text-analytics-endpoint-here>"
Helper functions
The following functions were created in python to help with the various aspect of loading the comment files into a Pandas data frame and cleaning the data up for use to generate the words cloud. You can download the full listing of the python code at my GitHub page.
- get_text_analytics_client – Create a client service of the Text Analytics SDK.
- get_comment_sentiment – Analyze comments and return the overall sentiment.
- language_detection – Using the SDK, identify the language of the comments.
- get_comment_keyphrases – Extracts key phrases from the comments
- get_comment_entities – Extracts well-known entities like name, organization, location, etc. from the comments
- get_stopwords — Generate external STOP WORDS from this site: http://members.unine.ch/jacques.savoy/clef/englishST.txt. And then add the domain specific STOP WORDS from the get_comment_entities function above.
- generate_commentSTwords – Generate specific stop words that pertains to the comments in the CSV file.
- create_word_cloud — Generates a word cloud visualization and optionally write it to .png file, if specified.
Positive Sentiment Word Cloud
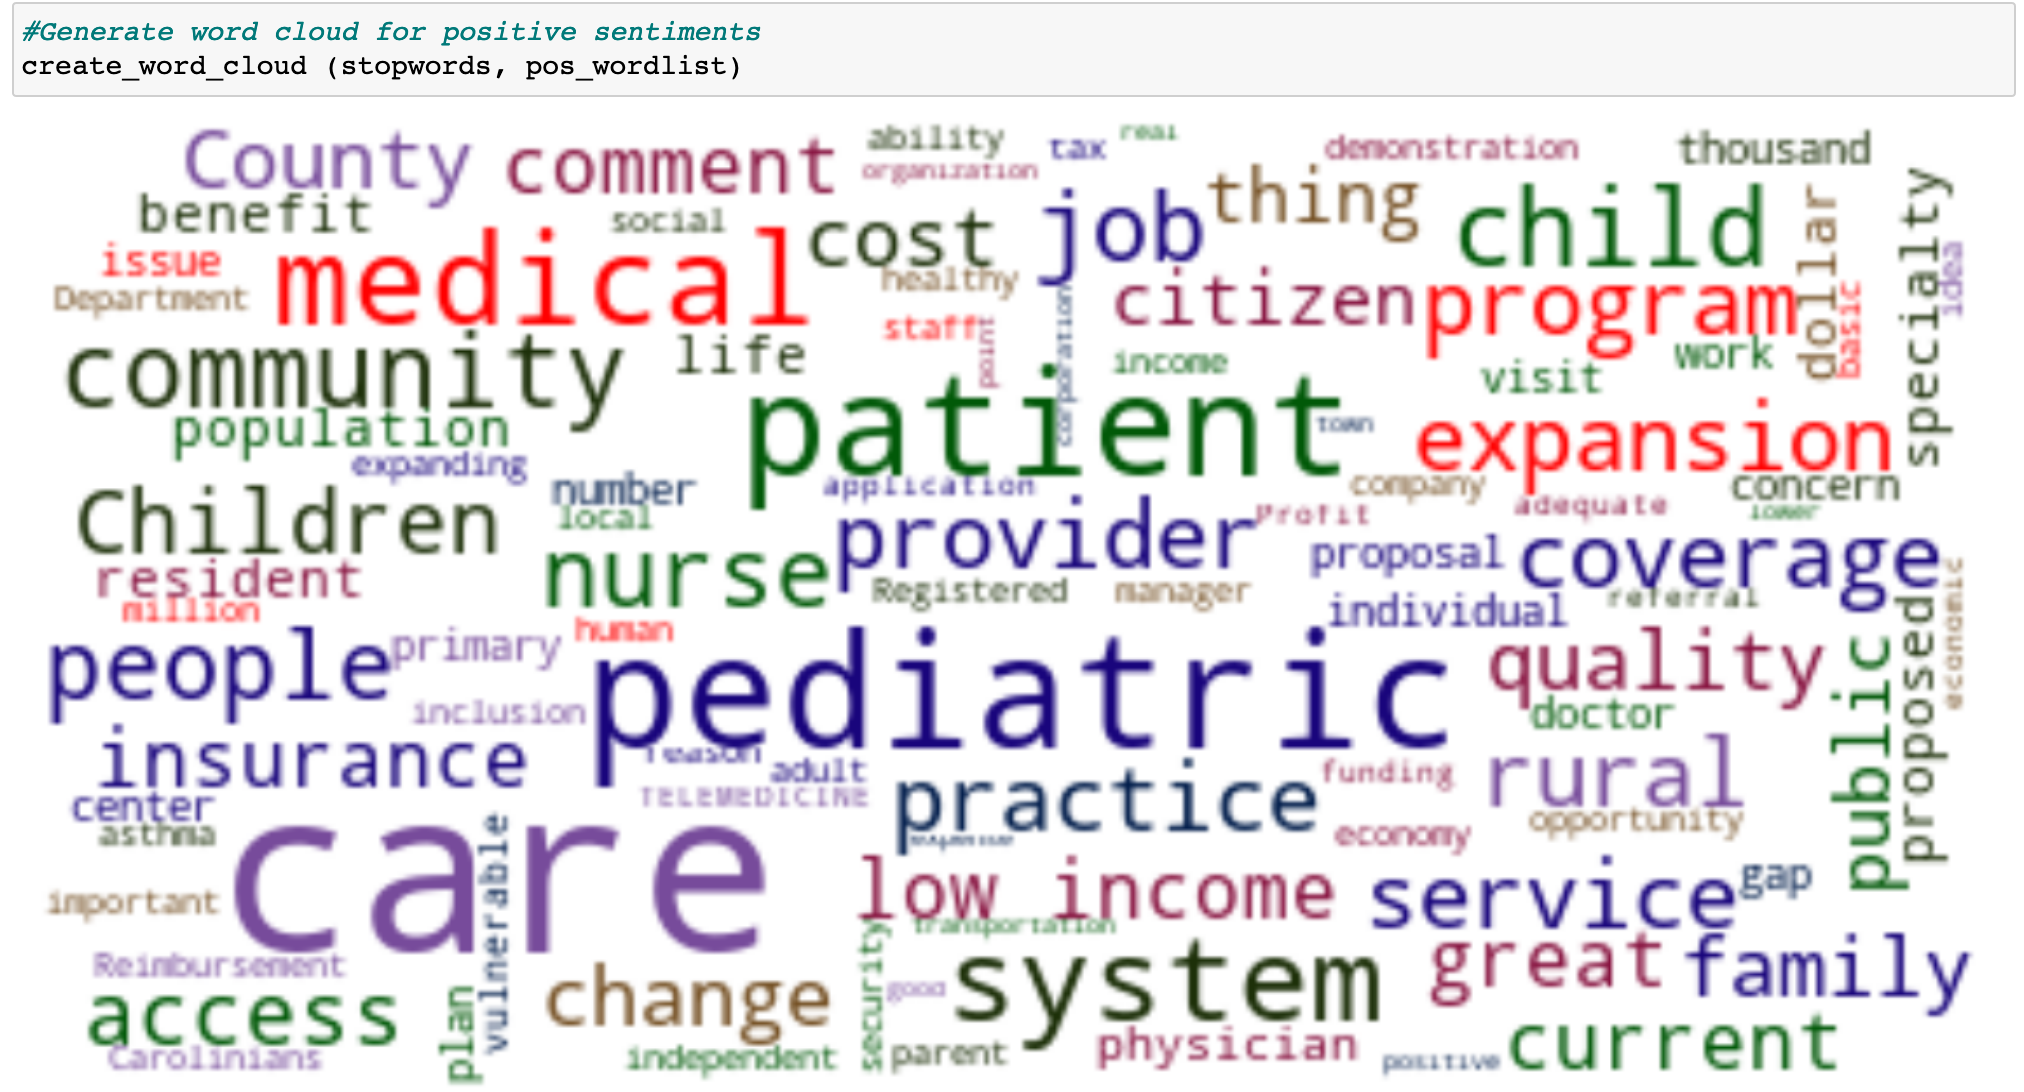
Figure 7: Word cloud of the positive sentiments
Negative Sentiment Words Cloud
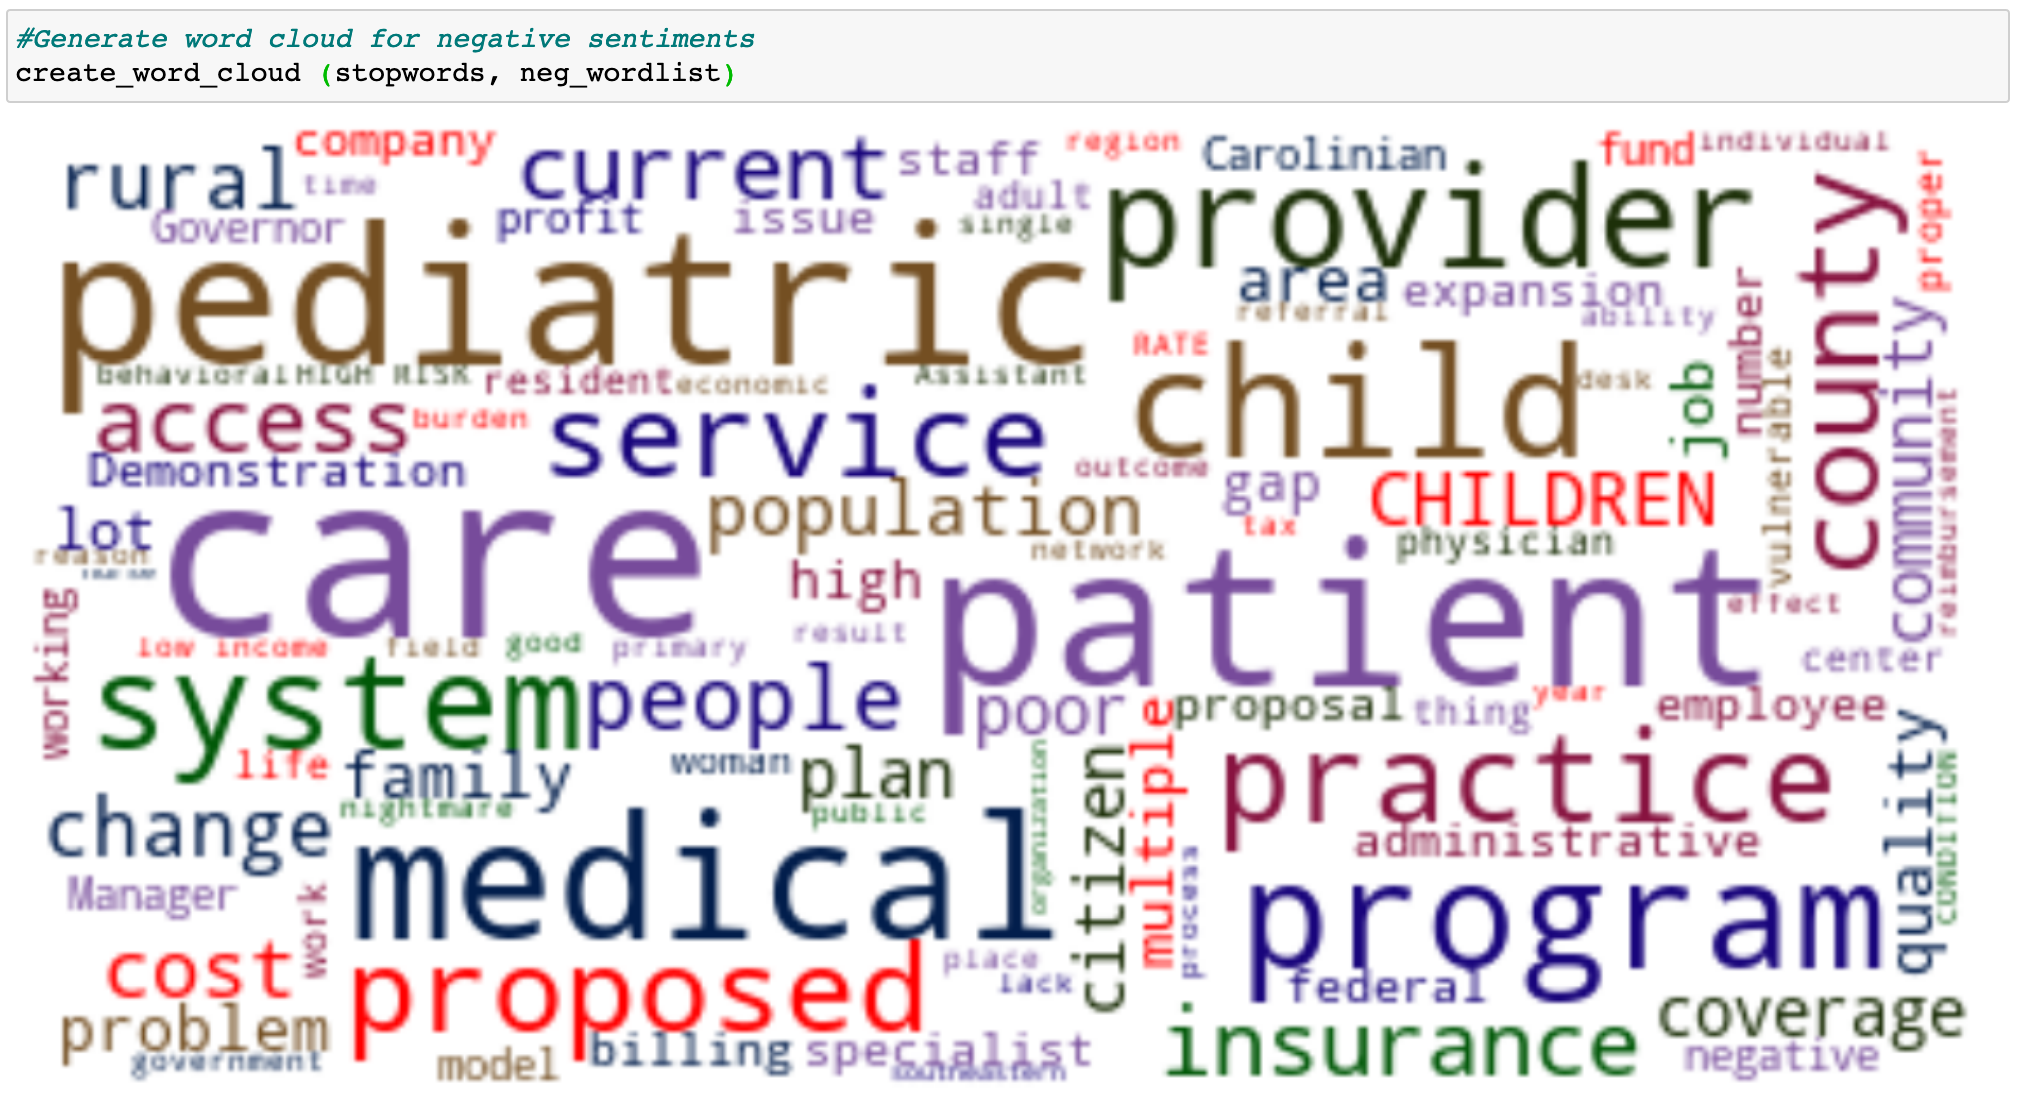
Figure 8: Word cloud for negative sentiments
Download the source code here.
0 comments