
In this post, App Dev Manager Fidelis Ekezue explains how to use Azure Cognitive Services Text Analytics API Version 3 Preview for Sentiment Analysis in nine simple steps.
Businesses, public and private sectors respectively, often solicit unstructured comments and reviews from the public and consumers of their policies and products. Traditionally, these comments and reviews are paper based, however, the advancement in information technology has moved the medium for these comments and reviews online. The move to soliciting comments and reviews online has three major impacts namely businesses can collect comments from their consumers quickly and more efficiently, larger number of comments can be obtained within a short period, and opportunity for bots to submit comments. There is an increasing concern of the effect of bots-generated comments and batch comments from advocacy groups inundating the process with a high number of submissions that can skew the outcome. Sifting through large unstructured text data manually and extracting valuable information is time-consuming and difficult. We can analyze many comments today because of advances in Machine Learning, Artificial Intelligence and Natural Language Processing (NLP). One such tool is the Microsoft Cognitive Services Text Analytics API Version 3. With this version of the API, the evaluates text and returns overall sentiment scores for the text and the sentiment scores for individual sentences in the text.
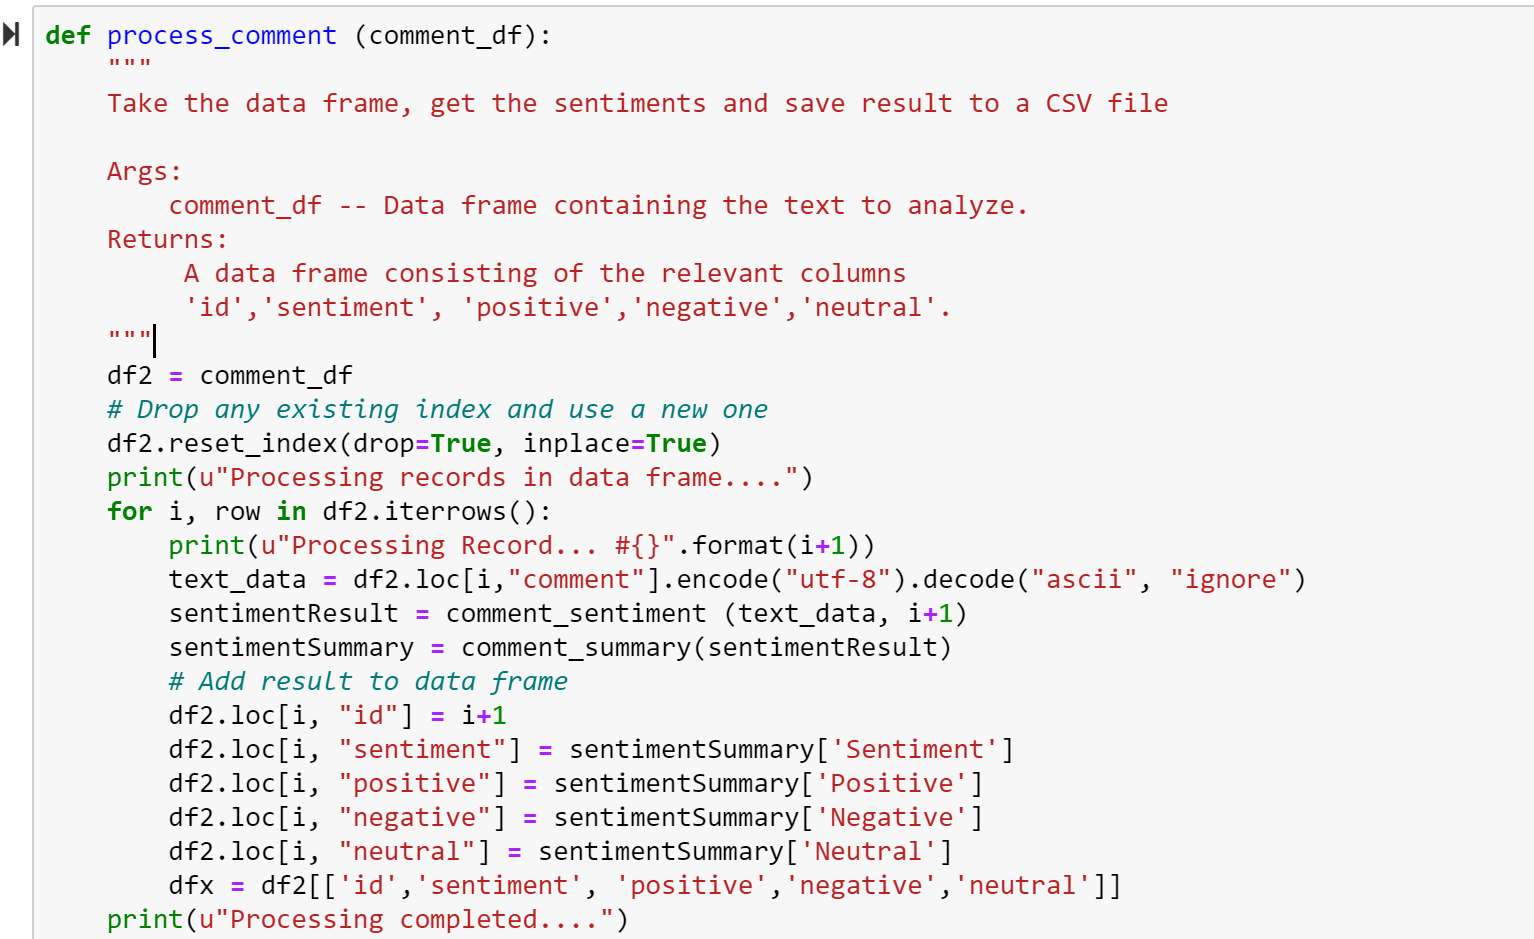
In this blog, I will demonstrate how Text Analytics API Version 3 Preview of the Microsoft Azure Cognitive Services can be used to analyze large unstructured data. This analysis aims to understand the sentiments expressed in a solicited public comment process and determines the degree of the positivity or negativity of the comments. Text Analytics V3 expects the document in JSON with the following format: ID, text, and language. One limitation of Text Analytics V3 is that the document must have less than 5,120 characters. The data used for this demonstration is in CSV format and the comments varied from one sentence to several sentences of multiple pages. Given these constraints, I developed python codes in Jupyter notebook to do the following:
- Transformed each comment line into a JSON document as expected by the API
- Segmented each sentence as separate comment
- Called the API to analyze the sentiment one document at a time.
- Wrote the sentiment to a CSV file. This file is imported to Power BI to plot the results. A tutorial on Microsoft PowerBI can be found here.
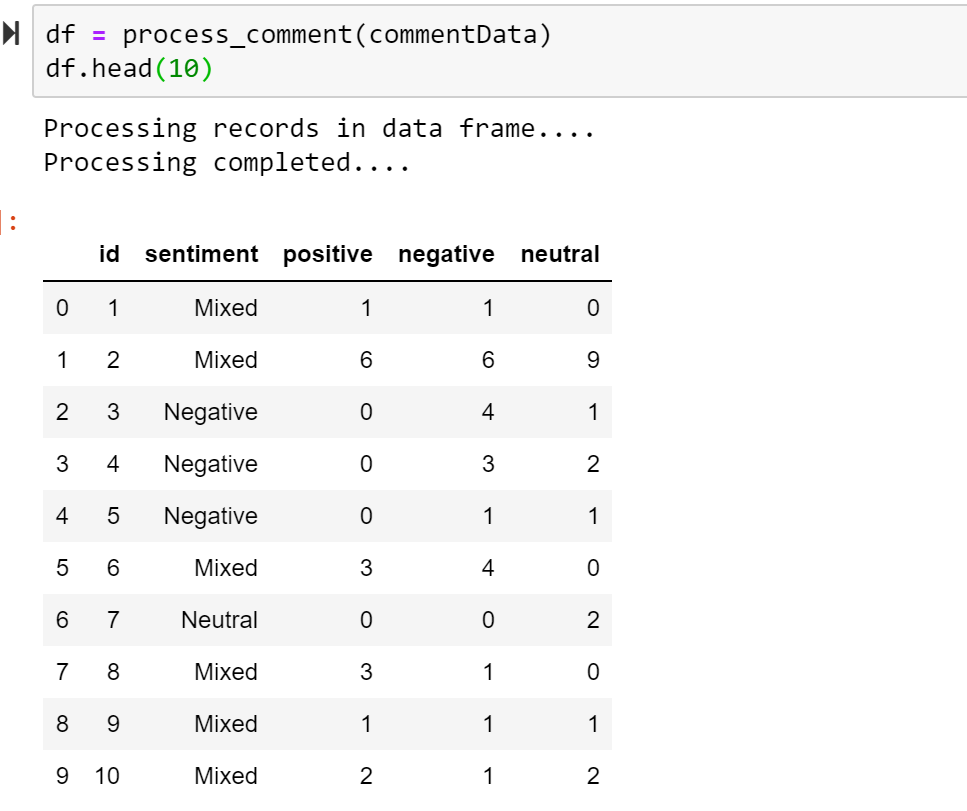
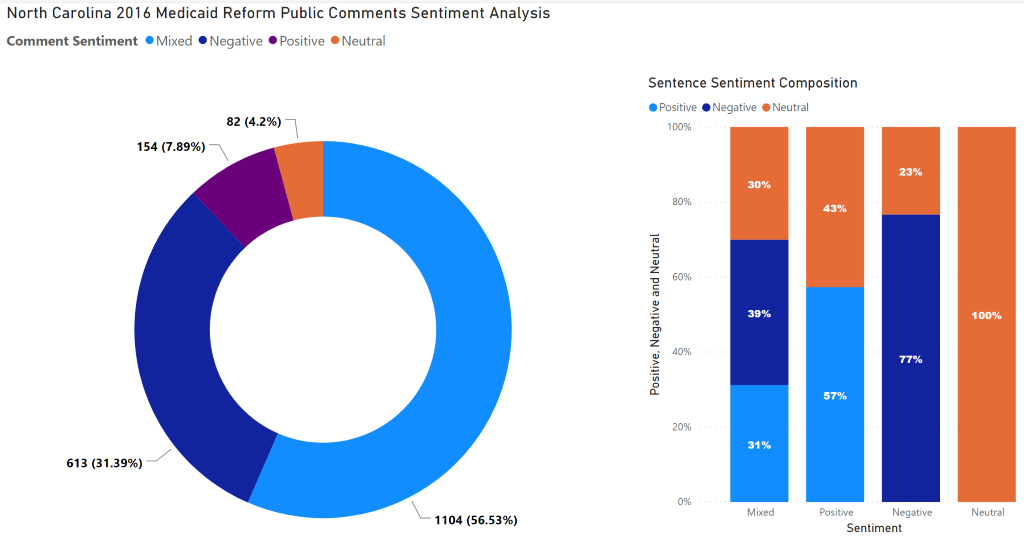
The Text Analytics API uses pre-trained models from Microsoft’s extensive work on NLP to analyze the comments and classify them according to the sentiments into four categories, positive, negative, mixed, and neutral. The data used for this demonstration consist of public comments for North Carolina’s Medicaid Reform. The public comment period was from June 2016 to July 2016 and a total of 1,953 responses were received. This analysis did not check for duplicate comments as it focuses on showing how Text Analytics API can be used to analyze and quantify sentiments in comments. This demonstration assumes that you have an Azure subscription and know how to create Azure Cognitive Services Resource. If you do not have an Azure subscription, you can sign up for a free trial account and if you are unfamiliar with how to create Azure Cognitive Services, follow this tutorial.
Get the source code for this tutorial on GitHub here.
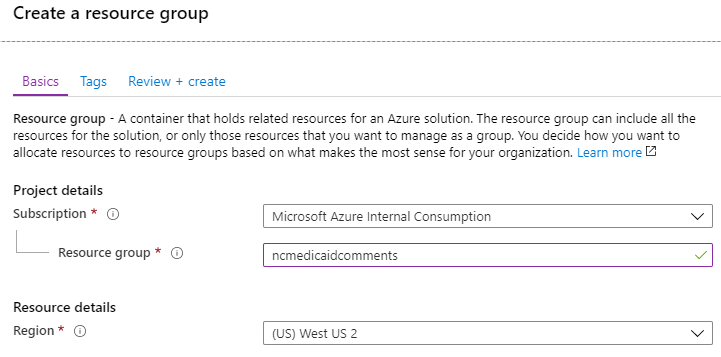
Step 1: Create Azure Resource Group
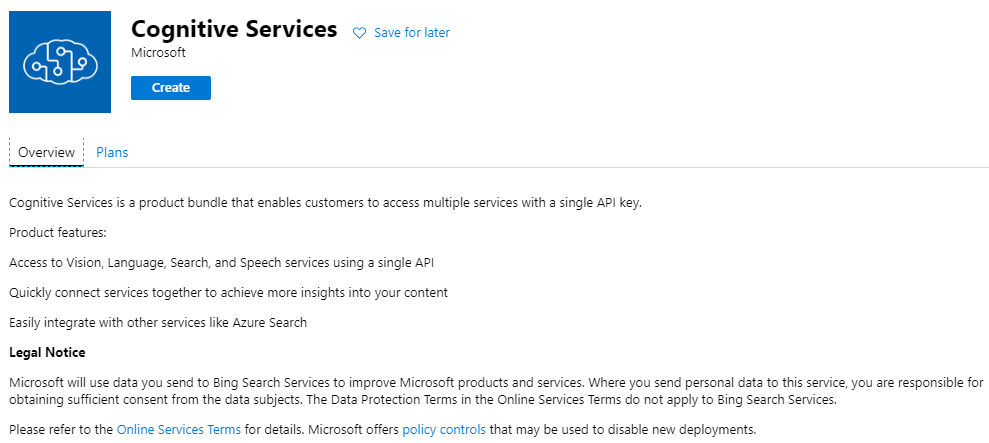
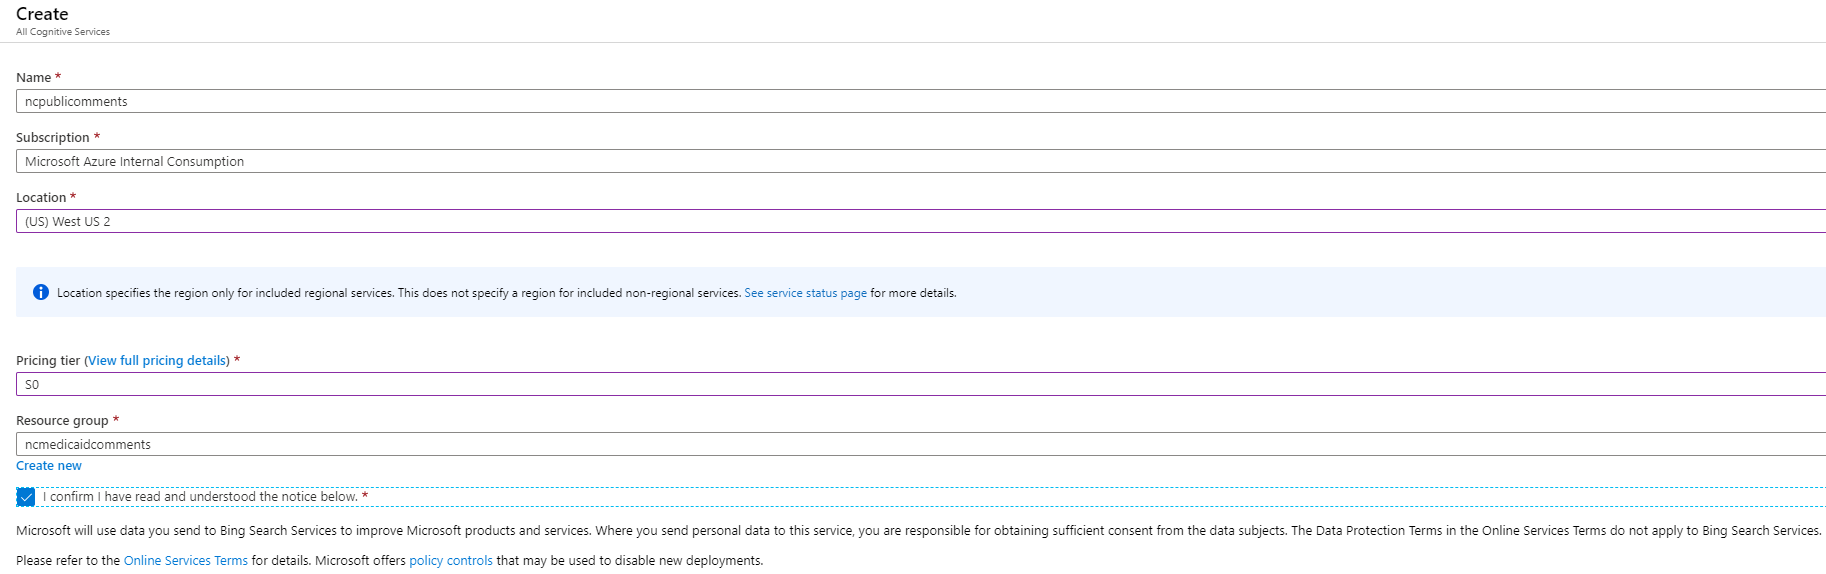
Step 2: Create Azure Cognitive Services
Supply the name, subscription, location, service plan and resource group. For the resource group, use the resource group created in Step 1 and then click Create.
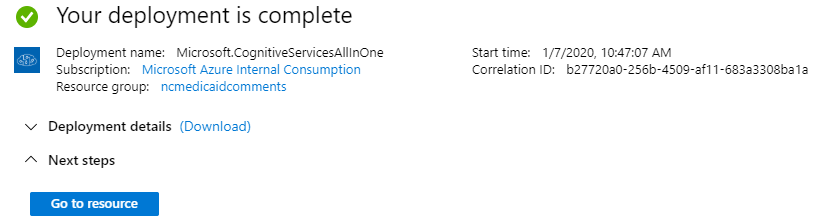
After the resource is created, click on the Go to resource
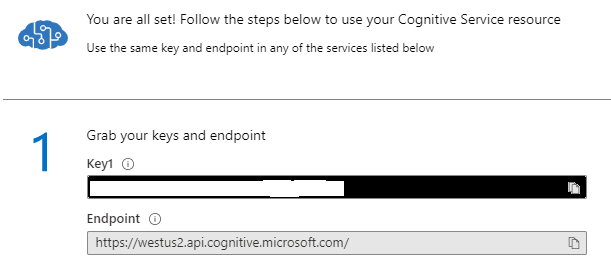
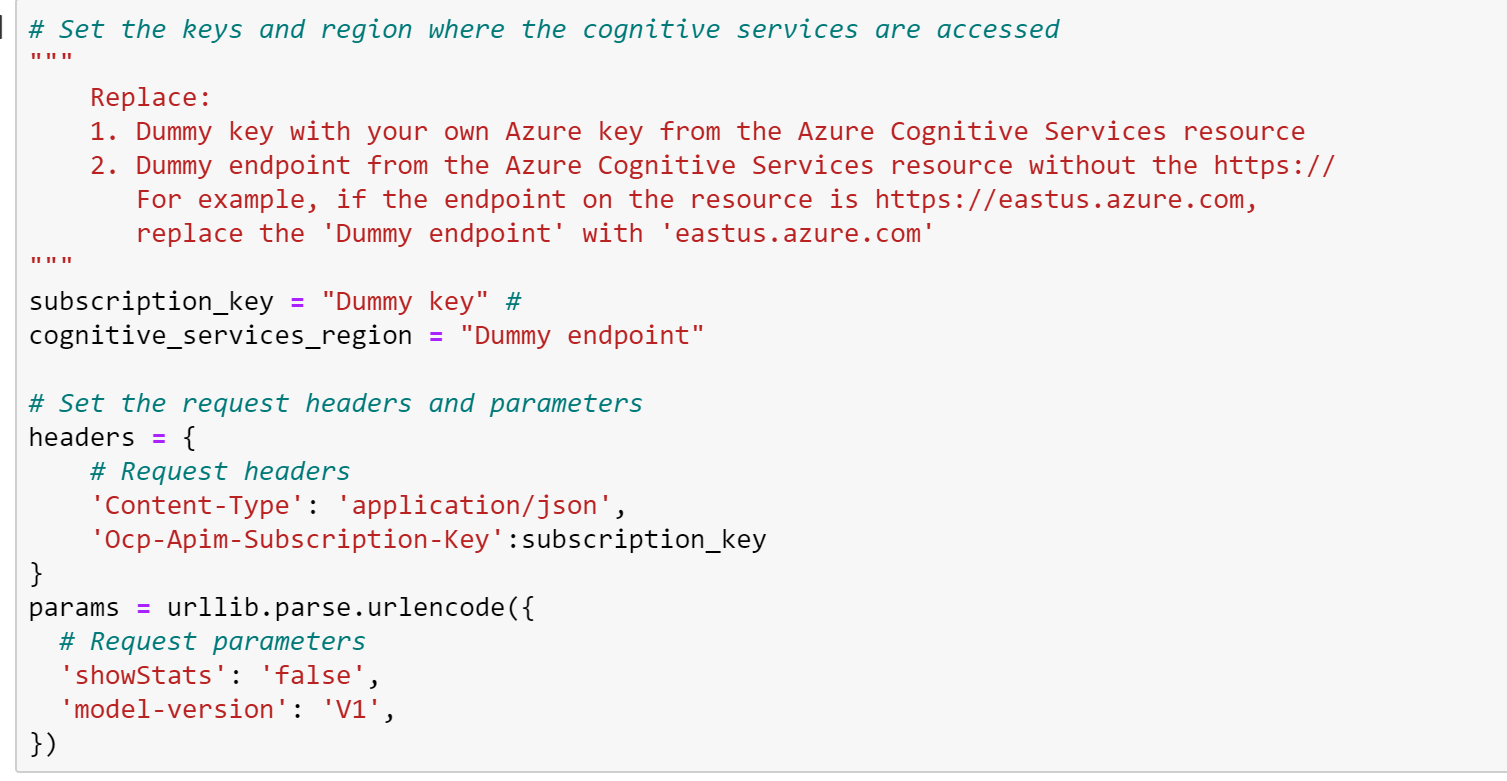
Step 3: Make Note of the Key and Endpoint
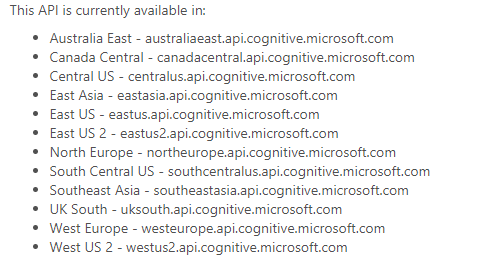
Note that the Text Analytics API Version 3 Preview is only available in certain regions. As of the time of this writing (January 2020), it is available in the following regions:
Step 4: Setup Python Environment in Jupyter Notebook and Load Helper Files
You can use Azure Notebook or your preferred Jupyter Notebook like the version that is installed when you install Python from Anaconda or Google Colab. If you are unfamiliar with Azure Jupyter Notebook, please see this tutorial. The Python version used for the demonstration is 3.7.

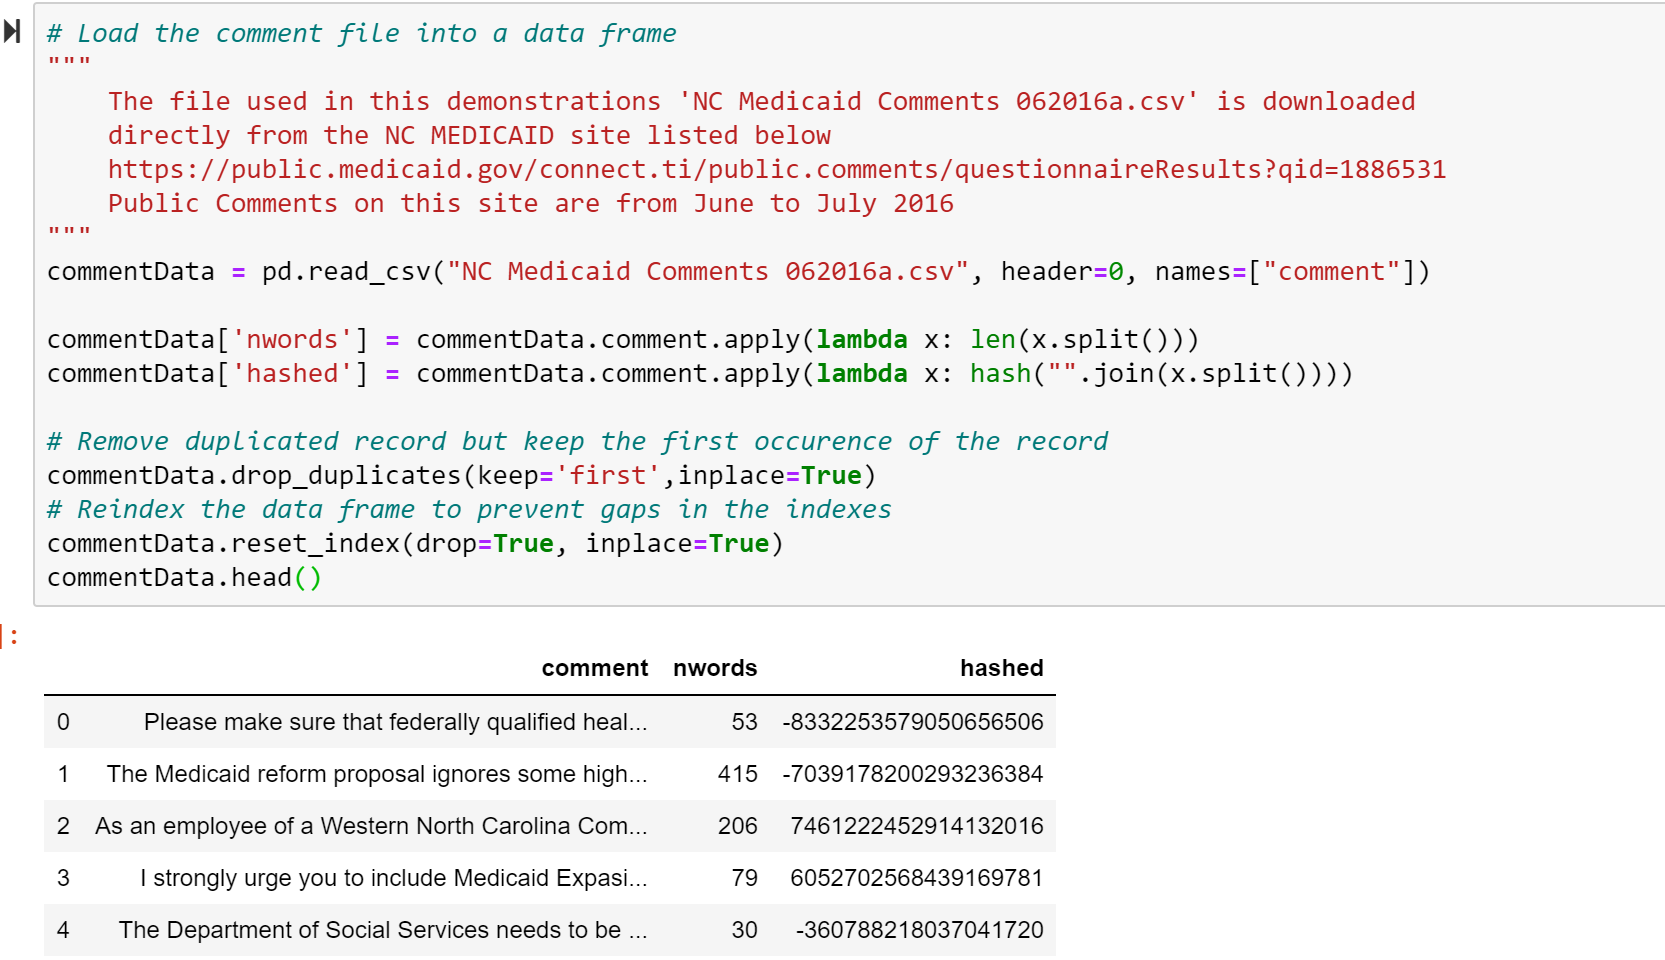
Step 5: Load the Downloaded Comments File in CSV into a Data Frame
Step 6: Load the Downloaded Comments File in CSV into a Data Frame
The downloaded CSV file can be read from your desktop, OneDrive or uploaded to your Azure storage. The next statement assume you are pointing to the correct location of the file and your file is named as in the snippet. If that is not the case, you can change the statement to point to your own file.
Step 7: Convert the Comments in the Data Frame to JSON Format
Some of the comments consist of multiple sentences and quite large. Passing the entire file of comments may note be optimal, so the steps below takes each line of comments and convert them to a JSON document in the formation that the Text Analytics API accepts.
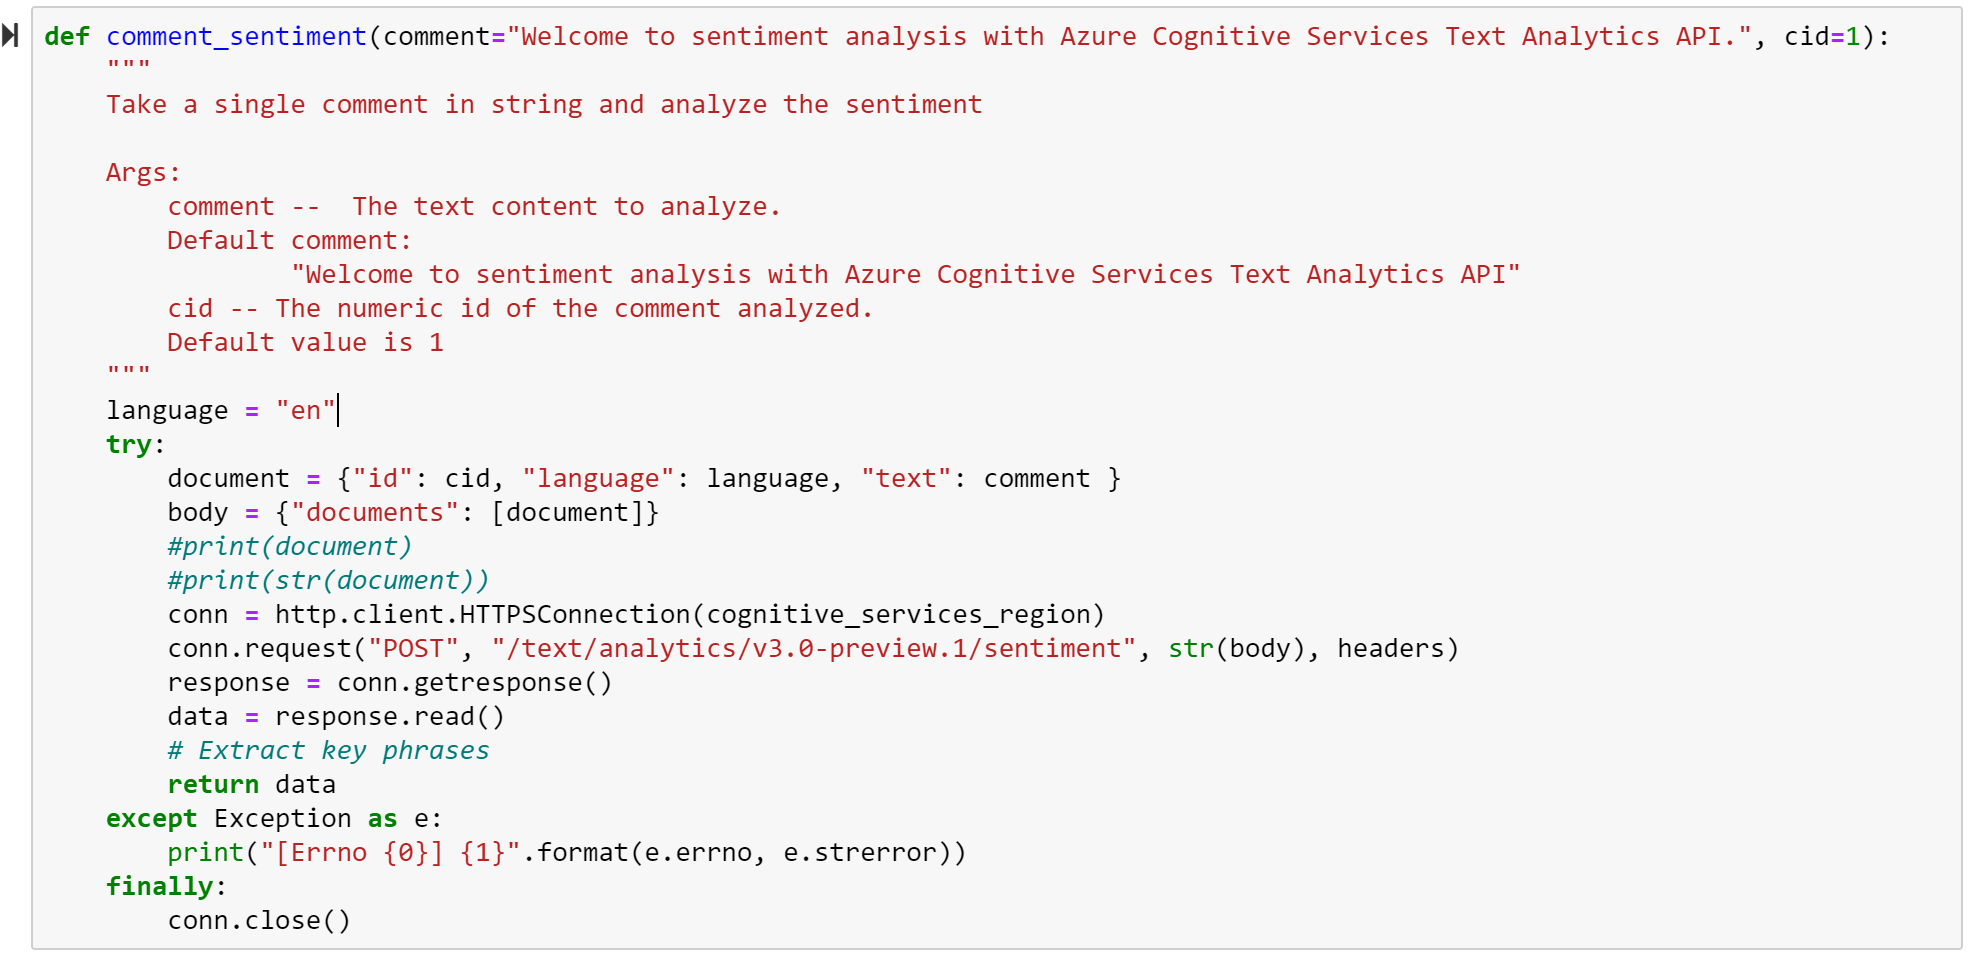
Step 8: Get Comment Sentiment
For each line, the code below gets the comment sentiment by passing the JSON to the Text Analytics API. The result is return for summarization
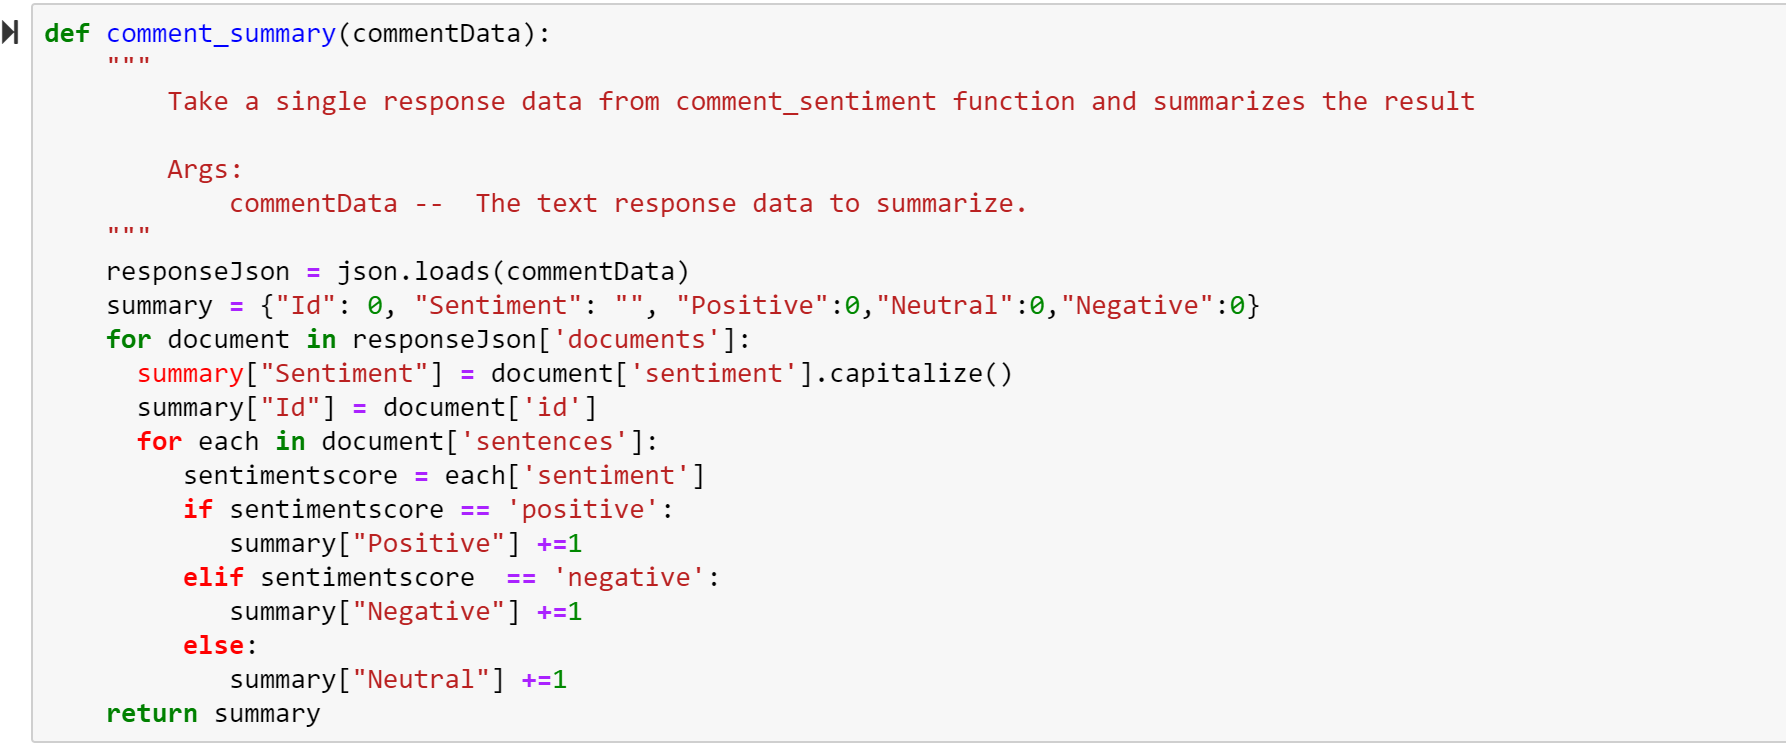
Step 9: Summary of Comment Sentiments
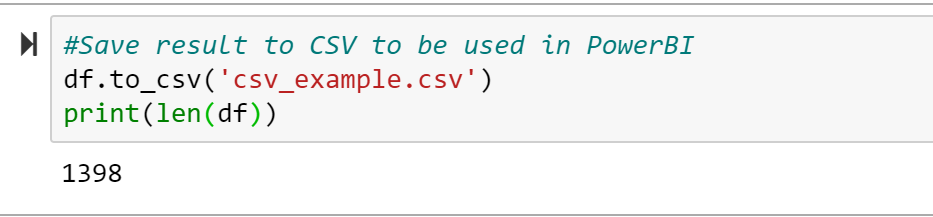
Sentiment Summary with PowerBI
0 comments