
ARM64EC (“Emulation Compatible”) is a new application binary interface (ABI) for building apps for Windows 11 on ARM. With ARM64EC, you can build new native apps that can run on ARM or incrementally transition existing x64 apps to native performance on ARM. For more information about ARM64EC, check out the Windows Developer blog.
Why Should Developers Target ARM64EC?
Applications that are built to run on ARM, give customers the benefit of a great native experience that unlocks the full power of the ARM device. However, from a developer perspective, porting an app to run on ARM can be all-or-nothing, since all the binaries within a process need to be rebuilt as ARM before a customer can enjoy the benefits.
With ARM64EC, you can choose to start small and build incrementally. Once you identify the part of your codebase that would benefit most from native performance, you can simply rebuild it as ARM64EC. The rest of the app will remain fully functional as emulated x64, but the recompiled ARM64EC parts will now have native speed.
In addition, the ability to mix and match x64 and ARM64EC makes it possible to build an app on ARM even if it depends on x64 code outside of your control. For example, projects with third-party dependencies that don’t support ARM can leave them as x64. Also, apps with an in-proc plugin ecosystem can build as ARM64EC to get native speed on ARM, while continuing to load and use x64 plugins.
How to Target ARM64EC in Visual Studio
To start using Visual Studio to build your projects as ARM64EC, you’ll need to install these prerequisites:
- The latest Windows Insider SDK build which is available through the Windows Insider program.
- The latest Visual Studio 2019 Preview or Visual Studio 2022 Preview
- The ARM64EC tools from the Visual Studio Installer:
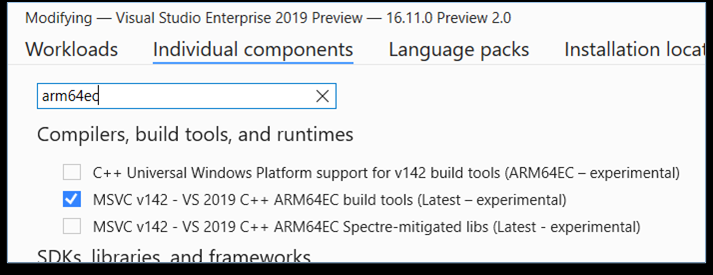
Once you have installed all the prerequisites, you can now target ARM64EC in your MSBuild and CMake Projects as explained in the following sections.
Note: In 17.4, in order to get ARM64EC support, install the ARM64 build tools instead.
MSBuild Projects
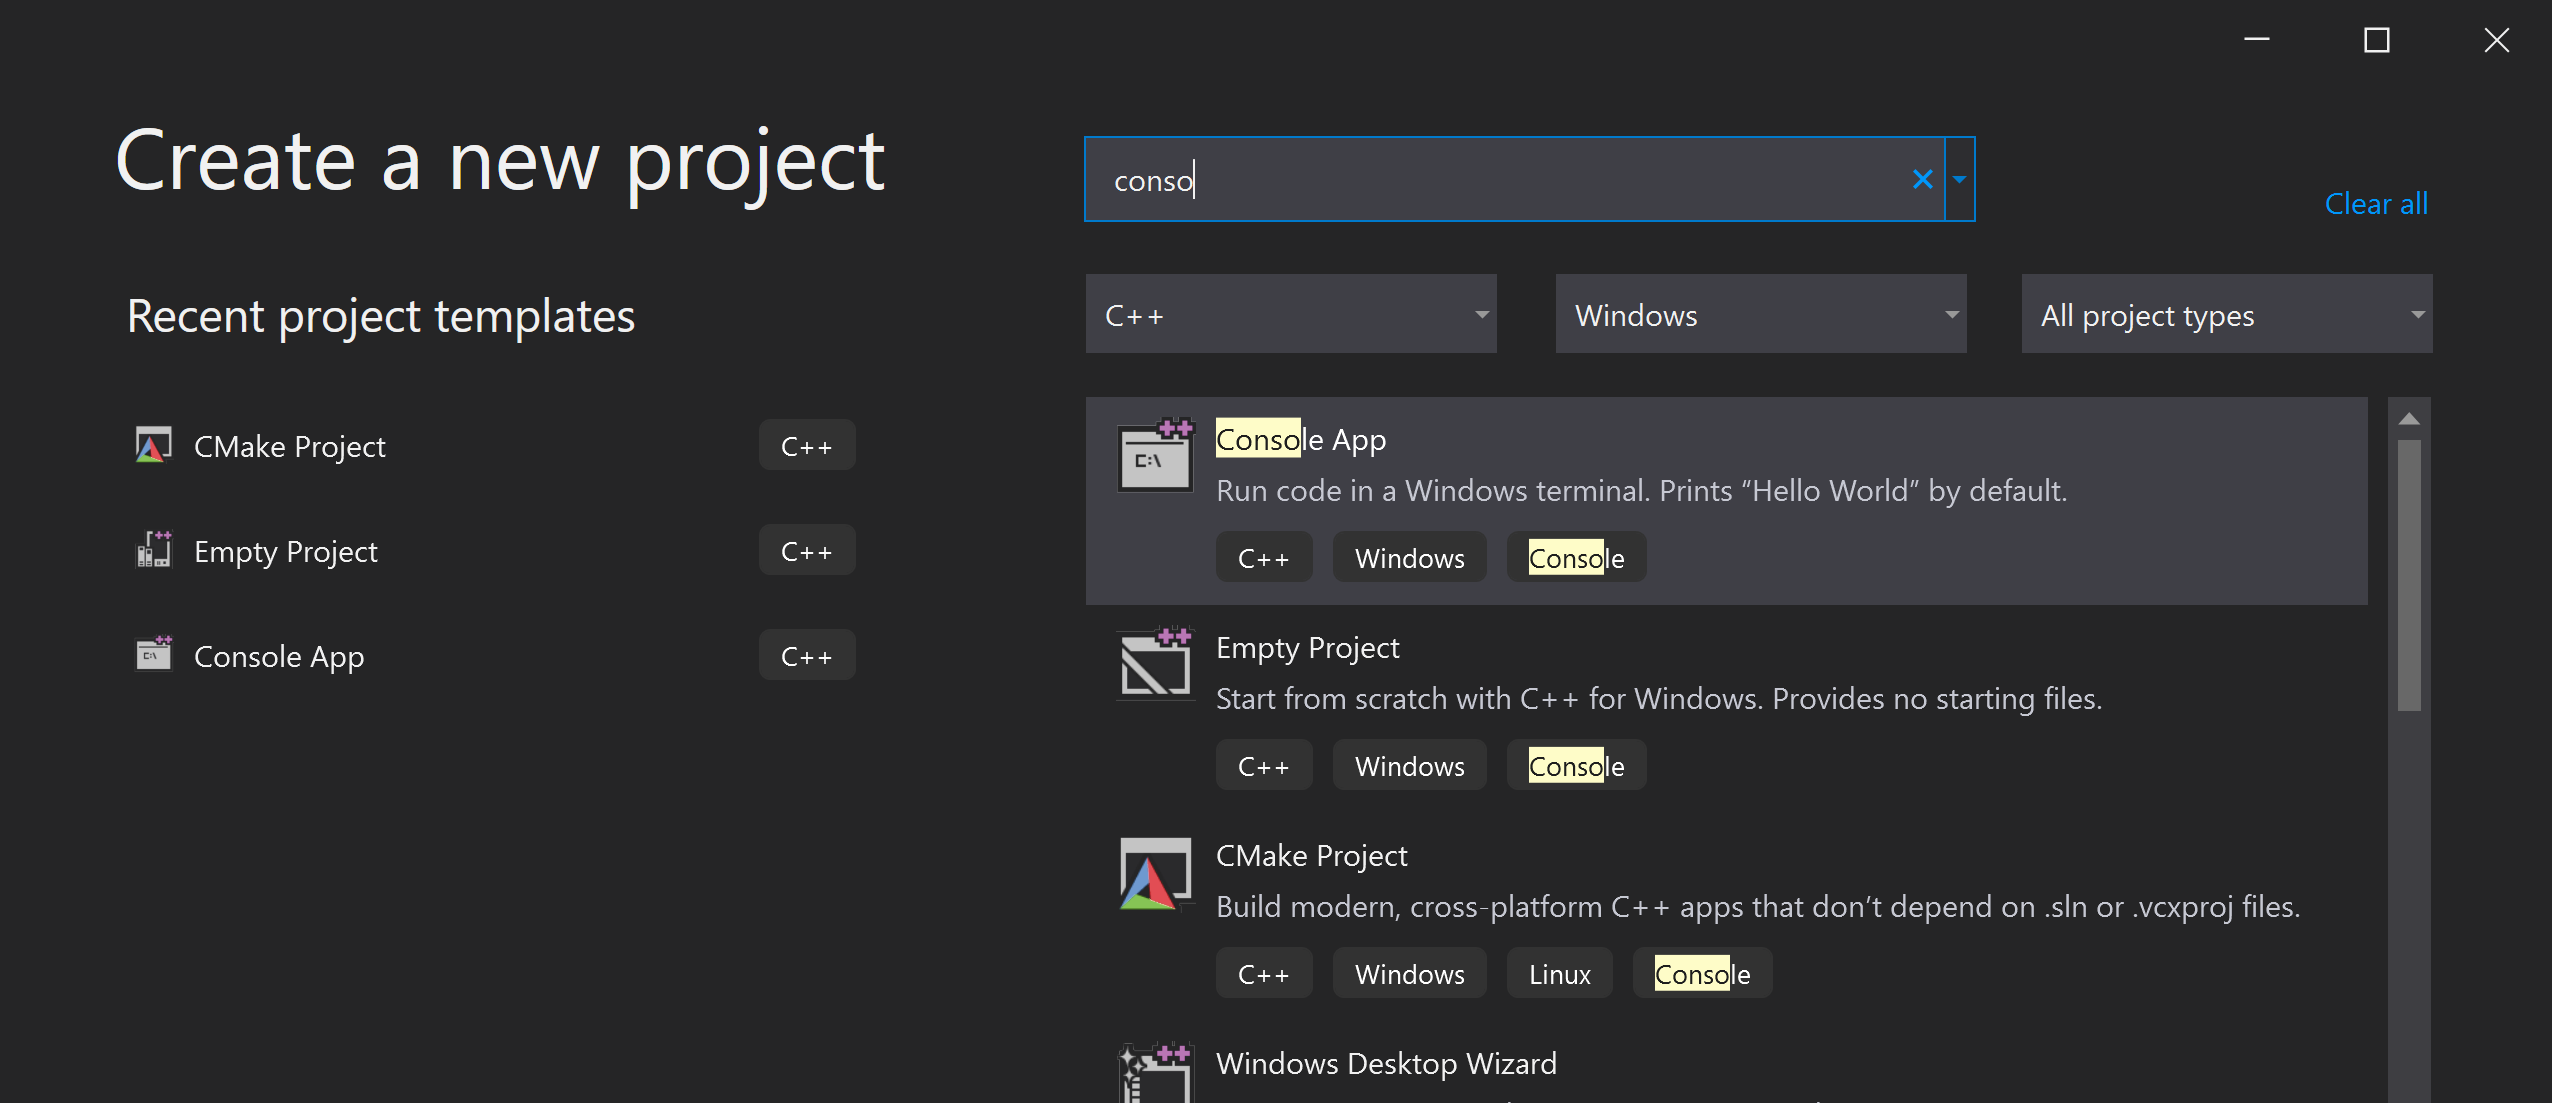
Open your C++ project or solution in Visual Studio. If you don’t have one yet, create a new one by navigating to: Create a new project > C++ Console App:
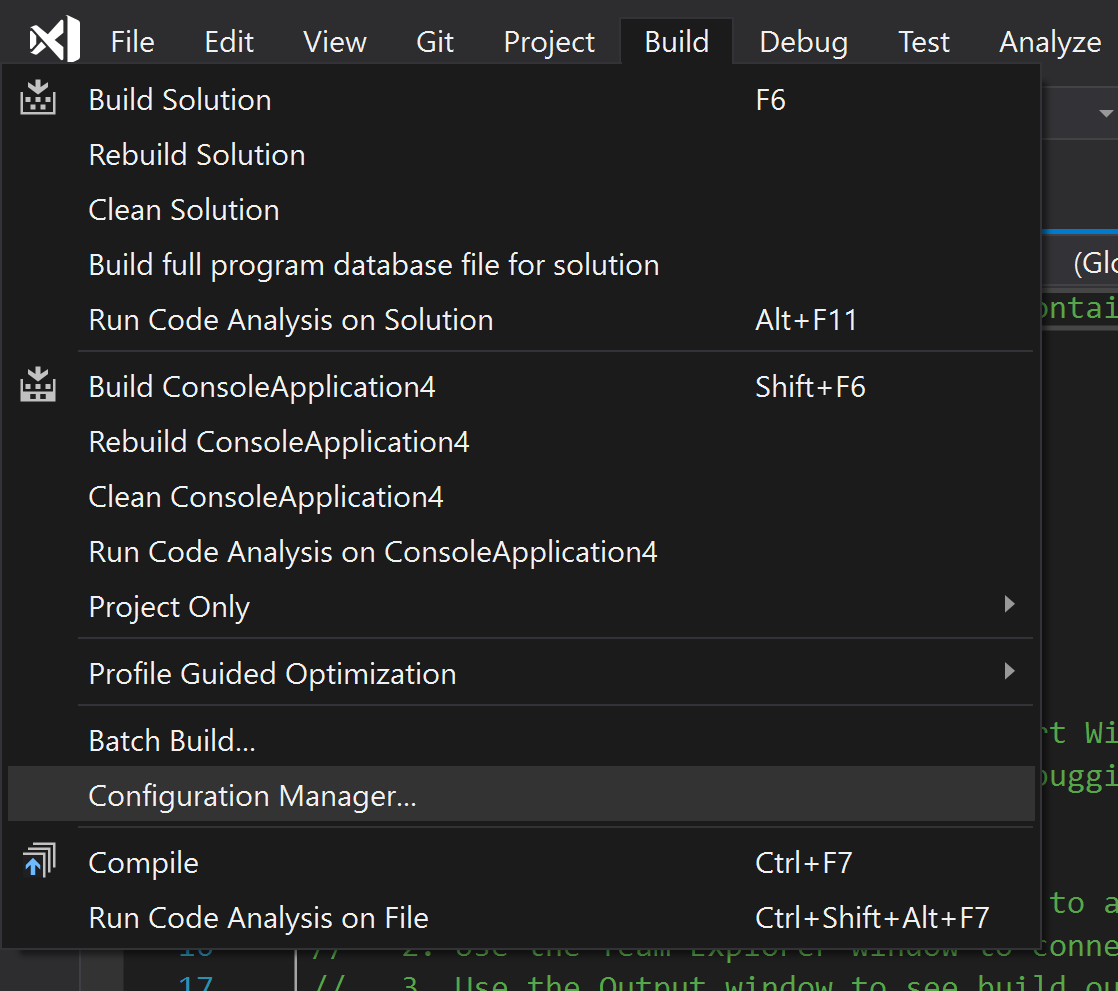
Open up the configuration manager by navigating to the tool bar and clicking build > configuration manager:
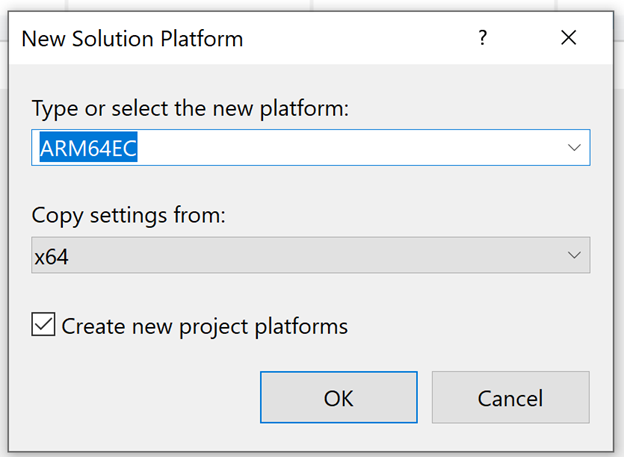
In the Active solution platform box, select <New…> to create a new platform:
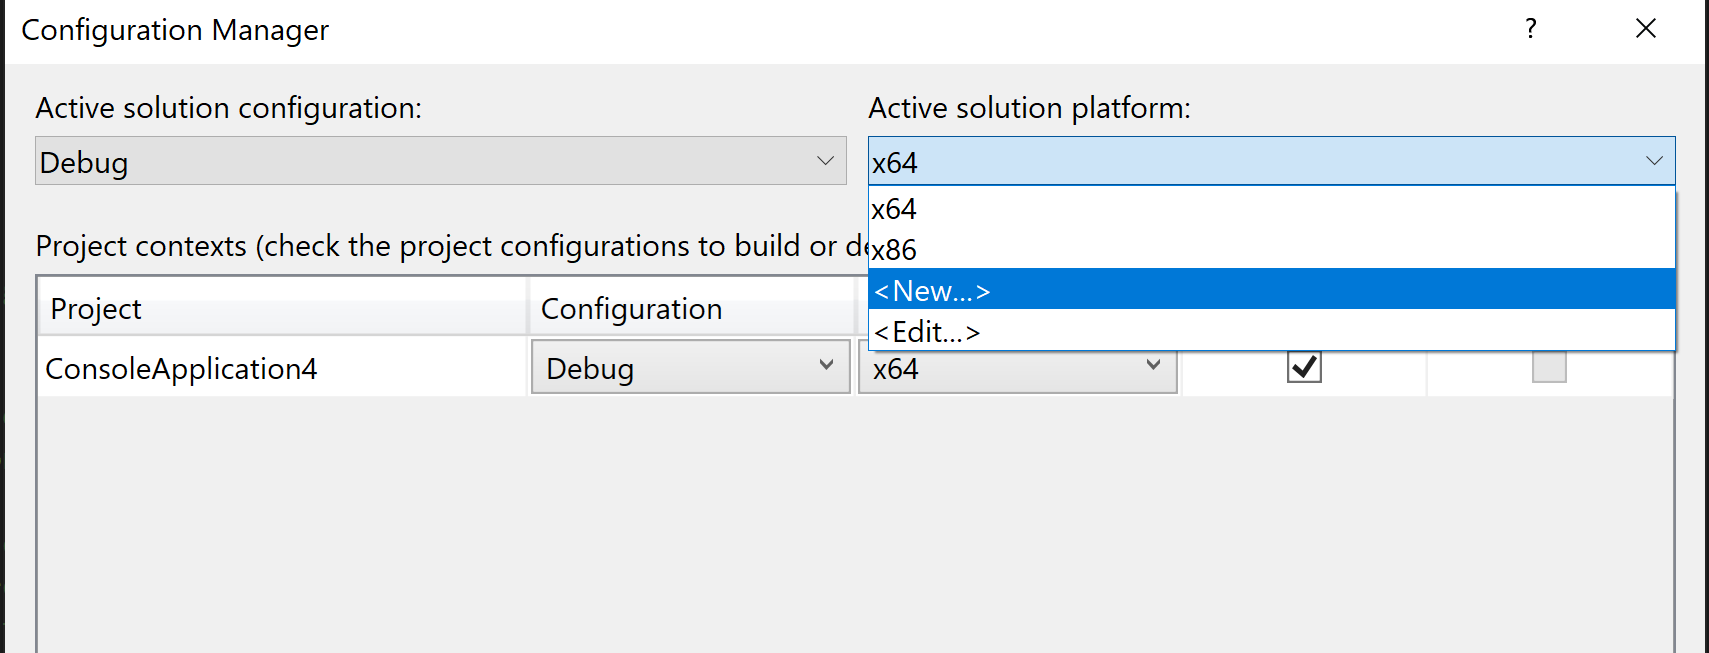
Select ARM64EC, Copy settings from x64, check the Create new project platforms checkbox and click OK:
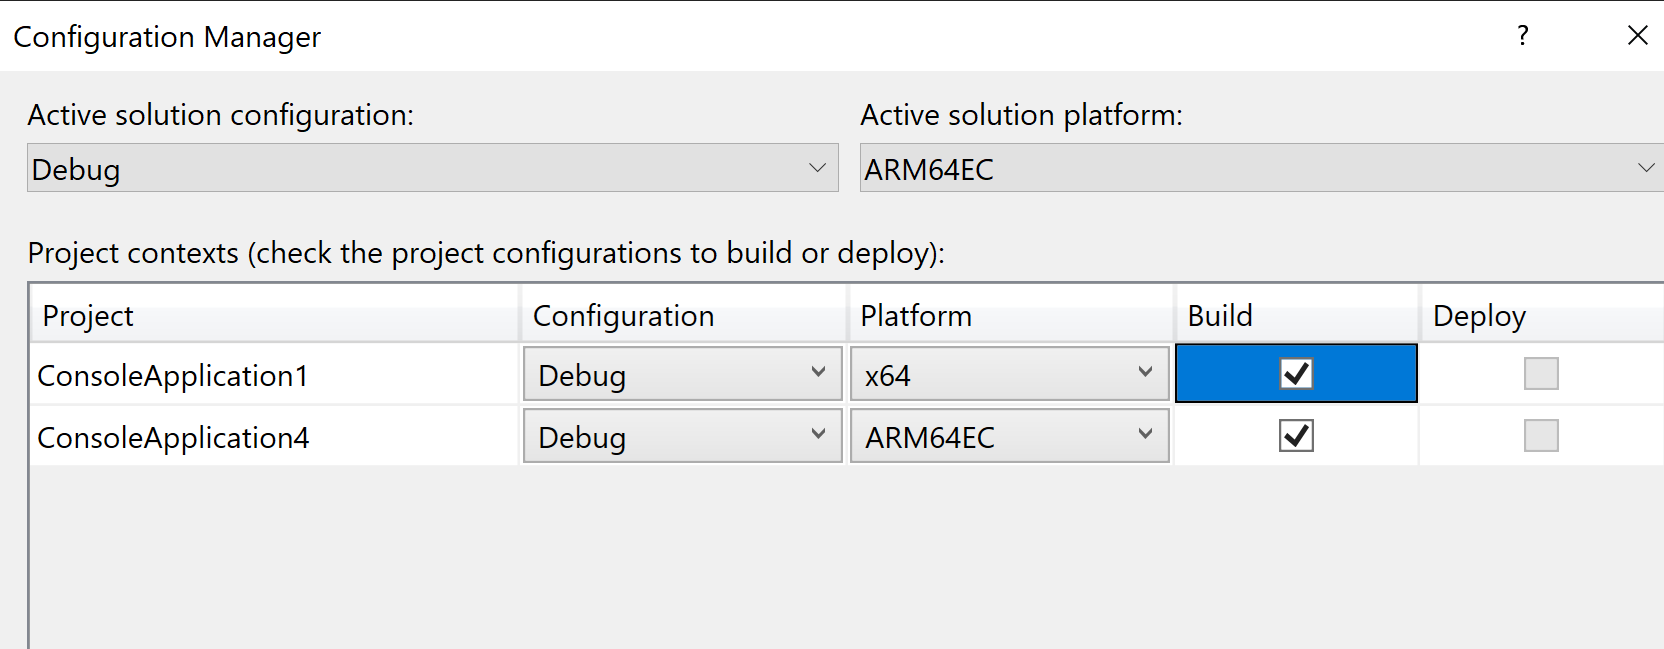
Finally, ensuring that ARM64EC is the active solution configuration, select Build from the menu to successfully build your ARM64EC project.
Note: By design, not all projects in the ARM64EC solution need to be targeting ARM64EC as they can target x64 instead. Ensure that you configure those x64 projects in the configuration manager to target x64 under the ARM64EC solution build:
For more information on working with MSBuild C++ Projects, see our documentation on Visual Studio Projects – C++ | Microsoft Docs and Remote Debug a C++ Project – Visual Studio (Windows) | Microsoft Docs
CMake Projects
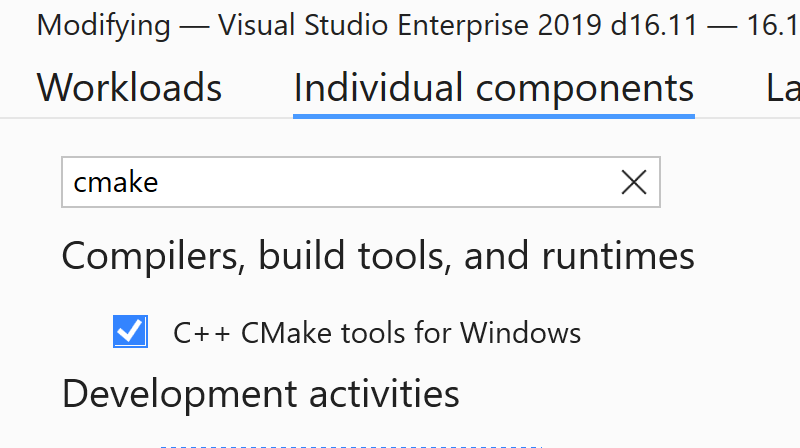
If you haven’t already, install the CMake Build tools from the Visual Studio Installer:
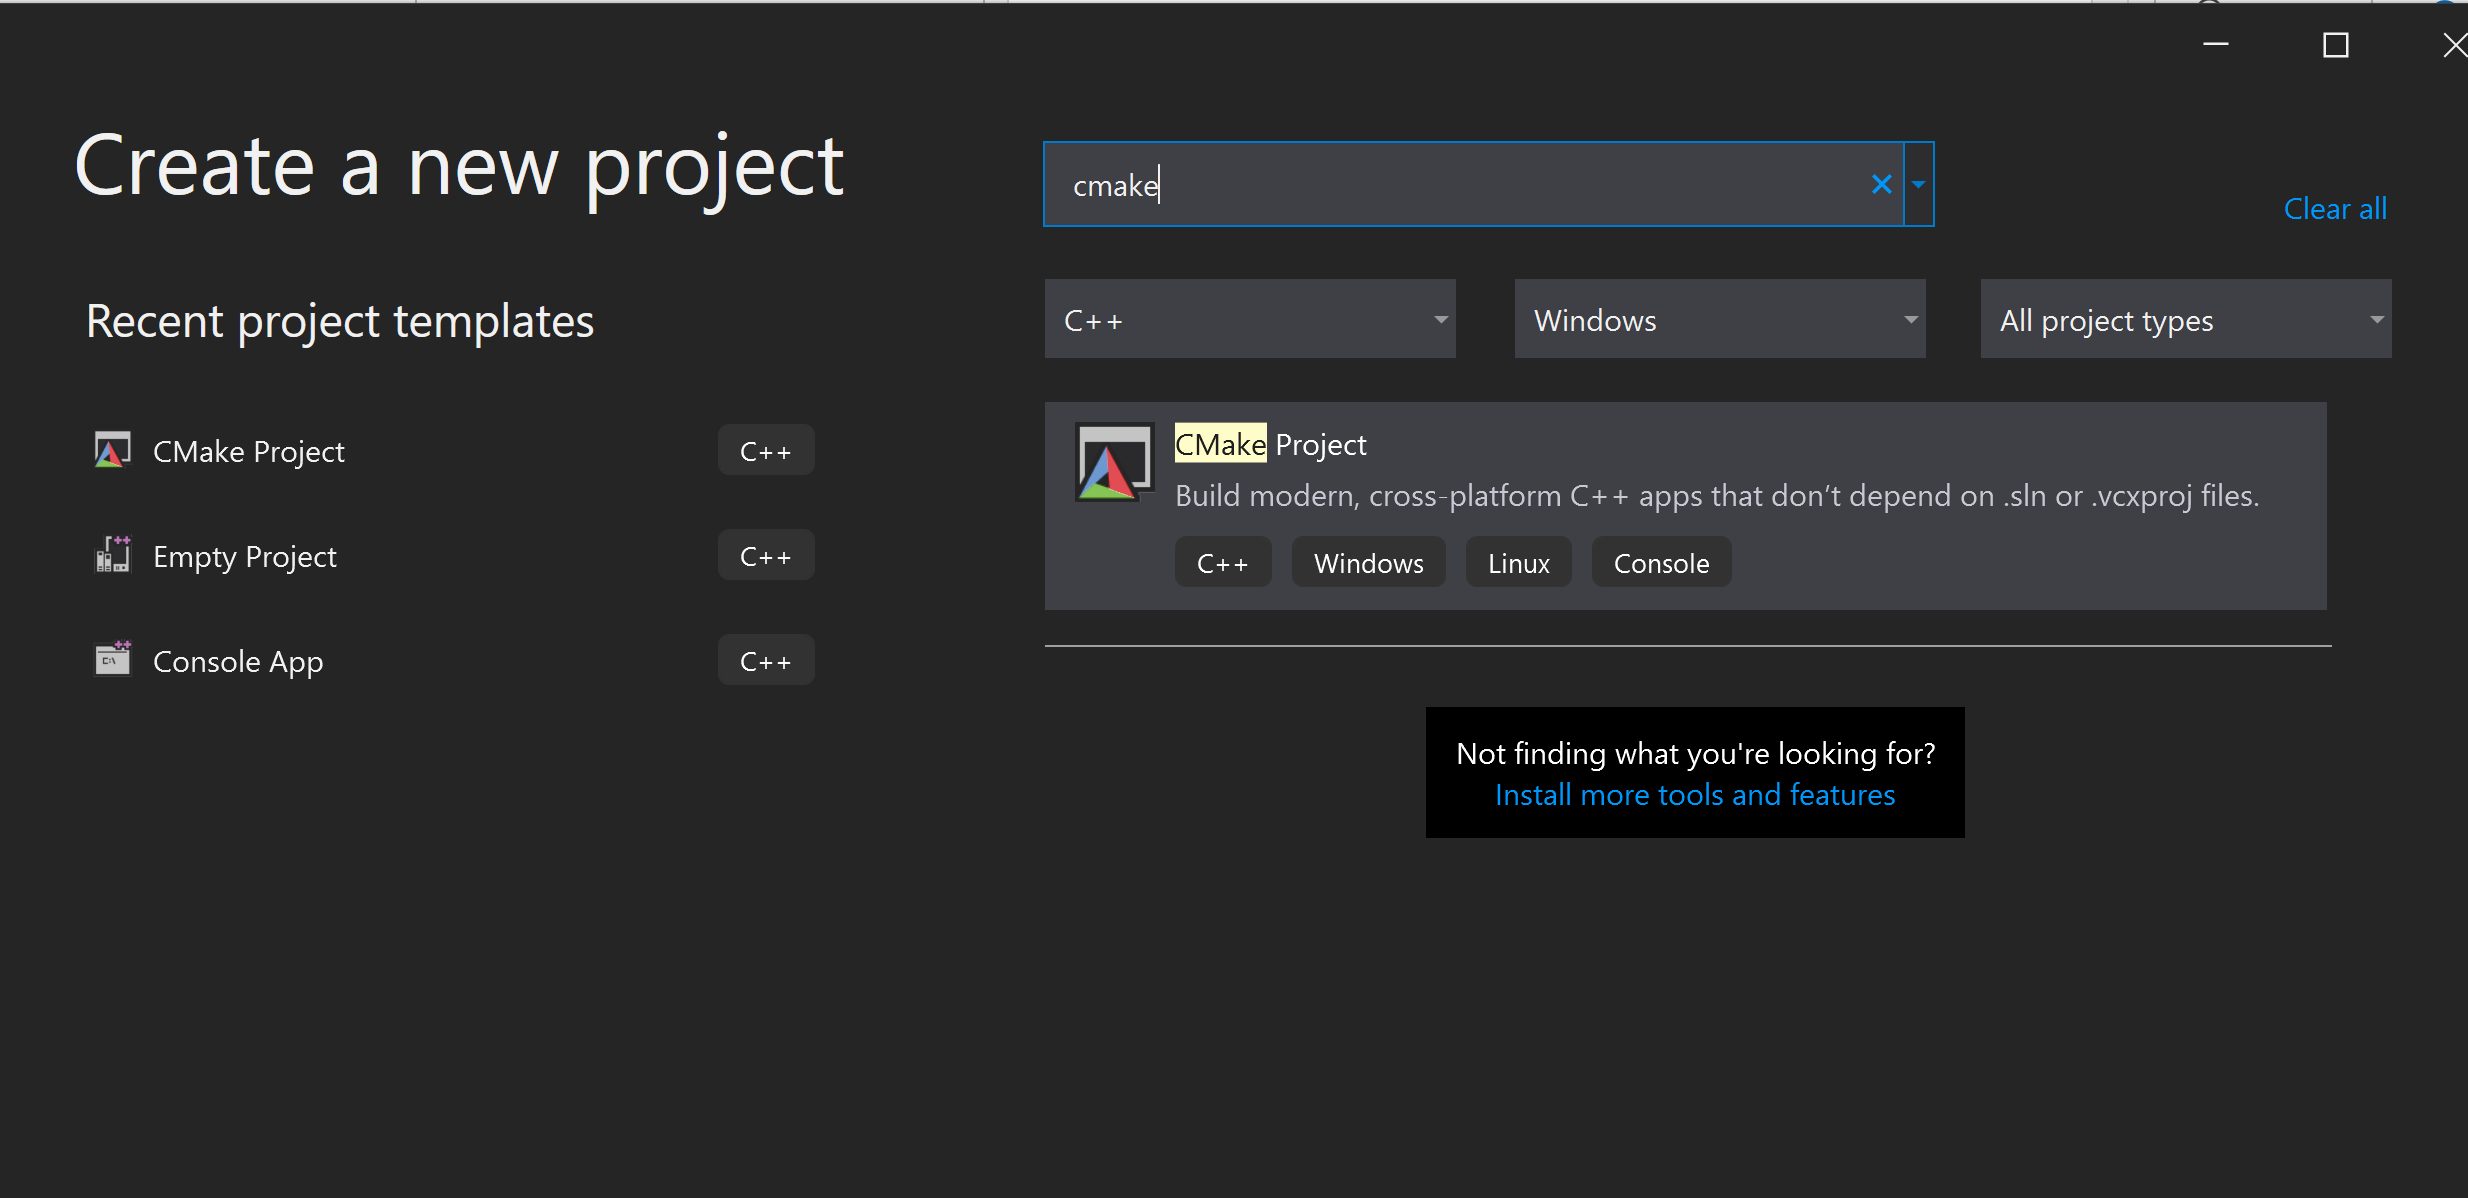
Open your C++ CMake project in Visual Studio. If you don’t have one yet, create a new one by navigating to: Create a new project > CMake Project:
With CMakePresets.json integration in Visual Studio, the default active configuration of the new project will be the Windows default which targets configuring and building on the local Windows Machine. This is the scenario we are interested in.
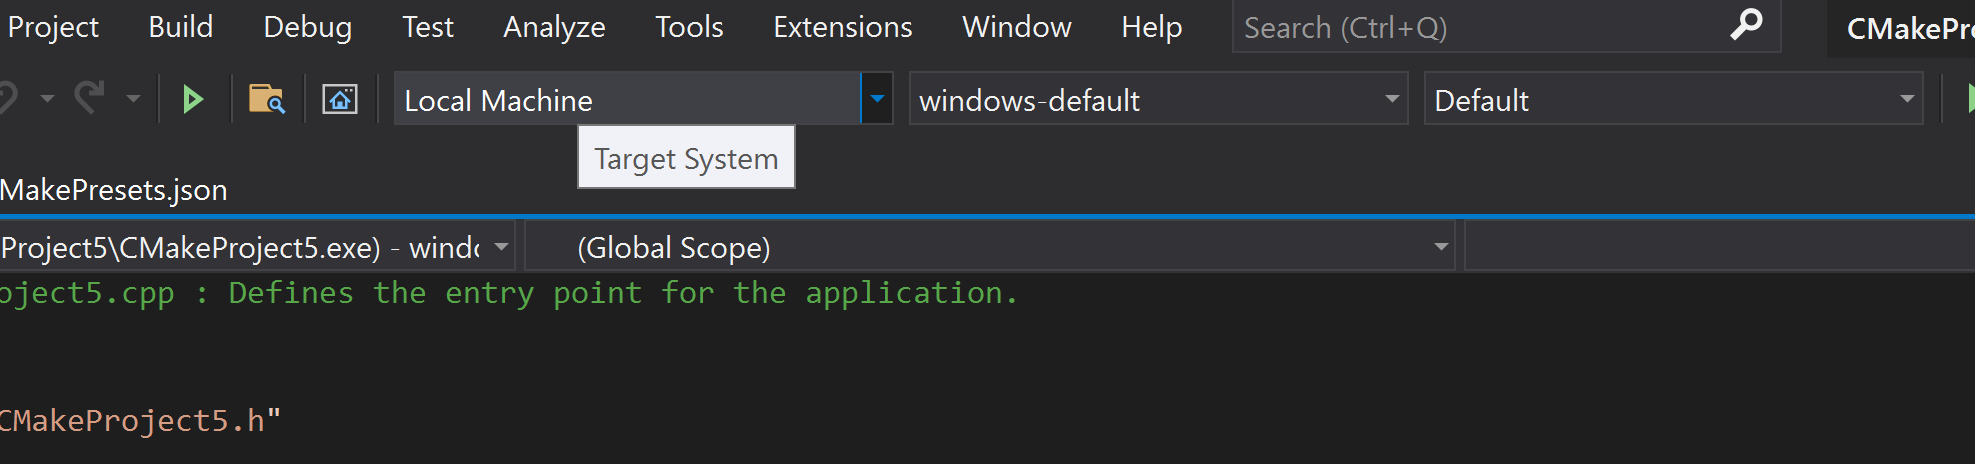
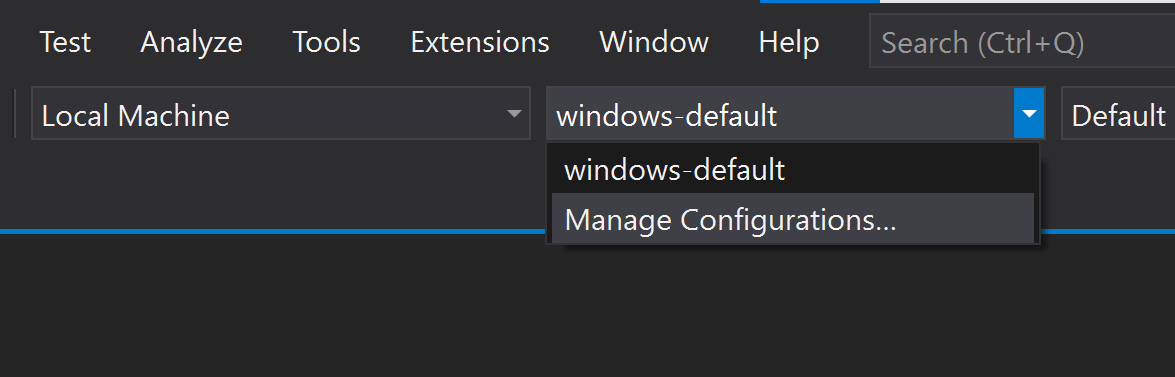
Open up the CMakePresets.json file by going to the active configuration dropdown and selecting Manage Configurations:
Modify the architecture property under the windows configuration you want for ARM64EC:
 "architecture": {
    "value": "arm64ec",
    "strategy": "external"
 }
Note: The default generator is Ninja. If using the visual studio generator (2019 or 2022), change the strategy field to set.
If using Ninja generator, you’ll also need to set some environment variables by adding the environment object to your CMakePresets configuration:
 "environment": {
    "CXXFLAGS": "/arm64EC",
    "CFLAGS": "/arm64EC"
 }
Save the CMakePresets file and make sure the active configuration is set to the arm64ec configuration. From the menu bar, select project menu, then select Configure <Project Name> in order to generate your CMake cache.
Build your CMake Project targeting ARM64EC like any other CMake project: navigate to the Build Menu and select build all.
For more information on working with CMake projects and CMakePresets, see our documentation on CMake projects in Visual Studio | Microsoft Docs , Configure and build with CMake Presets | Microsoft Docs and Tutorial: Debug a CMake project on a remote Windows machine | Microsoft Docs.
Developer Command Prompt
If you are interested in using the Visual Studio Developer Command Prompt for compiling and linking source files for ARM64EC, you need to use the ARM64 Developer Command Prompt, and then run your cl and link commands separately:
vsdevcmd -host_arch=x64 -arch=arm64 // creates an ARM64 Developer Command Prompt from your default Developer Command Prompt
cl /arm64EC /c <args>
link /MACHINE:ARM64EC <args>
Note: When using the Ninja generator for ARM64EC CMake builds in the developer command prompt, you must explicitly set the environment variables CFLAGS and CXXFLAGS to /arm64EC. Run these commands in your developer command prompt before running CMake:
set CFLAGS=/arm64EC
set CXXFLAGS=/arm64EC
Give us your feedback
Download the latest Visual Studio 2019 Preview or Visual Studio 2022 Preview today and give it a try. We’d love to hear from you to help us prioritize and build the right features for you. We can be reached via the comments below, Developer Community, and Twitter (@VisualC). The best way to file a bug or suggest a feature is via Developer Community.
What are the downsides of ARM64EC?
Performance costs due to emulator checks for transition between boundaries?
Additional memory usage due to emulator being loaded into the process?
Is it loaded on demand or unconditionally?
I.e. if I’m developing a new software, I can mandate plugin vendors to build the plugins also as pure ARM64. How much do I gain?
Hi Jan,
The biggest downside right now is that ARM64EC is new – the ARM64EC tools are marked “experimental” when you install them, building ARM64EC requires the Insider SDK, and running ARM64EC requires Insider builds. That means you can’t yet build production apps as ARM64EC and you won’t find many libraries built as ARM64EC yet.
If you are building a new app as ARM64 and can mandate that any dependencies or plugins are built as ARM64, then the benefits of ARM64EC aren’t going to hold much weight for your scenario – and that’s totally fine. The goal isn’t to...
Hi. Great answer! I didn’t notice it until today. Thank you.
I have peeked into generated assembly a little; looks interesting. I’m definitely looking forward to the documentation.
Why isn't ARM64EC available for projects built with .Net Native?
Here's my scenario: in a UWP app, I have a C# assembly that references an x64 native DLL through PInvoke, so on ARM64 builds I currently disable the features that rely on this DLL. Ideally, I'd like to compile the C# assembly with ARM64EC, so it can still reference the native x64 DLL on ARM64 devices. Note that, because this is UWP, the referencing assembly is compiled with .Net Native, which relies on the C++ compiler backend.
Is it just the IDE support that's missing, or is there anything fundamental...
Most likely because .NET Native and the whole UWP story seems to be on life support.
Check the WinUI 3.0 and UWP related discussions over at Github.
That’s a reasonable guess. Hopefully MS will provide a smooth migration path for existing UWP apps.
Thank you for the overview!
What if I want to use ARM64EC only for components that have x64 dependencies, and I want to use ARM64 for the rest of the app? Or if I cannot use ARM64EC everywhere?
As an example, let's say I'm building an app that loads some plugins. I would like it to be able to load both ARM64 and x64 plugins, so I build the main app as ARM64, and a plugin loader in ARM64EC.
Will I be able to reference ARM64EC plugin loader from ARM64 app? And will I be able to load ARM64 plugins from ARM64EC loader?
Maybe...
Hi Alexander,
The ARM64EC ABI conceptually allows building code that is compatible with x64 code but has native speed on ARM64. If you’re using ARM64EC for an in-proc plugin scenario, most likely you’d build the core of your app as ARM64EC (for native speed) and then load plugins as x64 (emulated). If you want this app to load an in-proc plugin and have the plugin run with native speed, the plugin should be built as ARM64EC.
If you want to leverage ARM64EC but can’t use ARM64EC everywhere in the process or module, you’d leave any parts that can’t...