Back in the December 17th update, we added the ability to make changes to files in the web UI, and it works for both TFVC and Git. Edit is easy to find, since it’s right above the content on the screen.
Add, rename, and delete are available through drop down menus. Let’s take a look at where those are.
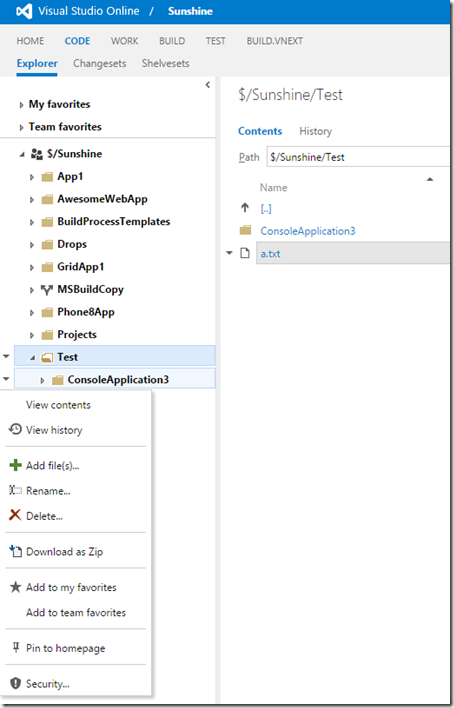
To add files, you need to click on the triangle beside the parent folder. In that same menu, you can also rename or delete the folder as well as download the folder as zip file.
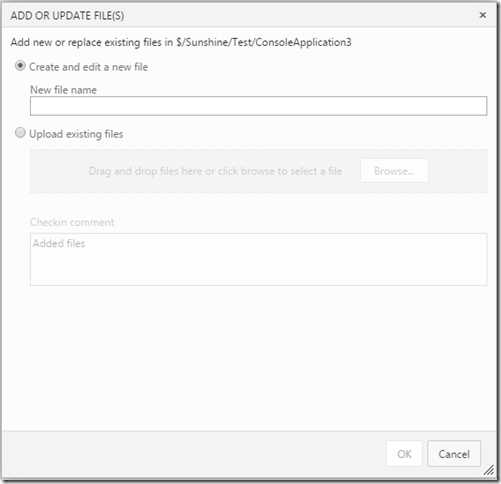
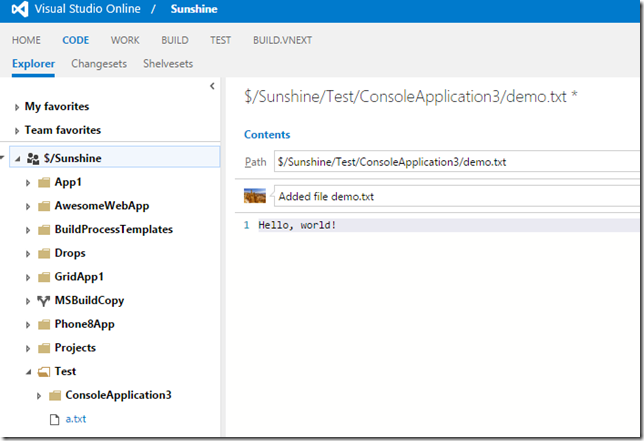
When adding files, I can either choose to create a new file, which will then take me to the editor in the browser, or I can upload existing files by dragging and dropping or by browsing.
When you add or edit a file, don’t forget to update the comment to something meaningful – it’s the text beside your avatar.
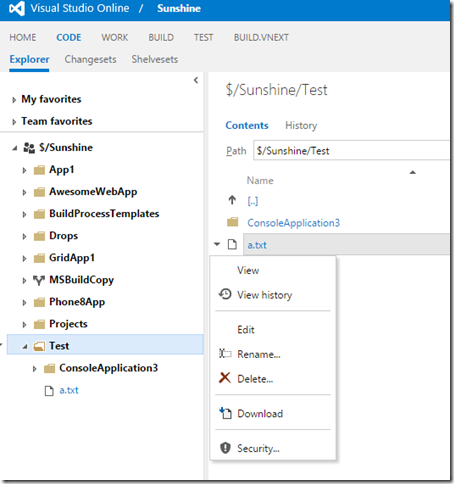
To rename or delete a file, you need to click the triangle beside the file’s name to get the drop down menu to appear.
While all of my screen shots are with TFVC, this all works with Git repos as well.
[Update]
For TFVC, saving an edit checks in the change unless you have gated checkin configured. If you are using gated checkin, your change will be submitted if the build passes. If you have continuous integration enabled, saving the file will trigger a build.
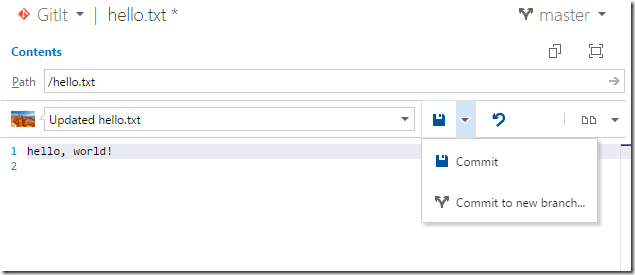
For Git, saving will by default commit your change. You have the option of committing to a new branch and issuing a pull request. To do that, click the triangle beside the save icon.
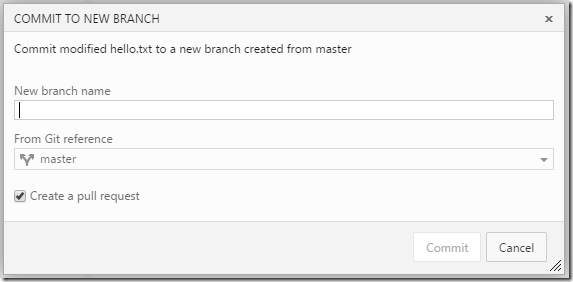
Then you’ll have the opportunity to name the branch.
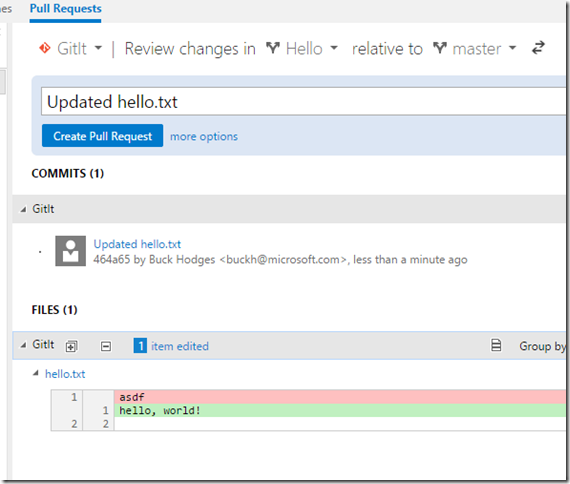
If you go with the default option to create a pull request, you’ll be taken to the pull request experience automatically.
Enjoy!
Follow me on Twitter at twitter.com/tfsbuck

0 comments
Be the first to start the discussion.