
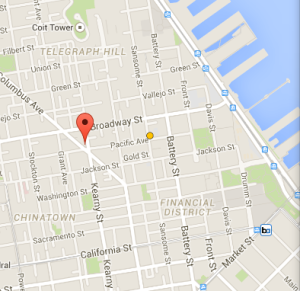
Inside Google Play Services is the powerful Google Maps API, which allows you to add a rich and interactive maps control to your Android apps. However, the maps control and API can be heavy, and sometimes you just want to display a simple map with a few markers on top of it. This is where the brand new Google Maps Lite mode can come in handy by providing a bitmap image at a specified location and zoom level, while still giving access to a subset of the full API.
 This is perfect for situations when your users don’t need to interact with the map, a map is displayed in a feed of items, or you just need a small map to show with a marker. In my case, I wanted to create an app to flip through a list of nearby coffee shops to help feed my 24/7 coffee obsession. I didn’t want to interact with the map; I just wanted the name, rating, and distance of the coffee shop to be overlaid on top of the map. Let’s go over how to start using Google Maps Lite in an app like this.
Setting Up Your Project
To get started with Google Play Services and Google Maps, you will first need to install the Component or NuGet in your Xamarin.Android project.
Obtaining a Google Maps API Key
The next step requires a bit of manual work to obtain your Google Maps API Key from Google, however, we have a great walkthrough to follow on our documentation site. Once you have your key, you will need to update your AndroidManifest.xml with a few meta-data entries and permissions:
<manifest xmlns:android="http://schemas.android.com/apk/res/android" android:versionName="4.5" package="com.xamarin.docs.android.mapsandlocationdemo2" android:versionCode="6">
    ...
    <application android:label="@string/app_name">
        <!-- Put your Google Maps V2 API Key here. -->
        <meta-data android:name="com.google.android.maps.v2.API_KEY" android:value="YOUR_API_KEY" />
        <meta-data android:name="com.google.android.gms.version" android:value="@integer/google_play_services_version" />
    </application>
    <uses-permission android:name="android.permission.ACCESS_COARSE_LOCATION" />
    <uses-permission android:name="android.permission.ACCESS_FINE_LOCATION" />
    <uses-permission android:name="android.permission.INTERNET" />
    <uses-permission android:name="android.permission.ACCESS_NETWORK_STATE" />
    <uses-permission android:name="android.permission.ACCESS_WIFI_STATE" />
    <uses-permission android:name="android.permission.WRITE_EXTERNAL_STORAGE" />
    <uses-feature android:glEsVersion="0x00020000" android:required="true" />
</manifest>
Adding a Map in Lite Mode
Enabling Lite mode on a map is extremely simple, as it uses the same classes and interfaces as the full Google Maps API. This means you can add a simple flag to your MapView, MapFragment, or GoogleMap Options.
XML attribute
<FrameLayout xmlns:android="http://schemas.android.com/apk/res/android"
    xmlns:map="http://schemas.android.com/apk/res-auto"
    android:layout_width="fill_parent"
    android:layout_height="fill_parent">
   <com.google.android.gms.maps.MapView
        android:id="@+id/map"
        android:layout_width="match_parent"
        android:layout_height="match_parent"
        map:cameraZoom="15"
        map:mapType="normal"
        map:liteMode="true"/>
</FrameLayout>
In Code Behind
var options = new GoogleMapOptions ();
options.InvokeLiteMode (true);
Initializing the Map
Recently, Google changed how developers should initialize their Maps when using Google Play Services. You must now complete two steps to get your map to appear:
1.) Find your map and create
In your Activity’s OnCreate method, you will need to find your MapView and call its OnCreate method passing in the bundle.
mapView = FindViewById<MapView> (Resource.Id.map);
mapView.OnCreate (bundle);
2.) Implement IOnMapReadyCallback and Get Map
To get the reference to your GoogleMap (which is what you use to add markers and zoom to a location), you must implement IOnMapReadyCallback on your Activity and then call the MapView’s GetMapAsync method.
public class MainActivity : ActionBarActivity, IOnMapReadyCallback
{
  GoogleMap googleMap;
  MapView mapView;
  protected override void OnCreate (Bundle bundle)
  {
    base.OnCreate (bundle);

    SetContentView (Resource.Layout.main);
    mapView = FindViewById<MapView> (Resource.Id.map);
    mapView.OnCreate (bundle);
    mapView.GetMapAsync (this);
  }

  public async void OnMapReady (GoogleMap googleMap)
  {
    this.googleMap = googleMap;
    //Setup and customize your Google Map
    this.googleMap.UiSettings.CompassEnabled = false;
    this.googleMap.UiSettings.MyLocationButtonEnabled = false;
    this.googleMap.UiSettings.MapToolbarEnabled = false;
  }
}
Move Map to Location
Google Maps Lite is powerful enough to enable you to move the camera to a specific location and even control the Zoom Level. Using the Geolocator Plugin, you can easily zoom the map to your current location:
MapsInitializer.Initialize(this);
var position = await CrossGeolocator.Current.GetPositionAsync (10000);
var me = new LatLng (position.Latitude, position.Longitude);
googleMap.MoveCamera (CameraUpdateFactory.NewLatLng (me));

Note the MapsInitializer.Initialize(this);, which must be called before you start interacting with the map.
Adding Markers
With your map up and running, you can now start adding markers or other items to the map. In this case, let’s add a circle indicator at our current location and a full marker at the closest coffee shop:
var coffeeMarker = new MarkerOptions ();
coffeeMarker.SetPosition (new LatLng (coffee.Latitude, coffee.Longitude));
//add marker to map
googleMap.AddMarker (coffeeMarker);

var meMarker = new CircleOptions ();
meMarker.InvokeCenter(me);
meMarker.InvokeRadius (16);
meMarker.InvokeStrokeWidth (0);
meMarker.InvokeFillColor (Resources.GetColor (Resource.Color.accent));
//add circle to map
googleMap.AddCircle (meMarker);
Learn More
You can grab the entire source code for my app Coffee Filter, which shows how to use the Google Places API to query nearby coffee locations based on your location. Additionally, you can download Coffee Filter from Google Play on your Android device to try it today.

Be sure to read through Google’s Lite Mode documentation to see all of the available API features when using a map in Lite Mode. To see how to easily integrate more features in Android’s location and maps APIs, be sure to read through our Xamarin documentation to easily integrate them into your Xamarin.Android apps.