

Last November, we announced the release of the Windows ML Samples Gallery. The newest release of the gallery adds 4 new samples, 2 of which are discussed in detail below.
Real-Time Background Image Blurring
Linnea May
Real-time machine learning inference is a hot topic in ML, with applications such as real-time object detection in autonomous cars or background image blurring of a video stream during a work call. This new sample demonstrates the best practices to follow with Windows Machine Learning (Windows ML) and Microsoft Media Foundation to run background image blurring during inference on a real-time video stream at 30+ frames per second when using a dedicated GPU.

Background image blurring running at 30 frames per second.
The sample uses an asynchronous Media Foundation Transform (MFT) to apply an effect to the input video stream.
The MFT will start by asynchronously requesting a new video sample from the capture source which in this case is the camera. This sample is converted into a shareable VideoFrame then run through the composition of three models: a preprocessing model, a Fully Convolutional Network, and a postprocessing model. Once the sample has been transformed, it’s returned to the Media Foundation processing pipeline via an asynchronous callback to the preview sink, which displays the sample to the screen.
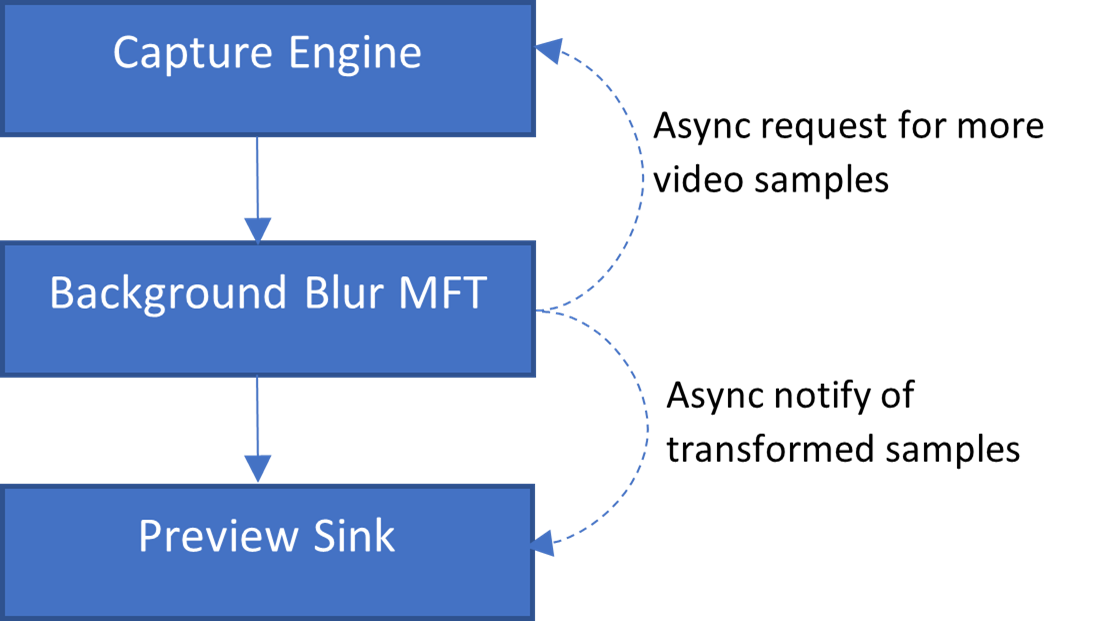
The basic data flow of the Background Blur sample.
Microsoft.AI.MachineLearningExperimental.LearningModelJoinOptions fuses together three stages of the model:
- Preprocessing: The FCN needs 0-1 scaling and z-score normalization, so we use Windows ML’s LearningModelBuilder to compose ONNX operators into a preprocessing stage.
- FCN ResNet-50 takes in a preprocessed image of shape (N, 3, height, width), where N is the batch size, and outputs shape (N, 21, height, width) where each pixel is one-hot encoded as one of FCN-ResNet’s 21 possible classes.
- Postprocessing: We use another LearningModelBuilder to isolate and blur the pixels that are classified as “background”, then compose it with the non-blurred foreground.
Getting started
Windows Machine Learning Resources
| Resource | Description |
| Background Blur Sample Code | Source code for the background image blur sample |
| Windows ML Experimental API | Documentation for the LearningModelBuilder and LearningModelJoinOptions |
| ORT model building unit tests | A good intro to building models with LearningModelBuilder and LearningModelJoinOptions |
| ONNX operators schema | ONNX operators that can be used when building a model with LearningModelBuilder |
| ONNX Model Zoo FCN | Open-source models in the ONNX format |
Media Foundation Resources
| Resource | Description |
| Introduction to Media Foundation Transforms | Start here to learn more about Media Foundation Transforms as a model for processing media data |
| Windows Async MFT Sample | Demonstrates how to create an asynchronous Media Foundation Transform |
| Windows Capture Engine Sample | Demonstrates how to use the Media Foundation CaptureEngine to capture video |
DirectX Resource Binding
Numfor Mbiziwo-Tiapo
Learn how to bind and inference on Direct3D 12 Resources using ONNX Runtime in the DX Resource Binding ORT Sample.
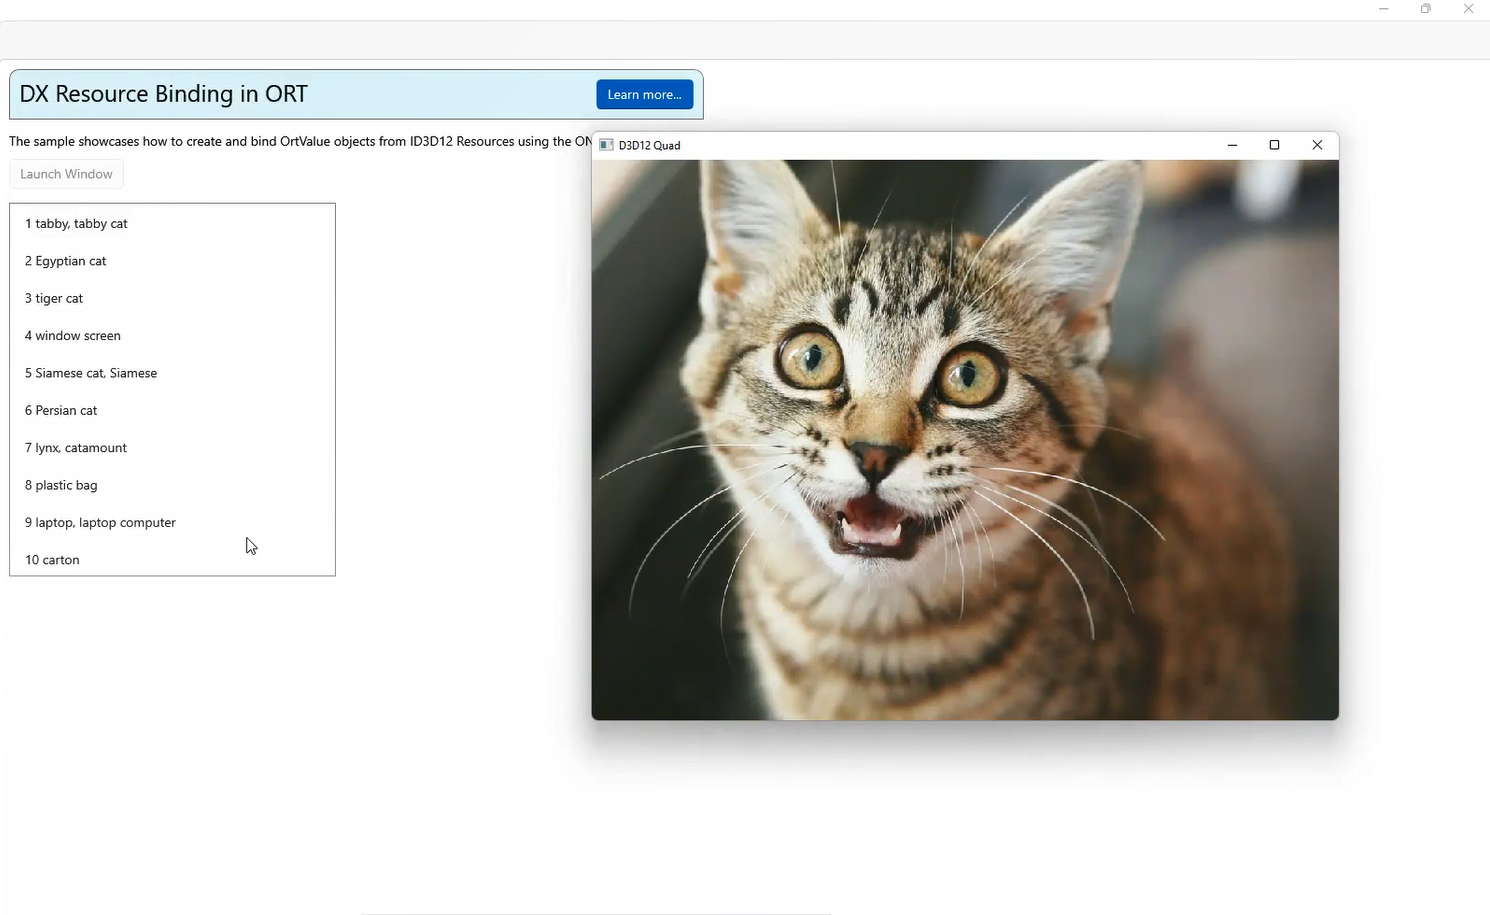
DX Resource Binding Sample
In this sample, images are drawn to the screen using Direct3D 12. The images are then preprocessed and inferenced on in real-time using the ONNX Runtime C++ API.
The general structure of the sample is stated below:
- DXResourceBinding.h / .cpp : main interface between D3D code and ORT code
- D3D12Quad.h / .cpp : handles all D3D-related functions, including drawing the images to the screen in an HWND
- ORTHelpers.h / .cpp : handles all ORT functions for preprocessing and evaluation. Also shows how to create an ORT Value from a D3D resource
The sample follows this sequence of steps:
- Step 1 : Buffer is drawn to the screen using Direct3D 12.
- Step 2 : An empty D3D12_RESOURCE_DIMENSION_BUFFER is created that will serve as the copy destination for the image being drawn to the screen which is of type D3D12_RESOURCE_DIMENSION_TEXTURE2D
-
- The image must be copied into this buffer because DirectML expects resource dimension buffers
- Step 3 : The texture 2d is copied into the resource dimension buffer
- Step 4: The buffer is converted to an ORT Value and passed through a preprocessing model that shrinks the tensor to a size of 224 x 224 x 3 (the expected input size for EfficientNetLite)
- Step 5: The preprocessed input is the passed through EfficientNet where the image is classified
Try it out and stay involved
The Windows ML Samples Gallery can be downloaded from the Microsoft Store or from GitHub. We encourage you to try it out and give feedback by reporting issues or requesting new samples on the issues page.
Stay tuned to the Windows AI Blog for more updates and news!
0 comments