

Quickly switching your power plan/scheme on Windows 10
In response to my recent Windows 10 Audio Workstation Tweak Guide, I was asked about switching power plans on the fly. This can be useful if you use a laptop and want to maximize battery life (or simply minimize your energy usage) when doing normal work, but then have max performance available when working in your DAW.
There are a few ways to switch plans, but I’ll focus on two good options here. In the end, I’ll show how to create a couple links to enable you to change the plan with a single click.
Using the user interface
This is the simplest approach. You use (or create) two different power profiles based on your needs, and then use the radio buttons to make one of them active.
Tip: I go through power plan / scheme settings for music production in my Windows 10 DAW tweak guide.
Open this UI by opening the settings app, navigating to System, and then “Power & Sleep”. On the right, you’ll see “Additional power settings”. You can launch the control panel UI from there.
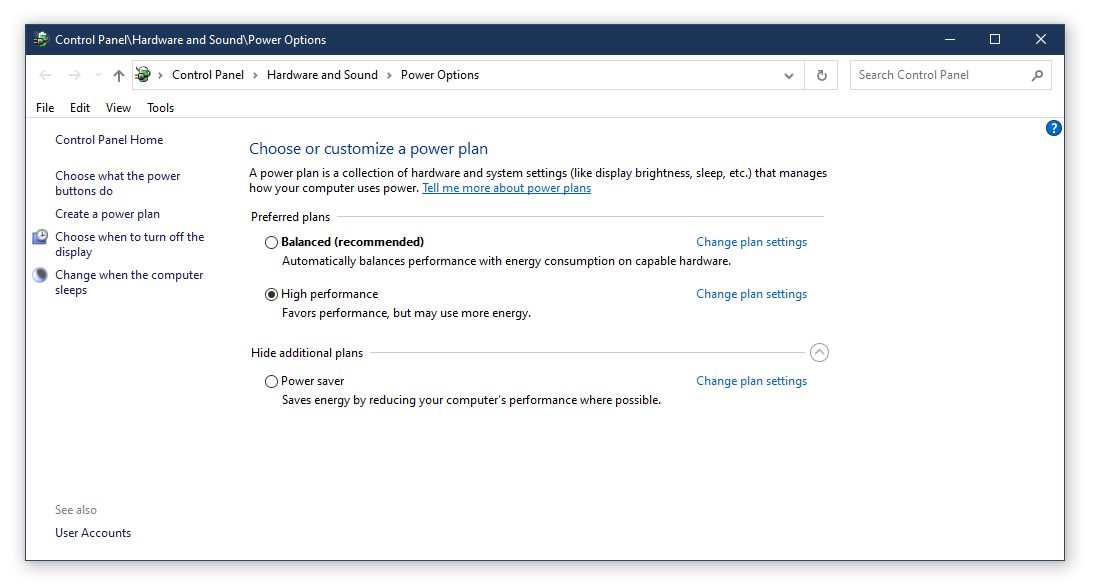
Note we’re constantly improving Windows. As of the time of this writing, the UI for additional power settings is in Control Panel. In the future, it may be located in the settings app or elsewhere.
Super easy, and requires very little setup on your part. It’s not the quickest way to change plans, however.
Using the command line
This is especially powerful, because you can create a small batch file and pin it to your desktop, Start Menu or task bar, and quickly switch between power plans on the fly. It does require more setup, however.
This makes use of the Windows powercfg utility. This utility lets you do a number of things related to power, like control power throttling for a specific application, tell you the reason Windows last woke up from sleep, list power schemes, and more.
In these examples, I’m using the excellent Windows Terminal, created by a team here at Microsoft in Windows & Devices. It has a portable JSON-based configuration file so you can easily bring it across machines, it supports background colors, transparency, images, emojis, and much more. You can zoom in and out using control-scroll, and you can copy or paste text just by selecting it and right-clicking. Windows Terminal also supports several different consoles including cmd.exe, PowerShell, and The Windows Subsystem for Linux. It’s actively developed out in the open, [https://github.com/Microsoft/Terminal](so you can see the code, file issues, and even contribute). You can also download the Windows Terminal from the [https://aka.ms/terminal](Microsoft Store, here). You can, of course, use the bundled cmd.exe Windows console app if you want.
Note that several of these options require running the console as administrator. This is easy to do:

Introducing the powercfg utility
Windows 10 includes a command-line utility for managing the power plans/schemes (“plan” and “scheme” are interchangeable here). This is designed more for system administrators, but it is super easy to use for our needs.
Getting help
If you want to see the options for the powercfg utility, just type powercfg -? (you can use the forward slash / instead of the dash - if you prefer).

I won’t go through each of the switches in the tool, but just a few of the ones of most interest. If you are an advanced user, there are a few more which may be useful to you. You may find more information in the powercfg documentation here.
List all the power plans on the system
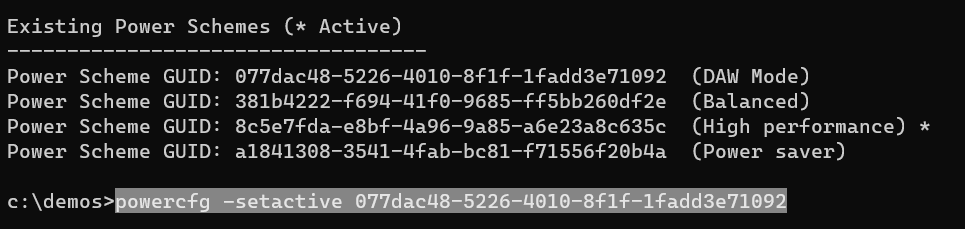
Systems typically have multiple power schemes set up. Here, you can see that I have three.
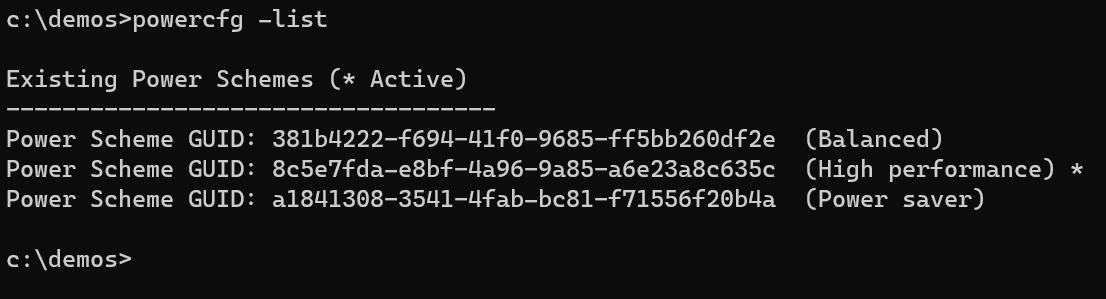
The GUID (Globally Unique IDentifier) for the scheme is the important thing to remember. Or better than remember, you can just copy it from the terminal screen. If you have Windows Clipboard History enabled, you can copy both as separate entries that you can paste using Windows + v.
Show the currently active power scheme
The starred entry in the full list is the active one. If you want to return just the active entry, you’ll use the -getactivescheme switch.

Show or change the settings for a scheme
Select the GUID from one of the schemes and past it in to a command line with the -query switch.
It produces pages of data which I won’t paste here, but you can see individual parameters for the scheme, as well as their alias. There’s more documentation for the -change and -query switches in the powercfg docs, although not for all settings. One way to figure out values that are not documented is to change them using the UI and then see what values show up in this report.
Duplicate a scheme
This is super useful to enable you to create a new scheme based off of an existing one. For example, you may want a special DAW-mode scheme based off of the existing High Performance scheme. To do this, use the -duplicatescheme switch.
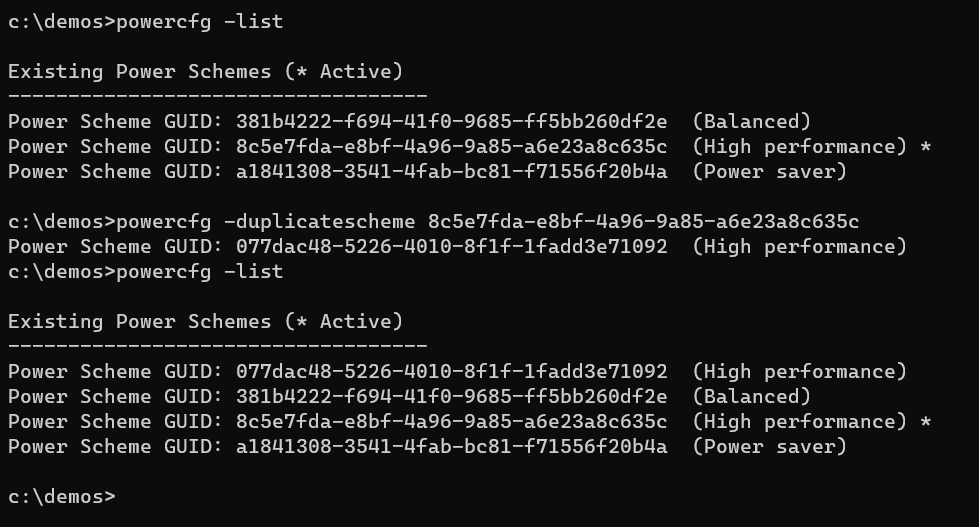
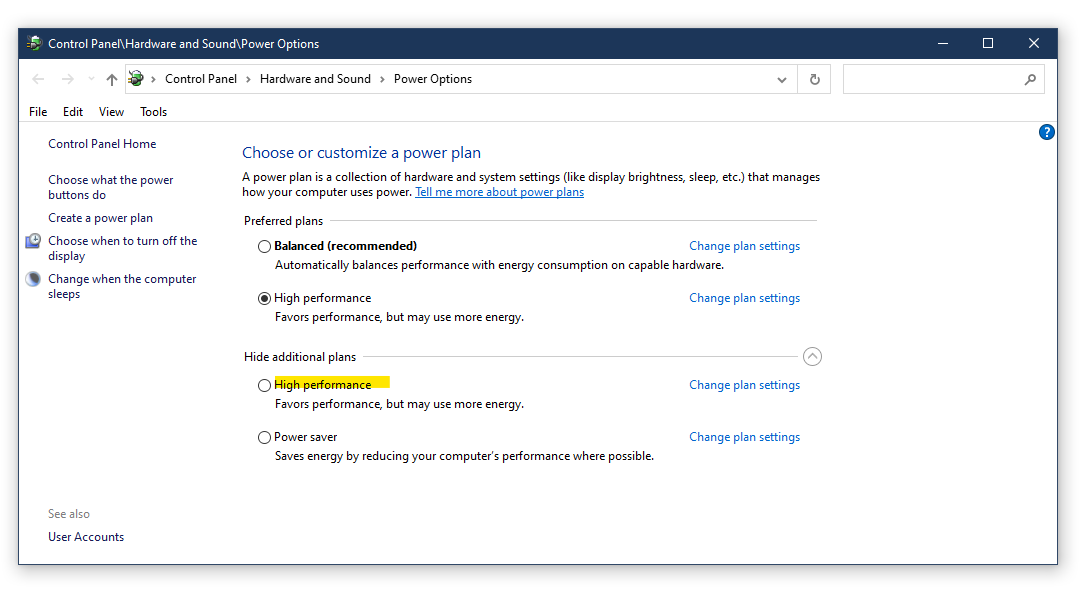
You see that the new scheme has a new GUID, but the same name. You can also confirm this in the power settings window. You may need to hit the refresh button in the address bar at the top.
Rename a scheme
You can rename a scheme to make its expected use more obvious to you and others. This is done using the -changename switch.
In my case, I’m going to rename the second “High Performance” scheme to “DAW mode”, and also give it a better description
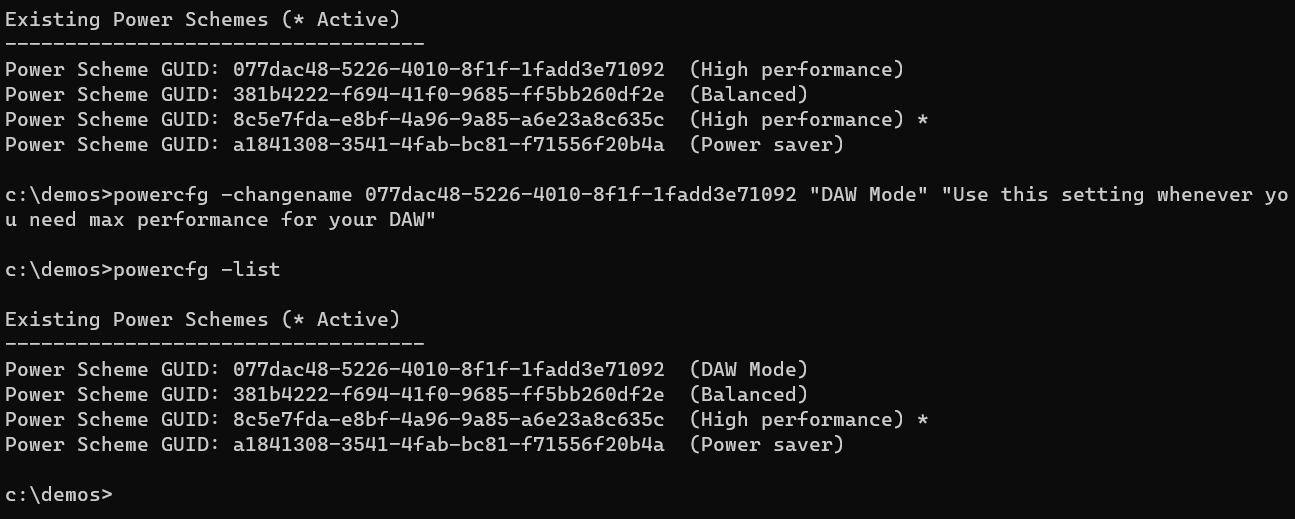
Again, we can confirm the change by using the control panel.
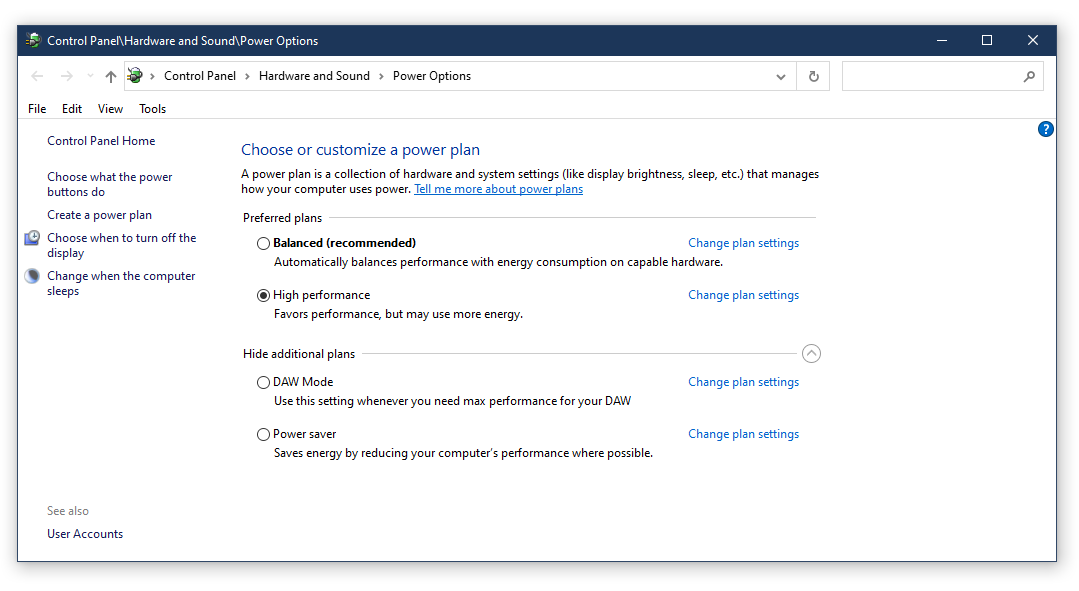
You can see the DAW Mode plan is there, along with a new description. You can tweak this plan all you want, and it will not impact the existing High Performance plan.
Switching to the new plan
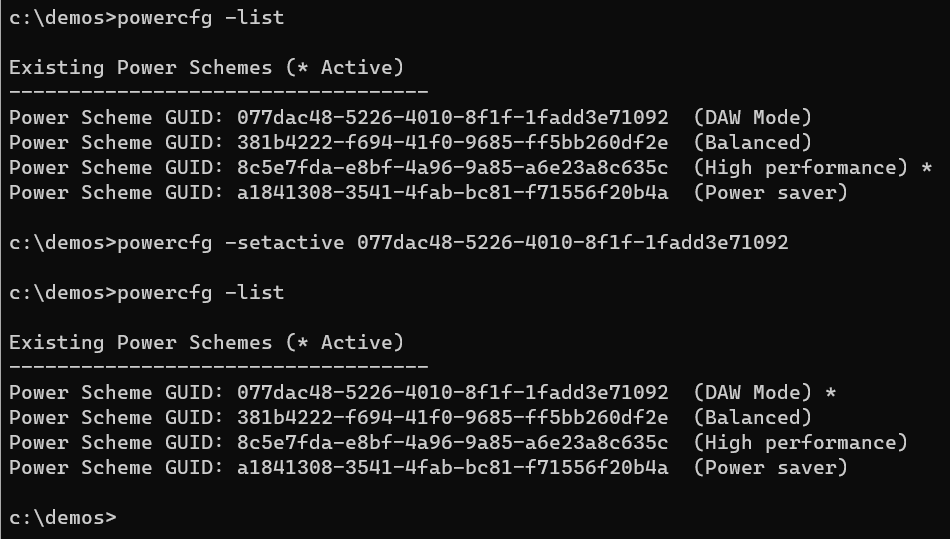
If you want to switch to this new plan, you can use the UI. But if we want this to be easy in the future, we want to handle the switching with a simple command. So, to switch to the new scheme use the -setactive switch along with the GUID of the plan you want to set active.
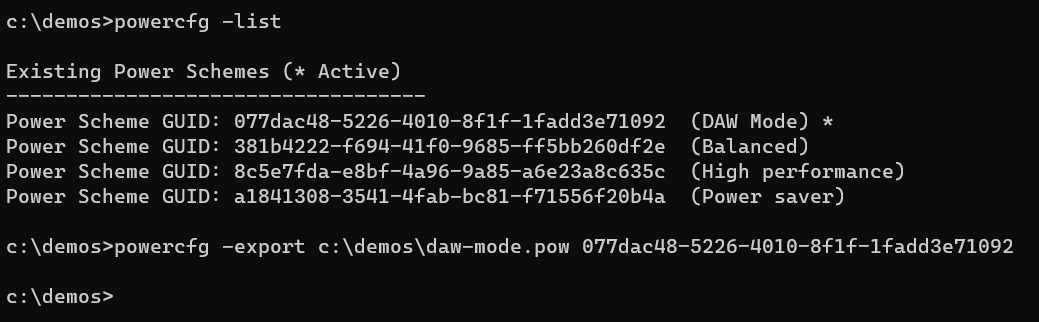
Optionally export settings for reuse on other machines
If you are responsible for provisioning DAWs for other folks, or just like to share with others in the community, you may want to create a couple uniquely-named power schemes and then share them with others. You can do this by using the -export and -import switches, in conjunction with everything else we’ve done here.
Keep in mind that not all power options are available on or relevant for all types of devices. Always test.
Creating a couple links to make it easier
Now that we know the two ways to switch power schemes, we can easily create a couple links to switch into one or the other.
First, you need to have the two GUIDs handy for your power schemes. You get this using the -list switch mentioned earlier. It’ll be even easier if you copy the entire -setactive command line instead of just the GUID. So I’ll do that here.
Here’s the DAW mode one:
And here’s the “balanced” one:

Now to create the shortcuts. Right-click in Windows Explorer in some convenient folder you have write access to (your documents, desktop, etc.) and select “new -> shortcut”.
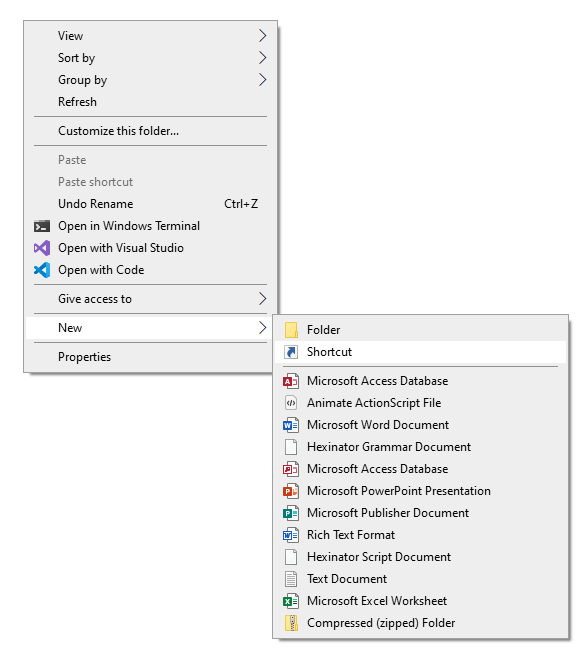
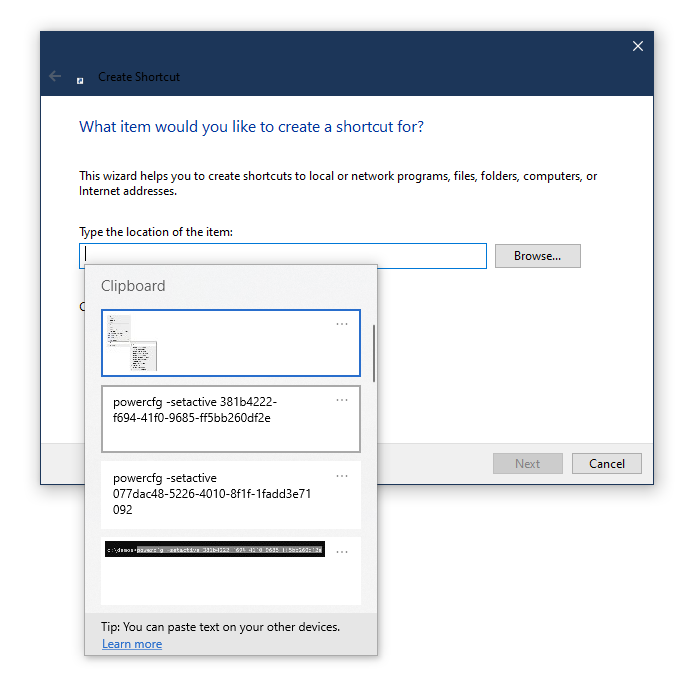
Paste in the command line for the power plan you are setting up the shortcut for. You’ll want one shortcut for the DAW Mode plan, and another for your non-DAW plan.
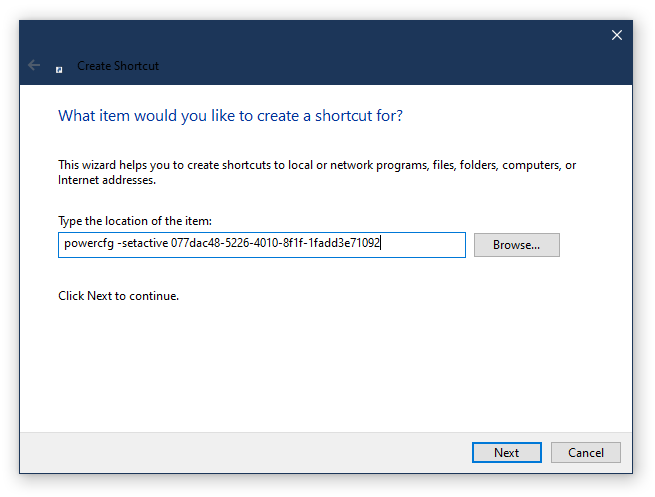
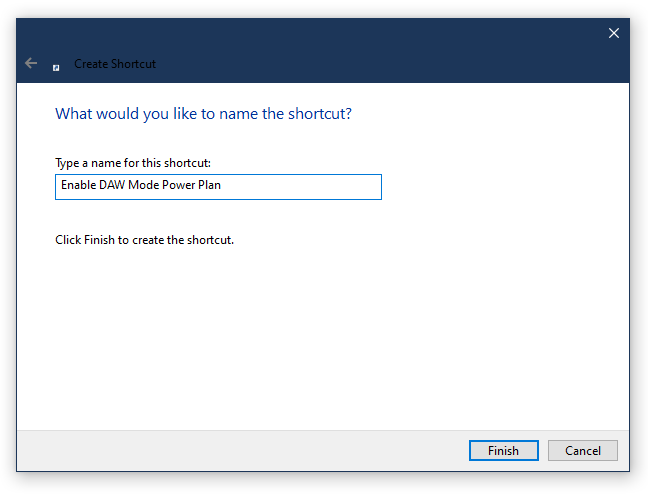
Next, give the shortcut a meaningful name, and then hit the finish button.
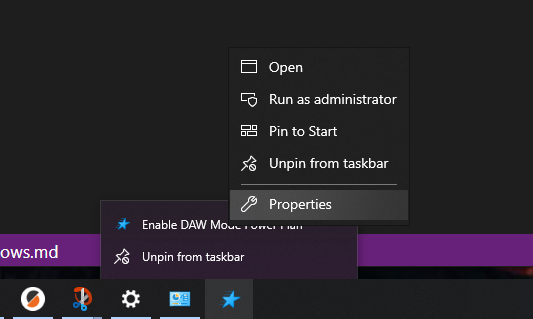
Now drag the shortcut to the task bar and pin it there, or right-click and pin it to Start. The icon that is auto-selected is pretty meaningless in this context. You may want to browse for other icons on your system and assign a new one by right-clicking the taskbar item, and then right-clicking the menu entry for the shortcut and then clicking “properties”.
Then open the Shortcut tab and click “Change Icon…”
![]()
The default shell32.dll source has a lot of icons. Here are a few other built-in sources, in alphabetical order:
- %systemroot%\system32\ddores.dll
- %systemroot%\system32\imageres.dll
- %systemroot%\system32\mmres.dll
- %systemroot%\system32\netshell.dll
- %systemroot%\system32\wmploc.dll
There are many other built-in sources, as well as third-party .ico files you can download and use. Always be careful of who you download content from.
Repeat for your other power plan. Then, when you want to use your DAW, just switch into the appropriate power scheme by clicking the taskbar or Start Menu link.
Where to go from here
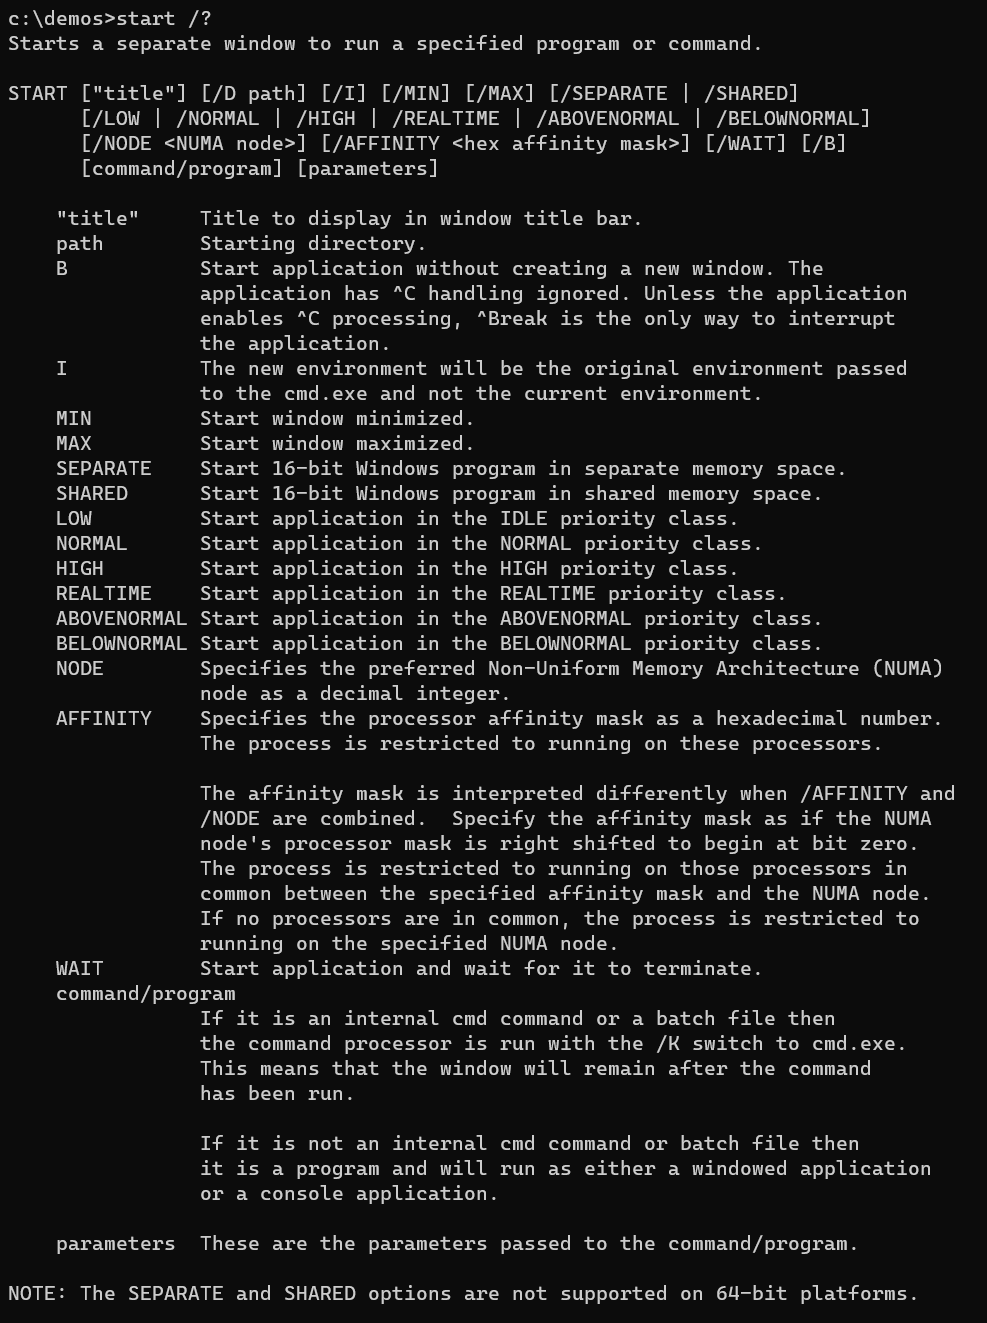
If you want to get extra fancy, you could even create a batch file which sets the power plan, launches your DAW and then waits, and then sets the power plan back to normal when done. I won’t show you how to create batch files here, but the command to launch the DAW and wait will use the start command. That command has lots of switches available as well, enabling you to set the priority, processor affinity, etc.
The /wait switch is what you want in the batch file to have it wait until the DAW has completed. This will work only if the DAW itself isn’t just a launcher process that launches the DAW and then terminates.
With that, I hope you have the tools you need to manage your power schemes on Windows, and automate switching between them. Questions or comments? Suggestions for going further? Please let me know in the comments below.
0 comments