


A step-by-step guide to enable the AI-powered coding assistant within Visual Studio
Introduction to GitHub Copilot
GitHub Copilot is a new tool that helps you write code faster and smarter with the help of artificial intelligence. It can suggest code completions, generate code snippets, and even write entire functions for you. GitHub Copilot works with a variety of languages and frameworks, and it can learn from your own code and preferences. In the following video short, Bruno Capuano shares how to install GitHub Copilot in Visual Studio. Visual Studio supports many programming languages, such as C#, VB.NET, C++, Python, and more. By installing GitHub Copilot in Visual Studio, you can leverage the power of AI to enhance your coding experience and productivity.
Prerequisites
Before you can install GitHub Copilot in Visual Studio, you need to have the following:
- A GitHub account. You can sign up for free at GitHub.com.
- An active GitHub Copilot subscription (Individual, Business, or Enterprise).
- Visual Studio 2022 17.6 or later installed.
GitHub Copilot Installation
How you install GitHub Copilot in Visual Studio is changing. Sarting in the 17.10 in the Preview channel GitHub Copilot is a recommended component that can be installed from the Visual Studio Installer. The instructions below still apply to the 17.9 version of Visual Studio in the release channel.
You can learn all about the upcoming changes to GitHub Copilot in this blog: Introducing the new Copilot experience in Visual Studio – Visual Studio Blog (microsoft.com).
Once you have the prerequisites, you can install GitHub Copilot in Visual Studio by following these steps:
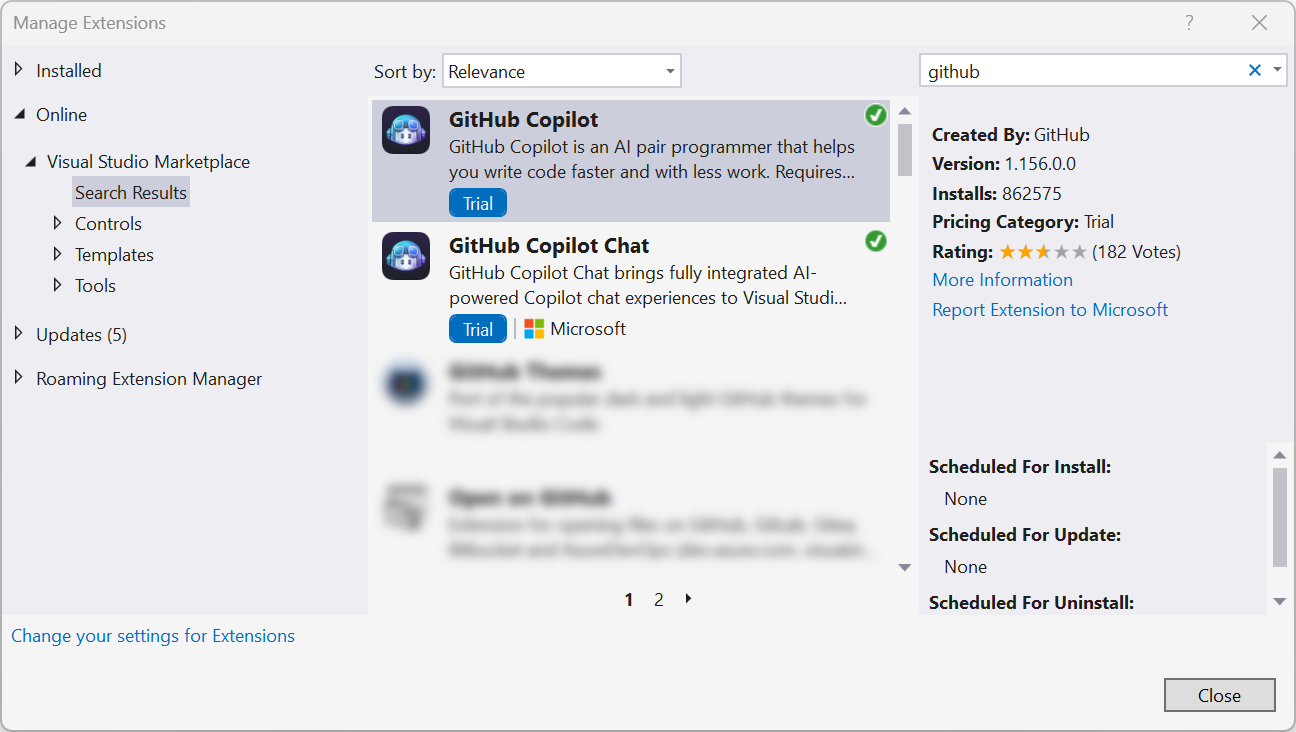
- Open Visual Studio and go to the Extensions menu. Select Manage Extensions.
- In the Manage Extensions window, search for GitHub Copilot in the online tab. Select the GitHub Copilot extension and click Download.
- After the download is complete, close Visual Studio and run the installer for the GitHub Copilot extension. Follow the instructions to complete the installation.
- Open Visual Studio again and go to the Tools menu. Select Options.
- In the Options window, go to the GitHub Copilot tab. Click Sign in with GitHub and authorize the extension to access your GitHub account.
- After you sign in, you can start using GitHub Copilot in Visual Studio. You can access the Copilot panel from the View menu or by pressing Ctrl+Alt+C.
What is the difference between GitHub Copilot and GitHub Copilot Chat?
GitHub Copilot and GitHub Copilot Chat are both AI-powered tools designed to assist developers, but they serve different purposes and are used in different contexts:
- GitHub Copilot harnesses AI to help you write code faster and with fewer errors by providing suggestions for whole lines or blocks of code directly within supported integrated development environments (IDEs) like Visual Studio.
- GitHub Copilot Chat is a chat interface that allows you to interact with GitHub Copilot in a conversational manner. You can ask coding-related questions and receive answers within GitHub.com and supported IDEs like Visual Studio and is useful for getting explanations, generating code snippets, and understanding best practices.
GitHub Copilot focuses on code completion within IDEs like Visual Studio, while GitHub Copilot Chat provides a conversational interface for coding assistance and explanations. Both aim to enhance developer productivity but do so through different interfaces and interactions with the user.
Conclusion
Now that you have successfully installed GitHub Copilot in Visual Studio, you can now enjoy the benefits of AI-powered coding assistance. GitHub Copilot can help you write code faster and you can also learn from the suggestions and examples that GitHub Copilot provides. To learn more about GitHub Copilot and how to use it, check our collection with resources here or via our full-length video.
Additional Resources
0 comments