

We are thrilled to announce the latest enhancements to the .NET Upgrade Assistant. .NET Upgrade Assistant helps upgrade solutions to newer versions of .NET. Whether you’re upgrading from .NET Framework to .NET 8 or just between .NET Core versions (from .NET 6 or 7 to .NET 8 or 9), .NET Upgrade Assistant can help you understand what changes will be needed. .NET Upgrade Assistant is available as a Visual Studio extension or as a command-line tool. Now as part of your upgrades to modern .NET, you’ll have access to powerful code assessment features.
Here’s what’s new:
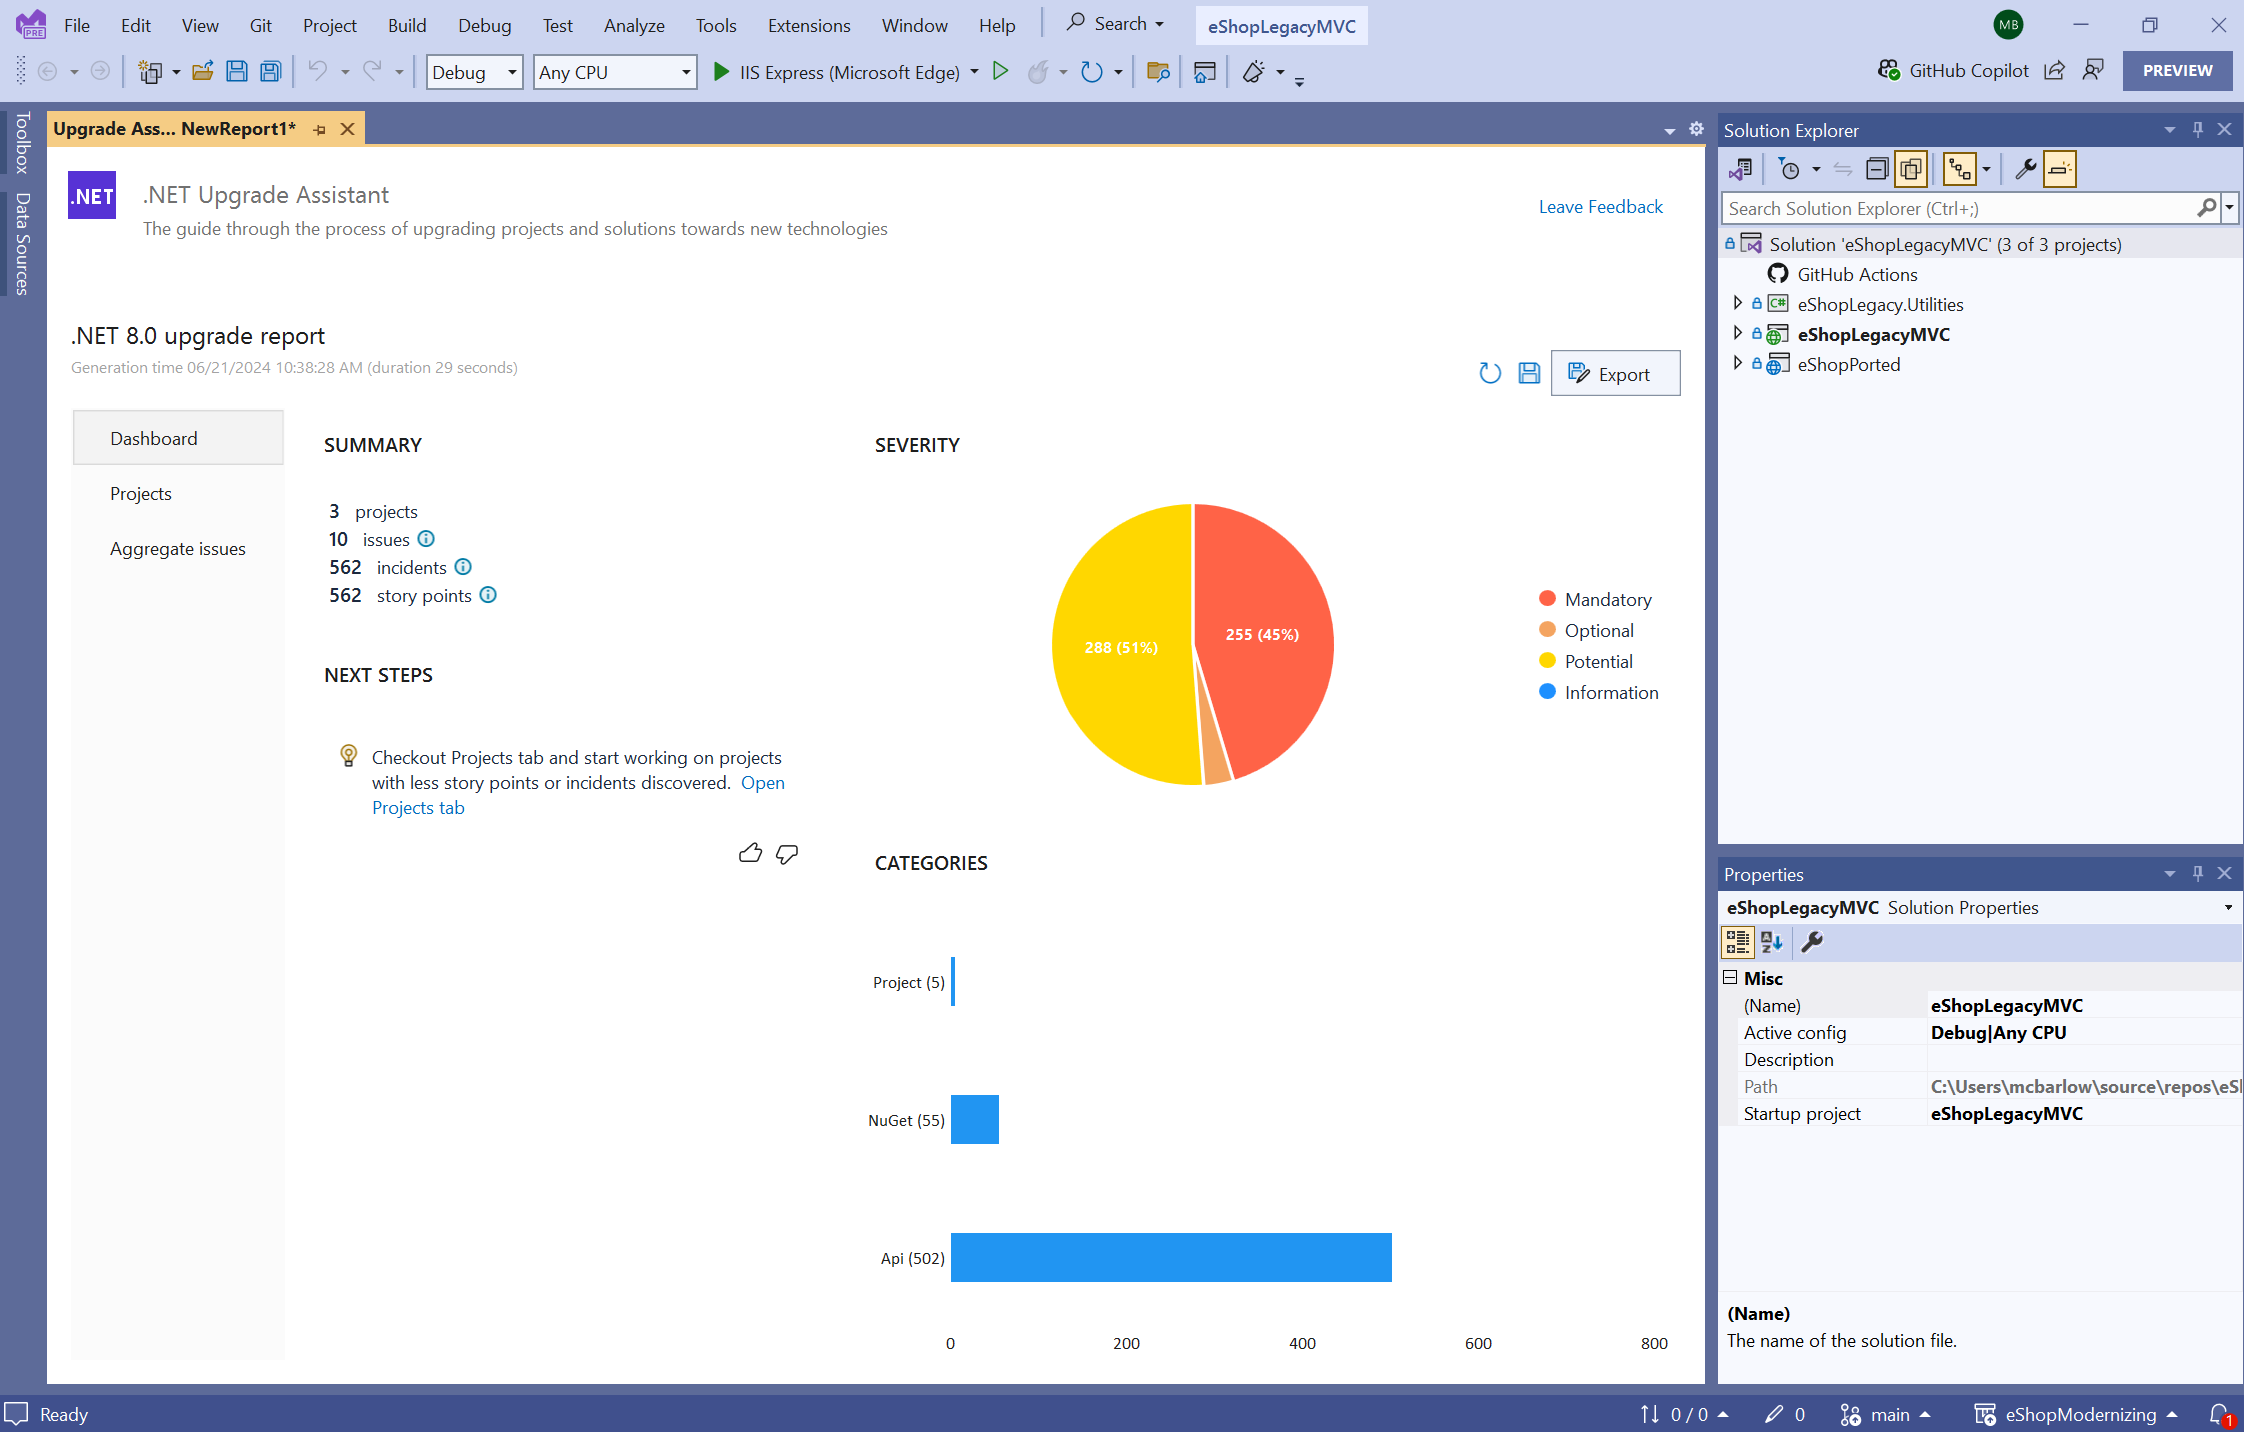
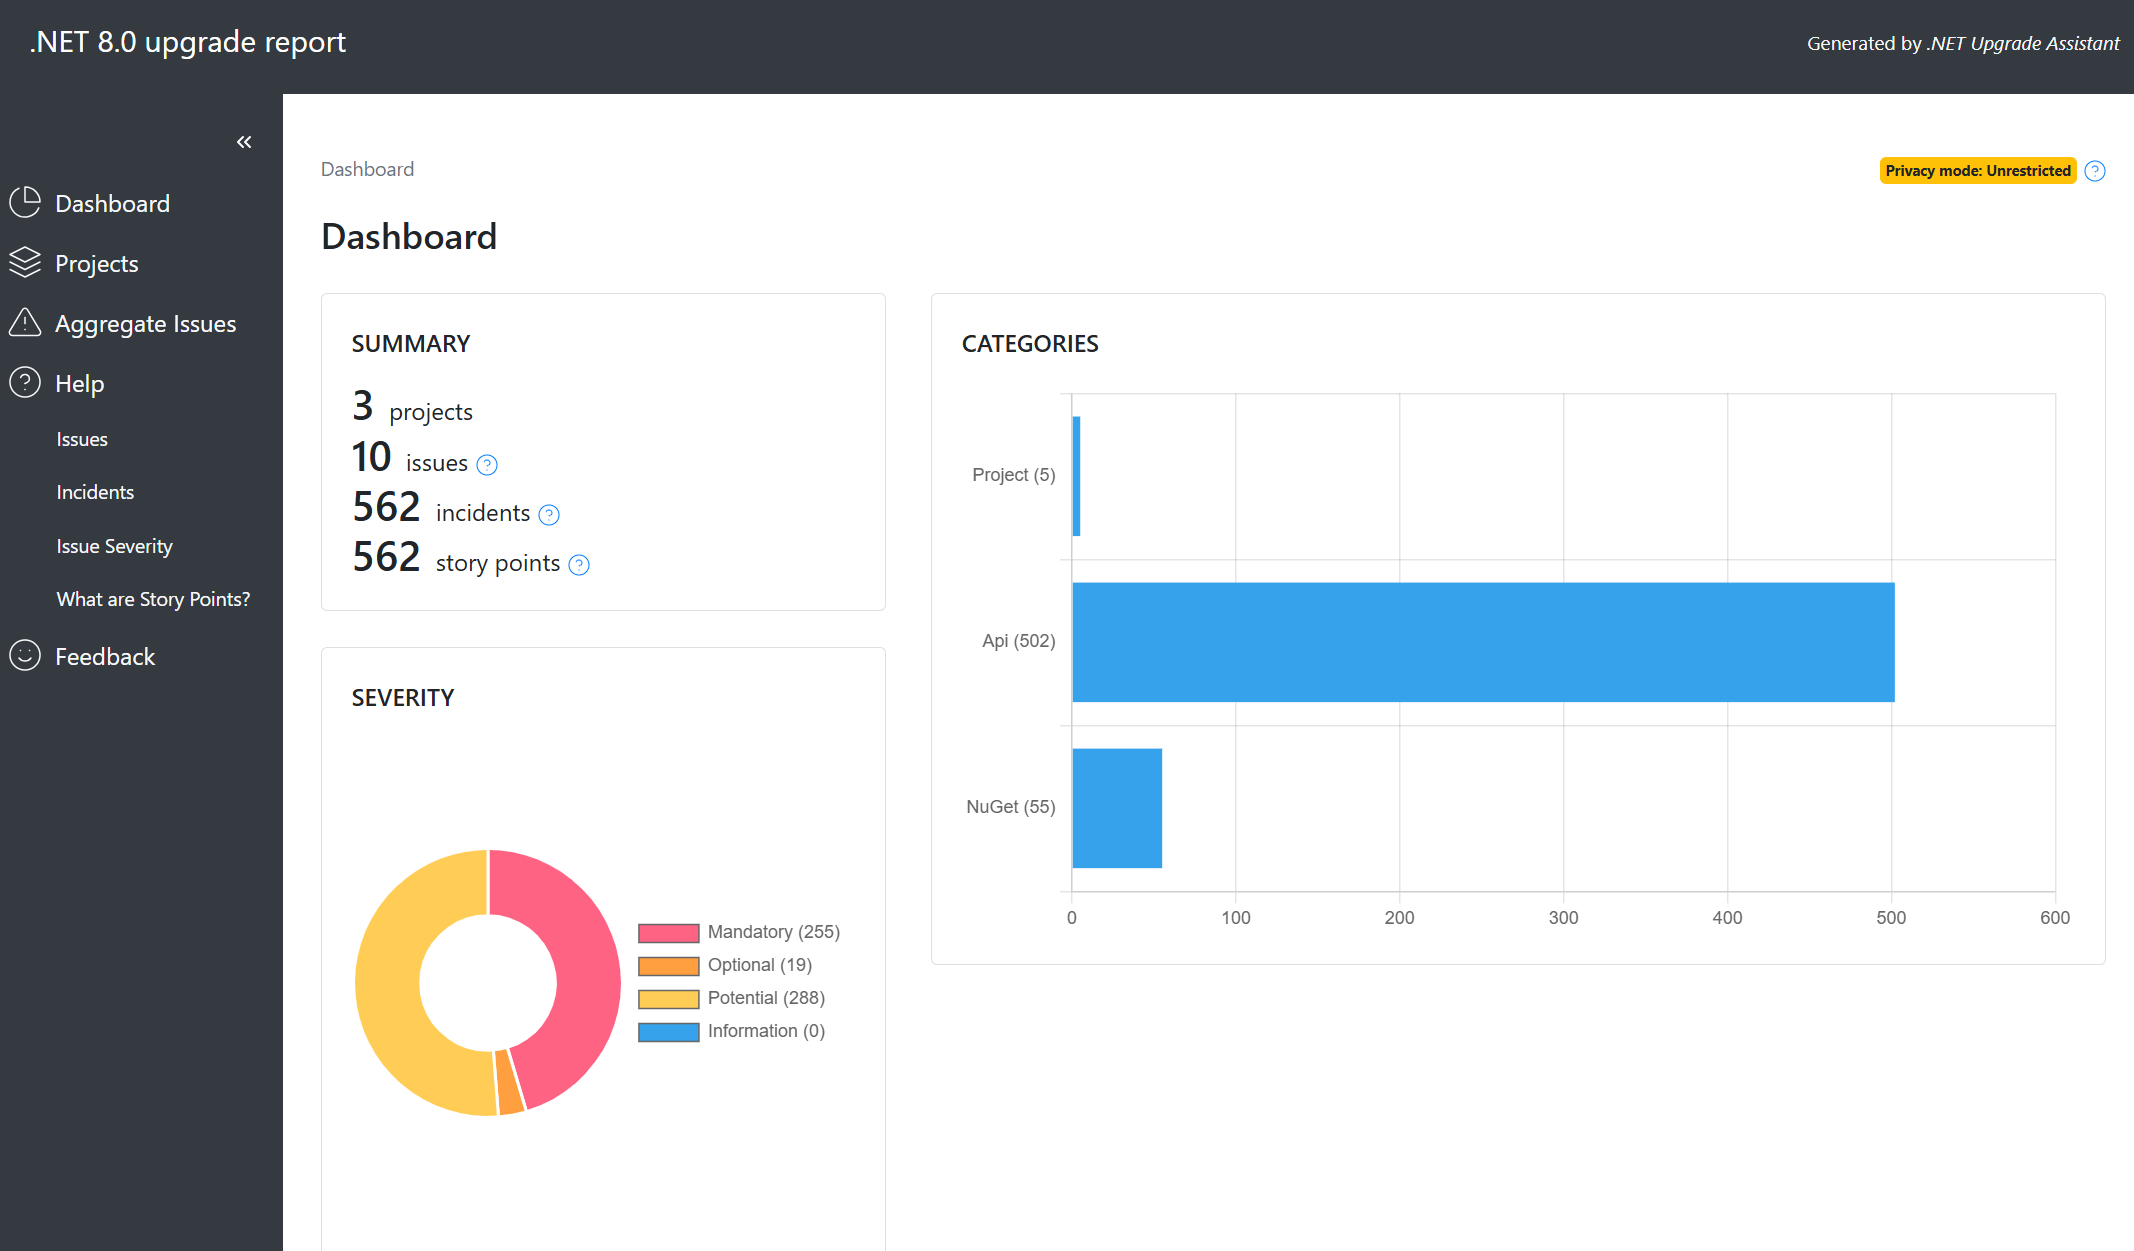
Our code assessment tool scans your solution at the source code level and identifies potential issues and dependencies that could pose challenges during the upgrade process. You will be provided with a comprehensive dashboard that provides an overview of issues across your entire solution and estimates of how much effort will be required for each issue to be remediated.
Each issue in the report is categorized by severity, allowing you to prioritize your efforts. Whether it’s a mandatory issue blocking upgrade or an optional issue identifying opportunities to take advantage of features available in the latest .NET framework, you’ll know exactly where you need to focus your attention.
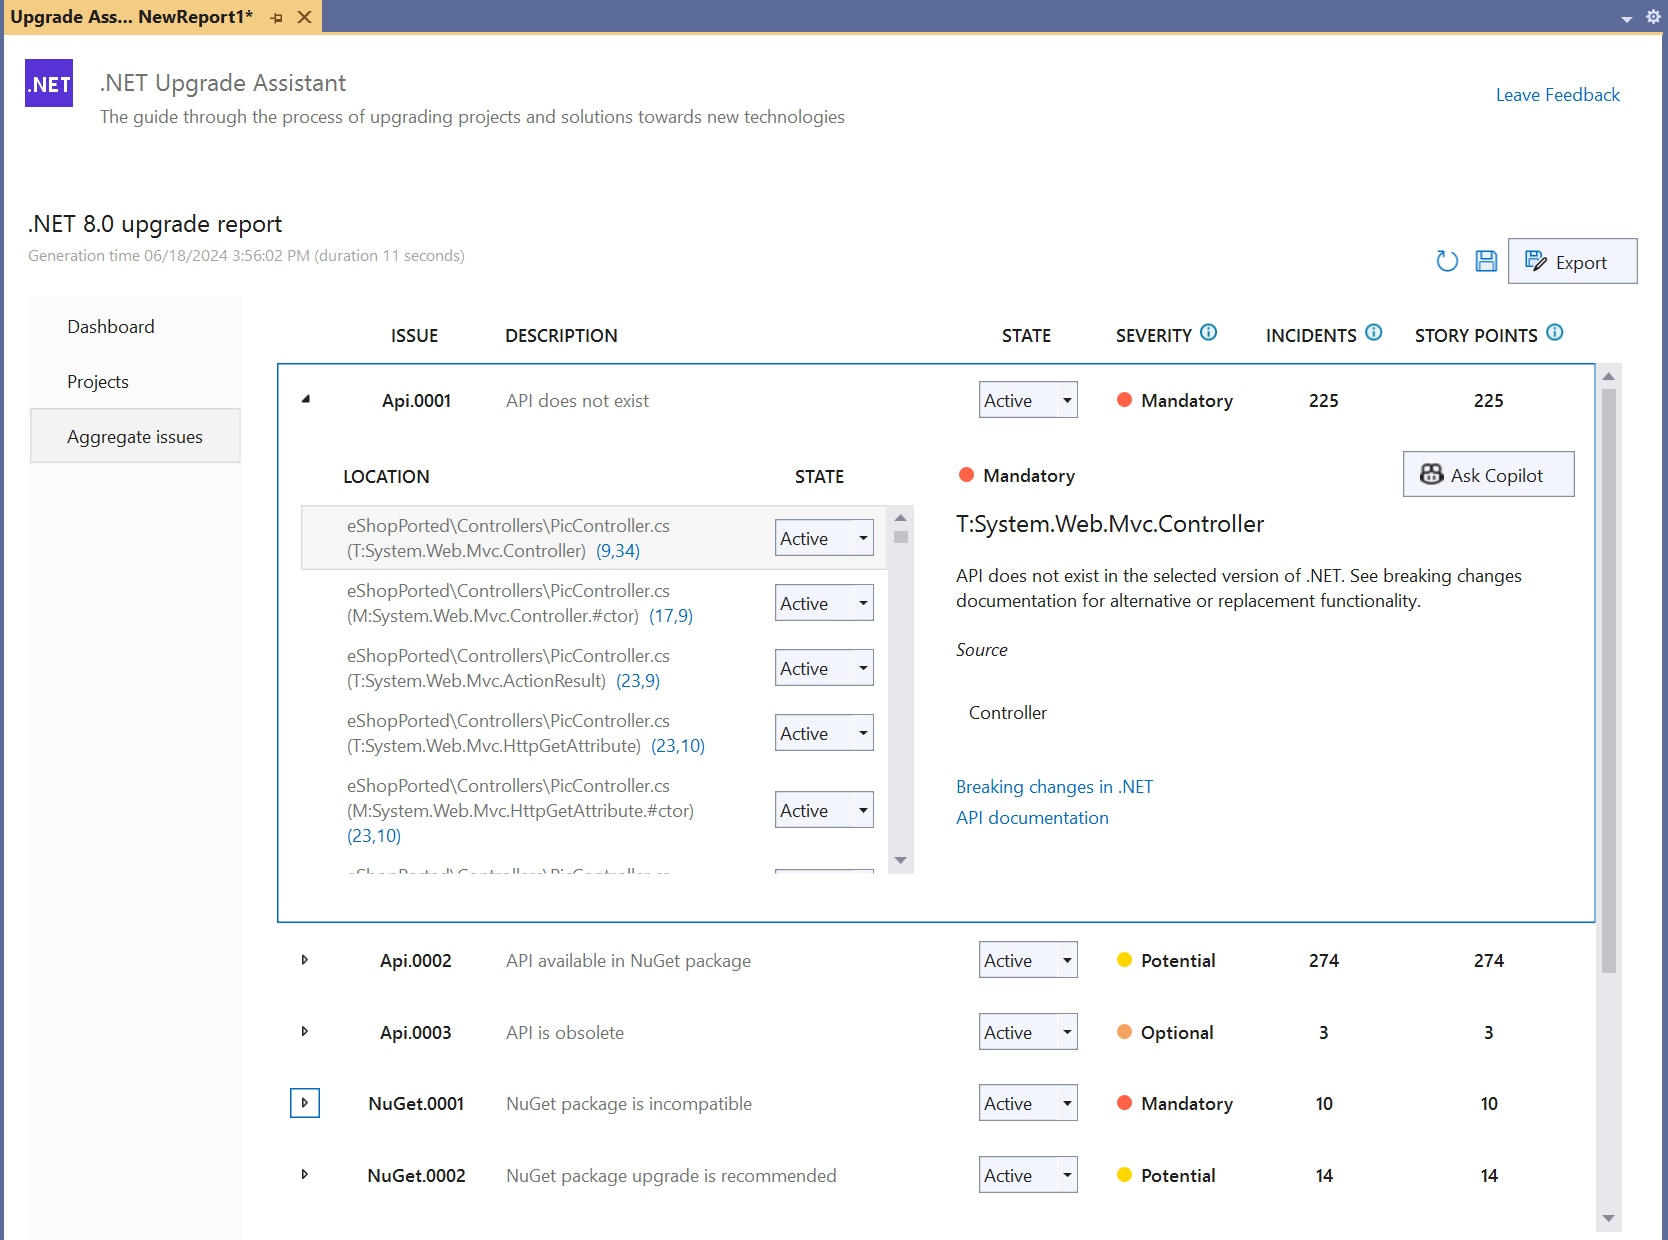
Issues can provide exact locations within your source code where issues were detected, making troubleshooting and fixing dependencies a breeze. Easily navigate through projects and pinpoint areas that need attention. You can jump to a line that requires your attention, address issues and mark them as fixed, and save the current state of the issues and report so you or your coworkers can pick up exactly where you left off, making collaboration easier than ever. We also include relevant links to documentation, best practices, and community discussions to give you the guidance you need to tackle each challenge.
Install the Visual Studio Extension
Pre-requisites:
- Windows operating system
- Visual Studio 2022 version 17.1 or later
Installation:
If you don’t already have the .NET Upgrade Assistant installed, you can download and install the extension from the Visual Studio Marketplace or install it from inside Visual Studio.
Note: The .NET Upgrade Assistant extension now installs on a per-user basis so there’s no requirement for elevated admin permissions to install. This addresses a need voiced by some users who don’t have admin permissions on their dev machines. More information and troubleshooting suggestions may be found in this blog post.
Install the CLI tool
Prerequisites:
- .NET SDK
The .NET Upgrade Assistant is also available as a .NET global tool. You can install the tool with the following command:
dotnet tool install -g upgrade-assistantSimilarly, because the .NET Upgrade Assistant is installed as a .NET tool, it can be easily updated by running:
dotnet tool update -g upgrade-assistant
Analyze applications with Visual Studio
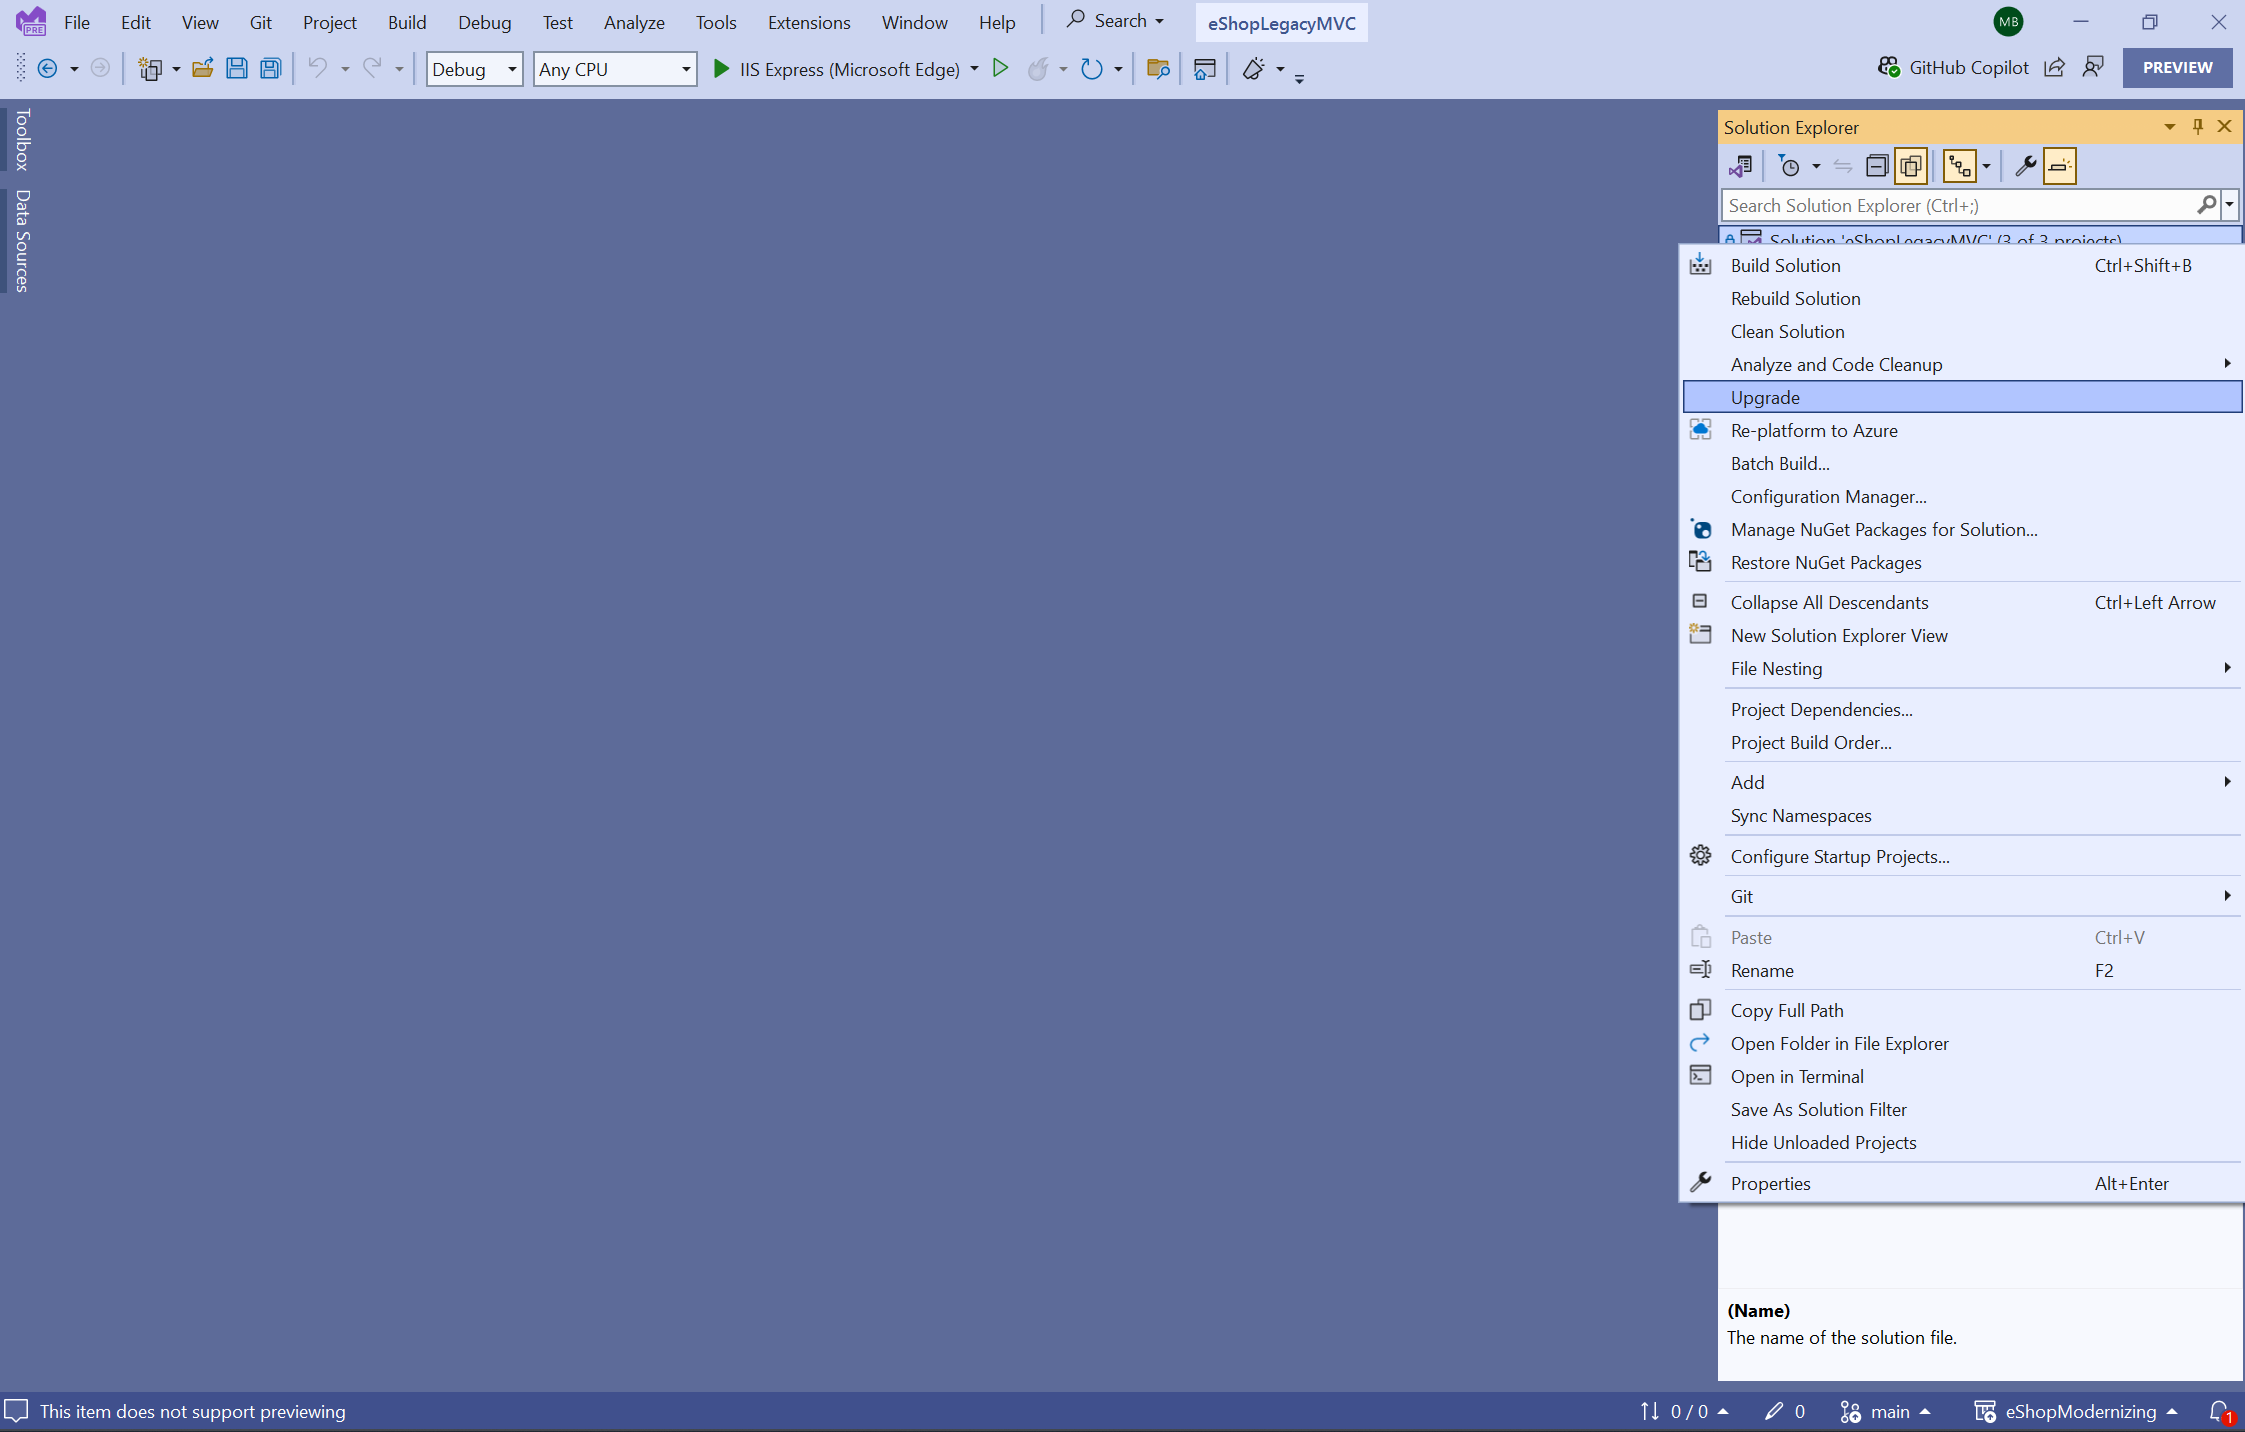
Once you have installed the Visual Studio extension, you are all set to analyze your application in Visual Studio. You can do so by right clicking on your solution in the Solution Explorer and selecting Upgrade.
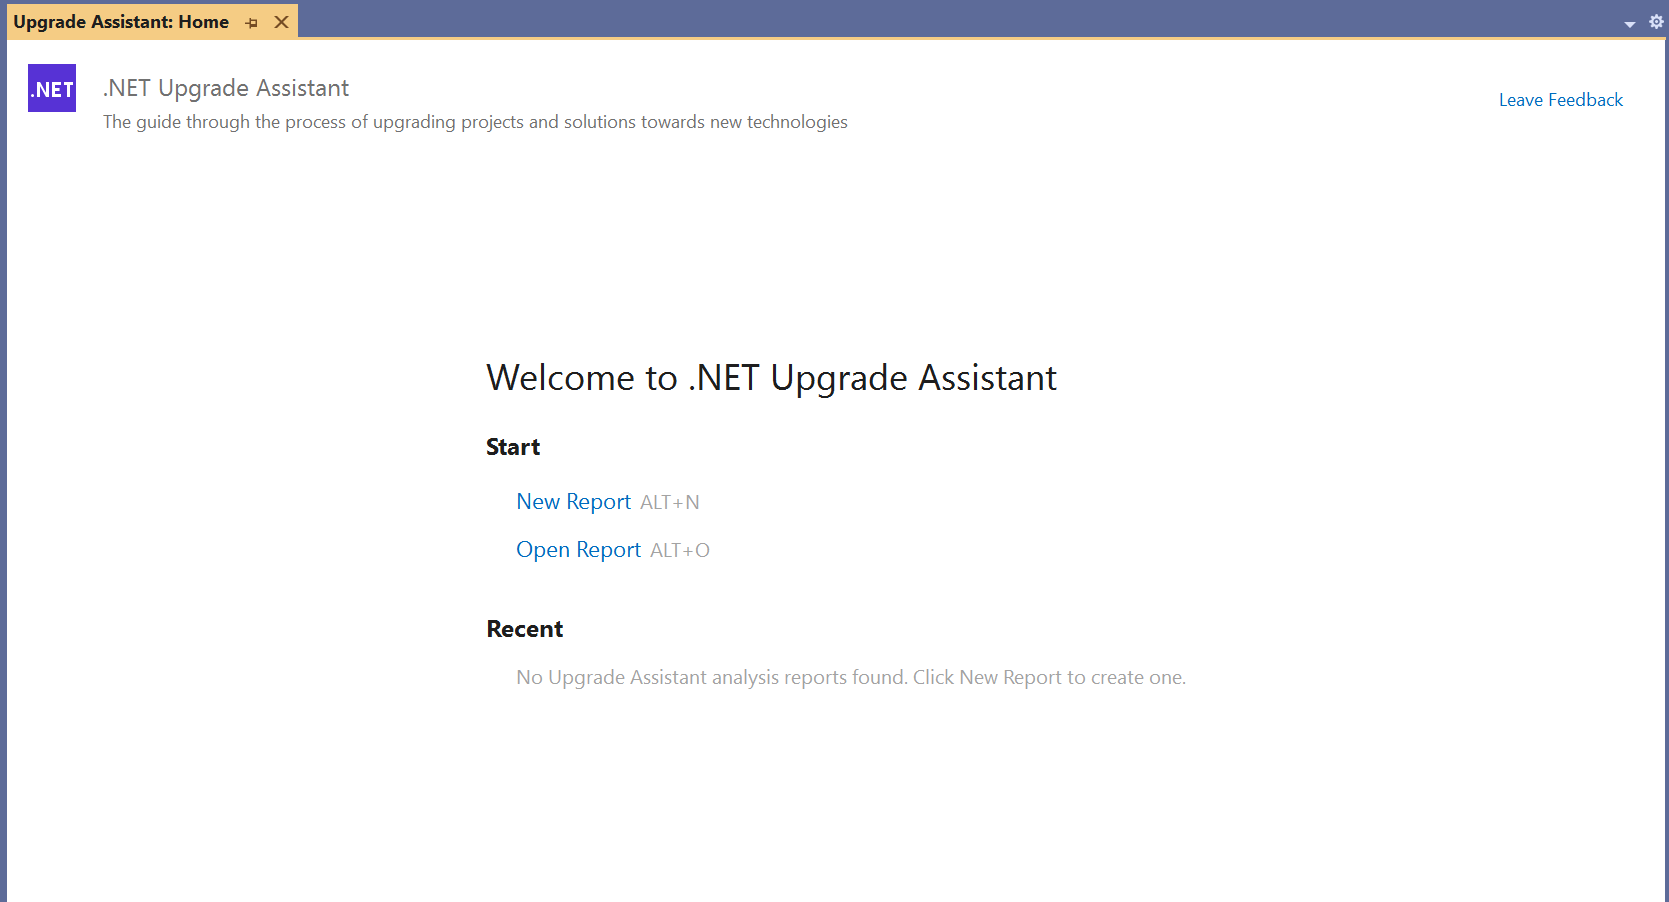
The tool will open a window offering you to either create a new report or open an existing one.
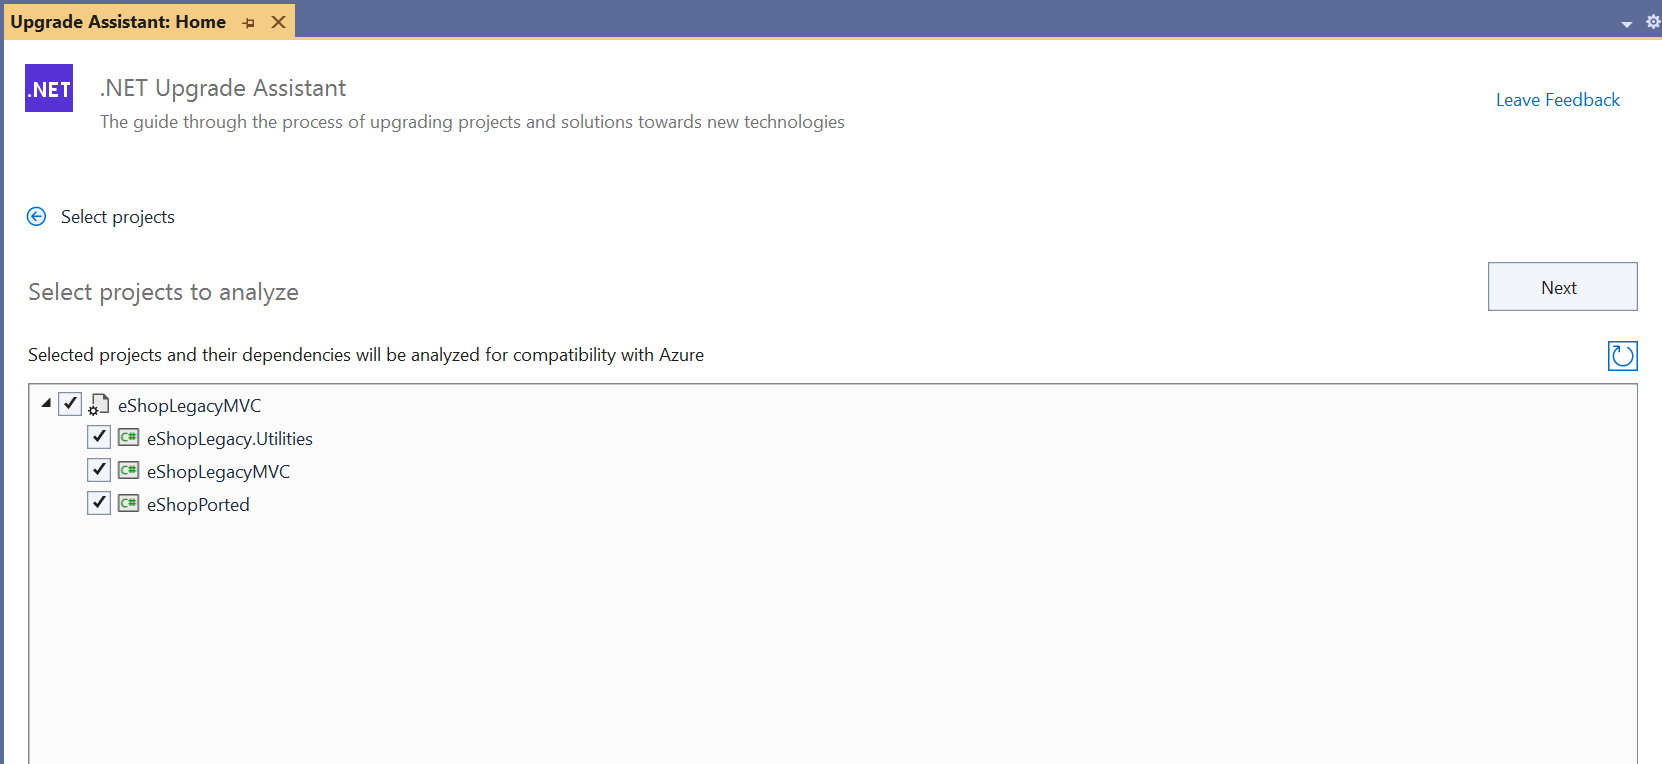
To start a new report, select the projects you want to analyze on the next screen. Web projects are already checked for you, but you may change the selection by checking or unchecking the boxes next to the projects. When the tool runs its assessment, it also analyzes the dependencies for your selected projects.
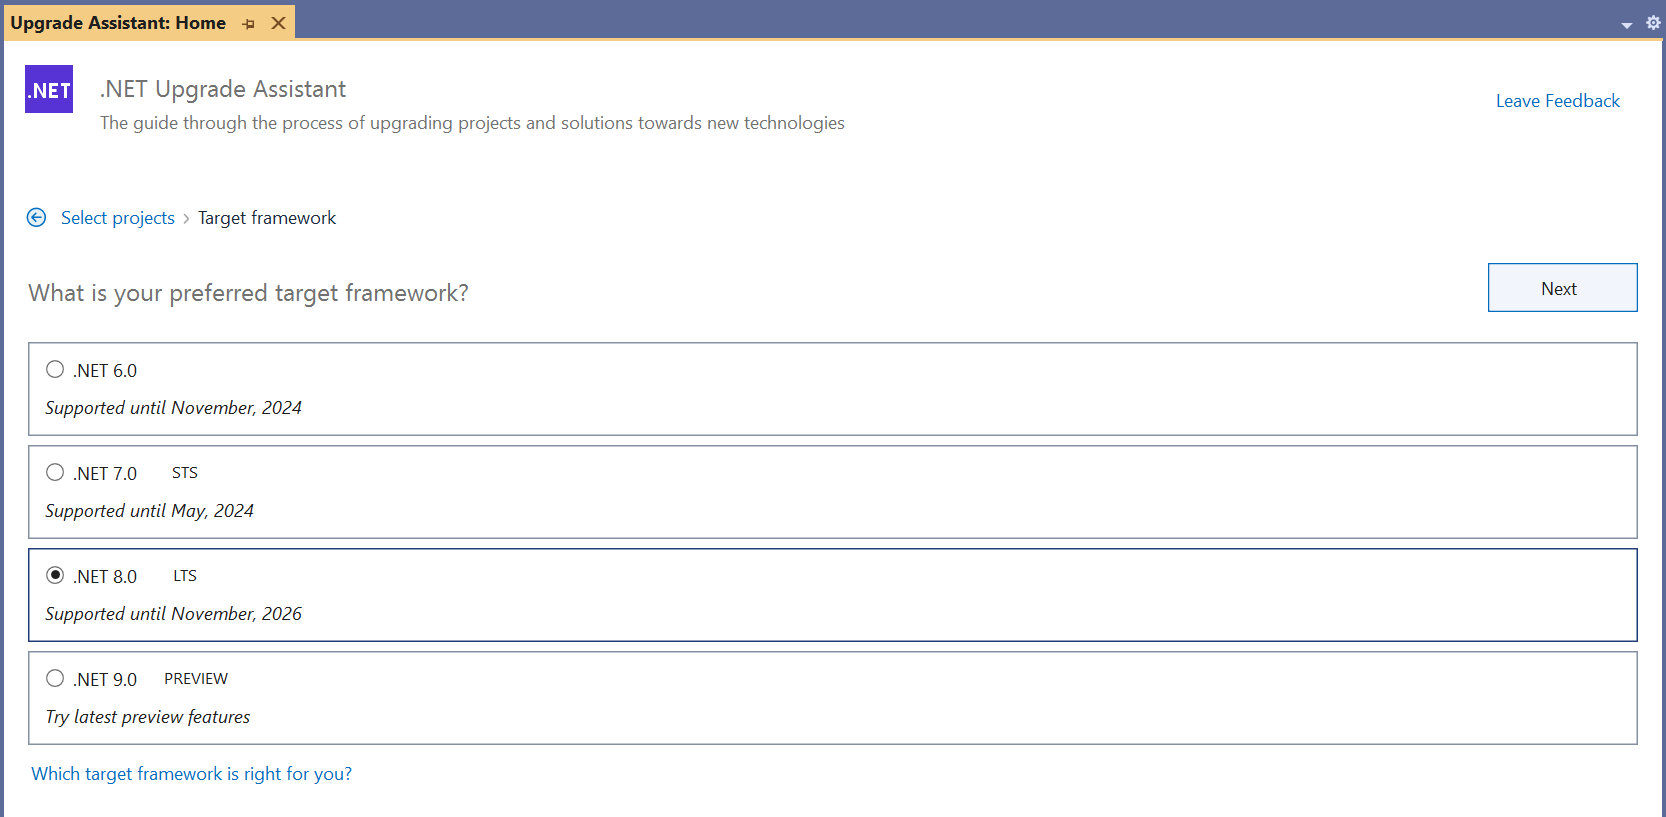
On the next screen you can select your preferred target framework for the upgrade. If you need help deciding which target framework is right for you, please check out this blog post.
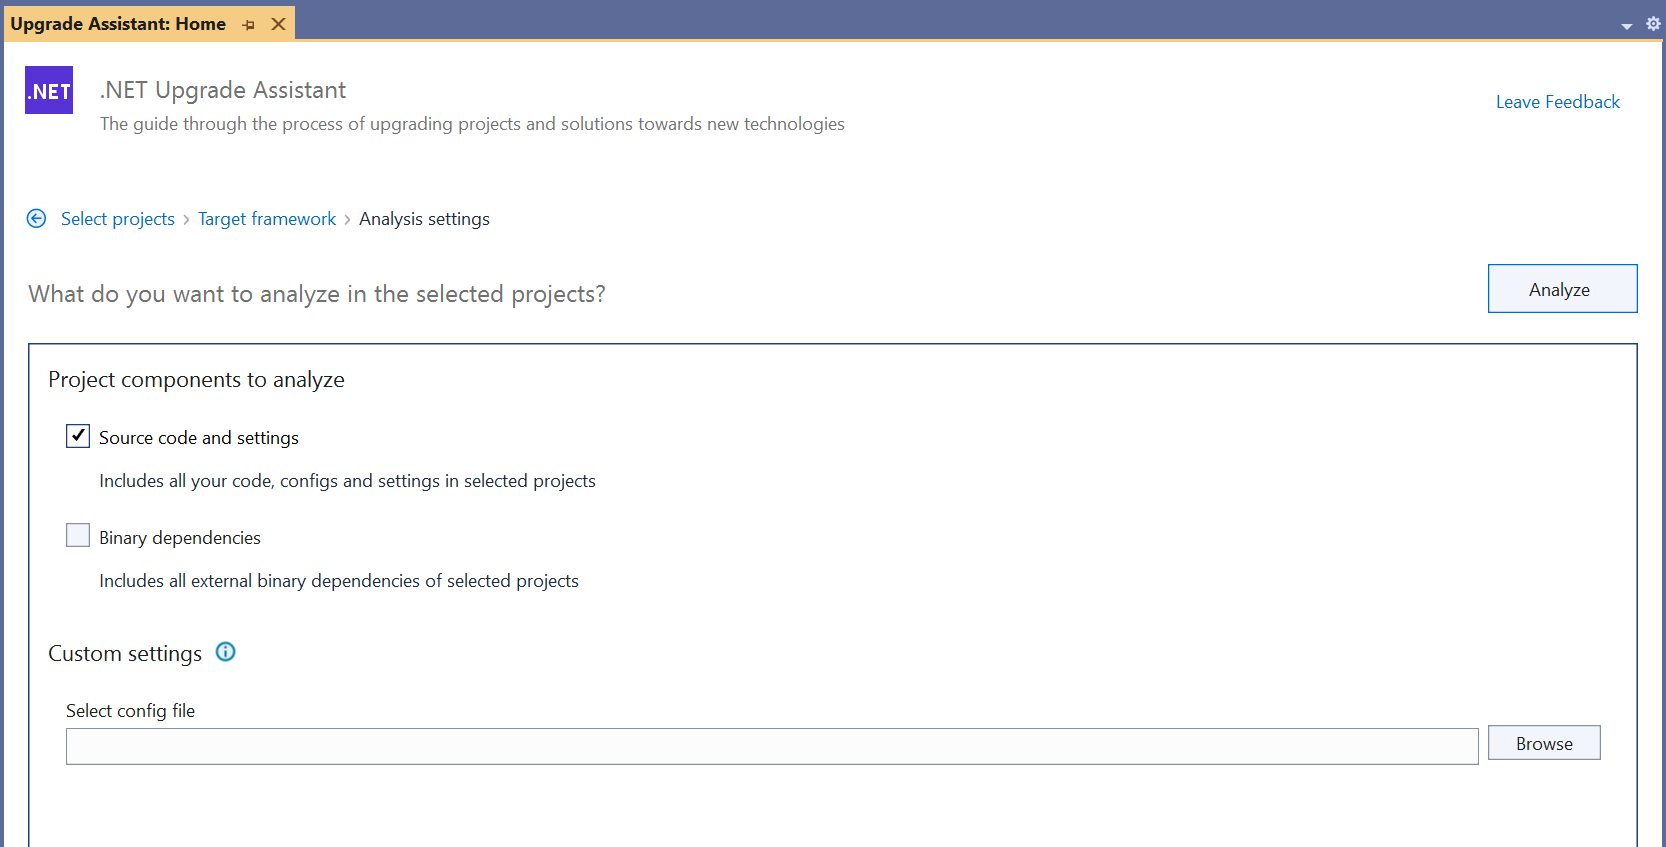
Next you will choose the components from the previously selected projects that you want to analyze. You can select just your source code and settings, or also include all your code’s binary dependencies for analysis. A custom config file may also be included to change the way that the rules for analysis work. After this selection, hit Analyze to begin the assessment of your application and receive your report
Analyze applications with the CLI
After you’ve installed the .NET Upgrade Assistant CLI tool, open a terminal window and navigate to the directory that contains the project you want to analyze. You can use the following command to see the available options the CLI provides:
upgrade-assistant --helpRun analysis on your application with:
upgrade-assistant analyzeThe CLI tool provides an interactive way of choosing which project to analyze. Use the arrow keys to select an item, and press Enter to run the item. Select the project you want to analyze. Follow the prompts in the command terminal to make the same selections as outlined above in the Visual Studio extension. When the analysis is done, you will be provided with a report in the format you selected.
Interpret Results
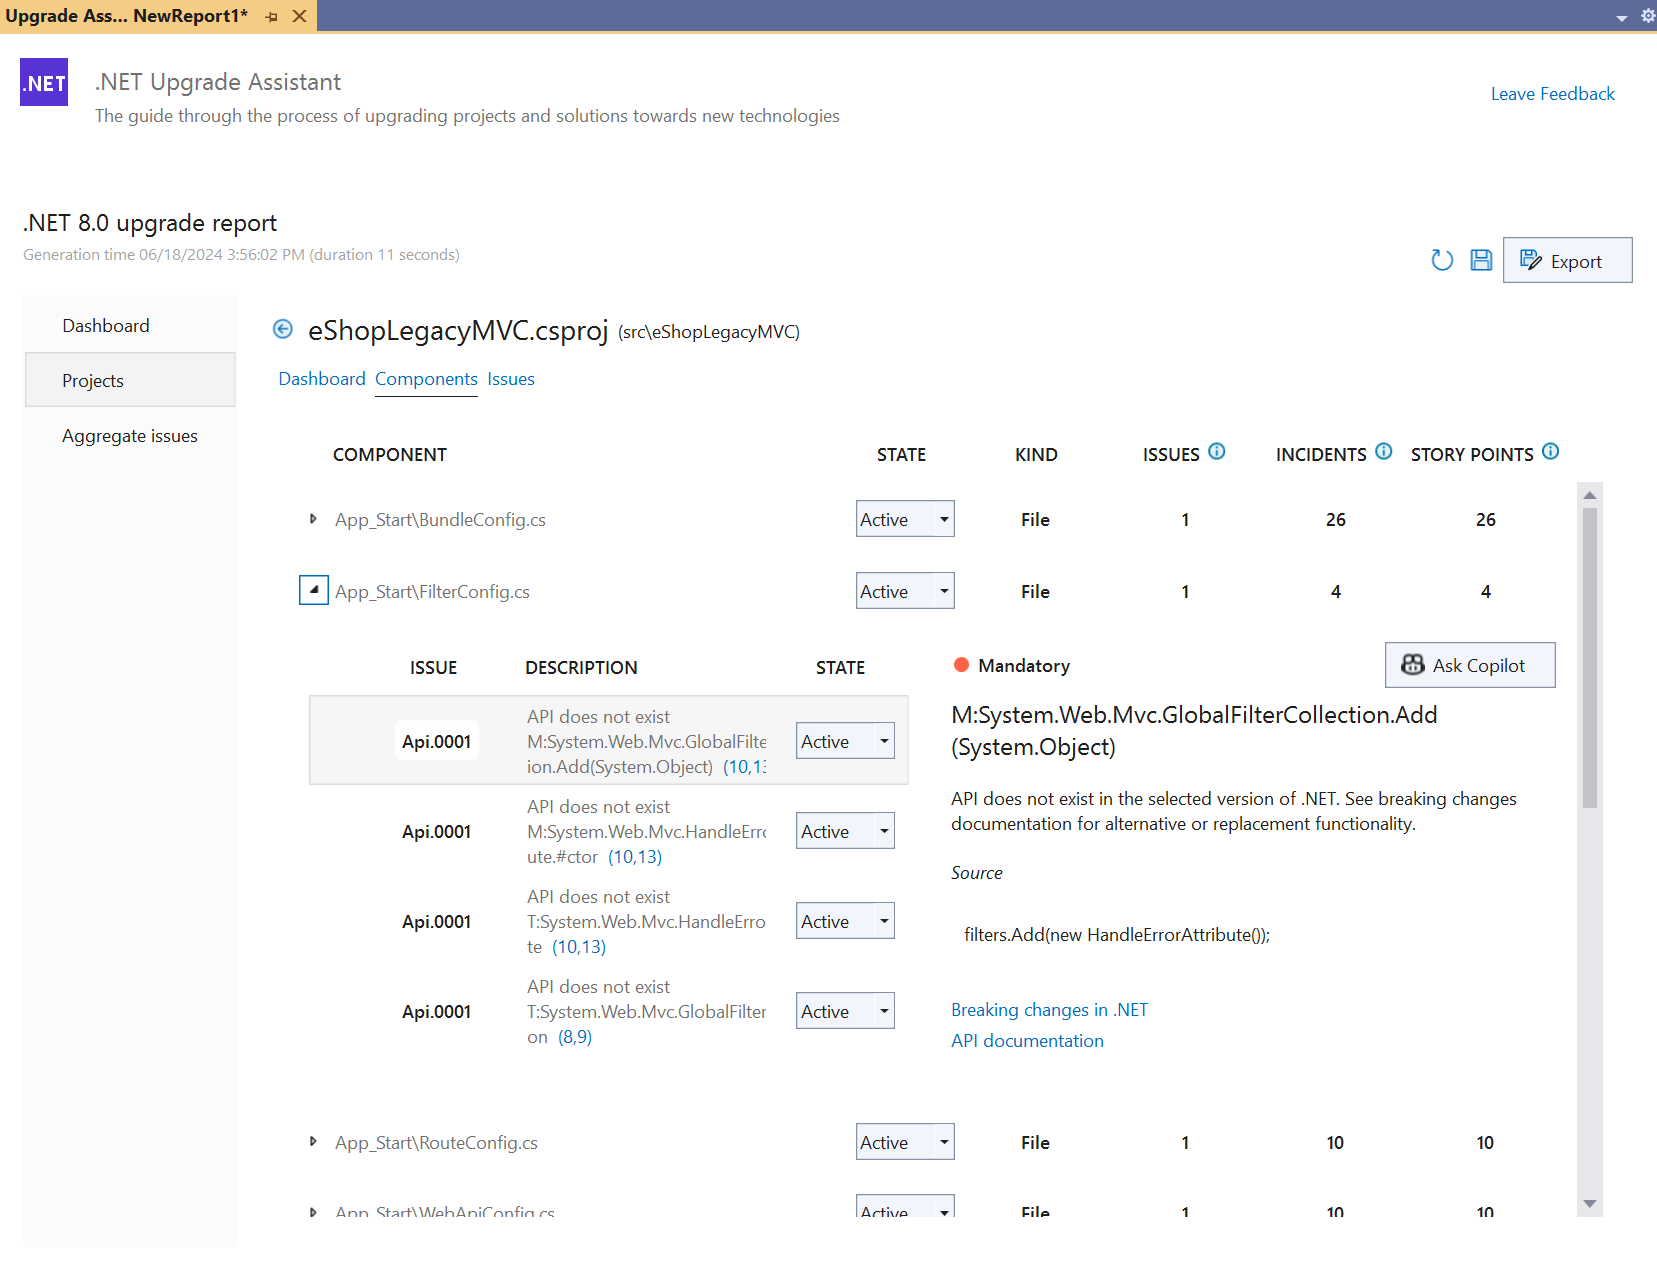
After analysis in Visual Studio, the tool will provide you with a dashboard summary and detailed report. The report will show you information about the number of projects analyzed, issues and incidents found, and an estimate of how much effort each issue, incident, and project will take to be fixed.
You can view aggregate issues for the whole solution or dig into project specific views. Here you can see detailed information on each incident, get help on how to fix them, jump to their location in code, and so on. You can view these issues by type of issue or by component so that you can understand where the bulk of the issues in the report originate from.
Share results
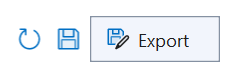
Both the CLI tool and Visual Studio allow you to save the results of the analysis in various formats so that you may share the report with others. In Visual Studio, just click the export icon in the top right corner of the tool window and select your desired export format.
In the CLI tool, the final selection before your report is generated will be to select your desired export format. Press Enter to select, then you will be prompted to enter a name for your report. The tool will then generate your report in the format you selected.
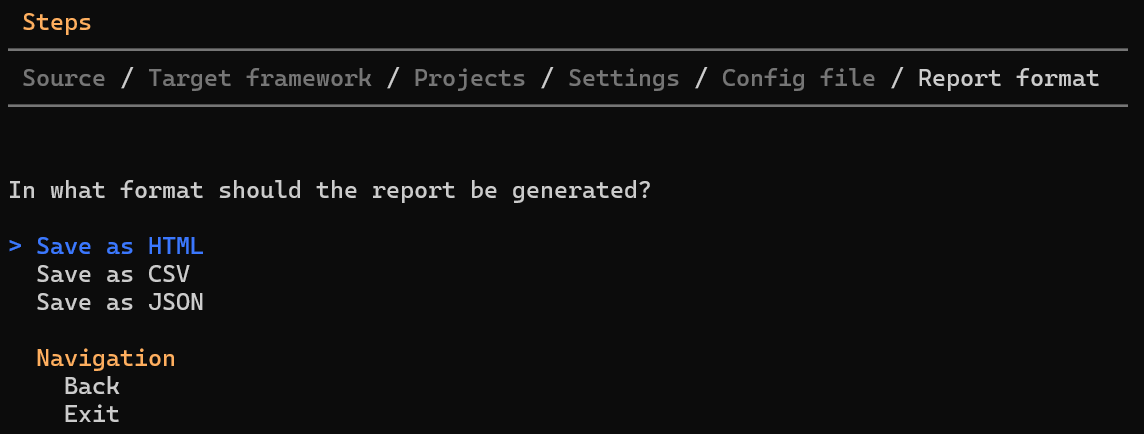
The tool can generate reports in HTML, CSV, and JSON formats. The HTML report looks very similar to the dashboard you’ll see in the Visual Studio after the analysis is completed.
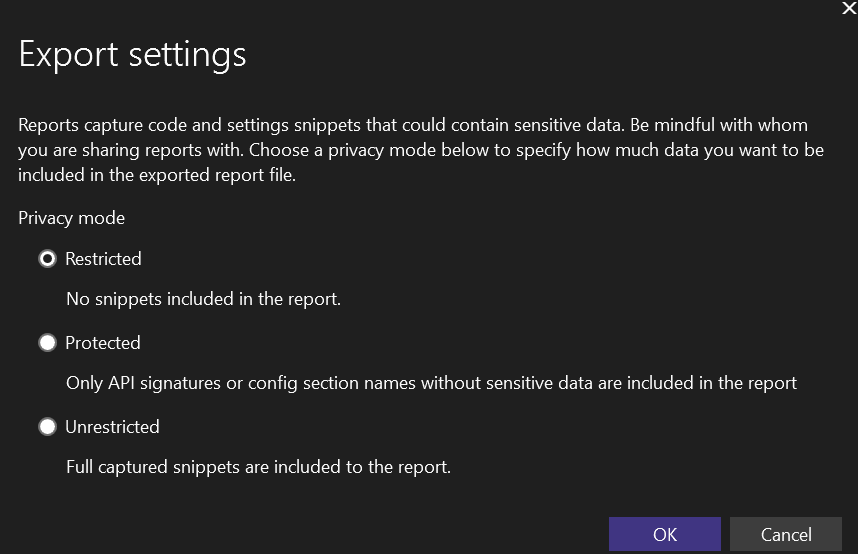
You can export these reports with various privacy modes so that you can feel confident that those who receive the reports will have exactly the right amount of information required to understand what work needs to be done without risking exposing sensitive information.
Useful Materials
For supported languages, project types, and upgrade paths, please refer to our Microsoft Learn documentation for the .NET Upgrade Assistant.
Documentation: Overview of the .NET Upgrade Assistant – .NET Core | Microsoft Learn
Install: How to install the .NET Upgrade Assistant – .NET Core | Microsoft Learn
Getting started: .NET Upgrade Assistant | Get Started (microsoft.com)
Feedback
Please give us your feedback or report any issues either by filing an issue directly in the .NET Upgrade Assistant repository, or via the Visual Studio feedback channel by choosing Help | Send Feedback in Visual Studio. Please mention “.NET Upgrade Assistant” in the title so it will get routed to our team quickly. We appreciate your input and want to build the best tools for you!
0 comments