

Hi all,
Today we’re featuring a guest author on our Semantic Kernel blog, José Luis Latorre Millás, an MVP for Microsoft focused on AI. We will turn it over to Jose to dive into Making Plans with Semantic Kernel – Implementing the Microsoft Graph Plugin.
“Welcome back – I’m continuing where we left off in part 1 here. We ended part 1 with our tenant configured for remote access, we created an app and provided permissions to it to access the tenant securely through OAuth 2.0. We also created a Plugin base class to access it through OAuth2.0, as an App or as a user. We also tested and saw that this is working.
In part 2, we’ll dive into access for Microsoft Graph, see what is possible, implement functions in the plugin (creating a bucket and adding tasks) and then a basic Semantic Kernel App to create the tasks for our goal and use the plugin to create them in Microsoft Planner. Let’s get started!
Accessing Microsoft Graph
Microsoft Graph is the culmination of integrating what initially were some Office specific set of APIs. It expanded over the years to become Microsoft Graph that covers APIs over diverse services including Office 365, Azure AD/Entra, Enterprise Mobility and Security, among others.
With Graph, we can now call disparate APIs with a unified schema, auth to multiple services using a single access token and manage OAuth permissions to multiple services in a common, unified, permission model – we did that on the previous blog post.
For accessing Graph conveniently from .NET we have a NuGet client library, Microsoft.Graph, which makes our work a lot easier, still, some features are not fully implemented, but it has all that we need for today’s demo plugin.
We could access it through building our REST requests and handling the responses ourselves, which we can explore on the documentation and test on the widely known Graph Explorer: https://developer.microsoft.com/en-us/graph/graph-explorer
There, we can search by product and on each of the possible entries which correspond to possible Microsoft Graph queries, test them (after authenticating) or go to the documentation, as shown in the image below.
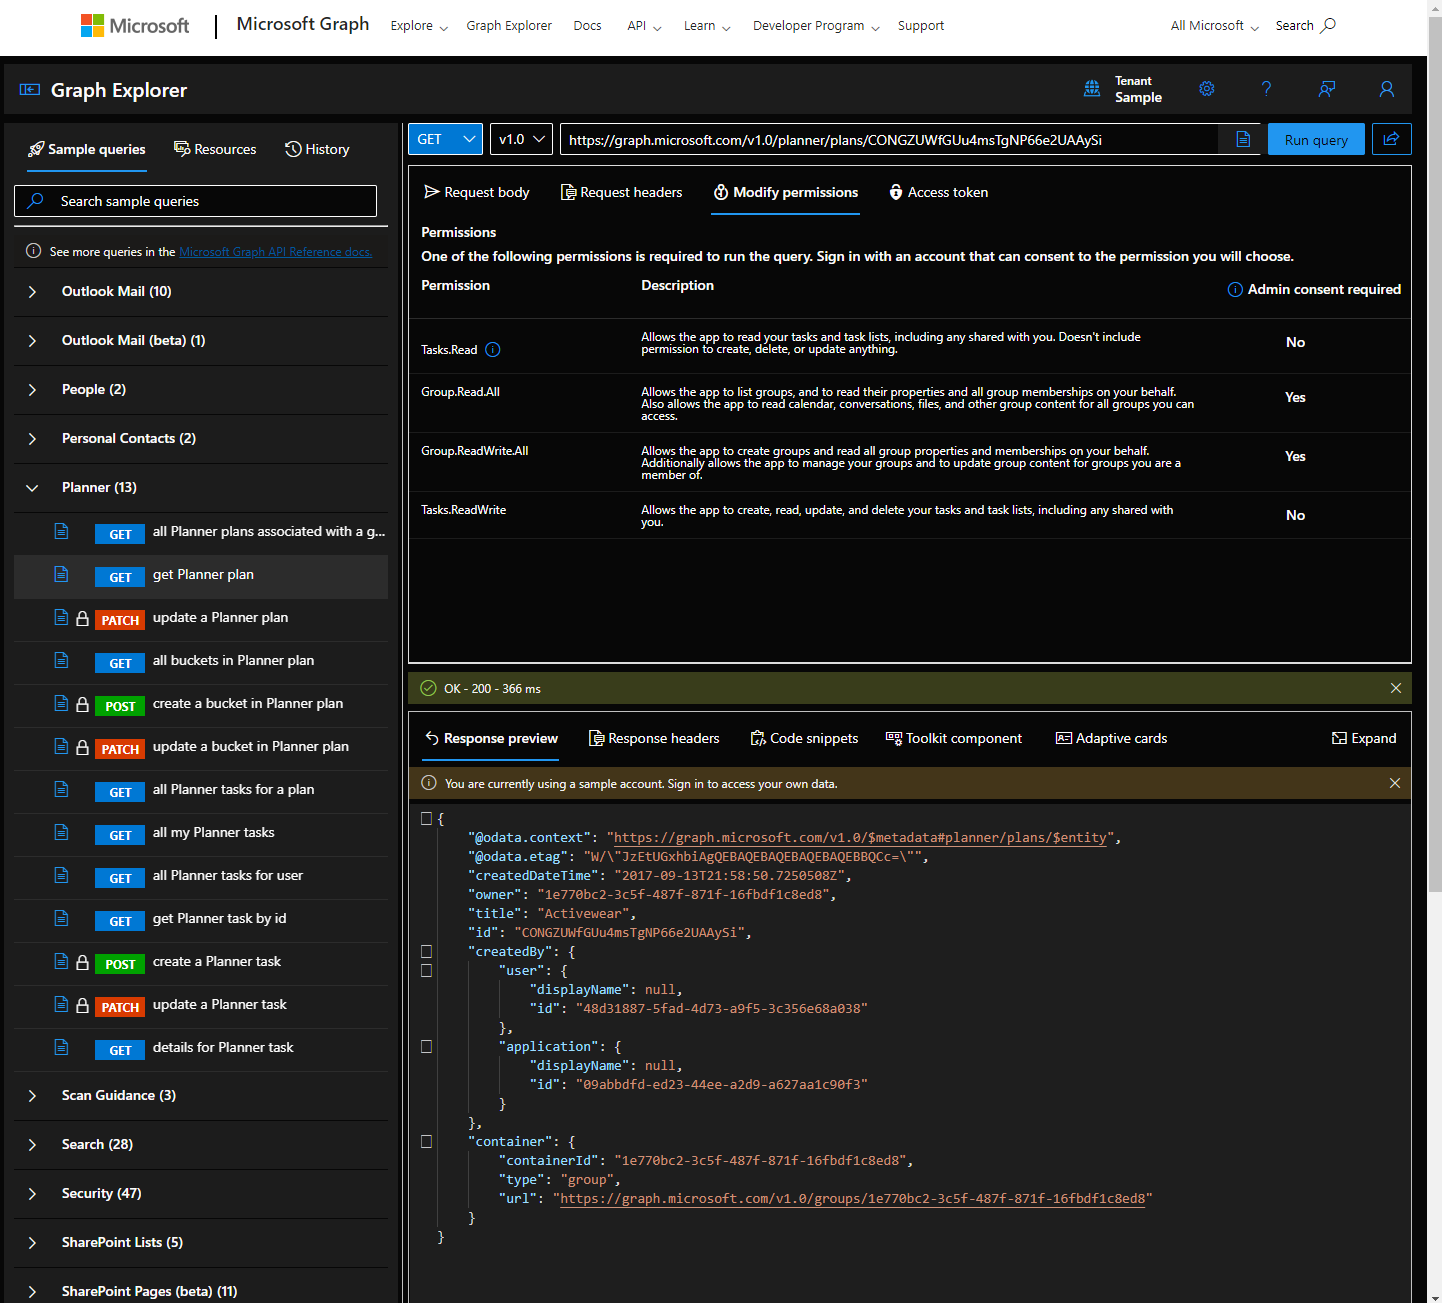
We can try some sample queries against a sample tenant, explore the request headers, see the needed permissions and do the same with the response. You can also authenticate and work using your own tenant, which is convenient.
Note that some of the queries are covered by the .NET Client SDK but others are not so in that case you should handle the payload yourself. Also, do check the beta version of the Client SDK on this case, as this might be implanted on the beta version.
You can learn more about Microsoft Graph at https://developer.microsoft.com/en-us/graph
For using and documentation on the Microsoft.Graph Client Library, https://www.nuget.org/packages/Microsoft.Graph
Or, if you’d rather check its code, it is open source and located here: https://github.com/microsoftgraph/msgraph-sdk-dotnet
Creating the Bucket
Once we have a clear view on how to explore and use the Microsoft Graph API and NET Client SDK, which was a bit tricky, so to say for a first-time user – me – two additional concrete resources place I investigated were:
- https://learn.microsoft.com/en-us/graph/api/planner-post-buckets
- https://github.com/microsoftgraph/microsoft-graph-docs-contrib/blob/main/api-reference/v1.0/includes/snippets/csharp/create-plannerbucket-from-planner-csharp-snippets.md
- https://github.com/microsoftgraph/dotnetcore-console-sample/blob/main/day21-planner/README.md
The last entry helped me greatly. It covers more Microsoft Graph aspects in very good detail so be sure to check it out, it is part of a course in GitHub that covers more aspects, and it has a great deal of detail. This is part of the 30 days of Microsoft Graph free training initiative which has an amazing deal of content if you are into implementing “Anything Graph” – the home for this initiative can be found in the following URL: https://devblogs.microsoft.com/microsoft365dev/announcing-30-days-of-microsoft-graph-blog-series/ which can help you greatly to dive into the Graph.
Coming back to our Bucket creation task, we only needed a Plan Id (from Microsoft Planner we can create plans, which have plan ids) and then a name for our Bucket. So, we had to create a PlannerBucket object with them and then invoke the GraphClient.Planner.Buckets.PostAsync(bucket) (we created earlier the GraphClient which is already Authenticated & Authorized).
This will return the bucket object to us, so we can use it to add tasks to it.
Of course, to make it a Semantic Kernel Native Function we must put the KernelFunction attribute to the method and provide it a proper description, as well as adding a Description attribute to all the parameters, so the LLM can associate and understand the purpose of this Native Function.
We can see the CreateBucketAsync finalized method next:
    [KernelFunction, Description("Creates a Microsoft Planner Bucket given a Microsoft Planner plan ID and a bucket name")]
    public async Task<PlannerBucket> CreateBucketAsync(
        [Description("The Microsoft Planner plan id")] string planId,
        [Description("The Microsoft Planner bucket name")] string name)
    {
        var bucket = new PlannerBucket
        {
            Name = name,
            PlanId = planId
        };

        var createdBucket =
            await GraphClient.Planner.Buckets.PostAsync(bucket);

        return createdBucket;
    }
Creating the Tasks
Once with a Microsoft Planner bucket in our power, we can create tasks for it, so let’s give our plugin the ability to do so!
For this we need the Microsoft Planner planId, the Bucket Id and a title for the task.
Note that we received the created bucket on our earlier method, so this serves as an example that manages complex objects as a return parameter.
Very similar in approach to the previous method, we will receive those parameters and invoke Microsoft Graph in order to create a PlannerTask with those elements and some optional parameters and invoke the GraphClient.Planner.Tasks.PostAsync(plannerTask) to execute the Task creation. My challenge for you here is to go into GraphExplorer and find this method and to try it out.
The code is as follows:
    [KernelFunction, Description("Creates a Microsoft Planner Task given a plan ID, a bucket ID, and a task title")]
    public async Task<PlannerTask> CreateTaskAsync(
        [Description("The Microsoft Planner plan id")] string planId,
        [Description("The Microsoft Planner bucket id")] string bucketId,
        [Description("The Microsoft Planner task title")] string taskTitle)
    {
        PlannerTask createdTask = null;

        var plannerTask = new PlannerTask
        {
            PlanId = planId,
            BucketId = bucketId,
            Title = taskTitle,
            DueDateTime = DateTimeOffset.UtcNow.AddDays(7), // Optional: Set a due date 7 days from now
            Assignments = new PlannerAssignments()
        };

        try
        {
            createdTask =
                await GraphClient.Planner.Tasks
                    .PostAsync(plannerTask);
        }
        catch (ServiceException ex)
        {
            Throw
        }

        return createdTask;
    }
With this, the Plugin is complete and should be ready to be used by Semantic Kernel.
Next, we will set up everything in another console application that will use Semantic Kernel to load the plugin, create a list of tasks to achieve a goal and then use this plugin to create them in Microsoft Planner, putting everything together.
Creating Tasks
For using the Plugin we can create a console application and add a reference to the Plugin project, also we will need the Microsoft.SemanticKernel and Microsoft.SemanticKernel.PromptTemplates.Handlebars NuGet packages.
On the code I recommend setting up all the secrets as Environment variables, which you can configure depending on the deployment, and creating the kernel with an Azure OpenAI model, gpt-4-32k.
Next, we create the MicrosoftGraphPlugin with the tenant, client id and secret and import it into the kernel as object.
This should be the code resulting for this:
        var modelDeploymentName = "Gpt4v32k";
        var azureOpenAIEndpoint = Environment.GetEnvironmentVariable("AzureOpenAI_Endpoint", EnvironmentVariableTarget.User);
        var azureOpenAIApiKey = Environment.GetEnvironmentVariable("AzureOpenAI_ApiKey", EnvironmentVariableTarget.User);

        var builder = Kernel.CreateBuilder();
        builder.Services.AddAzureOpenAIChatCompletion(
            modelDeploymentName,
            azureOpenAIEndpoint,
            azureOpenAIApiKey,
            modelId: "gpt-4-32k"
        );
        var kernel = builder.Build();

        // Creating the graph Plugin
        string msGraphTenantId = Environment.GetEnvironmentVariable("msGraphTenantId", EnvironmentVariableTarget.User);
        string msGraphClientId = Environment.GetEnvironmentVariable("msGraphClientId", EnvironmentVariableTarget.User);  // app id
        string msGraphClientSecret = Environment.GetEnvironmentVariable("msGraphClientSecret", EnvironmentVariableTarget.User);

        string microsoftPlannerGraphPluginName = "MicrosoftPlannerGraphPlugin";
        var msGraphPlannerPlugin = new MicrosoftPlannerGraphPlugin(msGraphTenantId, msGraphClientId, msGraphClientSecret);
        kernel.ImportPluginFromObject(msGraphPlannerPlugin, microsoftPlannerGraphPluginName);
Following this we declare two strings, one containing a prompt to create a prompt plugin with the responsibility to create the list of tasks to achieve a goal, and a task definition to be used as input for this prompt plugin:
     string userPromptGenerateTasks = @"I want YOU to plan the tasks needed to accomplish the following goal and tasks to achieve it:" +
            "---" +
            "{{ $input }}" +
            "---" +
            "For this goal and approximate tasks, can you prepare:" +
            " 1. A list of tasks in order how they should be done? each task should be short text with a number in front showcasing its order." +
            " 2. A name to group all the tasks which is descriptive, clear and short." +
            "With this prepare a JSON with should contain this information, containing:" +
            " 1. a JSON element, named/with key bucketname that contains the name for grouping the tasks. " +
            " 2. a JSON array, named/with key tasklist that contains an array with all the tasks. Each task should have the key task." +
            "Ensure the JSON is valid and well formed." +
            "Ensure ONLY THE JSON IS OUTPUTTED." +
            "Do not output anything else but the JSON.";

        string inputTask = "make a plan for 2024 events for semantic kernel from now to end of year, include some hackathons
(we love them) and things that motivate and engage developers to code . Please propose a plan that has an overall preparation
and then 1 task per event/hackathon. Think also on possible types of events and create a task to assess each one of them.
output the events execution as tasks, name them event type - month. Also output the types of events you can think of as tasks
 like Event Type Assessment. Output first the event type assessments and next all of the events for the rest of the year
 (we are at end of February so plan from March and onwards. Also generate 2 to 3 hackathons along the year. make an amazing
events plan for 2024!!! Remember to output the assessments of event types that you can think of and after them, the events per month.
 Also bear in mind that a month can have more than one event!";
Which we can invoke directly through the kernel with the InvokePromptAsync command:
        var jsonWithTasks = await kernel.InvokePromptAsync(
            userPromptGenerateTasks,
                new KernelArguments() { { "input", inputTask } });
This will return a JSON object which we will have to deserialize into a class that I named “EventPlan”, which is a set of two classes:
public class EventPlan
{
    public string Bucketname { get; set; }
    public List<TaskItem> Tasklist { get; set; }
}

public class TaskItem
{
    public string Task { get; set; }
}
We even got a suggestion for the BucketName! Isn’t AI Cool?
We can then implement a quick deserialization for the resulting JSON into this class hierarchy structure. Note that I defined the JSON in the prompt with keys and names, if this doesn’t work, we should give an example. With GPT-4 it worked well but it might not be so smart on lower-end models and require an example of the output JSON.
The code is as follows:
private EventPlan DeserializeJsonTasks(string jsonWithTasks)
    {
        var options = new JsonSerializerOptions
        {
            PropertyNamingPolicy = JsonNamingPolicy.CamelCase,
            WriteIndented = true
        };

        EventPlan eventPlan = JsonSerializer.Deserialize<EventPlan>(jsonWithTasks, options);

        return eventPlan;
    }
With this we can proceed to get the output of our Prompt Function, deserialize it into an EventPlan type and reverse it to create them in the right order in Microsoft Planner. This last point is just to align with how does Microsoft Planner order the tasks upon creation, nothing more.
       var resultJsonTasks = jsonWithTasks.GetValue<string>();
        EventPlan eventPlan = DeserializeJsonTasks(resultJsonTasks);
        eventPlan.Tasklist.Reverse(); // reverse the order of the tasks so we can add them in the correct order in Planner.
Putting it together with a Handlebars Prompt
Here we can see a bit of the magic power that the Handlebars Templates can provide. First, we will create a variable to hold the bucket creation result.
With the obtained Bucket complex object, we will get its Bucket Id and assign it to a variable that we will use to create the tasks.
We’ll iterate for each task of the eventPlan list of tasks that we created earlier. With each task, we will tell the AI model to create a task using the Microsoft Planner Plugin CreateTask native function.
Once all tasks have been created, as a finisher, we will instruct the model to tell the user that the bucket and list of tasks have been created, first by listing the bucket and tasks and finally letting the user know that “The tasks need to be done” in a funny way – why not add humor? AI is since last year capable of it! Finally, we will create a Prompt Function using Handleabars syntax, as we need variables and loops, and execute it!
The code looks as follows:
var handlebarsTemplate =
    @"
    {{set ""newBucket"" (MicrosoftPlannerGraphPlugin-CreateBucket planId=MicrosoftPlannerPlanId name=eventPlan.Bucketname )}}
    {{set ""newBucketId"" newBucket.id}}

    {{#each eventPlan.Tasklist}}
        {{set ""newTask"" (MicrosoftPlannerGraphPlugin-CreateTask planId=MicrosoftPlannerPlanId bucketId=newBucketId taskTitle=this.Task)}}
    {{/each}}

    Tell the user that you have created the following Bucket in Microsoft Planner: {{json eventPlan.Bucketname}}
    As well as the following tasks:
    {{#each eventPlan.Tasklist}}
        - {{json this.Task}}
    {{/each}}

   // Let the user know that the tasks have been created in the Microsoft Planner plan and now they need to be done in a funny way.
    ";

var HandlebarsSPromptFunction = kernel.CreateFunctionFromPrompt(
    new()
    {
        Template = handlebarsTemplate,
        TemplateFormat = "handlebars"
    },
    new HandlebarsPromptTemplateFactory()
);

var customHandlebarsPromptResult =
    await kernel.InvokeAsync(
        HandlebarsSPromptFunction,
        new() {
            { "eventPlan", eventPlan },
            { "MicrosoftPlannerPlanId", MicrosoftPlannerPlanId }
        }
    );

Console.WriteLine($"\n\n Result:  {customHandlebarsPromptResult}");
Running it
We will set the PlannerPluginDemo project as startup and run it, we should see a console application printing a goal in the console and ask us if we would like another goal instead.
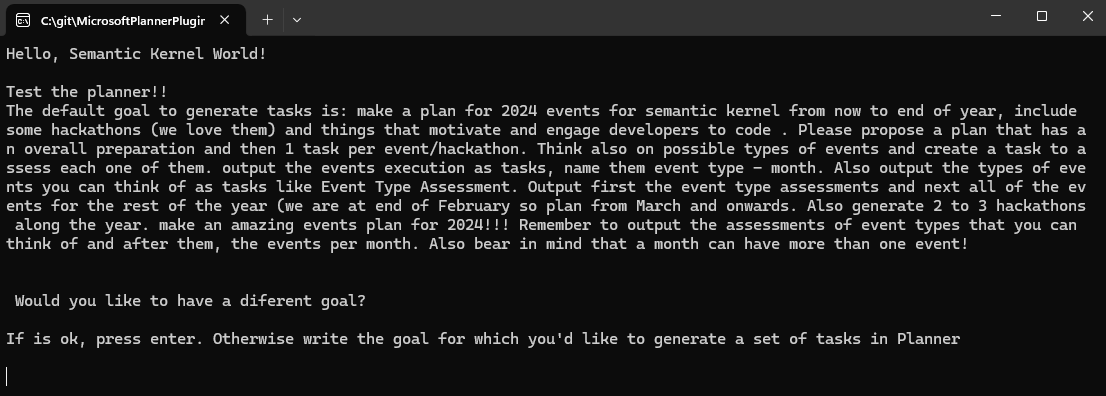
We will press enter and will get a response that it’s generating tasks for this goal and then invoke the task generation prompt, which once done, will print as it comes, in JSON:
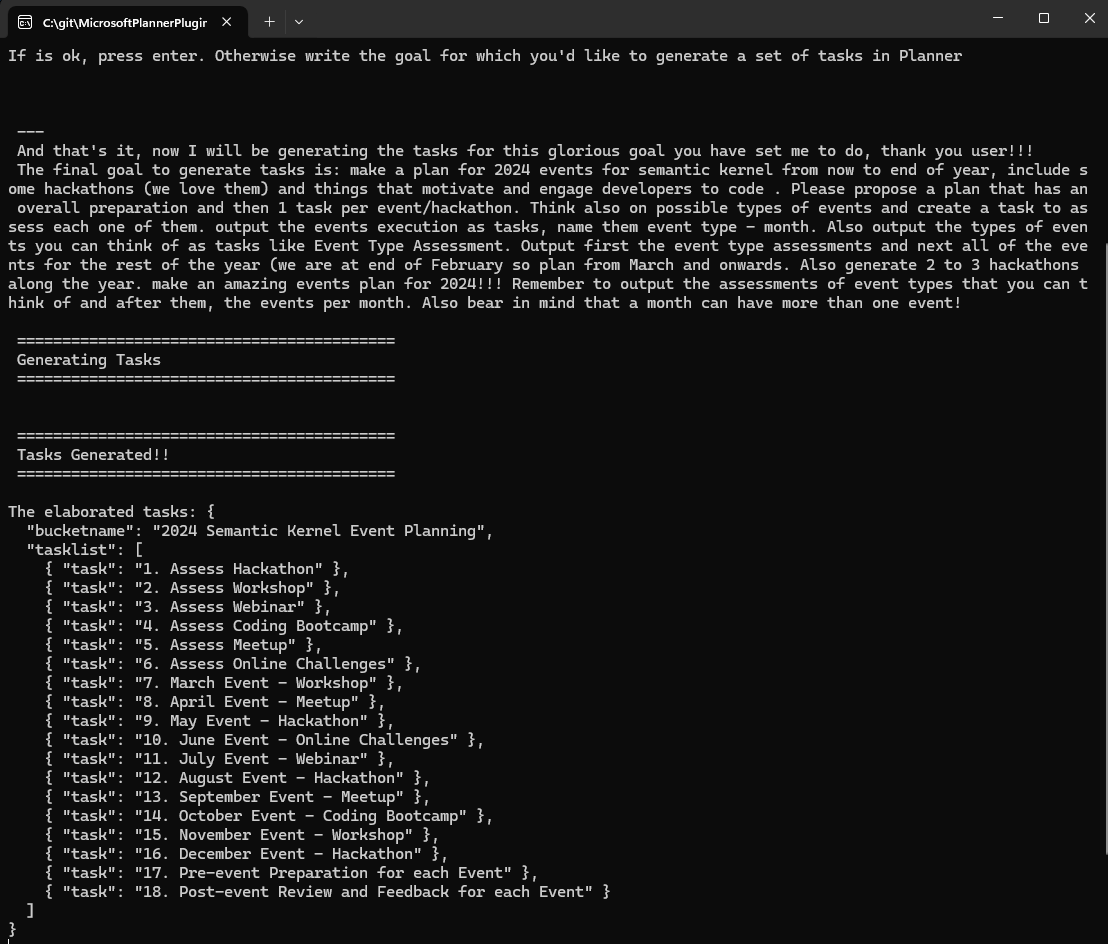
After this, we’ll print the tasks and proceed to execute the Handlebars prompt, which will create the Microsoft Planner Bucket, showcasing tasks and a summary of what’s been happening. It should look as follows:
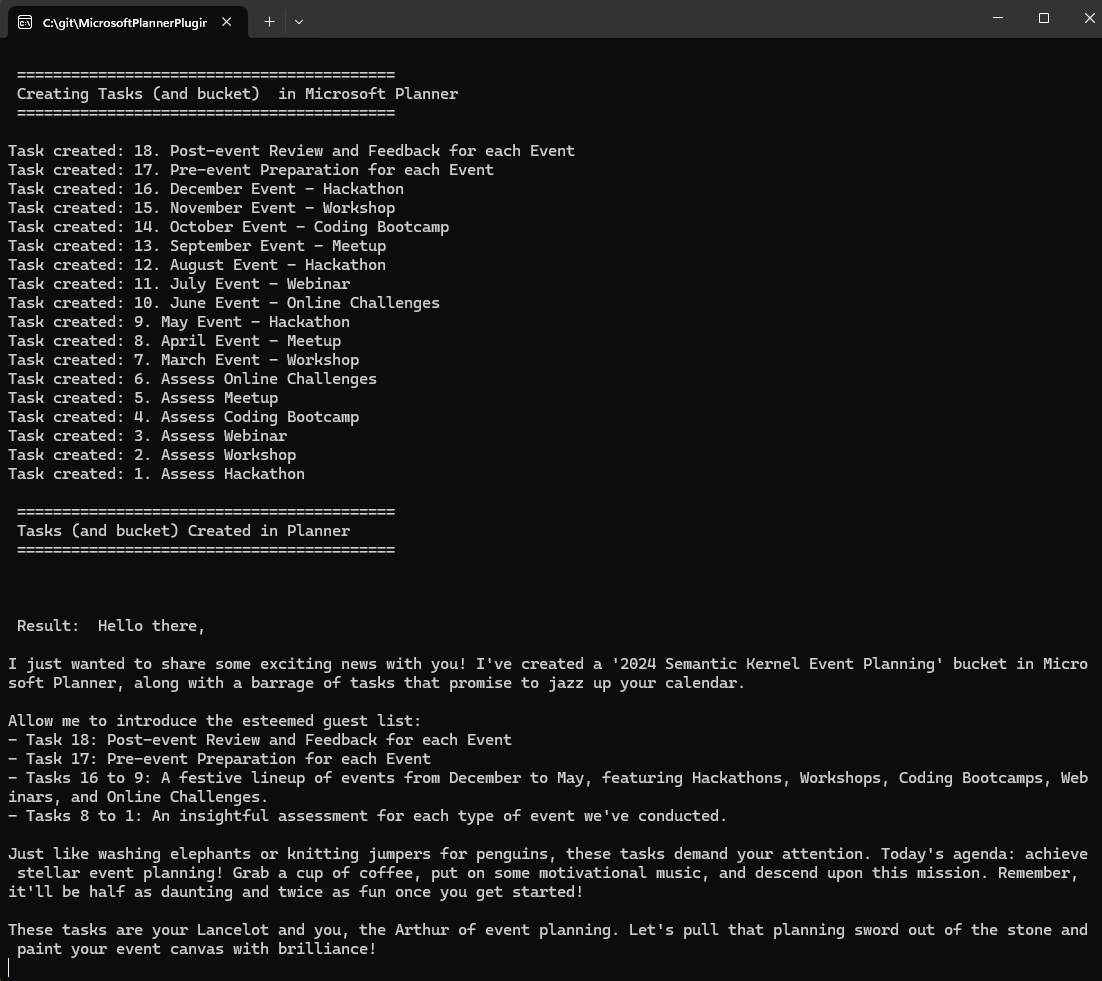
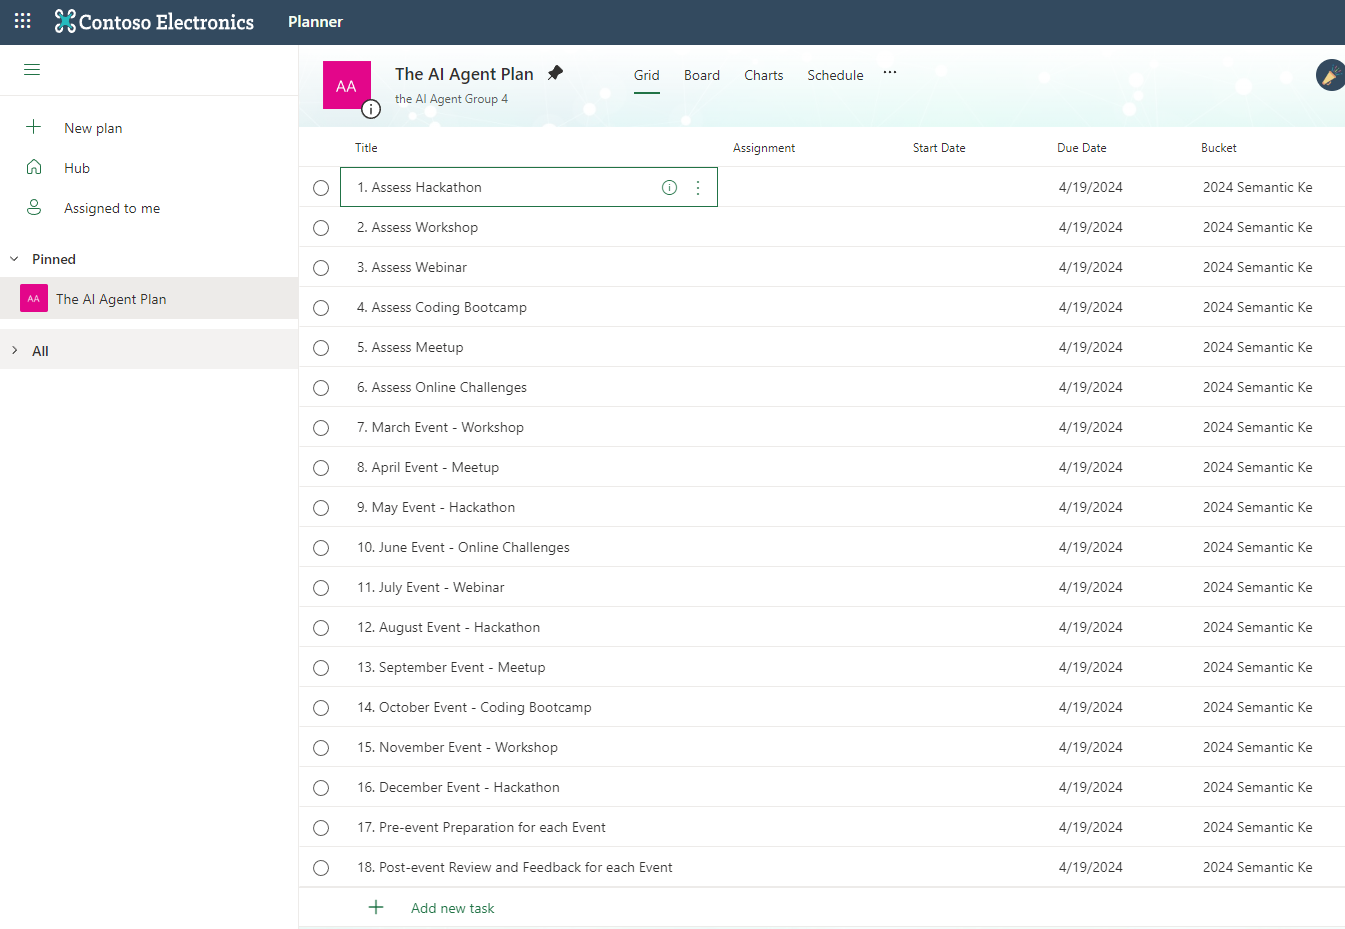
If we go into Microsoft Office Planner, at tasks.office.com, we will be able to see the tasks created under the specified bucket.
Conclusion
So, it wasn’t so complex, right? This can be applied to any Microsoft Graph and API out there, as OAuth is standard. The most important takeaway is how easy it is to provide an additional skill to an AI model by using the kernel and then streamline its usage with an advanced prompt such as Handlebars. In our case, creating a list of tasks which could be easily transformed into sending an email, checking your calendar all in any Microsoft Office tenant that you have credentials for.
As a disclaimer, we could also have used plain Function Calling or the Stepwise V2 planner too, but I have a predilection to the Handlebars – and if a process is known, why bother making the AI think about it, don’t you think? Handlebars prompts enable to streamline a process perfectly if it is clear and defined, and we do not need to take an intelligent decision while on it. For these kinds of scenarios, they are perfect.
I hope this lets you see what is possible here, we built a streamlined copilot for Microsoft Planner.
Get the code from https://github.com/joslat/MicrosoftPlannerPlugin, to set up your demo tenant and try it on your own.”
From the Semantic Kernel team, we want to thank José for his time. We’re always interested in hearing from you. If you have feedback, questions or want to discuss further, feel free to reach out to us and the community on the Semantic Kernel GitHub Discussion Channel! We would also love your support, if you’ve enjoyed using Semantic Kernel, give us a star on GitHub.
0 comments