Summary: Obtain and install the AzureRM cmdlets.
This blog post is part of a series about how to work with the Azure Resource Manager cmdlets. To get the most out of this series, read the posts in order.
- Work with the Azure Resource Manager cmdlets – Part 1
- Work with the Azure Resource Manager cmdlets – Part 2
- Work with the Azure Resource Manager cmdlets – Part 3
- Work with the Azure Resource Manager cmdlets – Part 4
- Work with the Azure Resource Manager cmdlets – Part 5
After you finish this series, move on to the next two series to learn more about the Azure Resource Manager cmdlets.
- Retrieve Azure Resource Manager virtual machine properties by using PowerShell
- Create Azure Resource Manager virtual machines by using PowerShell
 I heard Microsoft introduced some new cmdlets to work with Azure Resource Manager. Could you show me how I could install them?
 Honorary Scripting Guy, Sean Kearney, is here today to introduce you to the newest cmdlets to manage the Azure Resource Manager environment.
Most of the time when you hear about AzureRM, you hear the word JSON in the same context, and that’s true. The JSON language helps you to do some incredibly powerful and complex infrastructure templates.
However, we still have (and thank goodness!) a plethora of available Windows PowerShell cmdlets. These cmdlets are part of a new generation in that Microsoft developed them and posted them on GitHub. This allows the community to examine and offer up suggested changes directly in the code. Here are the PowerShell cmdlets on GitHub.
To use the new cmdlets, you will need to have an environment that is running at least the Windows Management Framework Version 5. If you’re using Windows 7, you’ll need to upgrade to at least PowerShell Version 5.
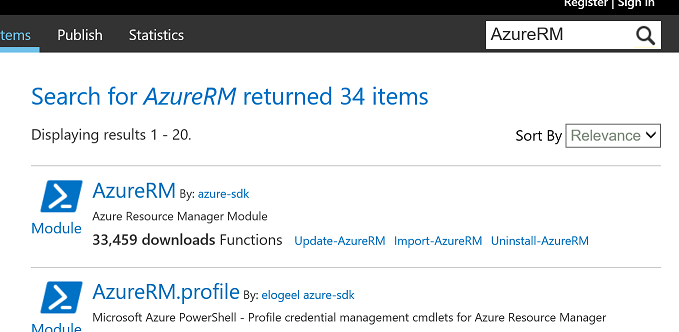
Now, where can you get them? You can access them in the PowerShell Gallery.
Just go to the Gallery and search for AzureRM to obtain the link.
From this point, you will see a series of modules that match this search. To download the module, simply click the AzureRM link directly to the right of the PowerShell logo in your returned search.
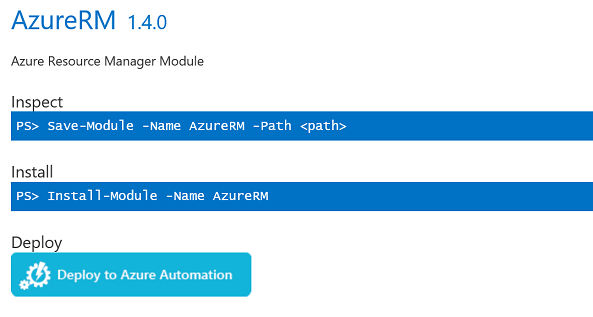
You’ll now see instructions that explain how to get the cmdlets through two samples of PowerShell cmdlets in Version 5.
What inspect means is that you can download the module to a location where you can examine it directly. This is good if security wants to review the code or if you’d like to open things yourself and poke about. An example of this cmdlet in use would be:
Save-Module –Name AzureRM –path C:\Users\John\Downloads\
This will initiate a download of the AzureRM module from the PowerShell Gallery to your computer.
Install will download the module to a Common PowerShell modules folder that’s discoverable by all users and is available immediately for use. Now the simple example you can use is the one provided above.
Install-Module –name AzureRM
You can also access it in this fashion by using the Find-Module cmdlet which searches the PowerShell Gallery for the module in question. You can then pipe that directly into Install-Module.
Find-Module -name AzureRM | Install-Module
If this is the first time that you’re using these cmdlets, you will get a warning about downloading some software. It’s okay to grab because it’s part of the Open Source solution that PowerShell Gallery uses.
There will also be a warning about downloading from an Untrusted Repository. This is because, by default, the PowerShell Get module which supplies this functionality wants you to “think twice” rather than just randomly installing modules.
Now that the modules are installed, stop by tomorrow when we’ll start to actually use them by connecting to Microsoft Azure.
I invite you to follow the Scripting Guys on Twitter and Facebook. If you have any questions, send email to them at scripter@microsoft.com, or post your questions on the Official Scripting Guys Forum. See you tomorrow.
Until then, always remember that with Great PowerShell comes Great Responsibility.
Sean Kearney Honorary Scripting Guy Cloud and Datacenter Management MVP


0 comments