
Summary: Learn how to use PowerShell to create storage accounts.
This blog post is part of a series about how to work with the Azure Resource Manager cmdlets. To get the most out of this series, read the posts in order.
- Work with the Azure Resource Manager cmdlets – Part 1
- Work with the Azure Resource Manager cmdlets – Part 2
- Work with the Azure Resource Manager cmdlets – Part 3
- Work with the Azure Resource Manager cmdlets – Part 4
- Work with the Azure Resource Manager cmdlets – Part 5
After you finish this series, move on to the next two series to learn more about the Azure Resource Manager cmdlets.
- Retrieve Azure Resource Manager virtual machine properties by using PowerShell
- Create Azure Resource Manager virtual machines by using PowerShell
 Now that we know how to create resource groups, what is our next step to prepare the Azure Resource Manager infrastructure for virtual machines (VMs)?
 Honorary Scripting Guy, Sean Kearney, is here today with a wee bit more PowerShell for your Azure Resource Manager world.
If we want to ever create our virtual machines, the next step within Azure Resource Manager is to create somewhere to store the VMs and their data. Within Resource Manager, this place is known as a storage account.
As we did yesterday, we’ll show you the slow way first (clickity click nightmare) and the express train with PowerShell.
Well, remember the old commercial, “First you get good, then you get fast” Right? What? What do you mean that commercial was only in Canada?
Ah well, no problem. Let’s get to the serious stuff and learn how to create a storage account.
Naturally, you are already signed in to the Azure portal ahead of time. No? Quickly, then! Sign in, please.
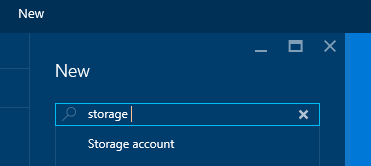
So, as we did yesterday, we click New and start to type storage to see a prompted list of options. We then click on the Storage account option.
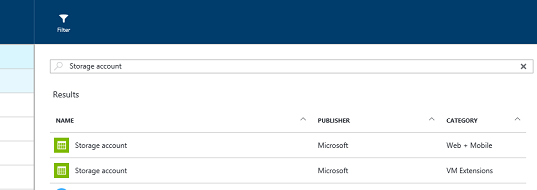
For the storage account, you’ll see two options: Web + Mobile or VM Extensions . Let’s select VM Extensions because our target scenario is for VMs.
After you select VM Extensions, the first page of the wizard explains what the storage account is (similar to the page from yesterday that explained resource groups).
From this point, click the lovely and magical blue Create button to get to the fun stuff.

On our next page, we need to populate some key details:
- Name for the storage account (3 to 24 characters in length, only lowercase and numbers)
- Deployment model
- Resource Manager (This one, new)
- Classic (old Azure VMs)
- Account kind
- General purpose
- Blob storage
- Type of replication for the storage
- Zero-redundant
- Locally-redundant
- Read-only geo-redundant
- Geo-redundant
For our demo purposes, we’re going to opt for the Locally-redundant storage. If this were in a temporary machine to be spun up, we could even just use the Zero-redundant option.)
- Subscription name
- Resource group name
- Remember the one that we created yesterday? We can click the dropdown list and select it or we can have Resource Manager spin up one with a new, relatively random name.
- Location
- East US, Canada Central, yadda yadda….. maybe, eventually, the moon?
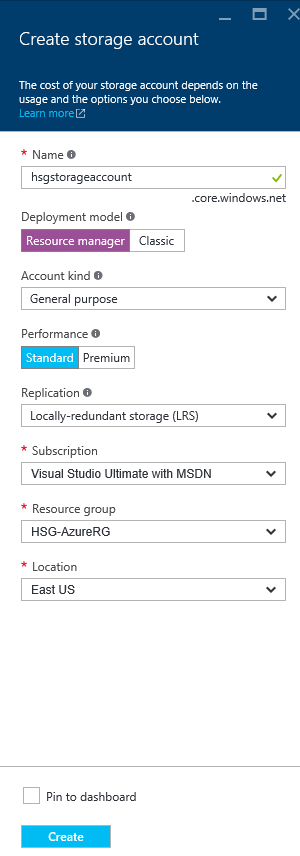
As you can see in the following screenshot, we have selected all the settings that we will need to create a storage account named hsgstorageaccount.core.windows.net in East US.
Click the blue Create button to kick things into gear.
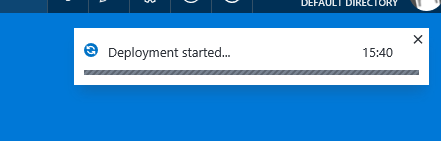
As before, we can see a status update from Azure to indicate that things are working as expected.
This process can take a little bit longer because we need to allocate some actual disk space within the Azure Datacenter of your choice. It won’t take hours, mind you, but maybe enough time to run up and grab a cup of tea.
Now for the easy way to do it with PowerShell. We just need to use the New-AzureRMStorage cmdlet. The information that we need to supply is identical with the exception that the cmdlet will grab your default subscription and just use that. Having said that, if you have multiple subscriptions, you can specify any one of these when you create a storage account.
$Name=’hsgstorageaccount’
$Location=’East US’
$RGName=’HSG-AzureRG’
$Sku=’Standard_LRS’
$Storage=’Storage’
New-AzureRMStorageAccount –ResourceGroupName $RGName –Name $Name –SkuName $Sku –Location $Location Kind $Storage
I’ll bet you’re wondering something to yourself. Just how did we figure out the name to use for the storage and the SKU to define that information?
One way is to use the Show-Command cmdlet to get a GUI interface to build the output that gives you a nice pulldown list.
Show-Command New-AzureRMStorageAccount
The other trick? You’ll like this in today’s PowerTip!
Pop in tomorrow when we’ll put together our network settings for a VM.
I invite you to follow the Scripting Guys on Twitter and Facebook. If you have any questions, send email to them at scripter@microsoft.com, or post your questions on the Official Scripting Guys Forum. See you tomorrow.
Until then always remember that with Great PowerShell comes Great Responsibility.
Sean Kearney Honorary Scripting Guy Cloud and Datacenter Management MVP
0 comments