Summary: Send and receive content to the Text-to-Speech API with PowerShell.
Q: Hey, Scripting Guy!
I was playing with the Text-to-Speech API. I have it almost figured out, but I’m stumbling over the final steps of formatting the SSML markup language. Could you lend me a hand?
—MD
A: Hello MD,
Glad to lend a hand to a Scripter in need! I remember having that same challenge the first time I worked with it. It’s actually not hard, but I needed a sample to work with.
Let’s first off remember where we were last time. We’ve accomplished the first two pieces for Cognitive Services Text-to-Speech:
- The authentication piece, to obtain a temporary token for communicating with Cognitive Services.
- Headers containing the audio format and our application’s unique parameters.
Next, we need to build the body of content we need to send up to Azure. The body contains some key pieces:
- Region of the speech (for example, English US, Spanish, or French).
- Text we need converted to speech.
- Voice of the speaker (male or female).
For more information about all this, see the section “Supported locales and voice fonts” in Bing text to speech API.
The challenge I ran into was in just how to create the SSML content that was needed. SSML, which stands for Speech Synthesis Markup Language, is a standard for identifying just how speech should be spoken. Examples of this would be:
- Content
- Language
- Speed
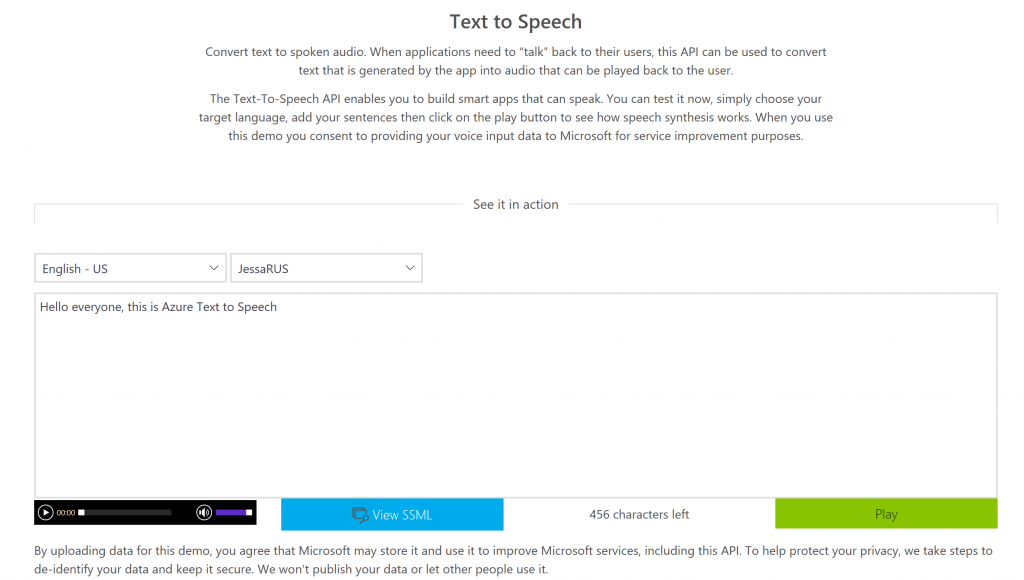
I could spend a lot of time reading up on it, but Azure gives you a great tool to create sample content without even trying! Check out Bing Speech, and look under the heading “Text to Speech.” In the text box, type in whatever you would like to hear.
In the sample below, I have entered in “Hello everyone, this is Azure Text to Speech.”
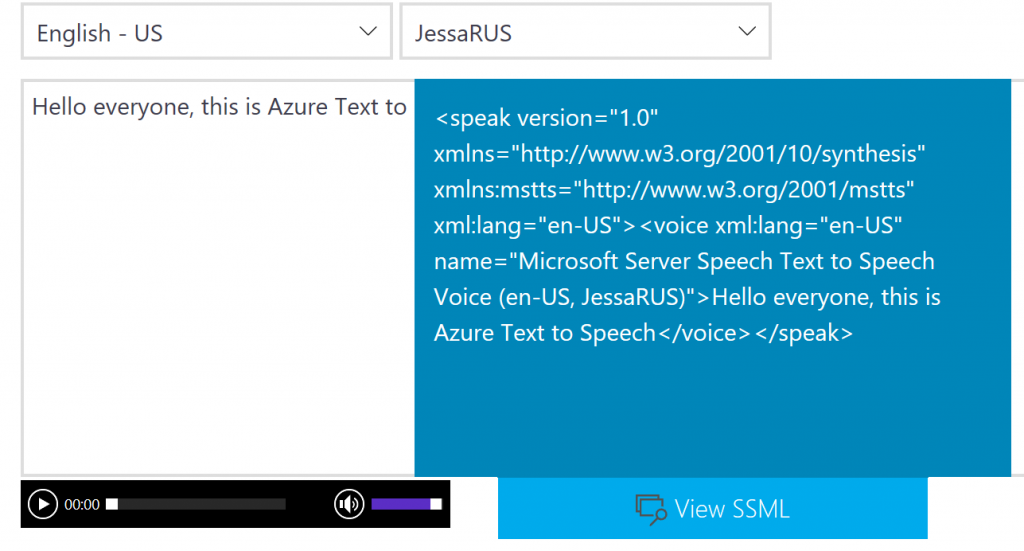
Now if you select View SSML (the blue button), you can see the code in SSML that would have been the body we would have sent to Azure.
You can copy and paste this into your editor of choice. From here, I will try to break down the content from our example.
<speak version=”1.0″ xmlns=”http://www.w3.org/2001/10/synthesis” xmlns:mstts=”http://www.w3.org/2001/mstts” xml:lang=“en-US”><voice xml:lang=“en-US” name=“Microsoft Server Speech Text to Speech Voice (en-US, JessaRUS)”>Hello everyone, this is Azure Text to Speech</voice></speak>
The section highlighted in GREEN is our locale. The BLUE section contains our service name mapping. The locale must always be matched with the same service name mapping from the row it came from. The double quotes are also equally important.
If you mix them up, Azure will wag its finger at you and give a nasty error back.
The section in RED is the actual content that Azure would like us to convert to speech.
Let’s take a sample from the table, and change this to an Australian female voice.
We first replace the locale with “en-AU,” and then the service name mapping with “Microsoft Server Speech Text to Speech Voice (en-AU, Catherine).”
<speak version=”1.0″ xmlns=”http://www.w3.org/2001/10/synthesis” xmlns:mstts=”http://www.w3.org/2001/mstts” xml:lang=“en-AU”><voice xml:lang=“en-AU” name=” Microsoft Server Speech Text to Speech Voice (en-AU, Catherine)”>Hello everyone, this is Azure Text to Speech</voice></speak>
Now if we’d like to have her say something different, we just change the content in red.
How does this translate in Windows PowerShell?
We can take the three separate components (locale, service name mapping, and content), and store them as objects.
$Locale=‘en-US’
$ServiceNameMapping=‘Microsoft Server Speech Text to Speech Voice (en-US, JessaRUS)’
$Content=‘Hello everyone, this is Azure Text to Speech’
Now you can have a line like this in Windows PowerShell to dynamically build out the SSML content, and change only the pieces you typically need.
$Body='<speak version=”1.0″ xmlns=”http://www.w3.org/2001/10/synthesis” xmlns:mstts=”http://www.w3.org/2001/mstts” xml:lang=”‘+$locale+'”><voice xml:lang=”‘ +$locale+'” name=’+$ServiceNameMapping+’>’+$Content+'</voice></speak>’
At this point, we only need to call up the REST API to have it do the magic. But that is for another post!
See you next time when we finish playing with this cool technology!
I invite you to follow the Scripting Guys on Twitter and Facebook. If you have any questions, send email to them at scripter@microsoft.com, or post your questions on the Official Scripting Guys Forum.
Sean Kearney, Premier Field Engineer, Microsoft
Frequent contributor to Hey, Scripting Guy!


0 comments