Summary: Microsoft Scripting Guy, Ed Wilson, talks about using Windows PowerShell to find and disable webcams and cameras.
Microsoft Scripting Guy, Ed Wilson, is here. It is really interesting (at least to me) the way certain questions seem to swirl around like trigger fish taking up residence near a coral reef. They keep coming back, although they appear to go away for a certain amount of time. Today’s question is no exception. When webcams first began to make their appearance on laptops, there was a huge rash of activity amongst network admins to remove drivers, disable the devices, or otherwise make them unusable.
This makes sense because many (if not most) corporate users can get along fine without enabling their webcams. In fact, I rarely turn on the webcam on my laptop, even though I routinely spend more than a quarter of my time in meetings via LYNC.
The reason? One is bandwidth. I have a hard enough time making the connection stable enough for a multi-hour meeting without adding the additional resource of a webcam. The second reason is that after a given amount of time, one tends to forget that the webcam is broadcasting (assuming that condition one is fixed), and soon everyone in the meeting is watching me take off my glasses, rub my eyes, scratch my head, or yawn for a real long time. Whereas there is a microphone mute button, muting video is more intrusive if I started the meeting with the video on.
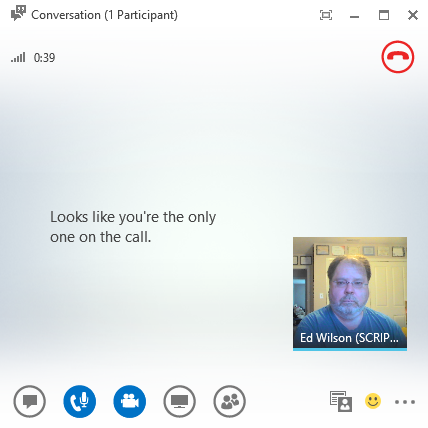
Lastly, assuming that condition 1 and 2 are satisfied, there is an inherit latency that is downright disturbing. People hear me speak, and then a few seconds later, they see my lips move. It is like a bad monster movie from the sixties. Here is an example of the bad monster movie experience. Dude, everyone was scared away.
So how do I disable the webcam? It is pretty easy…
Just the steps
There are only two steps I need to take:
- Find the webcam (or camera) Plug and Play device ID. (I will use WMI for this.)
- Use Devcon to disable the device. (I happen to have DevCon on my system, but you may need to download it because it is not part of the standard Windows installation.)
Find the camera
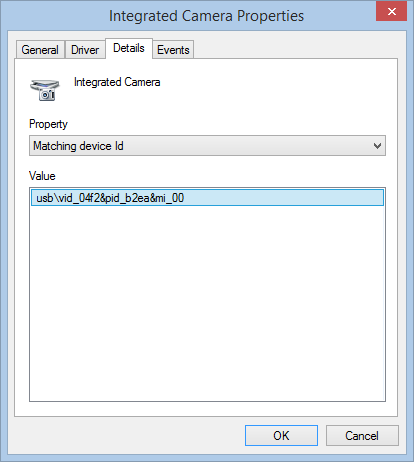
I decide that I want to cheat a little bit before I get too carried away. I open Computer Management and click Device Manager. From the list of components, I choose Imaging devices and select Integrated Camera. I right-click the icon and click Properties. Next I go to the Details tab. There are lots of properties displayed. But the one I want is Matching device Id. The menu is shown here:
Now, I want to find the same information from within WMI. I prefer to use the Get-CimInstance cmdlet (available in Windows PowerShell 3.0 and later) because it is faster than Get-WmiObject and because in 95% of the cases, the output returned is easier to read. Here is the command I use to find the camera:
Get-CimInstance Win32_PnPEntity | where caption -match 'integrated camera'
When I have found my camera, the next step is to return only the Plug and Play device ID. To do this, I once again take advantage of the Windows PowerShell 3.0 (or later) features. The output returns the ID of the camera and the ID of the camera audio. In reality, I want to disable both, so I am in a good shape here.
Note Your values and devices may be different than those I have on my laptop. This is why you should first look at sample data in Device Manager before getting too carried away. If you have multiple device makers, you need to use something like the Switch statement to pick up the specific devices you have on your network.
PS C:\> (Get-CimInstance Win32_PnPEntity | where caption -match 'integrated camera').pnpDeviceID
USB\VID_04F2&PID_B2EA&MI_00\7&35A58CE9&0&0000
Now that I know I am getting the information I need to obtain from WMI, I can go to the next step…
Use Devcon to disable the camera
Devcon is the command-line, device-manager utility. It was originally developed to help hardware makers who were working with devices, and as such, it was included in the Windows DDK. Because it is also a useful utility for network administrators, it is available via the Microsoft Download Center. It has not been updated in a while, and it is not supported. However, it is just the tool to use when working with hardware devices that do not have a nice cmdlet or WMI class that exposes management interfaces. A good overview of Devcon is presented in article 311272 in the Microsoft Knowledge Base.
Note There is a 32-bit version and a 64-bit version, and you must use the version that is appropriate to your operating system. Luckily, the download package includes both versions, and when you unzip the package, it creates ia64 and i386 folders.
If you are using a later version of the operating system, you need to download the Windows Driver Kit (WDK) for the appropriate version of the operating system. For example, there is a WDK 8.1 upgrade kit that contains a version of DevCon for Windows 8.1. To get information about the WDK and download it, see WDK and WinDbg downloads.
Unfortunately, a full installation of the WDK is required, and you can only select the destination directory. So you might want to download and install Devcon on a virtual machine, and then after you copy the tools you want, revert the virtual machine. I really wish there was a tools-only installation, but there is not.
Also, the page states that Visual Studio is required, but you can skip that step, and during the installation, you can skip the warning. After all, if you are only after the tools—you do not need Visual Studio. MSDN has a good overview page about DevCon: Windows Device Console (Devcon.exe). It also provides examples about how to use the tool: Device Console (DevCon.exe) Examples.
When using Devcon to work with a device ID, it is required to preference the string with an ampersand. Therefore, I decided to use a format string to do this. Here is the script I have at this point:
$id = (Get-CimInstance Win32_PnPEntity |
where caption -match 'integrated camera').pnpDeviceID
$ppid = "{0}{1}" -f '@',$id
I change my location to where my copy of Devcon is. I then get the status of the webcam, disable the camera, and call the status again. If I use Devcon –r, it will reboot if required. I do not want to do that, and so I leave that part of the command off. Here are the three Devcon commands:
Set-Location c:\fso
Devcon status $ppid
Devcon disable $ppid
Devcon status $ppid
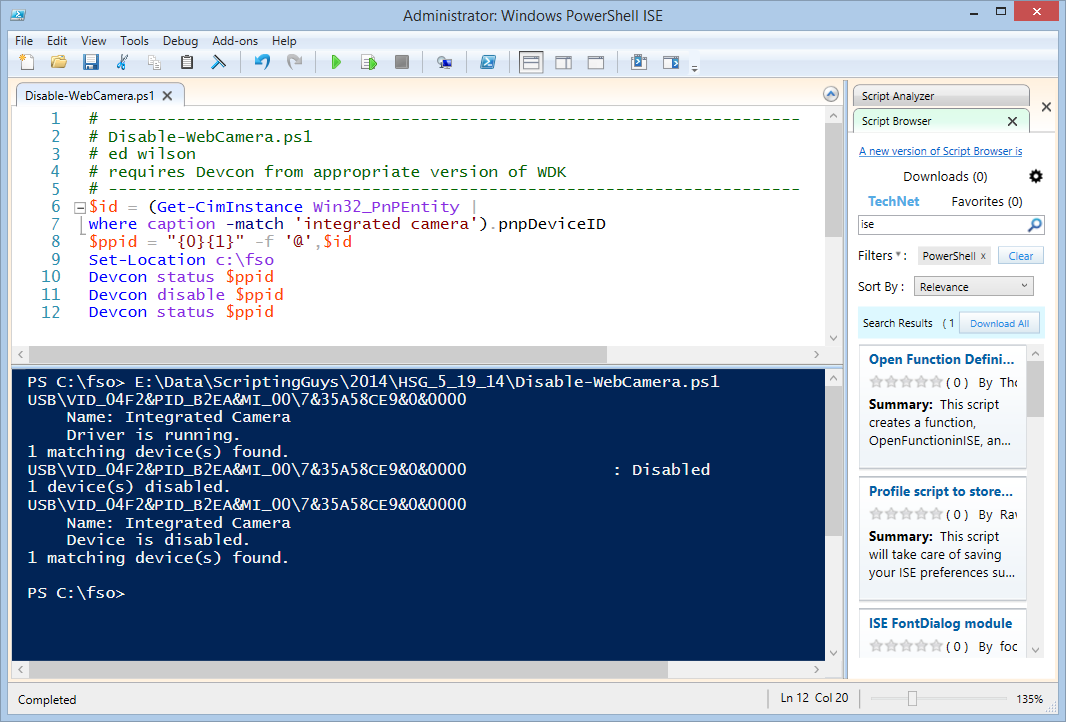
Here is the script and the output from the script:
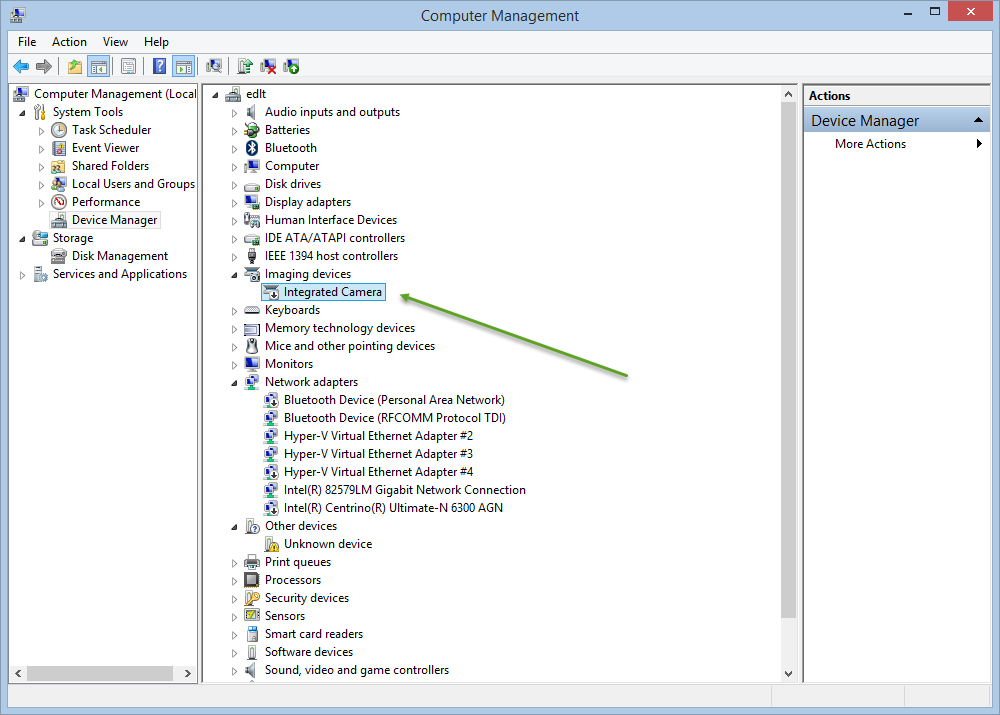
In my Computer Management console, I see the camera is disabled:
To enable the camera, I would use:
devcon enable $ppid
Well, that is about all there is to using Devcon to disable or enable the webcam.
I invite you to follow me on Twitter and Facebook. If you have any questions, send email to me at scripter@microsoft.com, or post your questions on the Official Scripting Guys Forum. See you tomorrow. Until then, peace.
Ed Wilson, Microsoft Scripting Guy


0 comments