Summary: Microsoft Scripting Guy, Ed Wilson, talks about using regions in the Windows PowerShell ISE.
 Hey, Scripting Guy! I like using the Windows PowerShell ISE. The price is right I guess. There is one thing that kind of bugs me, however. When I am writing a long script, there is too much scrolling, and things seem to slow down. I wish there was a way that I did not have to deal with lines and lines of script. I guess I can move the functions into a module, but that adds more complexity than I want in my life right now. Is there something that can help?
—RR
 Hello RR,
Microsoft Scripting Guy, Ed Wilson, is here. One of the features added to the Windows PowerShell ISE in Windows PowerShell 3.0 was the region feature. It permits me to mark sections of the script that will collapse or expand as I wish—depending on whether I turn on or turn off outlining mode. I can do this by selecting Show Outlining (Regions) from the View menu. But dude, that requires using a mouse. I prefer to use Windows PowerShell to control the Windows PowerShell ISE.
I can create a region in the Windows PowerShell ISE by doing two things. The first is to use the pound sign, the region keyword, and a description of the region. The second is to end the region section by using a pound sign and the endregion (all one word) keyword. This is shown here:
#region begin regiiin
#endregion
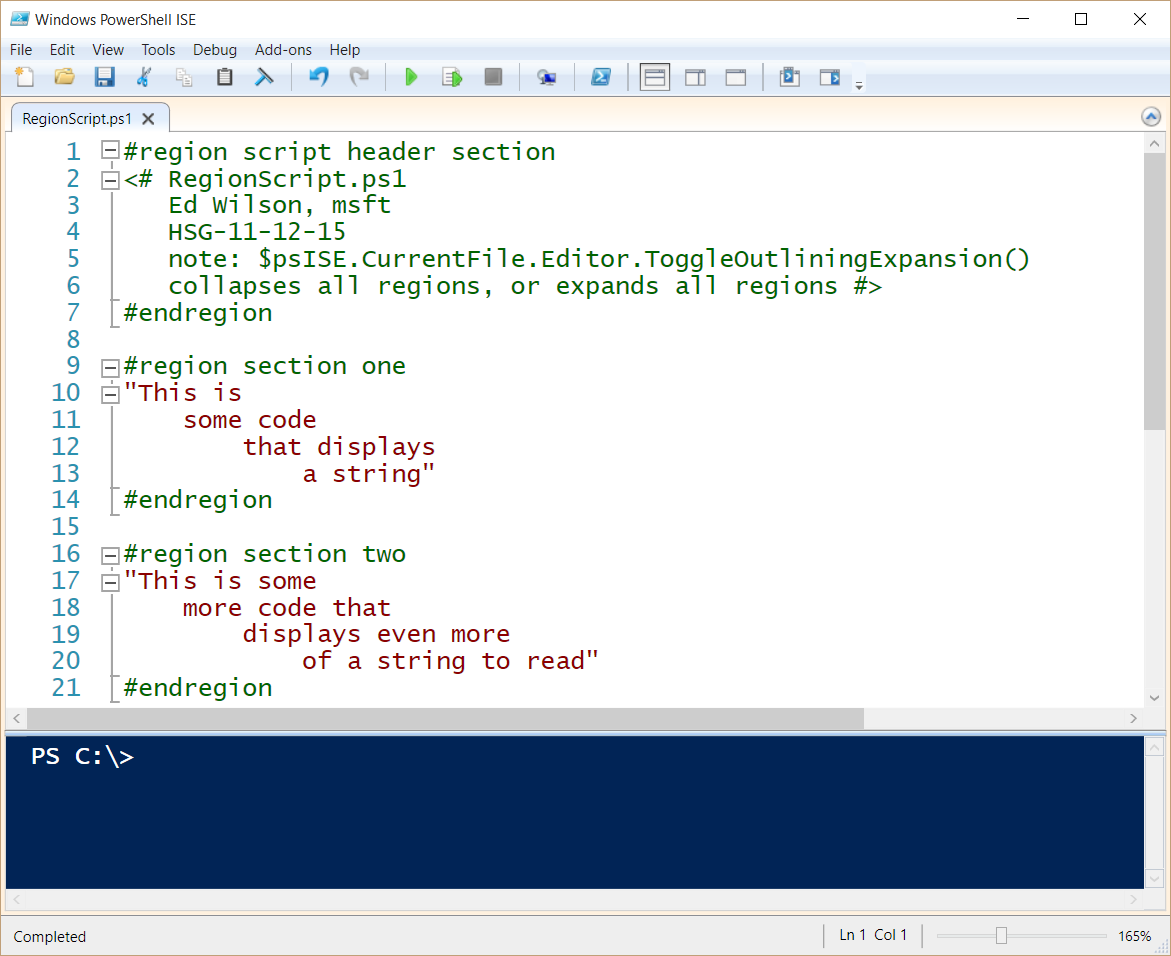
That is all there is to it. Begin and end the region. The following image shows s script with three regions marked in it:
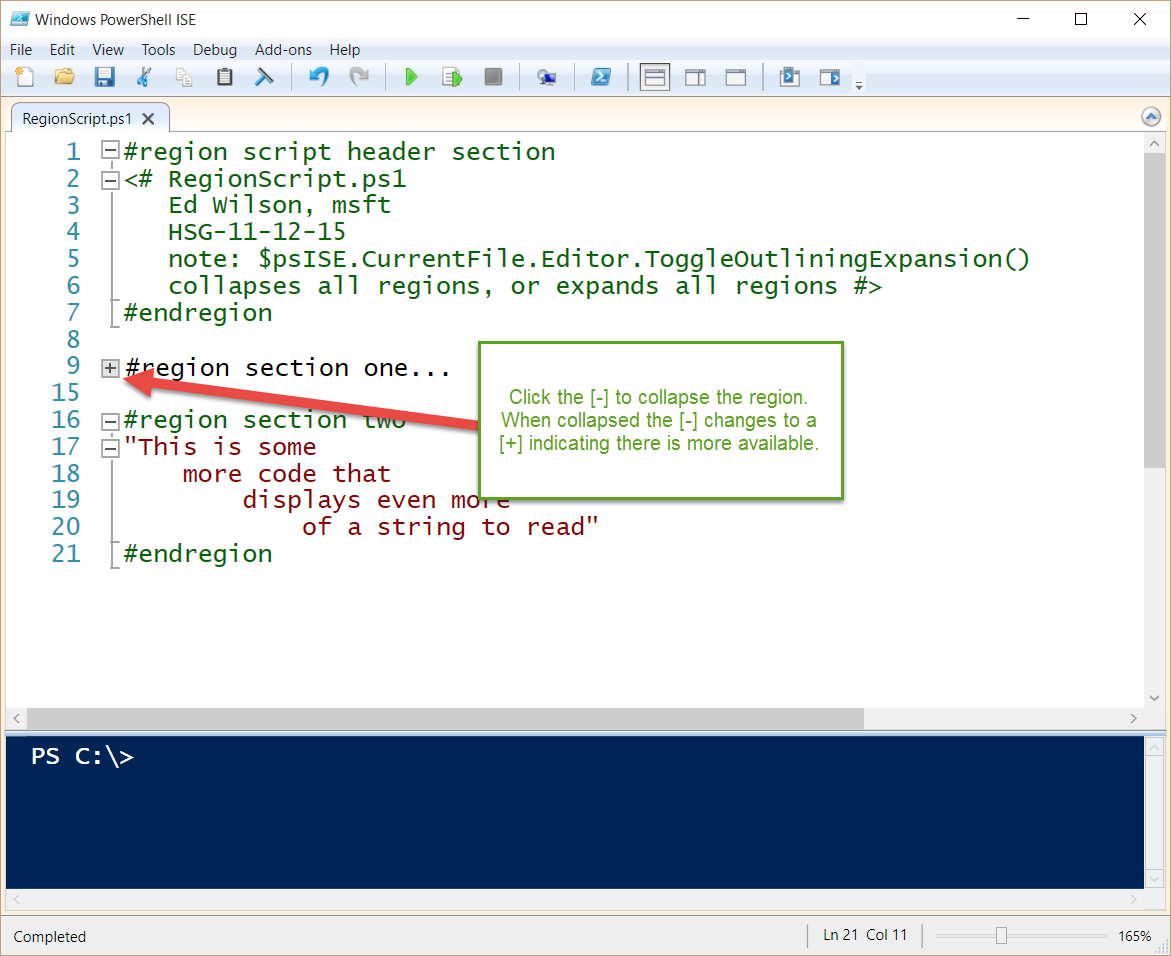
The thing that is a bit confusing is that the #region and #endregion look like comments in the code. To collapse a region, I click the minus sign ( – ) that appears beside the #region command:
When the region collapses, the minus sign changes to a plus sign ( + ). This change indicates that the region is collapsed, and that there is more code hidden in the region.
Note It is important for readability of code that the region names make sense and describe what the region contains. This permits you to quickly find the code required.
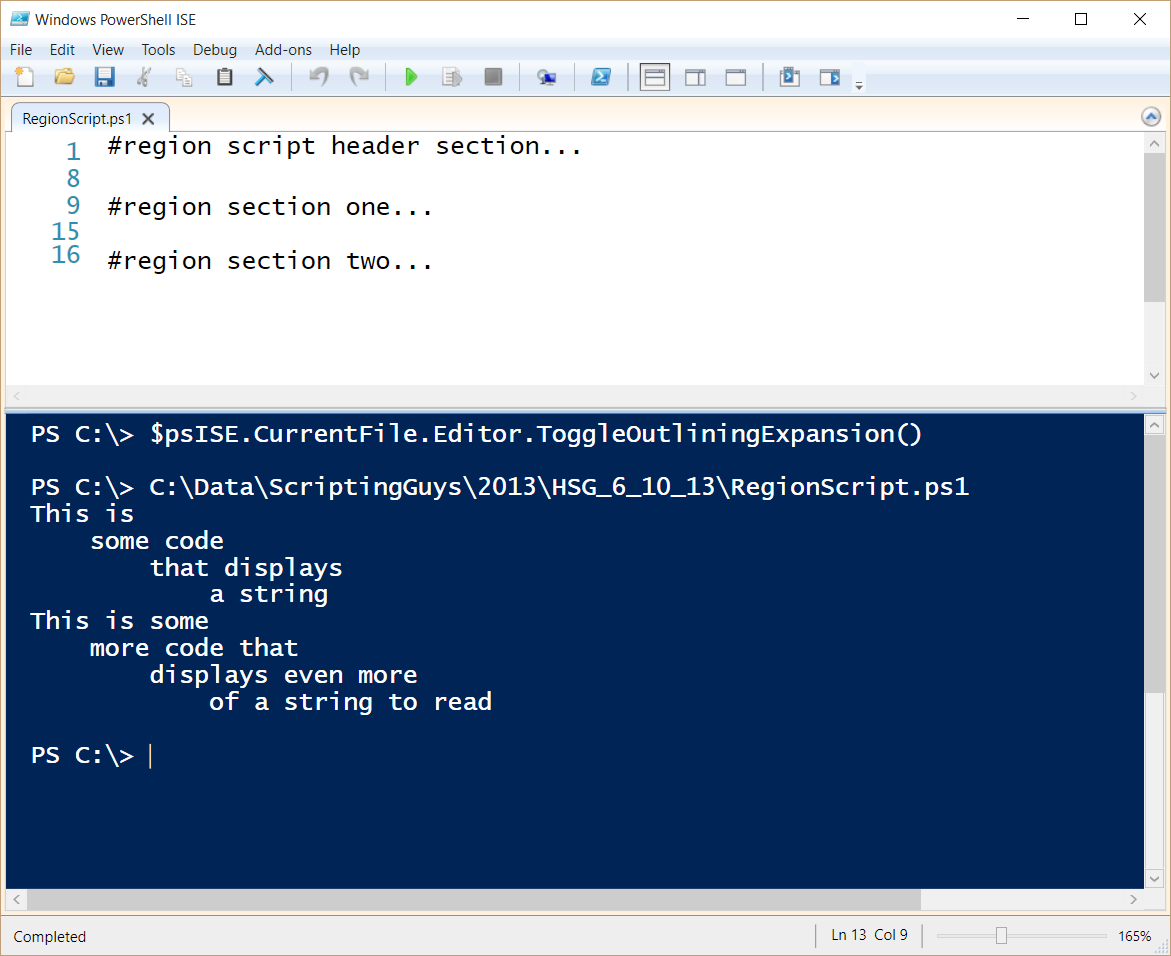
I can quickly collapse or expand all regions by using the ToggleOutliningExpansion() method. This method is available from the Editor object of the current file. The command is shown here:
$psISE.CurrentFile.Editor.ToggleOutliningExpansion()
When I toggle all of the closed regions, the script still runs. In fact, toggling or expanding a region in a script has no effect on run ability—only on readability. The following image shows the command I used to collapse all of the regions. It also shows that when I run the script, the commands still execute.
Play around with regions. They should become a best practice added to your script repository. They make code easier to read, and therefore, easier to troubleshoot when the time comes. And for such a slight amount of work, it can pay great dividends.
RR, that is all there is to using regions in your Windows PowerShell ISE. Join me tomorrow when I will talk about more cool stuff.
I invite you to follow me on Twitter and Facebook. If you have any questions, send email to me at scripter@microsoft.com, or post your questions on the Official Scripting Guys Forum. See you tomorrow. Until then, peace.
Ed Wilson, Microsoft Scripting Guy


0 comments