Use PowerShell to Manage an EqualLogic SAN
Summary: Guest blogger, Mike Robbins, talks about using Windows PowerShell to manage an EqualLogic SAN.
Microsoft Scripting Guy, Ed Wilson, is here. Today we have a returning guest blogger, Mike F. Robbins, who will talk about Managing an EqualLogic PS Series storage area network with PowerShell.
Now, here is Mike…
Mike F. Robbins is an MCITP, Windows PowerShell Enthusiast, IT Pro, senior systems engineer for Windows Server, Hyper-V, SQL Server, Exchange Server, SharePoint, Active Directory, and EqualLogic storage area networks. He has over eighteen years of professional experience providing enterprise computing solutions for educational, financial, health care, and manufacturing customers.
Blog: http://mikefrobbins.com
Twitter: @mikefrobbins
In my last Hey, Scripting Guy! blog post, Managing Symantec Backup Exec 2012 with PowerShell, I referenced that Windows PowerShell was something that could be used to manage everything in your datacenter, from product backup to the storage area network. Today I get a chance to discuss the second half of that (the storage area network portion).
The first thing you need to manage your EqualLogic PS Series storage area network (SAN) with Windows PowerShell is the EqualLogic Host Integration Tools for Microsoft also known as the HIT Kit for Microsoft, which can be downloaded from the EqualLogic support site. The most recent version of the HIT Kit is version 4.0.0, which was released in January 2012. It contains 67 Windows PowerShell cmdlets.
We will start by creating a new volume on our EqualLogic SAN with Windows PowerShell, and we will set up everything that you may forget about through the GUI, such as a snapshot schedule. There is nothing worse than needing something from a snapshot only to figure out, “Oh yeah, I forgot to set that up.” I am going to define all of the parameters as variables because I will be reusing them for each of the scripts that we will run against our SAN. It is also easier to simply modify the variables at the top of the script for each new volume that is provisioned instead of having to manually find the values that are buried in the script somewhere.
In my opinion, there are too many values to use a parameterized query and anyone who is allowed to provision storage on my SAN will be qualified to modify this script. I save the script for each of the volumes when they are created in case I ever need to know how they were originally provisioned or if they need to be re-created due to a disaster.
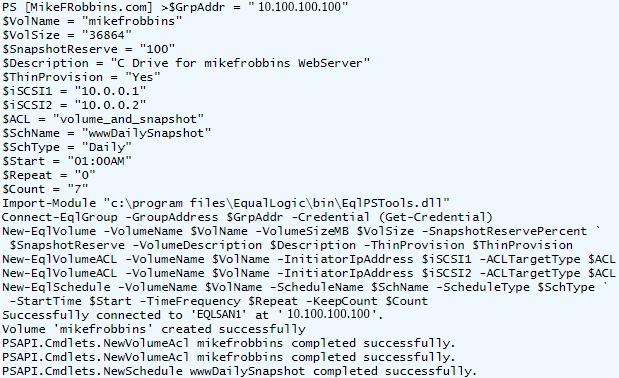
The following script creates a thin provisioned 36 GB volume named “mikefrobbins” with a snapshot reserve of 100%. It sets the description, creates access control list based on the iSCSI host IP address, and schedules a snapshot of the volume once a day at 1:00 AM. It will attempt to keep seven snapshots provided that their combined size doesn’t exceed the 100% snapshot reserve.
$GrpAddr = “10.100.100.100”
$VolName = “mikefrobbins”
$VolSize = “36864”
$SnapshotReserve = “100”
$Description = “C Drive for mikefrobbins WebServer”
$ThinProvision = “Yes”
$iSCSI1 = “10.0.0.1”
$iSCSI2 = “10.0.0.2”
$ACL = “volume_and_snapshot”
$SchName = “wwwDailySnapshot”
$SchType = “Daily”
$Start = “01:00AM”
$Repeat = “0”
$Count = “7”
Import-Module “c:\program files\EqualLogic\bin\EqlPSTools.dll”
Connect-EqlGroup -GroupAddress $GrpAddr -Credential (Get-Credential)
New-EqlVolume -VolumeName $VolName -VolumeSizeMB $VolSize -SnapshotReservePercent `
$SnapshotReserve -VolumeDescription $Description -ThinProvision $ThinProvision
New-EqlVolumeACL -VolumeName $VolName -InitiatorIpAddress $iSCSI1 -ACLTargetType $ACL
New-EqlVolumeACL -VolumeName $VolName -InitiatorIpAddress $iSCSI2 -ACLTargetType $ACL
New-EqlSchedule -VolumeName $VolName -ScheduleName $SchName -ScheduleType $SchType `
-StartTime $Start -TimeFrequency $Repeat -KeepCount $Count
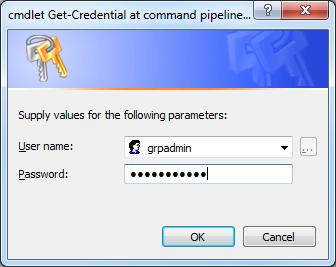
When the previous script is run, you will be prompted for a username and password for the SAN as shown here:
Grpadmin is the built in “administrator” account for all EqualLogic PS Series SANs. I recommend creating a personalized admin account for each of your SAN administrators for auditing purposes, and only using the grpadmin account for password recovery purposes so you do not have to call support as referenced in my blog post on that subject, EqualLogic PS Series SAN Password Recovery.
Because I have not disconnected my session from the SAN, I can continue to manage it without having to reconnect. Here I will take a manual snapshot of the volume that was created in the previous step:
New-EqlSnapshot -VolumeName $VolName
The following code determines what snapshots exist for this volume:
Get-EqlSnapshot -GroupAddress $GrpAddr -VolumeName $VolName |
Sort-Object CreationTimeStamp -descending | Select-Object SnapshotName
Now, I’ll remove all snapshots for this volume except for the latest one:
$VolSnaps = Get-EqlSnapshot -GroupAddress $GrpAddr -VolumeName $VolName
$VolSnaps | Sort-Object CreationTimeStamp |
Select-Object -first (($VolSnaps).Count -1) SnapshotName |
Remove-EqlSnapshot -VolumeName $VolName
Now let us restore the volume to the latest snapshot. Any time a volume is restored (reverted) to a previous snapshot, a new snapshot is automatically created prior to performing the restore operation.
Get-EqlSnapshot -GroupAddress $GrpAddr -VolumeName $VolName |
Sort-Object CreationTimeStamp -descending | Select-Object SnapshotName -first 1 |
Restore-EqlSnapshot -GroupAddress $GrpAddr -VolumeName $VolName
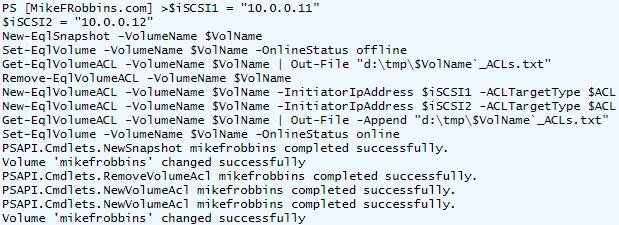
It is maintenance time. I have a volume that is going to be moved from one host server to another, and I need to modify its ACLs accordingly. I’m going to place the new server’s iSCSI IP addresses into two variables, take a snapshot of the volume before making any changes to it, set the volume offline to make sure nothing is accessing it, write the current ACLs to a text file for documentation purposes, remove the current ACLs, add the new ACLs, write the new ACLs to the same text file without overwriting it, and then place the volume online so that it’s ready to be connected to the new server.
$iSCSI1 = “10.0.0.11”
$iSCSI2 = “10.0.0.12”
New-EqlSnapshot -VolumeName $VolName
Set-EqlVolume -VolumeName $VolName -OnlineStatus offline
Get-EqlVolumeACL -VolumeName $VolName | Out-File “d:\tmp\$VolName`_ACLs.txt”
Remove-EqlVolumeACL -VolumeName $VolName
New-EqlVolumeACL -VolumeName $VolName -InitiatorIpAddress $iSCSI1 -ACLTargetType $ACL
New-EqlVolumeACL -VolumeName $VolName -InitiatorIpAddress $iSCSI2 -ACLTargetType $ACL
Get-EqlVolumeACL -VolumeName $VolName | Out-File -Append “d:\tmp\$VolName`_ACLs.txt”
Set-EqlVolume -VolumeName $VolName -OnlineStatus online
Now let’s remove the volume. The volume must first be taken offline to remove it.
Set-EqlVolume -VolumeName $VolName -OnlineStatus offline
Remove-EqlVolume -VolumeName $VolName –Force
Using the –Force parameter in the previous script prevents the following confirmation message from being displayed. Use extreme caution when using this parameter; otherwise it could create an RGE.
Check the firmware version on an EqualLogic PS Series SAN as follows:
Get-EqlMember –GroupAddress $GrpAddr |
Select-Object MemberName, FirmwareVersion | Format-Table -AutoSize
Last but not least, remember to disconnect from the SAN when you’re finished:
Disconnect-EqlGroup -GroupAddress $GrpAddr
The full script can be found in the Script Center Repository.
~Mike
Thank you, Mike for another great blog showing us the various uses of Windows PowerShell. Join me tomorrow for a great guest blog about Windows PowerShell and SQL Server by guest blogger, Luarte Jr.
I invite you to follow me on Twitter and Facebook. If you have any questions, send email to me at scripter@microsoft.com, or post your questions on the Official Scripting Guys Forum. See you tomorrow. Until then, peace.
Ed Wilson, Microsoft Scripting Guy


 Light
Light Dark
Dark
0 comments